Table of Contents

Related Manuals for HP J1473A


Summary of Contents for HP J1473A
- Page 1 All manuals and user guides at all-guides.com J1473A 4-port Console Switch J1474A 8-port Console Switch J1475A Console Switch Expansion Kit Owner’s Manual Manual do Proprietário Manual del propietario Manuel du propriétaire...
- Page 2 All manuals and user guides at all-guides.com...
- Page 3 All manuals and user guides at all-guides.com Rackmount Console Switch Owner’s Manual Hewlett-Packard Company www.hp.com ©1999 Hewlett-Packard Company. All rights reserved. IBM, PC/AT and PS/2 are registered trademarks of International Business Machines Corporation. ScrollPoint is a trademark of International Business Machines Corporation. Expert Mouse is a registered trademark of Kensington Technology Group.
- Page 4 All manuals and user guides at all-guides.com...
- Page 5 Le present appareil numerique n'emet pas de bruits radioelectriques les limites applicables aux appareils numeriques de la class A prescrites dans le Reglement sur le brouillage radioelectrique edicte par le ministere des Communications du Canada. Japan - VCCI Class A ITE www.hp.com/enclosures...
- Page 6 Declares that the product: Rackmount Console Switch 4-Port / 8-Port / Expansion Product Name: Product Type: Console Controllers Model Numbers: J1473A / J1474A / J1475A Product Options: Conforms to the following Product Specifications: Safety: IEC 950:1991+A1+A2+A3+A4 EN 60950:1992+A1+A2+A3+A4 EMC: CISPR 22:1993 / EN 55022:1994 - Class A...
-
Page 7: Table Of Contents
Chapter 6 - Port Scanning Choosing a Scanning Method ......................29 Turning Scanning On and Off......................30 Chapter 7 - Appendices A: Specifications ............................ 31 B: FLASH Upgrading ..........................32 C: Troubleshooting ..........................34 D: Problem Report ..........................39 www.hp.com/enclosures... - Page 8 POWER ON: This symbol indicates the principal on/off switch is in the on position. POWER OFF: This symbol indicates the principal on/off switch is in the off position. www.hp.com/enclosures...
-
Page 9: Chapter 1 - Product Overview
The Hewlett-Packard Rackmount Console Switch allows you to control multiple servers with one keyboard, monitor and mouse. The switch is available in two models: the J1473A and the J1474A. These models support four and eight attached servers respectively. Each server can be up to 15 feet away from the switch and peripherals. - Page 10 - J1474A models support eight. If more ports are needed, to 64 servers multiple units can be cascaded together for expansion. Up to two tiers of units can be connected for a total of 16 (J1473A) or 64 (J1474A) attached servers in one system. “Keep Alive”...
- Page 11 For easy integration into your current configuration, you can mount the Can be mounted in non-HP racks Rackmount Console Switch in any standard rack - even if it is not a Hewlett- Packard rack.
- Page 12 All manuals and user guides at all-guides.com Rackmount Console Switch Owner’s Manual www.hp.com/enclosures...
-
Page 13: Chapter 2 - Installation
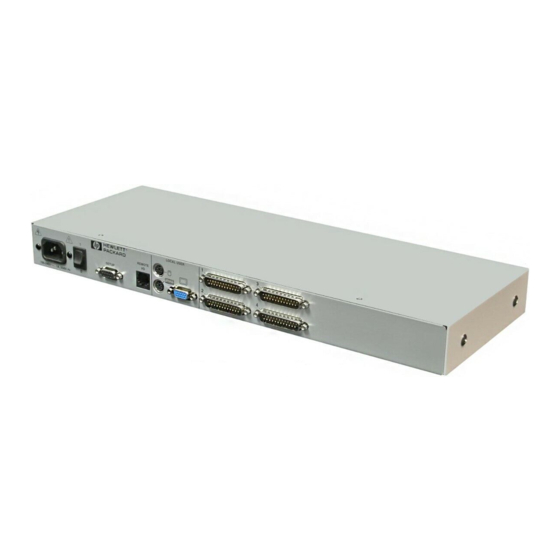
3. Plug your VGA monitor cable into the port labeled on the back of your Rackmount Console Switch. Plug your PS/2 keyboard cable and your PS/2 mouse cable into the ports labeled respectively. VGA MONITOR CABLE PS/2 MOUSE CABLE PS/2 KEYBOARD CABLE www.hp.com/enclosures... - Page 14 6. Locate the power cord that came with your Rackmount Console Switch. Plug it into the IEC power connector on the switch. Make sure that the power switch is off, then plug the other end of the power cord into an www.hp.com/enclosures...
- Page 15 7. Power-up your Rackmount Console Switch f irst, then power up all attached ser vers. The Rackmount Console Switch and all attached servers should be powered-down before servicing the unit. Always disconnect the power cord from the wall outlet. www.hp.com/enclosures...
- Page 16 All manuals and user guides at all-guides.com Rackmount Console Switch Owner’s Manual Connecting the Optional J1475A HP Console Switch 2 User Expansion Kit 1. Plug a standard Category 5 Unshielded Twisted Pair cable (up to 500 feet) into the RJ-45 style modular jack on the rear of the Rackmount Console Switch.
- Page 17 : e l e t i : e l : e l c i r : e l : e l e l i : e l t n i www.hp.com/enclosures...
-
Page 18: Advanced Install
6-pin miniDIN keyboard connector into the port. 4. Repeat steps 4-7 in the section ‘Connecting Servers to the Rackmount Console Switch’ for each attached server. CASCADING UNIT PS/2 MOUSE CONNECTOR BASE UNIT VIDEO CONNECTOR PS/2 KEYBOARD CONNECTOR (J1474A MODELS SHOWN) www.hp.com/enclosures... -
Page 19: Chapter 3 - Basic Operations
Press the ‘Escape’ key. The <ESC> command is used to exit Command Mode without executing an instruction. Regarding OSD on-screen menu commands, the words ‘choose’ and ‘select’ indicate that a users should highlight the relevant command and press the enter key. www.hp.com/enclosures... -
Page 20: Keyboard Switching
Selects the switch attached to Port 3 on the base unit, then selects Port 2 on the cascaded unit. 3. <CM>1<Enter> Selects Port 1 on the base unit as the active port. 4. <CM>2.1<ESC> Exit Command Mode. The instruction is not executed. Port 1 is still the active port. www.hp.com/enclosures... -
Page 21: System Control & Maintenance
<Enter> Use this command to resynchronize the mouse after a device or server hot-plug. Repeat, if necessary, until synchronization is re- established. Note: Using this command while the mouse is operating correctly will cause the mouse to lose sync. www.hp.com/enclosures... - Page 22 All manuals and user guides at all-guides.com Rackmount Console Switch Owner’s Manual www.hp.com/enclosures...
-
Page 23: Chapter 4 - On-Screen Display Operations
Activate on-screen display to restore the login prompt. Note: All Rackmount Console Switches ship in the default non-secure state. For more information on secure versus non-secure operation, see the section ‘Administrator Functions’. www.hp.com/enclosures... -
Page 24: The Osd Window
Press Enter to make the switch. To exit the OSD Window without changing ports, press Esc. To manually logout when in secure mode, press F10. www.hp.com/enclosures... -
Page 25: The Command Menu
<CM>MW<Enter> keyboard commands listed in the ‘System Control & Maintenance’ section of this manual. Choose the option ‘Version Information’ to display on your monitor the current version level of your Rackmount Console Switch firmware. Press the Esc key to clear this information from your screen. www.hp.com/enclosures... -
Page 26: Basic Port Maintenance
Then press Enter. (For further information see ‘The ID Window’ later in this chapter.) Press Esc at any point to exit this operation without adding the port. www.hp.com/enclosures... - Page 27 2. Press the Ctrl key twice to access the Command Menu or simply press the DELETE key. (If you press DELETE skip Step 3) 3. Choose the ‘Delete Port’ option. 4. Type Y or N at the prompt to confirm the deletion and press Enter. www.hp.com/enclosures...
-
Page 28: The Id Window
Press the <PAGE DOWN> key to cycle through the available text colors. Change window length Use the (+) and (-) keys to change the length of the ID Window. Change window size Press SPACE to toggle between large and small. ID Window Help Press F1 www.hp.com/enclosures... - Page 29 3. Select ‘Edit Port’ from the Command Menu. 4. Choose the option ‘ID Dwell Time’. 5. Enter a number between 0-255 seconds. Entering 0 disables the ID Window. Entering 255 allows the ID Window to stay on screen the entire time the port is active. www.hp.com/enclosures...
-
Page 30: Administrator Functions
Use these logins to configure and control server access for every type of system user. The administrator has full access privileges; additional users can have viewing or viewing with keyboard and mouse control capability for each attached server. This option is only available in secure mode. www.hp.com/enclosures... - Page 31 (Passwords are not case sensitive.) 6. Choose the ‘Logout Time’ heading. Enter a value in minutes for this user’s logout time. A value of 0 keeps the user logged on continuously; 60 is the maximum setting. The default is set for 5 minutes. www.hp.com/enclosures...
- Page 32 FLASH Upgrading allows you to change the code that runs your Rackmount Console Switch. This lets you enhance the features of your switch and keep it current with the latest improvements in KVM switching. For more information, see Appendix B. www.hp.com/enclosures...
-
Page 33: Chapter 5 - Console Switch 2 User Expansion Kit (Optional)
As long as both users are trying to access servers attached to the base Rackmount Console Switch, they may access any of them independently at the same time. In the diagram below, either user may access any attached server at any time. They may also share access to any attached server. www.hp.com/enclosures... -
Page 34: Multi Chassis Operation
Both users can simultaneously and independently access any server attached to the base Rackmount Console Switch unit. Similarly, independent access is possible across expansion units as long as each user is accessing a different different different expansion unit. different different www.hp.com/enclosures... - Page 35 Unit C. This user cannot independently access any server attached to Unit B until the first user connects to a server attached to a different Rackmount Console Switch unit. www.hp.com/enclosures...
- Page 36 All manuals and user guides at all-guides.com Rackmount Console Switch Owner’s Manual www.hp.com/enclosures...
-
Page 37: Chapter 6 - Port Scanning
Any active port in the system can be scanned in any order, as many times as desired. With all scan methods, you can adjust the dwell time for each port or omit a port from the scan sequence completely. Choose whichever method is most appropriate for your configuration. www.hp.com/enclosures... -
Page 38: Turning Scanning On And Off
Press Enter. By keyboard hot-key sequence The following key sequences control scanning. Key Sequence Action <CM>SG<Enter> Enables the scan Go command. (By Address Only) <CM>SH<Enter> Enables the scan Halt command. www.hp.com/enclosures... -
Page 39: Chapter 7 - Appendices
Maximum Resolution: 1600 x 1200 @ 72 Hz Peripherals: PS/2 keyboard, PS/2 mouse, IntelliMouse (PS/2 only), IBM Scrollpoint, Logitech Mouseman +, Logitech Marble Plus, Logitech Marble FX and Kensington Expert mouse. Regulatory UL 1950, CSA C22.2 No. 950, EN60950 Standards FCC part 15A, EN55022, EN50082 www.hp.com/enclosures... -
Page 40: B: Flash Upgrading
FLASH firmware revision from Hewlett- Packard. It is available through the Hewlett-Packard web site at www.hp.com/go/enclosures. Next you will need a serial cable (available at most electronics stores) to connect a server to your Rackmount Console Switch. Simply connect the serial cable between the SETUP port on your switch to the serial port on the server. - Page 41 If the switch detects an error, it will abort the upgrade and retain the original OSD firmware. Otherwise, it will return the message “Flash Upgrade Successful”. If the file read does not validate, you will be prompted to re-transfer your file. www.hp.com/enclosures...
-
Page 42: C: Troubleshooting
Appendix D completely. 3. Check the Hewlett Packard web site at www.hp.com/go/enclosures for the HP support service phone number nearest you. Have your Problem Report with you when you call. To expedite assistance, have this manual with you when you call, along with a copy of your invoice giving the date purchased and other identifying data. - Page 43 Mouse jumps or “hugs” screen If the mouse has been hot-plugged while running in Windows, you may need to close and restart Windows. If the mouse still does not function, try the mouse resynchronization command <ZM>. (For instructions on command mode, see 'Basic Operations'.) If the problem persists, contact Technical Support. www.hp.com/enclosures...
- Page 44 If the problem persists, contact Technical Support. Remote Video is Verify the remote monitor capabilities are equal to unrecognizable or greater than the local monitor capabilities. Plug and Play video is only supported on the local video port. www.hp.com/enclosures...
- Page 45 No keyboard, video or mouse Verify that the cable connecting the two units on expansion unit; base unit together is correctly connected on both ends. (For is functioning properly additional information, see the ‘Installation’ chapter.) If the problem persists, contact Technical Support. www.hp.com/enclosures...
- Page 46 Best results are obtained when they are on the same circuit. Use only Hewlett-Packard supplied cable. HP warranties do not apply to damage resulting from user supplied cable.
-
Page 47: D: Problem Report
Revision: Name and Model of Monitor: Name and Model of Keyboard: Name and Model of Mouse: Version Information (Select from the OSD Command Menu): List any non-PC equipment attached to the Rackmount Console Switch. (Include additional peripherals, adaptors, etc.): www.hp.com/enclosures... - Page 48 Problem Description: (Include all affected ports, exact nature of problem, troubleshooting steps taken, etc.) Fill out the chart below, including every server attached to your Rackmount Console Switch. Computer BIOS Video Operating Graphics Card Resolution / Port Manufacturer/ Manufacturer / Model Revision System Name/Model Scanrate www.hp.com/enclosures...
- Page 49 3. HP does not warrant that the operation of HP products will be uninterrupted or error free. If HP is unable, within a reasonable time, to repair or replace any product to a condition as warranted, customer will be entitled to a refund of the purchase price upon prompt return of the product.
- Page 50 Technical information in this document is subject to change without notice. © Copyright Hewlett-Packard Company 1999. All Rights Reserved. Reproduction, adaptation, or translation without prior written permission is prohibited, except as allowed under the copyright laws. Printed in USA 2/00 5967-9385 Rev. 1 www.hp.com/enclosures...