Table of Contents
Advertisement
Available languages
Available languages
HFW7819EWMP
Refrigerator
User Guide
Kühlschrank
Bedienungsanleitung
Réfrigérateur
Mode d'emploi
Frigorifero
Guida per l'utente
Frigorífi co
Manual del usuario
Frigorífi co
Guia do Utilizador
Koelvriescombinatie
Handleiding
Lodówka
Podręcznik użytkownika
Congelator
Manual de utilizare
Chladnička
Uživatelská příručka
Hűtőszekrény
Felhasználói útmutató
ΨΥΓΕΙΟ
ΟΔΗΓΙΕΣ ΧΡΗΣΗΣ
EN
DE
FR
IT
ES
PT
NL
PL
RO
CZ
HU
EL
Advertisement
Chapters
Table of Contents

Related Manuals for Haier HFW7819EWMP


Summary of Contents for Haier HFW7819EWMP
- Page 1 HFW7819EWMP Refrigerator User Guide Kühlschrank Bedienungsanleitung Réfrigérateur Mode d‘emploi Frigorifero Guida per l‘utente Frigorífi co Manual del usuario Frigorífi co Guia do Utilizador Koelvriescombinatie Handleiding Lodówka Podręcznik użytkownika Congelator Manual de utilizare Chladnička Uživatelská příručka Hűtőszekrény Felhasználói útmutató ΨΥΓΕΙΟ ΟΔΗΓΙΕΣ ΧΡΗΣΗΣ...
- Page 2 WARNING:Risk of fire/flammable mate- rial. The symbol indicates there is a risk of fire since flammable materials are used. Take care to avoid causing a fire by ingiting flammable material. WARNUNG: Brandgefahr/ brennba- res Material. Das Symbol weist auf Brandge- fahr hin, da brennbare Materialien verwen- det werden.
- Page 3 Nebezpečí vzniku požáru VAROVÁNÍ: Nebezpečí Požáru/ Hořlavého Materiálu. Symbol označuje riziko požáru, protože byly použity hořlavé materiály. Dbejte na to, aby nedošlo ke vzniku požáru zapálením hořlavého materiálu. FIGYELEM: Tűz / gyúlékony anyag veszélye. A szimbólum azt jelzi, hogy tűzveszély áll fenn, mivel gyúlékony anyagokat használnak. Ügyel jen arra, hogy ne tegyen rá...
- Page 5 User Manual Refrigerator-Freezer HFW7819EWMP...
- Page 6 Thank You Thank you for purchasing a Haier Product. Please read these instructions carefully before using this appliance. The instructions con- tain important information which will help you get the best out of the appliance and ensure safe and proper installation, use and maintenance.
-
Page 7: Table Of Contents
Content 1- Safety information ........................4 2- Intended use ..........................8 3- Product description ........................9 4- Control panel ..........................10 5- Use ..............................11 6- Energy saving tips ........................20 7- Equipment ..........................21 8- Care and Cleaning........................25 9- Troubleshooting ........................28 10- Installation ..........................31 11- Technical Data .........................34 12- Customer Service ........................35... -
Page 8: 1- Safety Information
1- Safety information Before switching on the appliance for the first time read the follow- ing safety hints!: WARNING! Before first use ▶ Make sure there is no transport damage. ▶ Remove all packaging and keep out of children´s reach. ▶... - Page 9 1- Safety information WARNING! Daily use ▶ This appliance can be used by children aged from 8 years and above and persons with reduced physical, sensory or mental ca- pabilities or lack of experience and knowledge if they have been given supervision or instruction concerning use of the appliance in a safe way and understand the hazards involved.
- Page 10 1- Safety information WARNING! Daily use ▶ Do not set unnecessarily low temperature in the refrigerator compartment. Minus temperatures may occur at high settings. Attention: Bottles can burst. ▶ Do not touch frozen goods with wet hands (wear gloves). Espe- cially do not eat ice lollies immediately after removal from the freezer compartment.
- Page 11 1- Safety information WARNING! Maintenance / cleaning ▶ Eliminate the dust on the back of the unit at least once in the year to avoid hazard by fire, as well as increased energy consumption. ▶ Do not spray or flush the appliance during cleaning. ▶...
-
Page 12: 2- Intended Use
2- Intended use 2.1 Intended use This appliance is intended for cooling and freezing food. It has been designed exclusively for use in dry-interior house-holds. It is not intended for commercial or industrial use. ards and loss of warranty claims. 2.2 Accessories Check the accessories and literature in accordance with this list (Fig.:2.2): Ice maker with... -
Page 13: 3- Product Description
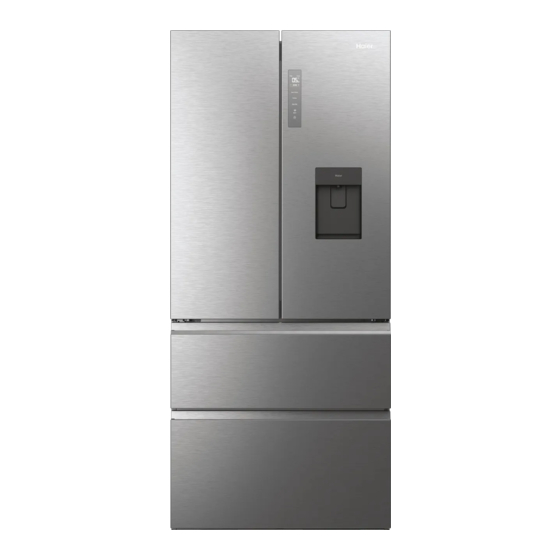
3- Product description Picture of appliance (Fig. 3) A: Refrigerator compartment 13 Panel of Humidity Zone 1 Rating plate and QR code 14 Humidity Zone drawer The kettle keeper 15 MyZone drawer 3 Water kettle B: Freezer compartment 4 Glass shelf and Wine rack 5 O.K.-temperature indicator (optional) 16 Freezer box 6 Door rack... -
Page 14: 4- Control Panel
4- Control panel Control panel (Fig. 4) Keys: Fridge&Freezer temperature mode swithover Auto mode and water filter warning on/off Wi-Fi setting F Panel lock/unlock Indicators: Fridge compartment selected Freezer compartment selected Temperature fridge &freezer compartment Water filter changed warning e Super-Freeze function Holiday function Auto intelligence function Wi-Fi function... -
Page 15: 5- Use
5- Use Remove all packaging materials, keep them out of children`s reach and dispose them in an environmentally friendly manner. Clean the inside and outside of the appliance with water and a mild detergent before putting any food in it. After the appliance has been levelled and cleaned, wait for at least 2 hours before connecting it to the power supply. - Page 16 5- Use 5.5 Lock/unlock panel Notice: Panel lock The control panel is automatically blocked against activation if 30 seconds no key is touched. For any settings the control panel must be unlocked. Touch key “F” for 3 seconds to block all panel ele- ments against activation (Fig.
- Page 17 5- Use 5.7.2.1 Adjust the temperature for fridge 5.7.2-1 1. Unlock the panel by touching key “F” if it is locked (Fig. 5.5). 2. Touch key “A” (ZONE) to select the fridge compart- ment,Indicator”a”illuminates and fridge compartment is activated(Fig. 5.7.2-1). The actual temperature in the fridge compartment 5.7.2-3 5.7.2-2...
- Page 18 5- Use 5.8 Super-Freeze function 5.8-1 5.8-2 Fresh food should be frozen as quickly as possible to the core. This preserved the best nutritional value, ap- pearance and taste. The Super-Freeze function ac- celerates the freezing of fresh food and protects the goods already stored from undesirable warming.
- Page 19 5- Use 5.10 Wi- Fi mode setting IN APP PAIRING PROCEDURE Step 1 wnload the hOn app on the stores Step 2 Step 3 Follow pairing instructions in the hOn App 5.11 My Zone drawer The fridge compartment is equipped with a MyZone drawer. In accordance with the food’s storage demands, the most suitable function can be selected to get the optimal nutri- tional value of the foods Following functions are available: 5.11.1 Function Cheese...
- Page 20 5- Use Notice: MyZone drawer One of the three functions of the MyZone compartment must always be activated When you chose “0°C Fresh“ or “Cheese” set the temperature of the refrigerating compartment in the middle level (5°C), in order to preserve your food in the optimal storage environment.
- Page 21 5- Use Before first use of the Ice or Water function water Using water dispenser Ensure you have followed the steps outlined in “Before you start using the ice and water function” prior to your first use of water dispenser. Dispensing Your water dispenser is designed for one-handed operation.
- Page 22 5- Use 5.14 Tips on storing f resh food 5.14.1 Storing in to the refrigerator compartment Keep your fridge temperature below 5°C. Hot food must be cooled to room temperature before storing in the appliance. Foods stored in the refrigerator should be washed and dried before storing Food to be stored should be properly sealed to avoid odour or taste alterations.
- Page 23 5- Use 5.14.2 Storage into the freezer compartment ▶ Keep the freezer temperature at- 18°C. ▶ 24 hours before freezing switch on the Super-Freeze function; -for small quantities of food 4-6 hours are sufficient. ▶ Hot food must be cooled to room temperature before storing in the freezer compartment. ▶...
-
Page 24: 6- Energy Saving Tips
6- Energy saving tips Energy saving tips Make sure the appliance is properly ventilated (see INSTALLATION). Do not install the appliance in direct sunlight or in the near of heat sources(e.g. stoves, heat er s). Avoid unnecessarily low temperature in the appliance. The energy consumption in- creases the lower the temperature in the appliance is set. -
Page 25: 7- Equipment
7- Equipment shelf level (Fig. 7.1). This helps to maintain a uniform temperature to ensure that your food is kept fresher for longer. 7.2 Adjustable shelves storage needs. hind edge (1) and pulling it out (2) (Fig. 7.2). 2. To reinstall it, put it on the lugs on both sides and push it to the most rearward position until the rear Notice: Shelves Ensure that all ends of a shelf are level. - Page 26 7- Equipment 7.5 HumidityZone and MyZone drawer For use and setting of the HumidityZone and My Zone drawer please check section USE. To remove the drawer out: 1. Pull out (1) to the maximum extent (Fig. 7.5). 2. Lift (2) to separate the drawer from the rail and re- move (3).
- Page 27 7- Equipment 7.8.2 Lower freezer drawer 7.8-2 1. Pull out to the lower freezer drawer to maximum extent (Fig. 7.8.2). 2. Pull out the freezing tray(A) to stop position, lift and remove. 3. Lift the drawer (B) until it is separated from the support block, push it into the freezer and tilt it to take out.
- Page 28 7- Equipment 7.11-1 7.11 Ice cube maker 1. Pour fresh drinking water into each ice-making box as per the scale mark inside the measuring cup, do not exceed the scale mark (Fig. 7.11-1). Notice: Do not bring water between the 2 buttons, otherwi- se the buttons maybe frozen and the ice cubes can- 7.11-2 not drop into the storage box.
-
Page 29: 8- Care And Cleaning
8- Care and Cleaning WARNING! Disconnect the appliance from the power supply before cleaning. 8.1 General Clean the appliance when only little or no food is stored. The appliance should be cleaned every four weeks for good maintenance and to prevent bad stored food odours. - Page 30 8- Care and Cleaning 8.3 Defrosting The defrosting of the refrigerator and the freezer compartment are done automatically; no manual operation is needed. 8.4 Replacing the LED-lamp The lamp adopts LED as its light source, featuring low energy consumption and long ser- vice life.
- Page 31 8- Care and Cleaning 8.7 Moving the appliance 1. Remove all food and unplug the appliance. Secure shelves and other moveable parts in the fridge and the freezer with adhesive tape. 3. Do not tilt the refrigerator more than 45° to avoid damaging the refrigerating system. WARNING! ▶...
-
Page 32: 9- Troubleshooting
9- Troubleshooting Many occuring problems could be solved by yourself without specific expertise. In case of a problem please check all shown possibilities and follow below instructions before you contact an after sales service. See CUSTOMER SERVICE. WARNING! ▶ Before maintenance, deactivate the appliance and disconnect the mains plug from the mains socket. - Page 33 9- Troubleshooting Problem Possible Cause Possible Solution It is not cold enough • The temperature is set too high. • Reset the temperature. inside the appli- • Too warm goods has been stored. • Always cool down goods before ance. storing them.
- Page 34 To contact the technical assistance, visit our website: https://corporate.haier-europe. com/en/ .Under the section “website”, choose the brand of your product and your country. You will be redirected to the specific website where you can find the telephone number and form to contact the technical assistance .
-
Page 35: 10- Installation
10- Installation 10.1 Unpacking WARNING! The appliance is heavy. Always handle with at least two persons. Keep all packaging materials out of children´s reach and dispose them in an environ- mentally friendly manner. Take the appliance out of the packaging. Remove all packaging materials. - Page 36 10- Installation 10.6 Fine tuning of the doors 10.6-1 If the doors are not in one level, this mismatch can be remedied by following: 10.6.1 Using adjustable foot Rotate the adjustable foot according to the direction of arrow (Fig. 10.6-1) to turn up or down the foot. 10.6-2 10.6.2 Using adjustment button Rotate the adjustment button on top of the door (Fig.
- Page 37 10- Installation 10.7 Waiting time 10.7 To the maintenance-free lubrication oil is located in the capsule of the compressor. This oil can get through the closed pipe system during slanting transport. Be- fore connecting the appliance to the power supply you have to wait 2 hours (Fig.
- Page 38 10 - 10.8.1 10.8.3 10.8.2 10.8.4 10.8.5...
-
Page 39: 11-Technical Data
11-Technical data regulation EU No. 2019/2016 Trade mark Haier HFW7819EWMP Refrigerator-freezer Category of the model Annual energy consumption (kWh/year) Volume cooling (L) Volume freezing (L) **** Star rating Frostfree system Temperature rise time(h) Freezing capacity (kg/24h) Climate class SN N.ST.T... -
Page 40: 12- Customer Service
12- Customer Service We recommend our Haier Customer Service and the use of original spare parts. your local dealer or and FAQs and where you can activate the service claim. To contact our Service, ensure that you have the following data available. - Page 43 Gebrauchsanleitung Kühl-Gefrierkombination HFW7819EWMP...
- Page 44 Danke Danke, dass Sie sich für ein Haier Produkt entschieden haben. Bitte lesen Sie diese Gebrauchsanleitung sehr sorgfältig bevor Sie das Gerät in Betrieb nehmen. Sie enthält wichtige Informationen, damit Sie viel Freude an Ihrem Gerät haben und ein sicherer und sauberer Betrieb gewährleistet ist.
- Page 45 Inhalt 1- Sicherheitshinweise ........................4 2- Vorgesehener Gebrauch ......................9 3- Gerätebeschreibung ........................10 4- Bedienblende ..........................11 5- Bedienung ............................ .12 6- Energiespartipps .........................22 7- Ausstattung ..........................23 ........................ .27 9- Fehlerbehebung ......................... .30 10- Installation ..........................33 11- Technische Daten ........................37 12- Kundendienst ...........................
-
Page 46: 1- Sicherheitshinweise
1- Sicherheitshinweise Diese Hinweise dienen der Sicherheit und sollten daher vor der Ins- tallation und Inbetriebnahme aufmerksam gelesen werden. WARNUNG! Vor dem ersten Einschalten ▶ Vergewissern Sie sich, dass das Gerät keinen Transportschaden aufweist. ▶ Entfernen Sie alle Verpackungsmaterialien und bewahren Sie diese außerhalb der Reichweite von Kindern auf. - Page 47 1- Sicherheitshinweise WARNUNG! ▶ Das Gerät wird mit 220-240 V/50 Hz betrieben. Abnorma- le Spannungsschwankungen können bewirken, dass das Gerät nicht startet, dass der Temperaturregler oder der Kompressor beschädigt werden oder dass während des Betriebes unnormale Geräusche auftreten. In einem solchen Fall muss ein automati- scher Spannungsregler eingebaut werden.
- Page 48 1- Sicherheitshinweise WARNUNG! ▶ Öffnen und schließen Sie die Tür(en) nur an den Griffen. Der Spalt zwischen den Abteilen sowie zwischen Tür und Schrank ist sehr schmal. Nicht hineingreifen; es besteht Quetschgefahr. Die Gerätetür(en) nur öffnen und schließen, wenn sich im Bewe- gungsbereich der Tür keine Kinder aufhalten.
- Page 49 1- Sicherheitshinweise WARNUNG! Wartung / Reparatur ▶ Die Reinigung und Wartung darf nur dann von Kindern durchge- führt werden, wenn sie beaufsichtigt werden. ▶ Trennen Sie das Gerät vor der Durchführung von Wartungsarbeiten von der Stromzufuhr. Vor dem Wiedereinschalten mindestens 5 Minuten warten, da häufiges Einschalten den Kompressor be- schädigen kann.
- Page 50 1- Sicherheitshinweise Informationen zum Kühlmittel WARNUNG! Dieses Gerät ist mit dem brennbaren Kühlmittel ISOBUTAN (R600a) befüllt. Achten Sie darauf, dass die Kühlmittelrohre bei Transport oder Installation nicht beschädigt werden. Austretendes Kühlmittel kann Augenschäden verursachen oder sich entzünden. Im Schadensfall sind offenen Feuerquellen fernzuhalten und der Raum gründlich zu lüften.
-
Page 51: 2-Vorgesehener Gebrauch
Das Gerät ist zum Kühlen und Gefrieren von Lebensmitteln geeignet. Dieses Gerät wur- de ausschließlich für den Gebrauch in trockenen Innenräumen im Haushalt konzipiert. Bei gewerblicher Nutzung entfällt die Haier Garantie. Verwenden Sie es nicht für andere Zwe- cke als die, für die es ausgelegt ist. -
Page 52: 3- Gerätebeschreibung
3- Gerätebeschreibung Hinweis: Unterschiede Aufgrund von technischen Änderungen und unterschiedlichen Modellen können einige der Abbildungen in dieser Anleitung von Ihrem Modell abweichen. Geräteabbildung (Abb. 3) A: Kühlfach des Kühlschranks 13 Platte der Humidity Zone 14 Humidity Zone Schublade 1 Typenschild und QR-Code 15 MyZone-Schublade 2 Einsatz Wasserbehälter 3 Wasserbehälter... -
Page 53: 4- Bedienblende
4- Bedienblende Bedienfeld (Abb. 4) Tasten: A Kühlschrank/Gefrierschrank Temperaturmodus-Umschaltung B Super Freeze-Funktion ein/aus C Urlaubsfunktion ein/aus D Auto-Modus und Wasserfilterwarnung ein/aus E WLAN-Einstellung F Bedienfeld verriegeln/entriegeln Anzeigen: a Kühlfach ausgewählt b Gefrierfach ausgewählt c Temperatur Kühl- und Gefrierfach d Warnung Wasserfilter gewechselt e Super-Freeze-Funktion Urlaubsfunktion g Auto-Set-Funktion... - Page 54 5- Nutzung 5.5 Bedienfeld verriegeln/entriegeln Hinweis: Bedienfeldsperre Das Bedienfeld wird automatisch gegen die Aktivierung gesperrt, wenn 30 Sekunden lang keine Taste berührt wird. Für alle Einstellungen muss das Bedienfeld ent- riegelt sein. Berühren Sie die Taste „F“ drei Sekunden lang, um ►...
- Page 55 5- Nutzung 5.7.2.1 Einstellen der Temperatur für den Kühlschrank 1. Entriegeln Sie das gesperrte Bedienfeld, indem Sie die Taste „F“ berühren (Abb. 5.5). 2. Berühren Sie die Taste „A“ (ZONE), um das Kühlfach auszuwählen, die Anzeige „a“ leuchtet und das Kühlfach ist aktiviert (Abb.
- Page 56 5- Nutzung 5.8 Super-Freeze-Funktion Frische Lebensmittel sollten so schnell wie möglich bis zum Kern eingefroren werden. So bleiben der beste Nährwert, das Aussehen und der Geschmack erhalten. Die Super Freeze-Funktion beschleunigt das Einfrieren frischer Lebensmittel und schützt die bereits gelagerte Ware vor unerwünschter Erwärmung. Wenn Sie einmal eine größere Menge an Lebensmitteln einfrieren müssen, empfiehlt es sich, die Super- Freeze-Funktion bereits 24 Stunden vor der Nutzung...
- Page 57 5- Nutzung 5.10 WLAN-Moduseinstellung KOPPELUNGSVORGANG IN DER APP Schritt 1 • Laden Sie die hOn-App aus den Stores herunter. Schritt 2 Schritt 3 Folgen Sie den Kopplungs- Erstellen Sie Ihr Konto in der hOn- anweisungen in der hOn-App. App oder melden Sie sich an, wenn Sie bereits ein Konto haben.
- Page 58 5- Nutzung Hinweis: MyZone-Schublade Eine der drei Funktionen des MyZone-Fachs muss immer aktiviert sein. ► Wenn Sie „0°C Fresh“ oder „Cheese“ gewählt haben, stellen Sie die Temperatur des ► Kühlfachs auf die mittlere Stufe (5°C) ein, um Ihre Lebensmittel in der optimalen Lagerumgebung aufzubewahren.
- Page 59 5- Nutzung Vor der ersten Verwendung der Funktion für Eiswürfel oder Wasser Vor der ersten Inbetriebnahme müssen Sie einmal Wasser durch den Filter laufen lassen, um Verun- reinigungen oder Lufteinschlüsse im Wassertank und Filtersystem herauszuspülen. Für Wasser • Drücken Sie gegen den Wasserspender, um 4 L Wasser auszugeben - warten Sie 4 Minuten, bevor Sie erneut Wasser ausgeben.
-
Page 60: 5- Bedienung
5- Bedienung 5.1 Vor dem ersten Gebrauch ▶ Alle Verpackungsmaterialien sind zu entfernen. Diese müssen unzugänglich für Kin- der aufbewahrt und auf umweltfreundliche Weise entsorgt werden. ▶ Vor dem Einlegen von Nahrungsmitteln sollte das Gerät innen und außen mit war- men Wasser und einem milden Geschirrspülmittel gereinigt werden. - Page 61 5- Bedienung 5.14 Tipps für das Einlagern von Lebensmitteln 5.14 1 Einlagern in das Kühlabteil ▶ Die Temperatur des Kühlabteils sollte stets auf unter 5°C gehalten werden. ▶ Warme Lebensmittel müssen vor dem Einlegen in das Kühlabteil auf Zimmertem- peratur abkühlen. ▶...
- Page 62 5- Bedienung 5.14.2 Einlagern in das Gefrierabteil ▶ Die Temperatur des Gefrierabteils sollte stets bei -18°C gehalten werden. ▶ 24 Stunden vor dem Einfrieren den Temperaturregler auf MAX Position stellen- bei kleinen Mengen genügen 4-6 Stunden. ▶ Warme Lebensmittel müssen vor dem Einlegen in das Gefrierabteil auf Zimmer- temperatur abkühlen.
- Page 63 5- Bedienung 5.14.3 Beim Aufbewahren von eingekauften Tiefkühlwaren sind folgende Punk- te zu beachten: ▶ Immer die Angaben des Herstellers in Bezug auf die zulässige Aufbewahrungsdauer der Nahrungsmittel beachten. Diese Dauer nicht überschreiten! ▶ Zwischen dem Kauf und der Einlagerung sollte so wenig Zeit wie möglich vergehen, um die Qualität der Nahrungsmittel zu erhalten.
-
Page 64: 6- Energiespartipps
6- Energiespartipps Tipps zum Energiesparen Darauf achten, dass das Gerät ausreichend belüftet ist (siehe INSTALLATION). Das Gerät nicht im direkten Sonnenlicht oder in der Nähe einer Wärmequelle (z.B. Heizkörper, Herd und andere Wärme abgebende Geräte) aufstellen. Unnötige tiefe Temperatureinstellungen sollten vermieden werden. Je niedriger die Temperatur eingestellt ist, desto höher ist der Energieverbrauch. -
Page 65: 7- Ausstattung
7- Ausstattung 7.1 Multi-air-flow Das Kühlabteil ist mit einem ventilatorgestützten Mul- ti- Air-Flow-System ausgestattet, welches für eine gleichmäßige Verteilung der Kühlluft auf unterschied- Fine-controlled micro air-channel NAVI-FORCE lichen Ebenen sorgt (Abb. 7.1). So können warme Lebensmittel schneller heruntergekühlt werden, die Ausgangsfrische und Qualität der eingelagerten Le- bensmittel bleibt erhalten. - Page 66 7- Ausstattung 7.5 MoistZone- und DryZone Schublade Gebrauch und Einstellung der MoistZone-und Dry- Zone Schublade siehe Kapitel BEDIENUNG. Zum Herausnehmen der Schubladen:: Schublade bis zum Anschlag vorziehen (1), (Abb. 7.5). 2. Schubladen anheben (2), um sie von der Schiene zu trennen und herausnehmen(3). Die Schritte in umgekehrter Reihenfolge ausführen, um die Schubladen wieder einzusetzen.
- Page 67 7- Ausstattung 7.8-2 7.8.2 Untere Gefrierfach Schublade Schublade bis zum Anschlag vorziehen (Abb. 7.8.2). 2. Gefriertablett (A) bis zum Anschlag vorziehen, an- heben und herausnehmen Schublade (B) anheben und von der Schiene tren- nen, in Richtung Gerät schieben und herausnehmen. Die Schritte in umgekehrter Reihenfolge ausführen, um die Schublade und Gefriertablett wieder einzusetzen.
- Page 68 7- Ausstattung 7.11-1 7.11 Eiswürfelbereiter 1. Fisches Trinkwasser in jedes Eisbereiterfach bis zur Markierung der maximalen Füllhöhe einfüllen (Abb. 7.11-1). Hinweis Achten Sie darauf, dass kein Wasser zwischen die beiden Drehknöpfe gelangt. Dieses würde gefrieren und die Eiswürfelentnahme behindern. 7.11-2 2.
- Page 69 8- Reinigung und Pflege WARNUNG! Schalten Sie vor jeder Wartung das Gerät aus und ziehen Sie den Netzstecker. 8.1 Allgemeines Gerät am besten dann reinigen, wenn nur wenig oder kein Kühl- bzw. Gefriergut ein- gelagert ist. Um unangenehme Gerüche im Gerät zu vermeiden, wird empfohlen, das Kühlabteil alle vier Wochen zu reinigen.
- Page 70 8- Reinigung und Pflege 8.2 Abtauen Das Kühl- und Gefrierabteil tauen automatisch ab, so dass kein manueller Eingriff erfor- derlich ist. 8.3 Austauschen der LED-Lampe WARNUNG! Tauschen Sie die LED Lampe nicht selbst aus sondern wenden Sie sich an der Kunden- dienst.
- Page 71 8- Reinigung und Pflege 8.7 Bewegen den Gerätes 1. Netzstecker ziehen und alle Lebensmittel aus dem Gerät entnehmen. 2. Die Ablagen und sonstigen beweglichen Teile im Kühl- und Gefrierabteil mit Klebe- band sichern. 3. Das Gerät nicht um mehr als 45 ° kippen, um Beschädigungen des Kühlsystems zu vermeiden.
-
Page 72: 9- Fehlerbehebung
9- Fehlerbehebung Die im Folgenden aufgezählten Probleme können meist selbst behoben werden. Wenden Sie sich erst dann an den Kundendienst (siehe Garantiekarte), wenn Sie alles geprüft ha- ben und den Fehler nicht beseitigen können. WARNUNG! ▶ Schalten Sie vor jeder Wartung das Gerät aus und ziehen Sie den Netzstecker. ▶... - Page 73 9- Fehlerbehebung Problem Mögliche Ursachen Lösungen Im Gerät wird es • Der Temperaturregler ist auf • Temperatur neu einstellen. nicht kalt genug. „schwach“ eingestellt. • Es wurde zu warmes Gut ein- • Gut erst abkühlen lassen. gelagert. • Es wurde zu viel auf einmal ein- •...
- Page 74 Um die technische Unterstützung zu kontaktieren, besuchen Sie unsere Website: https://corporate. haier-europe.com/en/ . Wählen Sie im Bereich „Website“ die Marke Ihres Produkts und Ihr Land aus. Sie werden auf die jeweilige Website weitergeleitet, auf der Sie die Telefonnummer und das Formular...
-
Page 75: 10- Installation
10- Installation 10.1 Auspacken WARNUNG! Das Gerät ist schwer. Nehmen Sie eine zweite Personen zu Hilfe. Bewahren Sie alle Verpackungsmaterialen für Kinder unzugänglich auf und entsor- gen Sie die Verpackung auf umweltfreundliche Weise. Gerät aus der Verpackung entnehmen. Alle Verpackungsmaterialen entfernen. 10.2 Umgebungsbedingungen Die Zimmertemperatur muss zwischen 10 °C und 43 °C liegen, da sie die Temperatur im der Nähe anderer Wärme abgebender Geräte (Herde, Heizkörper etc.) aufstellen. - Page 76 10- Installation 10.6-1 10.6 Feinjustierung der Türen Wenn nach dem Gerätausrichten ein Höhenversatz zwischen beiden Gerätetüren besteht, kann dieser wie folgt verringert werden: 10.6.1 Verstellen der Gerätefüße Gerätefuß gemäß Abbildung 10.6-1 in die entspre- chende Richtung drehen. 10.6-2 10.6.2 Verwendung der Einstellknöpfe Einstellknopf oben an der Tür drehen.
- Page 77 10- Installation 10.7 Wartezeit 10.7 Zur wartungsfreien Dauerschmierung befindet sich in der Kapsel des Kompressors Öl. Durch Schräglage beim Transport kann dieses Öl in das geschlossene Rohrsystem gelangen. Mit dem Einschalten des Gerä- tes muss 2 Stunden gewartet werden(Abb. 10.7), da- mit das Öl wieder zurück in die Kapsel läuft.
- Page 78 10- Installation WARNUNG! Nur an die Trinkwasserversorgung anschließen. Der Wasserfilter filtert nur Verun- ► reinigungen im Wasser und macht Eis sauber und hygienisch. Er kann nicht sterilisieren oder Keime oder andere schädliche Substanzen abtöten. Ein zu hoher Wasserdruck im Schlauch kann das Gerät beschädigen. Installieren Sie einen ►...
-
Page 79: 11- Technische Daten
11- Technische Daten 11.1 Produktdatenblatt gemäß 2019/2016 Marke Haier Modellkennung HFW7819EWMP Kühl-Gefrierkombination Kategorie Energieverbrauch (kWh/Jahr) Nutzinhalt Kühlen (L) Nutzinhalt Gefrieren (L) **** Stern-Einstufung Frostfrei System Lagerzeit bei Störung (h) Gefriervermögen (kg/24h) Klimaklasse SN.N. ST.T Luftschallemissionen (db(A) re 1pW) C(37) Gerätetyp Standgerät... -
Page 80: 12- Kundendienst
12- Kundendienst Wir empfehlen Ihnen unseren Haier Kundendienst und die Verwendung von Original Ersatzteilen. Sollte eine Störung an Ihrem Gerät auftreten, überprüfen Sie bitte zuerst die Hinweise im Kapitel FEHLERBEHEBUNG. Ihren Händler vor Ort oder unseren Kundenservice im Internet unter www.haier.com. - Page 81 12- Kundendienst VERFÜGBARKEIT VON ERSATZTEILEN Thermostate, Temperatursensoren, Leiterplatten und Lichtquellen sind nach dem Inverkehrbringen der letzten Einheit des Modells mindestens sieben Jahre lang verfügbar. T ürgriffe,Türscharniere, abletts und Körbe für einen Zeitraum von minde- stens sieben TJahren und Türdichtungen für einen eitraum von mindestens zehn Jahren, Znachdem die letzte Einheit des Modells auf den Markt gebracht wurde.
- Page 83 Manuel d’utilisation Réfrigérateur-congélateur HFW7819EWMP...
- Page 84 Nous vous remercions Nous vous remercions d'avoir acheté un produit Haier. Veuillez lire attentivement ces instructions avant d'utiliser l'appareil. Ces instructions sont des informations utiles vous permettant de mieux exploiter cet appareil, et vous assurer une installation, une utilisation et un entretien sécurisés et adéquats.
- Page 85 Sommaire 1- Consignes de sécurité ........................4 2- Utilisation prévue ..........................9 3- Description du produit ........................10 4- Panneau de commande ........................ 11 5- Utilisation ............................12 6- Conseils pour économiser de I‘énergie ..................22 7- Équipement ............................23 8- Entretien et nettoyage ........................27 9- Dépannage ............................
-
Page 86: 1- Consignes De Sécurité
1- Consignes de sécurité Avant de mettre l’appareil en marche pour la première fois, veuillez lire les consignes de sécurité ci-après : AVERTISSEMENT ! Avant la première utilisation ▶ Vérifiez que l’appareil n’a subi aucun dommage lié au transport. ▶ Retirez tous les emballages et tenez-les hors de portée des en- fants. - Page 87 1- Consignes de sécurité AVERTISSEMENT ! ▶ Uniquement pour le Royaume-Uni : Cet appareil est équipé d’un cordon d’alimentation avec fiche à 3 fils (mise à la terre), répon- dant aux normes de la prise à 3 fils (mise à la terre). Ne coupez jamais ou ne démontez jamais le troisième fil (mise à...
- Page 88 1- Consignes de sécurité AVERTISSEMENT ! Utilisation quotidienne ▶ Ouvrez et fermez les portes uniquement à l’aide des poignées. L’espace entre les portes et le cabinet est très réduit. Ne placez pas vos mains dans ces endroits pour éviter de coincer vos doigts.
- Page 89 1- Consignes de sécurité AVERTISSEMENT ! Entretien et nettoyage ▶ Assurez-vous que les enfants sont sous surveillance s’ils se char- gent du nettoyage et de l’entretien. ▶ Débranchez l'appareil de l'alimentation électrique avant d'entre- prendre tout entretien. Attendez au moins 5 minutes avant de re- démarrer l'appareil car plusieurs redémarrages endommagent le compresseur.
- Page 90 1- Consignes de sécurité Informations sur le gaz frigorigène AVERTISSEMENT ! Cet appareil contient du réfrigérant inflammable ISOBUTANE (R600a). Assurez-vous que le système de réfrigération n'est pas endommagé pendant le transport et l'installation. Une fuite de gaz frigorigène pourrait causer des dommages oculaires ou un incendie.
-
Page 91: 2- Utilisation Prévue
2- Utilisation prévue 2.1 Utilisation prévue Cet appareil a été conçu pour la réfrigération et la congélation des aliments. Il est destiné exclusivement à un usage ménager et dans des compartiments secs. Il n'est pas destiné à un usage commercial ou industriel. Aucune modification ou altération de cet appareil n'est autorisée. -
Page 92: 3-Description Du Produit
3-Description du produit Remarque : Différences En raison des changements techniques et de différents modèles, certaines des illustrations de ce manuel peuvent différer de votre modèle. Photo de l'appareil (Fig. 3) A : Compartiment du réfrigérateur 13 Panneau de la Humidity Zone 14 Tiroir Humidity Zone 1 Plaque signalétique et code QR 15 Tiroir MyZone... -
Page 93: 4- Panneau De Commande
4- Panneau de commande Panneau de commande (Fig. 4) Touches : A Basculement du mode de température entre réfrigérateur et congélateur B Marche/arrêt de la fonction Super congélation C Marche/arrêt de la fonction Vacances D Marche/arrêt avertissement pour le mode automatique et le filtre à... -
Page 94: 5- Utilisation
5- Utilisation 5.5 Verrouillage/déverrouillage du panneau Remarque : Verrouillage du panneau Le panneau de commande est automatiquement bloqué contre l'activation si aucune touche n'est effleu- rée pendant 30 secondes. Pour tous les réglages, le panneau de commande doit être déverrouillé. Effleurez la touche "F"... - Page 95 5- Utilisation 5.7.2.1 Réglage de la température du réfrigérateur 1. Déverrouillez le panneau en effleurant la touche "F" s'il est verrouillé (fig. 5.5) 2. Effleurez la touche "A" (ZONE) pour sélectionner le compartiment réfrigérateur, le voyant "a" s'allume et le compartiment réfrigérateur est activé (fig. 5.7.2-1). La température réelle dans le compartiment réfrigérateur est affichée (fig.
- Page 96 5- Utilisation 5.8 Fonction Super-Freeze (Super congélation) Les aliments frais doivent être congelés le plus rapidement possible intégralement. Cela préserve la meilleure valeur nutritive, l'apparence et le goût. La fonction Super-Freeze accélère la congélation des aliments frais et évite un réchauffement indésirable des produits déjà...
- Page 97 5- Utilisation 5.10 Réglage du mode Wi-Fi PROCÉDURE D'APPAIRAGE DANS L'APPLICATION Étape 1 • Téléchargez l'application hOn dans les stores Étape 2 Étape 3 Créez votre compte sur l'application Suivez les instructions d’appairage hOn ou connectez-vous si vous dans l'application hOn possédez déjà...
- Page 98 5- Utilisation Remarque : Tiroir MyZone Une des trois fonctions du compartiment MyZone doit toujours être activée ► Lorsque vous avez choisi "0°C Fresh" ou "Cheese", réglez la température du ► compartiment de réfrigération au niveau intermédiaire (5 °C), afin de préserver vos aliments dans un environnement de conservation optimal.
- Page 99 5- Utilisation Avant la première utilisation des fonctions Glaçons ou Eau Avant la première utilisation, vous devez faire passer de l'eau à travers le filtre pour éliminer les impuretés ou l'air emprisonné dans le réservoir d'eau et le système de filtration.
- Page 100 5- Utilisation 5.14 Conseils sur la conservation des aliments frais 5.14.1 Conservation dans le compartiment réfrigérateur Maintenez votre réfrigérateur à une température inférieure à 5 °C. Les aliments chauds doivent être refroidis à la température ambiante avant de les conserver dans l'appareil. Les aliments à...
- Page 101 5- Utilisation 5.14.2 Conservation dans le compartiment congélateur Réglez la température de congélation à -18° C. 24 heures avant la congélation, réglez la fonction Super congélation ; pour de petites Les aliments chauds doivent être refroidis à la température ambiante avant de les conserver dans le congélateur.
- Page 102 5- Utilisation 5.14.3 Suivez les instructions suivantes pendant la conservation des aliments commerciaux congelés : Suivez toujours les instructions des fabricants concernant le temps de conservation de ces aliments. Ne pas dépasser ces délais ! Faites en sorte que le temps entre l'achat et la conservation soit le plus court pos- sible pour préserver la qualité...
-
Page 103: 6-Conseils Pour Économiser De I'énergie
6- C 6-Conseils pour économiser de I‘énergie éc Conseils pour économiser de l’énergie N'installez pas l'appareil en direction des rayons solaires ou à proximité des sources Évitez de faire fonctionner l'appareil à une température inutilement basse. La consommation énergétique augmente lorsque l'appareil fonctionne à des tempéra- tures basses. -
Page 104: 7- Équipement
7- Équipement 7.1 Ventilation multiple Le réfrigérateur est équipé d’un système de ventila- tion multiple, qui permet à l’air froid de circuler dans tous les rayons (Fig. 7.1). Ce système permet de main- Fine-controlled micro air-channel NAVI-FORCE tenir une température homogène et de conserver les aliments pendant plus longtemps. - Page 105 7- Équipement 7.5 Tiroir MoistZone et DryZone Pour utiliser et régler le tiroir MoistZone et DryZone, veuillez vous référer à la section UTILISATION. Pour retirer le tiroir : 1. Tirez-le(1) au maximum (Fig. 7.5). 2. Soulevez-le(2) pour le séparer du rail et retirez-le (3).
- Page 106 7- Équipement 7.8.2 Tiroir inférieur du congélateur 7.8-2 1. Tirez au maximum le tiroir inférieur du congélateur 2. Tirez le plateau givrant(A) jusqu’à la position ex- trême, soulevez-le et retirez-le. 3. Soulevez le tiroir (B) jusqu’à ce qu’il se sépare du bloc de support, poussez-le dans le congélateur et inclinez-le pour le retirer.
- Page 107 7- Équipement 7.11 Machine à glaçons 7.11-1 1. Versez de l’eau potable fraîche dans chaque moule à glace conformément à la graduation du verre do- seur. N’excédez pas cette graduation (Fig. 7.11-1). Remarque : Évitez de laisser l’eau toucher les 2 boutons, sinon ils peuvent geler et les glaçons ne tomberont pas dans la boîte de stockage.
-
Page 108: 8- Entretien Et Nettoyage
8- Entretien et nettoyage AVERTISSEMENT ! Débranchez l'appareil de la prise d'alimentation avant de le nettoyer. 8.1 Généralités Nettoyez l'appareil uniquement lorsqu'il y a moins d'aliments ou pas d'aliments. toutes les quatre semaines. AVERTISSEMENT ! Évitez de nettoyer l'appareil à l'aide de brosses dures, métalliques, de détergent en poudre, d'essence, d'acétate d'amyle, d'acétone et toute autre solution similaire or- ganique, acide ou alcaline. - Page 109 8- Entretien et nettoyage 8.3 Dégivrage Le réfrigérateur et le congélateur se dégivrent automatiquement, aucune opération ma- nuelle n'est nécessaire. 8.4 Remplacement des lampes LED Les lampes sont des lampes LED ; elles consomment moins d'énergie et ont une longue durée de vie. En cas de problème, veuillez contacter le service clientèle. Voir SERVICE CLIENTÈLE.
- Page 110 8- Entretien et nettoyage 8.7 Déplacement de l'appareil 1. Retirez tous les aliments et débranchez l'appareil. 2. Sécurisez les rayons et autres pièces amovibles à l'intérieur du réfrigérateur et du congélateur à l'aide d'un ruban adhésif. 3. Ne penchez pas le réfrigérateur à plus de 45° pour éviter d'endommager le système de réfrigération.
-
Page 111: 9- Dépannage
9- Dépannage Vous pouvez résoudre la plupart des problèmes qui pourraient survenir sans expertise instructions ci-dessous avant de contacter un service après-vente. Voir SERVICE CLIEN- TÈLE. AVERTISSEMENT ! Avant tout entretien, veuillez éteindre l’appareil et le débrancher du secteur. Les appareils électriques doivent être entretenus uniquement par des experts en électricité, parce qu'une mauvaise intervention pourrait causer des dommages considérables. - Page 112 9- Dépannage Problème Causes probables Solutions possibles L’appareil n’est pas • La température est trop élevée. • Réglez à nouveau la température • Des aliments trop chauds sont • Laissez toujours les aliments re- placés dans le congélateur. froidir avant de les conserver. •...
- Page 113 Remarque : Fonction Mémoire pendant la coupure d'électri cité nis au préalable avant l'interruption du courant. To contact the technical assistance, visit our website: https://corporate.haier-europe.com/en/ . Under the section “website”, choose the brand of your product and your country. You will be redirected to the specific website where you can find the telephone number and form to con-...
-
Page 114: 10- Installation
10- Installation 10.1 Déballage AVERTISSEMENT ! L'appareil est lourd. Il faut toujours être au moins à deux pour le manœuvrer. Tenez tous les emballages hors de portée des enfants et mettez-les au rebut dans le respect de l'environnement. Sortez l'appareil de l'emballage. Retirez tous les emballages. - Page 115 10- Installation 10.6-1 10.6 Réglage minutieux des portes Si les portes ne sont pas au même niveau, vous pouvez y remédier en suivant la procédure suivante : 10.6.1 Utilisation des pieds ajustables Tournez les pieds ajustables en suivant la direction de vers le bas.
- Page 116 10- Installation 10.7 Temps d’attente 10.7 L'huile d'entretien du compresseur se trouve dans la capsule du compresseur. Cette huile peut se déverser dans le circuit fermé du système pendant le transport. Avant de brancher l’appareil à l’alimentation électrique, vous devez attendre 2 heures (Fig. 10.7) pour per- mettre à...
- Page 117 10-Installation AVERTISSEMENT ! Ne le raccordez qu’à l'alimentation en eau potable. Le filtre à eau filtre uniquement les ► impuretés dans l'eau et rend les glaçons propres et hygiéniques. Il ne peut stériliser ou détruire des germes ou d'autres substances nocives. Une pression d'eau trop élevée dans le tuyau peut endommager l'appareil.
-
Page 118: 11- Informations Techniques
11- Informations techniques réglementation UE N° 2019/2016 11.1 Fiche du produit conforme à la Marque de fabrique Haier Référence du modèle HFW7819EWMP Réfrigérateur-congélateur Catégorie du modèle Consommation énergétique annuelle (kWh/ Volume utile du réfrigérateur (L) Volume utile du congélateur (L) **** Classement en étoile... -
Page 119: 12- Service Client
12- Service client Nous vous recommandons notre service clients Haier et l’utilisation de pièces de re- change d’origine. Si vous avez un problème avec l’appareil, veuillez vous référer à la section DÉPANNAGE. Si vous ne trouvez pas de solution, veuillez contacter votre vendeur local ou rendez-vous sur le site www.haier.com, dans la zone Service et support, vous trou-... - Page 121 Manuale dell’Utente Frigorifero- Congelatore HFW7819EWMP...
- Page 122 Grazie Vi ringraziamo per aver deciso di acquistare un prodotto Haier. Vi invitiamo a leggere attentamente queste istruzioni prima di iniziare a usare il dispositivo. Le istruzioni contengono informazioni importanti che vi aiuteranno a trarre il meglio da questo dispositivo e vi garantiranno altresì sicurezza in fase di installazione, uso e manu- tenzione del dispositivo.
- Page 123 Indice 1- Informazioni di sicurezza ......................4 2- Im piegoc onformea los copop revisto .................9 3- D escrizioned elp rodotto .......................10 4- Pannello di controllo .........................11 5- Utilizzo ............................12 6- Suggerimentiperilrisparmiodienergia ..................22 7- Strumentazione ........................23 8- Cura e pulizia ..........................27 9- Guida alla risoluzione dei problemi ..................30 10- Installazione ..........................34 11- Dati tecnici ..........................38...
-
Page 124: 1- Informazioni Di Sicurezza
1- Informazioni di sicurezza Prima di accendere il dispositivo per la prima volta, leggere i se- guenti suggerimenti di sicurezza: AVVERTENZA! Prima di iniziare a usare il dispositivo ▶ Verificare che non vi siano danni verificatisi in fase di trasporto. ▶... - Page 125 1- Informazioni di sicurezza AVVERTENZA! ▶ Unicamente per il Regno Unito: Il cavo di alimentazione del dispo- sitivo è dotato di una presa a 3 poli (con messa a terra), adatta per una normale presa a 3 poli. Non tagliare o smontare mai il terzo polo (messa a terra).
- Page 126 1- Informazioni di sicurezza AVVERTENZA! ▶ Aprire e chiudere le porte servendosi unicamente delle maniglie. Lo spazio fra le porte e l'armadietto è molto stretto. Non mette- re le mani in queste zone per evitare di pizzicarsi le dita. Aprire o chiudere le porte del frigorifero solo quando non ci sono bambini nella zona di movimento delle porte.
- Page 127 1- Informazioni di sicurezza AVVERTENZA! ▶ Non utilizzare apparecchiature elettriche all'interno degli scom- parti di conservazione degli alimenti, ad eccezione di quelli consi- gliati dal costruttore Manutenzione / pulizia ▶ Verificare che i bambini siano supervisionati se eseguono opera- zioni di pulizia e manutenzione. ▶...
- Page 128 1- Informazioni di sicurezza Informazioni sul gas refrigerante AVVERTENZA! Il dispositivo contiene il refrigerante infiammabile ISOBUTANO (R600a). Verificare che il circuito del refrigerante non si sia danneg- giato in fase di trasporto o installazione. Le perdite di refrigerante possono causare lesioni agli occhi o rischi di incendio. Qualora si siano verificati danni, tenere lontano dalle fonti libere di fuoco, ven- tilare bene la stanza, non collegare o scollegare i cavi di alimenta- zione del dispositivo o di qualsiasi altro dispositivo.
-
Page 129: 2-Im Piegoc Onformea Los Copop Revisto
2-Im piegoc onformea los copop revisto 2.1 Impiego conforme allo scopo previsto Questo dispositivo è stato pensato per raffreddare e congelare alimenti. È stato progetta- to esclusivamente per essere usato all'interno di case con atmosfere asciutte all'interno. Non è stato pensato per un uso di tipo commerciale o industriale. Non sono ammesse modifiche o trasformazioni all'apparecchiatura. -
Page 130: 3-D Escrizioned Elp Rodotto
3-D escrizioned elp rodotto Avviso: Differenze A causa di modifiche tecniche e delle varietà dei modelli, alcune illustrazioni riportate nel presente manuale possono essere diverse dall'aspetto reale del modello acquistato. Immagine dell'elettrodomestico (Fig. 3) A: Vano frigorifero 13 Pannello Humidity Zone 14 Cassetto Humidity Zone 1 Targhetta e codice QR 15 Cassetto MyZone... -
Page 131: 4- Pannello Di Controllo
4- Pannello di controllo Pannello di controllo (Fig. 4) Tasti: A Commutazione della modalità temperatura tra frigorifero e congelatore B Attivazione/disattivazione della funzione Super Freeze C Attivazione/disattivazione della funzione Holiday D Attivazione/disattivazione della modalità automatica e avviso filtro acqua E Impostazione Wi-Fi F Blocco/sblocco del pannello Spie: a Comparto frigo selezionato... -
Page 132: 5- Utilizzo
5- Utilizzo 5.1 Prima di iniziare a usare il dispositivo ▶ Togliere tutti i materiali dell'imballaggio, tenerli fuori dalla portata dei bambini e smal- tirli in modo rispettoso dell'ambiente. ▶ Pulire l'interno e l'esterno del dispositivo con acqua e con un detergente delicato pri- ma di inserire alimenti all'intero. - Page 133 5- Utilizzo 5.5 Pannello di blocco/sblocco Avviso: blocco del pannello Se non viene toccato alcun tasto per 30 secondi, il pannello di controllo si blocca automaticamente in modo che non possa essere attivato. Per qualunque impostazione, il pannello di controllo deve essere sbloccato.
- Page 134 5- Utilizzo 5- Utilizzo 5.7.2.1 Regolazione della temperatura del frigorifero 1. Se il pannello è bloccato, toccare il tasto "F" per sbloccarlo (Fig. 5.5). 2. Toccare il tasto "A" (ZONE) per selezionare il vano frigorifero; la spia "a" si accende e il vano frigorifero si attiva (Fig.
- Page 135 5- Utilizzo 5- Utilizzo 5.8 Funzione Super-Freeze Gli alimenti freschi devono essere congelati più rapidamente possibile fino in profondità. In tal modo, si preservano il più possibile i valori nutrizionali, l'aspetto e il gusto. La funzione Super-Freeze accelera il con- gelamento degli alimenti freschi e protegge quelli già...
- Page 136 5- Utilizzo 5- Utilizzo 5.10 Impostazione della modalità Wi-Fi PROCEDURA DI ACCOPPIAMENTO DELL'APP Fase 1 • Scaricare l'applicazione hOn. Passo 2 Passo 3 Creare un account nell'app Seguire le istruzioni per hOn o accedere se esiste già l'accoppiamento nell'app hOn. un account.
- Page 137 5- Utilizzo 5- Utilizzo Avviso: cassetto MyZone Una delle tre funzioni del vano MyZone deve essere sempre attivata. ► Se è stata selezionata la funzione "0 °C Fresh" o "Cheese", impostare la temperatura ► del vano frigorifero al livello medio (5 °C) per proteggere gli alimenti in un ambiente di conservazione ottimale.
- Page 138 5- Utilizzo Operazioni preliminari prima dell’uso delle funzioni Ghiaccio o Acqua Prima di utilizzare per la prima volta il prodotto, è necessario far scorrere l'acqua attraverso il filtro per rimuovere le impurità o l'aria intrappolata nel serbatoio dell'acqua e nel sistema di filtraggio. Per l'acqua •...
- Page 139 5- Utilizzo 5.14 Suggerimenti per conservare alimenti freschi 5.14.1 Conservazione all’interno dello scomparto frigorifero ▶ Conservare la temperatura del frigorifero al di sotto dei 5°C. ▶ Gli alimenti caldi vanno conservati a temperatura ambiente prima di essere collocati all'in- terno del dispositivo. ▶...
- Page 140 5- Utilizzo 5.14.2 Conservazione all’interno dello scomparto congelatore ▶ Mantenere la temperatura del congelatore a -18°C. ▶ 24 ore prima del congelamento attivare la funzione Super-Freeze; -per piccole quantità di alimenti bastano 4-6 ore. ▶ Gli alimenti caldi vanno conservati a temperatura ambiente prima di essere collocati nello scomparto congelatore.
- Page 141 5- Utilizzo 5.14.2 1 Scatola congelatore: Alimenti congelati di piccole dimensioni quali ad esempio carne o pizze piccole 2 Cassetto di conservazione superiore del congelatore: Dispositivo per la realizzazione di cubetti di ghiaccio, pacchi congelatore, Fresher Pad, arti- coli meno pesanti, ad esempio gelato, verdura, pane, ecc.
-
Page 142: 6- Suggerimentiperilrisparmiodienergia
6- Suggerimenti per il risparmio di energia Suggerimenti per risparmiare energia ZIONE). Non installare il dispositivo direttamente esposto alla luce del sole o vicino a sorgenti di alimentazione (ad esempio: stufe, riscaldatori). Evitare di impostare temperature inutilmente basse all'interno dello scomparto frigo- rifero. -
Page 143: 7- Strumentazione
7- Strumentazione 7.1 Flusso multi-aria Il frigorifero è dotato di un impianto multi air flow, col quale i flussi di aria fresca sono localizzati su ogni ripia- no (Fig. 7.1). Ciò aiuta a mantenere una temperatura Fine-controlled micro air-channel NAVI-FORCE uniforme al fine di garantire che gli alimenti rimangano freschi più... - Page 144 7- Strumentazione 7.5 Cassetto MoistZone e DryZone Per usare e impostare il cassetto MoistZone e DryZo- ne controllare la sezione USO. Per estrarre il cassetto: 1. Tirare (1) al massimo (Fig. 7.5). 2. Sollevare (2) per separare il cassetto dal binario e togliere (3).
- Page 145 7- Strumentazione 7.8.2 Cassetto inferiore del congelatore 7.8-2 1. Estrarre il cassetto inferiore del congelatore fino al massimo (Fig. 7.8.2). 2. Estrarre il vassoio di congelamento (A) fino alla po- sizione di stop, sollevare e togliere. 3. Sollevare il cassetto (B) fino a che non sarà separa- to dal blocco di supporto, spingerlo nel congelato- re e inclinarlo per estrarlo.
- Page 146 7- Strumentazione 7.11 Dispositivo per la produzione dei 7.11-1 cubetti di ghiaccio 1. Versare acqua fresca in ogni scatola per la produ- zione dei cubetti, come indicato all’interno della coppa di misurazione; non superare il livello indica- to dalla tacca.(Fig. 7.11-1). Informativa: Non mettere acqua vicino ai 2 pulsanti, in caso con- trario i pulsanti si potrebbero congelare e i cubetti...
-
Page 147: 8- Cura E Pulizia
8- Cura e pulizia AVVERTENZA! Scollegare il dispositivo dalla presa di corrente prima di avviare le operazioni di pulizia. 8.1 Norme di sicurezza generali Pulire il dispositivo solamente quando all'interno vi sono pochi alimenti o quando è com- pletamente vuoto. Il dispositivo va pulito ogni quattro settimane al fine di garantire una buona manutenzione oltre che per evitare la formazione di cattivi odori al suo interno. - Page 148 8- Cura e pulizia 8.2 Pulizia del dispositivo per la produzione dei cubetti di ghiaccio 1. Estrarre il dispositivo per la produzione del ghiac- cio dal dispositivo. 2. Togliere il coperchio (A) e (B) (Fig. 8.2). 3. Pulire il dispositivo per la produzione del ghiaccio con acqua calda e detergente liquido per il lavaggio dei piatti.
- Page 149 8- Cura e pulizia 8.5 Guarnizioni della porta ausiliaria rimovibili Ci sono sei guarnizioni ausiliarie sulla porta e sul cas- setto superiore e inferiore del congelatore. 1. Localizzare le cinque guarnizioni ausiliarie sulla porta e sul cassetto superiore e inferiore del con- gelatore (Fig.
-
Page 150: 9- Guida Alla Risoluzione Dei Problemi
9- Guida alla risoluzione dei problemi Molti dei problemi più ricorrenti possono essere risolti senza competenze specifiche. In caso di problemi controllare tutte le possibilità indicate e attenersi alle seguenti istruzioni prima di contattare il servizio post vendita. Cfr. ASSISTENZA CLIENTI. AVVERTENZA! ▶... - Page 151 9- Guida alla risoluzione dei problemi Problema Possibile causa Possibile soluzione La parte interna del • La parte interna del frigorifero deve • Pulire l'interno del frigorifero. frigorifero è sporca essere pulita. e/o emette cattivi • All'interno del frigorifero sono •...
- Page 152 Per contattare l'assistenza tecnica, visitare il nostro sito Web: https://corporate.haier-europe. com/en/ . Nella sezione "websites", scegli la marca del tuo prodotto e il tuo paese. Verrai rein- dirizzato al sito specifico dove potrai trovare il numero di telefono e il modulo per contattare...
- Page 153 9- Guida alla risoluzione dei problemi 9.2 Interruzione di corrente In caso di black out, gli alimenti dovrebbero rimanere al fresco in modo sicuro per all'incir- ca 14 ore. Attenersi alle seguenti indicazioni durante un black out prolungato, in particolar modo se ciò...
-
Page 154: 10-Installazione
10-Installazione 10.1 Disimballaggio AVVERTENZA! L'apparecchiatura è pesante. Spostarlo sempre in due. Conservare tutti i materiali dell'imballaggio fuori dalla portata dei bambini e smaltirli in modo rispettoso dell'ambiente. Estrarre il dispositivo dall'imballaggio. Togliere tutti i materiali dell'imballaggio. 10.2 Condizioni ambientali La temperatura della stanza dovrebbe sempre collocarsi in un intervallo compreso fra i 10° ché... - Page 155 10-Installazione 10.5 Allineare l’apparecchiatura 10.5 L'apparecchiatura dovrebbe essere collocato su una superficie piatta e resistente. 1. Inclinare l’apparecchiatura leggermente all’indie- tro (Fig. 10.5). 2. Impostare i piedini al livello desiderato. max 45° 3. Sarà possibile verificare la stabilità andando ad agire in modo alternato sulle diagonali.
- Page 156 10-Installazione 10.6-3 10.6.3 Uso di distanziatori ▶ Aprire la porta superiore e sollevarla. ▶ Fissare con attenzione il distanziatore (all’interno della borsa degli accessori) nell’anello in plastica bianco della cerniera centrale, eseguendo l’opera- zione a mano o servendosi di pinze (Fig. 10.6-3). Non graffiare o ammaccare la porta .
- Page 157 10- Installazione AVVERTENZA! Collegare solo a una fonte di acqua potabile. Il filtro dell'acqua filtra solo le impurità ► dell'acqua e pulisce e igienizza il ghiaccio. Non è in grado di sterilizzare o distruggere germi o altre sostanze nocive. Se la pressione dell'acqua nel tubo è eccessiva, l'elettrodomestico potrebbe danneggiarsi. ►...
-
Page 158: 11- Dati Tecnici
11- Dati tecnici 11.1 Scheda prodotto conformemente alla normativa UE numero 2019/2016 Marchio commerciale Haier HFW7819EWMP Frigorifero-congelatore Categoria del modello Consumo energetico annuo (kWh/anno) Volume di conservazione congelamento (L) Valutazione a stelle Sistema senza gelo Frostfree Sì Sicurezza in caso di blackout (h) Capacità... -
Page 159: 12- Servizio Di Assistenza
12- Servizio di assistenza Consigliamo di fare riferimento alla nostra Assistenza Clienti Haier; consigliamo inoltre di servirsi di componenti originali. In caso di problemi col dispositivo, controllare come prima cosa la sezione GUIDA ALLA RISOLUZIONE DEI PROBLEMI. Qualora non fosse possibile trovare una soluzione, contattare il proprio rivenditore locale l’area Assistenza &...