
Related Manuals for KitchenAid KGRA806P


Summary of Contents for KitchenAid KGRA806P
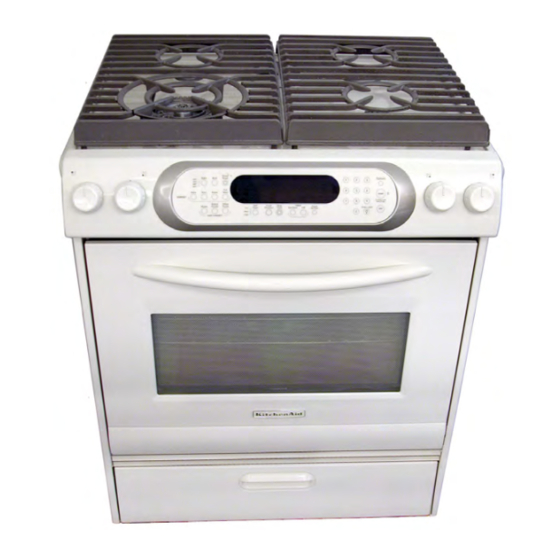
- Page 1 KAC-42 TECHNICAL EDUCATION SELF-CLEANING SLIDE-IN/FREESTANDING GAS RANGES Freestanding Models: KGRA806P & KGRI801P Slide-In Models: KGSA906P & KGSI901P JOB AID 4317367...
- Page 2 FORWARD This KitchenAid Job Aid, “Self-Cleaning Slide-In/Freestanding Gas Ranges,” (Part #4317367), provides the technician with information on the installation, operation, and service of Self-Cleaning Slide-In/Freestanding Gas Ranges. It is to be used as a training Job Aid and Service Manual. For specific information on the model being serviced, refer to the “Use and Care Guide,”...
-
Page 3: Table Of Contents
Model & Serial Number Designations ................1-2 Model & Serial Number Label & Tech Sheet Locations ............. 1-3 Specifications ........................1-4 KitchenAid Gas Range Warranty ..................1-7 INSTALLATION INFORMATION ................... 2-1 Gas Supply Requirements ....................2-1 Electrical Requirements ..................... 2-3 L.P. - Page 4 Oven Temperature Sensor ....................5-6 Cooling Fan Motor ......................5-6 Oven TOD .......................... 5-7 Gas Distribution Valve ....................... 5-7 Clock Models KGRA806P & KGSA906P ................5-8 Clock Models KGRI801P & KGSI901P ................5-11 DIAGNOSTICS & TROUBLESHOOTING ................6-1 Diagnostics ........................6-1 Troubleshooting .........................
-
Page 5: General
GENERAL SAFETY FIRST Your safety and the safety of others is very important. We have provided many important safety messages in this Job Aid and on the appliance. Always read and obey all safety messages. This is the safety alert symbol. This symbol alerts you to hazards that can kill or hurt you and others. -
Page 6: Model & Serial Number Designations
MODEL NUMBER MODEL NUMBER K GS A 90 6 P WH PRODUCT GROUP K = KITCHENAID PRODUCT IDENTIFICATION DR = DUAL FUEL RANGE DS = DUAL FUEL SLIDE-IN RANGE ER = ELECTRIC STANDARD RANGE ES = ELECTRIC SLIDE-IN RANGE GR = GAS STANDARD RANGE... -
Page 7: Model & Serial Number Label & Tech Sheet Locations
MODEL & SERIAL NUMBER LABEL & TECH SHEET LOCATIONS The Model/Serial Number label and Tech Sheet locations are shown below. Model/Serial Number Location (On Chassis Frame) Tech Sheet Location (On Underside Of Drawer) -
Page 8: Specifications
6000 BTU/5000 BTU 6000 BTU/5000 BTU Gas Ignition Cooktop Electronic Electronic Gas Valves Degrees 210 degrees 210 degrees Oven Controls Jabil GOC KitchenAid Premium Jabil GOC KitchenAid Premium Oven Display Scrolling Text Scrolling Text Interior Main Oven Cooking System Standard... - Page 9 KGSA906P BL, BT, SS, WH Model Number KGRA806P BL, BT, SS, WH True Convection with Slide-In; True Convection with Easy Convect Conversion Easy Convect Conversion Model Description Oxford Division Name Oxford Dimensions/Specifications Weight Shipping Weight (lbs) Ratings 120 V Electric Voltage/Phase/Frequency(Hz)
- Page 10 12500 BTU/10000 BTU Gas Right Rear Output (BTU)(Nat/LP) 6000 BTU/5000 BTU Gas Left Rear Output (BTU)(Nat/LP) Electronic Gas Ignition Cooktop 210 degrees Gas Valves Degrees Jabil GOC KitchenAid Premium Oven Controls Scrolling Text Oven Display Interior Main Oven True Convection Cooking System Self Cleaning - Soil Level &...
-
Page 11: Kitchenaid Gas Range Warranty
I. In Canada, travel or transportation expenses to customers who reside in remote areas. KITCHENAID OR KITCHENAID CANADA DO NOT ASSUME ANY RESPONSIBILITY FOR INCIDENTAL OR CONSEQUENTIAL DAMAGES. Some states or provinces do not allow the exclusion or limitation of incidental or consequential damages, so this exclusion or limitation may not apply to you. - Page 12 — NOTES —...
-
Page 13: Installation Information
14″ water column. your KitchenAid dealer. Examples of a qualified person include Provide a gas supply line of 3/4″ (1.9 cm) licensed heating personnel, authorized rigid pipe to the range location. - Page 14 The supply line shall be equipped with an The regulator setting must be checked at approved shutoff valve. This valve should a minimum of 1 inch water column above be located in the same room, but external the manifold pressure. The inlet pressure to the range, and should be in a location to the regulator should be as follows for that allows ease of opening and closing.
-
Page 15: Electrical Requirements
ELECTRICAL REQUIREMENTS NOTE: The metal chassis of the range MUST WARNING be grounded in order for the control panel to work. If the metal chassis of the range is not grounded, NO keypads will operate. Check with a qualified electrician if you are in doubt as to whether the metal chassis of the range is grounded. -
Page 16: L.p. Gas Conversion
L.P. GAS CONVERSION Check to make sure that the main gas WARNING supply line to the range has been shut off, and that the power supply cord is discon- nected from the AC outlet. Gas Valve Handle To “Shutoff” Position Electrical Shock Hazard Disconnect power before servicing. - Page 17 c) Use an 8 mm socket and carefully re- d) Remove the two T-20 torx screws from move the orifice spud from each of the the orifice cover and remove the cover. three standard surface burners. Orifice Cover (2 Screws) Orifice Spud e) Use a 7 mm nut driver and remove the two burner orifices.
- Page 18 Place the natural gas orifices in the orifice To convert the bake burner for use with card holes. L.P. gas: Replace the burner caps and grates. a) Remove the bake burner from the gas distribution valve orifice (see page 4-16 To convert the broil burner for use with for the procedure).
- Page 19 b) Pull the plastic cap off the gas distribu- d) Install the loop on the plastic cap over tion valve conversion cap. the natural gas side of the conversion cap. e) Install the plastic cap and the conver- sion cap on the gas distribution valve with the L.P.
-
Page 20: Adjusting For The Proper Flame
ADJUSTING FOR THE PROPER FLAME SURFACE BURNERS TRIPLETIER CROWN BURNER Turn on one of the surface burners and set Remove the control knobs from the five the flame to its lowest (LO) setting. The gas valves. flame should be steady and the inner cone Remove the control panel from the front should be dark blue in color. - Page 21 BAKE & BROIL BURNERS b) Adjust the air shutter until the flame is the proper height. The inner cone Remove the oven racks and oven bottom. should be bluish-green, and the outer Light the bake and broil burners, then mantle should be dark blue. There check their flames.
-
Page 22: Installing The Anti-Tip Bracket
INSTALLING THE ANTI-TIP BRACKET NOTE: The anti-tip bracket can be installed to WARNING hold either the right or left rear leg of the range. Determine which leg you wish to anchor to the floor. Place the template on the floor in the range opening so that the top edge is against the wall, molding, or cabinet, and the template is in the location where the... - Page 23 c) Remove the template from the floor. c) Remove the template from the floor. d) Line up the two mounting holes in the d) Tap the two plastic anchors into the anti-tip bracket with the two holes you mounting holes with a hammer. just drilled in the floor.
- Page 24 — NOTES — 2-12...
-
Page 25: Theory Of Operation
THEORY OF OPERATION CONVECTION BOWTIE BAFFLE AIRFLOW In a gas range, the convection fan will not turn on for the first four minutes of operation. This The bowtie baffle provides a wider air flow is to assure that a proper gas flame is present throughout the oven when using the convec- before the convection fan starts to circulate air tion cooking modes. - Page 26 — NOTES —...
-
Page 27: Component Access
COMPONENT ACCESS This section instructs you on how to service each component inside the Self-Cleaning Slide-In/ Freestanding Gas Ranges. The components and their locations are shown below. COMPONENT LOCATIONS Not Shown: Electronic Oven Control Cooktop Components Surface Burner TripleTier &... -
Page 28: Removing The Eoc Assembly On Slide-In & Freestanding Models, And The User Interface
REMOVING THE EOC ASSEMBLY ON SLIDE-IN & FREESTANDING MODELS, AND THE USER INTERFACE d) Pull out on the bottom of the control WARNING panel, unclip the top edge from the bracket, and rotate the control panel forward so you can access the compo- nents. - Page 29 To remove the electronic oven control To remove the user interface: (EOC) assembly on freestanding models: a) Remove the electronic oven control a) Open the oven door, and remove the assembly (see steps 5 or 6). screws from the bottom of the control b) Remove the four machine screws from panel (see the photo in step 5c).
-
Page 30: Removing The Ignition Switches, Gas Valves, And Control & Cooling Fan Thermal Switches
REMOVING THE IGNITION SWITCHES, GAS VALVES, AND CONTROL & COOLING FAN THERMAL SWITCHES To remove the standard ignition WARNING switches: NOTE: The standard ignition switches must be replaced as an assembly. They cannot be replaced individually. a) Pull out on the standard ignition switches and unsnap them from the gas valves, Electrical Shock Hazard then slide them off the valve stems. - Page 31 To remove a standard gas valve: a) Remove the ignition switch from the gas Gas Lines valve you are servicing (see step 5). b) Remove the 1/2″ gas line connector from the gas valve. c) Remove the 1/4″ hex-head gas valve mounting screw and its rubber seal Ignition Switch from the front of the gas manifold.
-
Page 32: Removing The Door Latch Assembly, The Spark Module (Dsi), And The Control Power Supply
REMOVING THE DOOR LATCH ASSEMBLY, THE SPARK MODULE (DSI), AND THE CONTROL POWER SUPPLY b) Remove the two top screws from the WARNING door latch assembly bracket. Electrical Shock Hazard Top Door Latch Screws Disconnect power before servicing. Replace all parts and panels before operating. - Page 33 b) Pull the spark module forward as far as b) Pull the control power supply forward it will go and disconnect the wires from as far as it will go, and disconnect the the terminals, then remove the spark wires from the terminals, then remove module from the unit.
-
Page 34: Removing The Power Supply Transformer
REMOVING THE POWER SUPPLY TRANSFORMER Using a 90° offset screwdriver, remove WARNING the screw from the power supply trans- former. Disconnect the 2-wire primary wire con- nector on the power supply transformer from the wiring harness. Cut the wire tie from around the primary wires. -
Page 35: Removing The Cooktop, And Asurface Burner & Ignitor
REMOVING THE COOKTOP, AND A SURFACE BURNER & IGNITOR Remove the four burner ring Torx screws WARNING from the TripleTier Burner and lift the ring off the cooktop. T/T Burner Screw Electrical Shock Hazard Ring (1 of 4) Disconnect power before servicing. Replace all parts and panels before operating. - Page 36 b) Lift the rear of the cooktop off the unit, e) Remove the two hex-head bracket and set it aside. screws and remove the burner from the bracket. Bracket Screws f) Remove the screw from the ignitor. Ignitor Screw To remove a standard surface burner and ignitor: a) Remove the cooktop (see step 8).
- Page 37 c) Remove the three Torx screws from the e) Remove the control panel (see page burner base. 4-2 for the procedure). f) Disconnect the TripleTier Burner base ignitor wire from the spark module ter- minal and remove the ignitor and wire from the unit.
-
Page 38: Removing The Rear Panel
REMOVING THE REAR PANEL Remove the eleven screws from the rear WARNING panel and remove the panel. Screw Electrical Shock Hazard (1 of 11) Disconnect power before servicing. Replace all parts and panels before operating. Failure to do so can result in death or electrical shock. -
Page 39: Removing An Oven Light Socket Assembly
REMOVING AN OVEN LIGHT SOCKET ASSEMBLY Unscrew the lens and bulb from the oven WARNING light socket assembly and remove them. Electrical Shock Hazard Disconnect power before servicing. Lens & Bulb Oven Light Socket Replace all parts and panels before Remove the rear panel from the unit (see operating. - Page 40 REMOVING THE BROIL BURNER, IGNITOR, & HALO BROIL ELEMENT To remove the ignitor from the broil WARNING burner: a) Remove the ignitor cover screw and remove the cover from the liner. b) Remove the two 5/16″ hex-head screws from the ignitor bracket. Electrical Shock Hazard Broil Ignitor Ignitor Cover...
- Page 41 To remove the broil burner: To remove the Halo broil element: a) Remove the ignitor from the broil burner a) Remove the front screw from the broil (see step 4). burner and allow it to drop down. b) Remove the rear screw from the broil b) Remove the rear screws from the Halo burner.
-
Page 42: Removing The Bake Burner And Ignitor
REMOVING THE BAKE BURNER AND IGNITOR Remove the four screws from the flame WARNING spreader and remove the spreader. Flame Spreader Electrical Shock Hazard 2 Screws 2 Screws Disconnect power before servicing. Replace all parts and panels before operating. Failure to do so can result in death or electrical shock. - Page 43 c) Disconnect the wire from the ignitor To remove the ignitor from the bake terminal. burner: a) Remove the bake burner from the unit (see step 6). b) Remove the two 5/16″ hex-head screws from the ignitor bracket, and slide the end of the ignitor out of the support.
-
Page 44: Removing The Convection Element & Fan Motor
REMOVING THE CONVECTION ELEMENT & FAN MOTOR To remove the convection element: WARNING a) Remove the two screws from the ele- ment brackets. Element Screw Electrical Shock Hazard Disconnect power before servicing. Replace all parts and panels before operating. Failure to do so can result in death or electrical shock. - Page 45 To remove the convection fan motor: a) Remove the 7/16″ hex-nut from the convection fan and remove the fan from the motor shaft. NOTE: The nut has a left-hand thread so turn it clockwise to remove it. Convection Fan Motor Fan Nut e) Disconnect the two wires from the con- b) Remove the three motor mounting...
-
Page 46: Removing The Oven Temperature Sensor
REMOVING THE OVEN TEMPERATURE SENSOR Remove the screws from the oven tem- WARNING perature sensor and pull the sensor wires and connector into the oven cavity. Oven Temperature Sensor Electrical Shock Hazard Disconnect power before servicing. Replace all parts and panels before operating. -
Page 47: Removing The Cooling Fan
REMOVING THE COOLING FAN Use a 90° screwdriver, and remove the WARNING two screws from each end of the cooling fan cover, then remove the cover. Electrical Shock Hazard Disconnect power before servicing. Replace all parts and panels before Cooling Fan operating. -
Page 48: Removing The Oven Tod
REMOVING THE OVEN TOD WARNING Wire Connector Screw (1 of 2) Wire Connector Electrical Shock Hazard Disconnect power before servicing. Oven TOD Replace all parts and panels before operating. Failure to do so can result in death or electrical shock. Unplug range or disconnect power. -
Page 49: Removing The Gas Distribution Valve
REMOVING THE GAS DISTRIBUTION VALVE Disconnect the gas lines from the gas WARNING distribution valve. Remove the four screws from the gas distribution valve, pull it down to remove the orifice from the bake burner, and lay it down so you can access the wires. Electrical Shock Hazard Disconnect power before servicing. -
Page 50: Removing The Power Supply Cord
REMOVING THE POWER SUPPLY CORD Disconnect the power supply cord con- WARNING nector from the main harness connector. Remove the green ground wire screw from the power supply cord. Release the strain relief from the power cord and remove the cord from the unit. Electrical Shock Hazard Disconnect power before servicing. -
Page 51: Removing A Side Panel
REMOVING A SIDE PANEL Remove the bottom rear screw for the side WARNING panel you are removing. Pull the back of the side panel out so it clears the support bracket, then slide the panel back until the top and bottom sup- ports are in the panel cutouts, then re- move the panel. -
Page 52: Removing & Reinstalling The Oven Door
REMOVING & REINSTALLING THE OVEN DOOR Close the door to within six to eight inches, To remove the oven door: then pull out on the bottom of the door Fully open the door. while slowly closing the door, and remove Rotate the locking arm on the door hinge the hinge hangers from the slots in the from the locked “down”... -
Page 53: Removing The Oven Door Gasket
REMOVING THE OVEN DOOR GASKET Remove the oven door from the range Starting at one end of the door gasket, pull (see page 4-26 for the procedure). the clips out of the liner holes, and remove the gasket. Remove the screw from the door gasket cover and remove the cover. -
Page 54: Removing The Decorative Glass And Oven Door Handle, The Hinges, And The Oven Door Glass
REMOVING THE DECORATIVE GLASS AND OVEN DOOR HANDLE, THE HINGES, AND THE OVEN DOOR GLASS Remove the oven door from the range e) Remove the two door handle screws (see page 4-26 for the procedure). from each of the brackets and remove the handle from the decorative glass. - Page 55 b) Position the door liner with the outer To remove the inner oven door glass: oven glass facing up, as shown. a) Remove the decorative glass and c) Remove the two screws from the lower handle from the door liner (see step 3). bracket for the outer oven glass.
- Page 56 — NOTES — 4-30...
-
Page 57: Component Testing
COMPONENT TESTING Before testing any of the components, perform • Check all connections before replacing com- the following checks: ponents, looking for broken or loose wires, failed terminals, or wires not pressed into • The most common cause for control failure is connectors far enough. -
Page 58: Standard & Tripletier Ignition Switches
WARNING Electrical Shock Hazard Disconnect power before servicing. Replace all parts and panels before operating. Failure to do so can result in death or electrical shock. STANDARD & TRIPLETIER d) Press and turn one of the gas valve knobs to the LITE position. At that point, IGNITION SWITCHES the switch should close, and the meter should indicate continuity. -
Page 59: Standard & Tripletier Gas Valves
WARNING Electrical Shock Hazard Disconnect power before servicing. Replace all parts and panels before operating. Failure to do so can result in death or electrical shock. STANDARD & TRIPLETIER DOOR LATCH ASSEMBLY GAS VALVES Motor Refer to page 4-4 for the procedure for servic- Door Switch ... -
Page 60: Power Supply Transformer
WARNING Electrical Shock Hazard Disconnect power before servicing. Replace all parts and panels before operating. Failure to do so can result in death or electrical shock. POWER SUPPLY TRANSFORMER HALO BROIL ELEMENT Primary Refer to page 4-14 for the procedure for servic- ... -
Page 61: Convection Element
WARNING Electrical Shock Hazard Disconnect power before servicing. Replace all parts and panels before operating. Failure to do so can result in death or electrical shock. CONVECTION ELEMENT CONVECTION FAN MOTOR Refer to page 4-18 for the procedure for servic- Refer to page 4-18 for the procedure for servic- ing the convection element. -
Page 62: Oven Temperature Sensor
WARNING Electrical Shock Hazard Disconnect power before servicing. Replace all parts and panels before operating. Failure to do so can result in death or electrical shock. OVEN TEMPERATURE SENSOR COOLING FAN MOTOR Refer to page 4-20 for the procedure for ser- vicing the oven temperature sensor. -
Page 63: Oven Tod
WARNING Electrical Shock Hazard Disconnect power before servicing. Replace all parts and panels before operating. Failure to do so can result in death or electrical shock. OVEN TOD GAS DISTRIBUTION VALVE Blue Orange Refer to page 4-22 for the procedure for ser- vicing the oven TOD. -
Page 64: Clock Models Kgra806P & Kgsa906P
CLOCK MODELS KGRA806P & KGSA906P Keypad Layout MODELS KGRA806P & KGSA906P COOK BAKE CLEAN OPTIONS OPEN TIME CONVECT CONVECT STOP TIMER START OPEN BAKE BROIL TIME TIMER MEATS CLOCK OPEN MAXI BREAD OVEN OPEN BROIL PROOF LIGHT CONVECT FULL OPEN... - Page 65 Display Board & Connector Pinouts Low Voltage Transformer...
- Page 66 Power Board 5-10...
-
Page 67: Clock Models Kgri801P & Kgsi901P
CLOCK MODELS KGRI801P & KGSI901P Keypad Layout MODEL KGRI801P & KGSI901P COOK BAKE CLEAN OPEN TIME STOP TIMER START OPEN TIME TIMER CLOCK OPEN OVEN OPEN LIGHT MAXI BREAD OPEN BROIL PROOF OPEN OPEN 5-11... - Page 68 Display Board & Connector Pinouts Low Voltage Transformer 5-12...
- Page 69 Power Board 5-13...
- Page 70 — NOTES — 5-14...
-
Page 71: Diagnostics & Troubleshooting
DIAGNOSTICS & TROUBLESHOOTING DIAGNOSTICS Door Relay Being Latch Meat Probe Switch Engaged Readout* Switch Code Code O . BROIL REL CYCLED AM34 UI30 EEKET - 002 #2 Oven Temp Warming Drawer #1 Oven Temp Version Sensor Readout* Sensor Readout* Sensor Readout * If available (3 dashes will be shown if not available) ENTERING MANUAL DIAGNOSTICS Within 120 seconds of power up, press the following keys to enable the relay capabilities listed... - Page 72 ERROR CODE Pressing the 3 key once will cycle to the next error code. An error code is displayed in the two right clock digits. ERROR CODE LIST ORDER ERROR CODE #1 MOST RECENT CODE ERROR CODE #2 ERROR CODE #2 ERROR CODE #3 ERROR CODE #3 ERROR CODE #4...
- Page 73 ERROR / FAILURE CODES Before proceeding with any corrective action, perform the following steps to enter the Diagnostic mode. 1. To recall last failure code, if not displayed, press the Cancel key to place the range in an idle state. 2.
- Page 74 FAILURE ERROR FAILURE ERROR MESSAGE/DESCRIPTION MESSAGE/DESCRIPTION (Leftmost (Rightmost (Leftmost (Rightmost 2 Clock 2 Clock 2 Clock 2 Clock SUGGESTED CORRECTIVE ACTION PROCEDURE SUGGESTED CORRECTIVE ACTION PROCEDURE Digits) Digits) Digits) Digits) MAIN SENSOR OPEN (top oven sensor opened) OVER TEMP COOK MAIN SENSOR SHORT or MAIN SENSOR SHORTED OVER TEMP CLEAN (top oven sensor shorted)
- Page 75 FAILURE ERROR FAILURE ERROR MESSAGE/DESCRIPTION MESSAGE/DESCRIPTION (Leftmost (Rightmost (Leftmost (Rightmost 2 Clock 2 Clock 2 Clock 2 Clock SUGGESTED CORRECTIVE ACTION PROCEDURE SUGGESTED CORRECTIVE ACTION PROCEDURE Digits) Digits) Digits) Digits) DOOR LATCH MSMATCH or DOOR LATCH MISMATCH LOST COMMUNICATION Systems (Door and latch switches do not agree.) PROCEDURE: Before proceeding, perform steps 1 through 3 above chart on page 6-3 NO OPERATING LATCH or LATCH NOT OPERATING...
-
Page 76: Troubleshooting
TROUBLESHOOTING HIDDEN EOC FUNCTIONS TEMPERATURE ADJUSTMENT The user activates all hidden EOC functions by 1. Press and hold the BAKE keypad for five (5) pressing and holding the appropriate key for 5 seconds. The current offset, if any, will be seconds. -
Page 77: Wiring Diagrams & Strip Circuits
WIRING DIAGRAMS & STRIP CIRCUITS WIRING DIAGRAMS TECH SHEET #9757665 KEYPAD P3-1 MAIN OVEN SENSOR P3-2 DISPLAY BOARD POWER P3-5 BOARD MEAT PROBE P3-6 P3-7 WARM DWR SENSOR P3-8 TRANSFORMER P7-1 DOOR SW THERMAL SW P7-2 OPENS @ 96.1°C ± 3°C LATCH SW (205°F ±... - Page 78 TECH SHEET #9757666 NOTE: Schematic shows door latch switch in the COOK position with oven door open, oven off, light on and halo element off. KEYPAD POWER DISPLAY BOARD BOARD MAIN OVEN SENSOR P3-1 P3-2 DOOR SW TRANSFORMER P7-1 THERMAL SW P7-2 OPENS @ 96.1°C ±...
-
Page 79: Strip Circuits
STRIP CIRCUITS BAKE, PREHEAT, CLEAN MAIN OVEN SENSOR P3-1 POWER BOARD P3-2 MEAT PROBE P3-5 P3-6 WARM DWR SENSOR P3-7 P3-8 P7-1 DOOR SW P7-2 LATCH SW P7-4 K2 BAKE IGNITER RELAY T3-1 T3-2 HALO 1200 W K4 HALO RELAY T2-1 T2-3 T2-2... - Page 80 SURFACE UNIT (TYPICAL) SURFACE BURNER IGNITION SWITCHES R/BK SURFACE IGNITORS OVEN/CONSOLE LIGHTS OVEN LIGHT 40 W POWER BOARD OVEN LIGHT 40 W P4-1 K7 OVEN LIGHT RELAY P4-3 CONTROL POWER/CLOCK KEYPAD P5-3 POWER BOARD DISPLAY BOARD P4-1 THERMAL SW TRANSFORMER OPENS@ 96.1°C ±...
- Page 81 CONVECTION ROAST MAIN OVEN SENSOR P3-1 POWER P3-2 BOARD HALO 1200 W T2-3 T2-1 K4 HALO RELAY P4-4 CONVECTION FAN 60 W P4-1 K9 CONVECTION FAN RELAY T3-2 K2 BAKE IGNITER RELAY BAKE SOLENOID CONVECTION BROIL P3-1 MAIN OVEN SENSOR POWER BOARD P3-2...
- Page 82 — NOTES —...
- Page 83 WARRANTY INFORMATION SOURCES IN THE UNITED STATES: FOR PRODUCT SPECIFICATIONS AND WARRANTY INFORMATION CALL: FOR WHIRLPOOL PRODUCTS: 1-800-253-1301 FOR KITCHENAID PRODUCTS: 1-800-422-1230 FOR ROPER PRODUCTS: 1-800-447-6737 FOR TECHNICAL ASSISTANCE WHILE AT THE CUSTOMER’S HOME CALL: THE TECHNICAL ASSISTANCE LINE: 1-800-253-2870...