Sony WALKMAN MZ-R909 Operating Instructions Manual
Hide thumbs
Also See for WALKMAN MZ-R909:
- Operating instructions manual (92 pages) ,
- Service manual (62 pages) ,
- Operating instructions manual (91 pages)
Table of Contents
Advertisement
Quick Links
ポータブルミニディスク
レコーダー
取扱説明書
お買い上げいただきありがとうございます。
電気製品は安全のための注意事項を守らないと、
火災や人身事故になることがあります。
この取扱説明書には、事故を防ぐための重要な注意事項と製品の
取り扱いかたを示しています。この取扱説明書と別冊の「安全の
ために」 をよくお読みのうえ、製品を安全にお使いください。
お読みになったあとは、いつでも見られるところに必ず保管して
ください。
MZ-R909
©2001 Sony Corporation
/Operating Instructions
3-234-030-02(1)
WALKMAN
は、
ソニー株式会社の
登録商標です。
Advertisement
Table of Contents

Related Manuals for Sony WALKMAN MZ-R909


Summary of Contents for Sony WALKMAN MZ-R909
- Page 1 3-234-030-02(1) ポータブルミニディスク レコーダー 取扱説明書 /Operating Instructions お買い上げいただきありがとうございます。 電気製品は安全のための注意事項を守らないと、 火災や人身事故になることがあります。 この取扱説明書には、事故を防ぐための重要な注意事項と製品の 取り扱いかたを示しています。この取扱説明書と別冊の「安全の ために」 をよくお読みのうえ、製品を安全にお使いください。 お読みになったあとは、いつでも見られるところに必ず保管して ください。 WALKMAN は、 ソニー株式会社の 登録商標です。 MZ-R909 ©2001 Sony Corporation...
-
Page 2: Table Of Contents
目次 付属品を確かめる ............各部のなまえ ..............ジョグダイヤルの使いかた ..........メニュー一覧 (本体/リモコン) ........ここだけ読ん 電源を準備する でも使えます 録音する 再生する 録音もとの機器との 種類のつなぎかた いろいろな録 音のしかた (光デジタル入力とアナログ入力) ......アナログ入力で録音する (接続コードが必要) ....長時間録音する ............. 「グループ機能」を使って録音する ......再生側に合わせて録音を始める/止める (シンクロ録音) ............上書きをせずに録音する ..........マイクで録音する ............一定時間ごとに頭出しマークをつけながら録音する (オートタイムトラックマーク) ....... 手動で録音レベルを調節する (マニュアル録音) ... 残り時間や録音位置を調べる... - Page 3 残り時間や再生位置を調べる ........いろいろな再 LINE OUT 生のしかた お手持ちのシステムで聞く ( ) ....編集する前に ..............編集する 名前をつける・変える ..........よく使う言葉を登録して使う (ネームバンク機能)..曲やグループを つのグループにまとめる (グループ設定) ............グループを解除する ............曲順を変える (ムーブ) ..........別のグループに曲を移動する ........グループの順番を並べかえる (グループムーブ) ... 頭出しマーク (曲番) をつける ........頭出しマーク (曲番) を消す ......... 曲やグループを消す ............G-PROTECTION 音飛びを抑える...
-
Page 4: 付属品を確かめる
付属品を確かめる ● パワーアダプター ●充電スタンド ●リモコン付きヘッドホン (組み立て後) ●キャリング ●充電式ニッケル ●充電池ケース ●乾電池ケース( Battery ポーチ 水素電池 ( ジャックなし) NH-14WM(A) carrying case ) ●取扱説明書 ●保証書 ●ソニーご相談窓口のご案内 安全のために • 充電スタンドにコイン、キー、ネックレスなどの金属類を置かないでください。充 電スタンドの端子が金属とつながるとショートし、発熱することがあります。 • 付属の充電式電池を持ち運ぶときは、必ず付属の充電池ケースに入れてください。 ケースに入れずにコイン、キー、ネックレスなどの金属類と一緒に携帯・保管する と、電池の+と−がショートし、発熱することがあります。 • 乾電池や乾電池ケース、または本体の乾電池ケース用端子はコイン、キー、ネック レスなどの金属類と一緒に携帯・保管しないでください。乾電池の+と−、または 乾電池ケースの端子が金属とつながるとショートし、発熱することがあります。 • 録り直しのきかない録音の場合は、必ず事前にためし録りをしてください。 • ポータブルミニディスクレコーダーの不具合により録音されなかった場合の録 音内容の補償についてはご容赦ください。 • あなたが録音したものは、個人として楽しむなどのほかは、著作権法上、権利... -
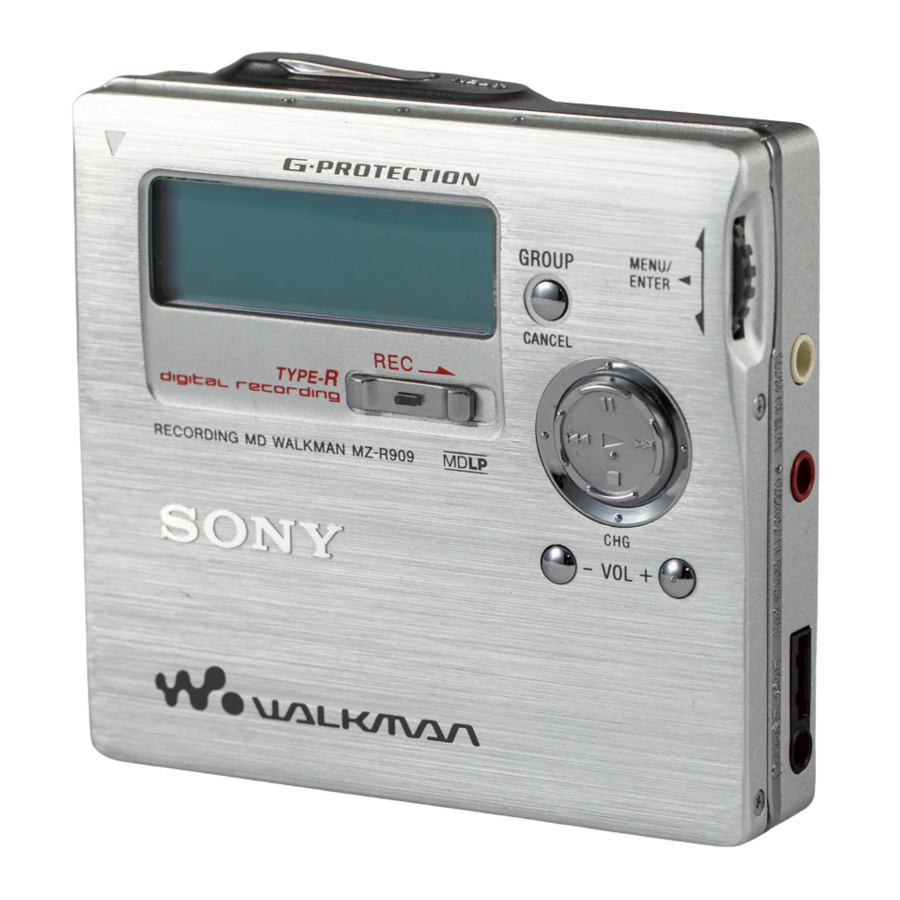
Page 5: 各部のなまえ
各部のなまえ ( )内のページに詳しい説明があります。 本体 GROUP/CANCEL 1 表示窓( 、 、 、 、 ) ボタン( 、 T MARK ボタン( 、 、 ) 、 、 ) END SEARCH (MENU ボタン( 、 、 qs ジョグダイヤル (メニュ /ENTER ) ー) (決定) ( 、 、 4 電池入れ ( )... - Page 6 表示窓(本体) 1 文字情報表示部( 、 、 、 6 電池残量表示( ) 、 ) 充電池や乾電池の残量の目安を表 ディスク名や曲名、日付、エラー 示します。 表示、曲番などが文字で表示され 7 シンクロ録音表示 ( ) 8 レベル表示 ( ) ます。 /LP4 ステレオ、 ステレオ ス 2 グループ表示( 、 、 ) テレオ、モノラル表示 ( ) 3 タイマー表示( ) q; 一時停止表示 4 ディスク表示(...
- Page 7 リモコン A B C DE DISPLAY ボタン( 、 、 、 回す/回してそのままにして、再 、 、 ) 生、頭出し、早送り、早戻しをし PLAYMODE ボタン ( 、 、 ) ます。 RPT/ENT repeat ( (リピート) 再生音を聞かずに高速で早送りや enter (決定) )ボタン ( ) 早戻しもできます。 SOUND ボタン ( ) 8 回転つまみ ( (音量)+...
-
Page 8: ジョグダイヤルの使いかた
ジョグダイヤルの使いかた 本機では、ジョグダイヤルを使って、停止時、録音時、再生時、編集時に様々な操作 をすることができます。 ジョグダイヤル 回して選択 押して確定 メニュー操作時の表示窓の見かた ジョグダイヤルを押すと表示窓にメニューが表示されます。ジョグダイヤルを下方向 に回すと表示は上方向に、上方向に回すと表示は下方向に1つずつずれます。メニュ ーを選択するには、選びたいメニューが表示窓のまん中で点滅しているときにジョグ ダイヤルを押します。 EDIT DISPLAY EDIT DISPLAY PLAY MODE DISPLAY PLAY MODE REC MODE ジョグダイヤルを上に回す ジョグダイヤルを下に回す メニュー一覧 (本体/リモコン) メニューの機能 DISPLAY 本体ではジョグダイヤルを押して、リモコンでは ボタンを 秒以上押してメ ニューに入ります。 * 本体メニュー リモコン 機能 * メニュー EDIT EDIT 曲名やディスク名、グループ名をつけたり、曲を消したり、グ... - Page 9 M-TIMER M-TIMER メロディタイマーの設定ができます( 、 ページ) 。 AUDIO OUT — /LINE OUT 出力の設定を選べます( 、 ページ) 。 SOUND — デジタルサウンドプリセットの設定を選べます ( ページ) 。 — SPEED 再生中に再生速度を変えることができます ( ページ) 。 — GROUP ON/OFF グループモードの を選べます ( 、 ページ) 。 PERSONAL PERSONAL パーソナルディスクメモリーへの登録/削除ができます ( 、...
- Page 10 本体 (ジョグダイヤル)の動作条件別メニュー一覧 本体のジョグダイヤルで選べるメニューの一覧です。操作について詳しくは ページ の表中の参照ページをご覧ください。ジョグダイヤルをくり返し回すとメニューの項 目はくり返し表示されます。 停止中のメニュー EDIT :Name :Set :Release Name Bank BankErase :Erase :Erase DISPLAY LapTime RecRemain GP Remain AllRemain Clock PLAY MODE Normal AllRepeat 1 Track 1 Repeat Shuffle PGMRepeat Shuf. Rep REC MODE MONO M-TIMER ( ページ)...
- Page 11 前ページより続く PERSONAL Entry? Erase? SYNC REC : ジョグダイヤルを押す。 : ジョグダイヤルを回す。 SYNC OFF SYNC ON MIC SENS SENS HIGH SENS LOW OPTION AVLS BEEP REC-Posi LP Stamp CONTRAST ( ページ) AVLS OFF AVLS ON From Here From End CLOCK SET ( ページ)...
- Page 12 再生中のメニュー EDIT :Name :Name Name Bank :Move :Move :Erase DISPLAY LapTime 1 Remain GP Remain AllRemain Rec Date PLAY MODE Normal AllRepeat 1 Track 1 Repeat Shuffle PGMRepeat Shuf. Rep M-TIMER ( ページ) TIMER 1 TIMER 2 TIMER 3 AUDIO OUT LINE OUT HeadPhone SOUND...
- Page 13 録音中のメニュー EDIT :Name :Name :Name Name Bank DISPLAY LapTime RecRemain Clock Rec Volume Auto REC ManualREC REC MODE MONO AUDIO OUT HeadPhone LINE OUT SOUND ( ページ) SOUND OFF SOUND 1 SOUND 2 TIME MARK 5 min. ON 10 min. ON 15 min.
- Page 14 リモコンの動作条件別メニュー一覧 DISPLAY リモコンで選べるメニューの一覧です。メニューが表示されるまで ボタン を押したままにします。回転つまみをくり返し回すとメニューの項目がくり返し表示 されます。 停止中のメニュー EDIT :Name GP:Set GP:Release Name Bank BankErase M-TIMER ( ページ) TIMER 1 TIMER 2 TIMER 3 GROUP GROUP OFF GROUP ON PERSONAL Entry? Erase? SEARCH Index Time : xボタンを押す。 OPTION : 回転つまみを回す。 AVLS BEEP AVLS OFF AVLS ON...
- Page 15 再生中のメニュー EDIT :Name GP:Name Name Bank :Move GP:Move M-TIMER ( ページ) :Erase TIMER 1 TIMER 2 TIMER 3 SPEED ( ページ) GROUP GROUP OFF GROUP ON PERSONAL Entry? Erase? SEARCH Index Time : xボタンを押す。 : 回転つまみを回す。 OPTION AVLS BEEP AVLS OFF AVLS ON BEEP ON BEEP OFF...
-
Page 16: ここだけ読ん でも使えます
ここだけ読ん 電源を準備する でも使えます お買い上げ時には、まず充電式電池を充電してください。ただし、 パワーアダプタ ーをつなげば、充電しなくても使用できます。 充電式電池を入れる #側を奥にして入れてくだ さい。 充電式電池を充電する 充電スタンドの組み立てかた 奥までしっかり差し込んでください。 コンセント 100V へ パワー アダプター (付属) DC IN 3V へ CHARGE ランプが点灯したことを確 認してください。 NH-14WM(A) 本機に付属の充電式電池 を入れた後、 付属の充電スタンドに置くだけで簡単に充電 CHARGE をすることができます。 約 時間で充電が完了し、 (充電) ランプが消えます。 充電スタンドにのせるとき、または充電中は操作しないでください。誤動作や充電さ れない原因になります。... - Page 17 アルカリ乾電池で使うときは 乾電池ケースを本体に取り付ける 図のように必ず#側から入れる 別売りのソニーアルカリ乾電池 (単 形) を 本入れます。 充電式電池と一緒に使うと長時間使用できます。 リモコンをつなぎ、ホールドを解除する しっかりつなぐ /LINE OUT へ HOLD ミニディスクを入れる 録音するときは録音用のディスクを入れてください。 OPEN ボタンを 図のようにディスク 押す。 のラベル面をふた側 にして矢印の向きに ふたが開きます。 奥まで押し入れ、 ふた を閉める。...
- Page 18 本体に付属の パワーアダプターを直接つないで充電することもできます。 DC IN 3V /CHG 本体の ジャックに パワーアダプターをつなぎ、停止中にx ボタンを押す。 Charging 「 」とe表示が出て充電が始まります。放電しきった状態から充電が完了するまで約 時間 分かかります。e表示が消えたら充電完了です。充電時間は充電式電池の使用状態によ り異なります。 ご注意 • 付属の充電スタンドは本機専用です。他機の充電はできません。 • NH-14WM(A) 付属の充電スタンドでは、付属または指定の電池( )以外は充電しないでくださ い。 • 充電中は充電スタンドや充電式電池が熱くなりますが、危険はありません。 • 充電には必ず付属の パワーアダプターをお使いください。 • お買い上げ時や長い間使わなかった充電式電池では、持続時間が短いことがあります。これは電 池の特性によるもので、何回か充放電をくり返すと充分充電されるようになります。充電式電池 は約 回充電できます。 • 充電式電池を充分に充電しても使える時間が通常の半分くらいになったときは、新しい充電式電 池と取り換えてください。 • 長い間お使いにならないときは、 パワーアダプターをコンセントから抜き、本体を充電スタ ンドからはずしてください。...
-
Page 19: 録音する
ここだけ読ん 録音する でも使えます 光デジタルケーブルを使って、光デジタル出力のある デッキや チューナーな どとつないでデジタル録音ができます ( 「デジタル録音の制限について」 ( ページ) もあわせてご覧ください) 。録音はステレオになります。 アナログ録音をするときは「アナログ入力で録音する」 ( ページ) をご覧ください。 曲をグループ内に録音するときは「 「グループ機能」 を使って録音する」 ( ページ) を ご覧ください。ここではグループ機能を使わない録音方法を説明します。 録音の際は、家庭用電源(コンセント)につなぐことをおすすめします。 つなぐ (奥までしっかりと差し込んでください。) プレーヤー、 ポータブル プレーヤー、 プレーヤーなど ビデオプレー ヤーなど コンセントへ 光デジタル出力へ 角型ジャック 光ミニジャック パワー アダプター 光デジタルケー (付属)... - Page 20 録音する つまみの中央のボタンを押しながら、 右にずら す。 「 」 表示と つまみ中央部の ランプが点 灯し、 録音が始まります。 録音したい やテープを再生する。 止めるには、 ■ボタンを押す。 ■ボタンを押して停止してから、 電池使用時では約 秒 後、 パワーアダプター使用時では約 分後に、 自動的に 電源が切れます。 こんなときは 操作 録音済み部分の後ろに新 END SEARCH ボタンを押し、 つまみの中央のボタンを押しなが しく録音する ら右にずらす。 録音した内容の途中から Nを押す、または./>を押して録音を始めたい位置を探し、x 続けて上書き録音する を押す。次に、 つまみを右にずらす。 一時停止する X を押す。 もう一度押すと解除されます。...
- Page 21 ご注意 • 「 Data Save 」 「 TOC Edit 」表示の点滅中は、録音した情報 (曲の開始・終了位置など)を ディスクに記録しています。衝撃を与えたり、電源を抜いたりすると、それまで録音した内容が 記録されません。 • TOC Edit 録音終了後、 「 」の表示が消えるまでふたは開きません。 • TOC Edit 録音中や編集中、また、その後■ボタンを押してから「 」 の表示が消えるまでに電池 をはずしたり、 パワーアダプター電源を切ったり、電池が消耗したときは、次に電源を入れ るまでふたは開きません。 • 光(オプティカル)タイプ以外のデジタル出力につなぐことはできません。 • ポータブル プレーヤーから録音するときは、 プレーヤーを一時停止にしてから録音の操 作をしてください。デジタル録音中は、音源の や と同じ曲番が自動的につきます。 • ポータブル プレーヤーから録音するときは −...
-
Page 22: 再生する
ここだけ読ん 再生する でも使えます 聞く Nを押す。 + − リモコンでは回転つまみをN>側に > 回す。 リモコンで操作すると 「ピ」 と確認音がし ます。 + −を押して、 音量を調節する。 リモコンでは回転つまみを引いた状態 で、 + −側に回して、 音量を調節す る。 表示窓で音量を確認できます。 回転つま みは音量調節後、 もとに戻します。 止めるには、 xボタンを押す。 回転つまみ リモコンで操作すると 「ピー」 と確認音がしま す。 次に再生するときは、 止めたところの続きから始まります。 ディスクの 曲目から再生を始めたいと きはNボタンを 秒以上押して再生を始めてください。 ■ボタンを押して停止してから、... - Page 23 再生が始められないときは ホールド(誤操作防止)スイッチを確認してください( 、 ページ) 。 ヘッドホンを直接本体につないで使うときは AUDIO OUT 1 ジョグダイヤルを押し、回して 「 」を点滅させ、もう一度押す。 HeadPhone ジョグダイヤルを回して 「 」を点滅させる。 ジョグダイヤルを押す。 • 録音された方法により、 ステレオ再生/ ステレオ再生/ ステレオ再生/モノラル再 生は自動的に切り換わります。 • グループ内の曲だけを再生するには「 「グループ機能」を使う」 ( ページ)をご覧ください。 • 音量の設定は、パーソナルディスクメモリーに登録することができます ( ページ) 。 ご注意 動作中に電池をはずしたり、 パワーアダプターを抜いたり、電池が消耗したときは、次に電 源を入れるまでふたが開かないことがあります。...
-
Page 24: いろいろな録音のしかた
いろいろな録音のしかた 録音もとの機器との 種類のつなぎかた (光デジタル入力とアナログ入力) 本機を プレーヤーやラジカセなど録音もとの機器とつなぐには、光デジタル入力を LINE IN 使うつなぎかたとアナログ入力 ( ) を使うつなぎかたの つの方法があります。 それぞれの録音のしかたは、光デジタル入力を使うときは「録音する」 ( ページ) 、 LINE IN アナログ入力 ( )を使うときは 「アナログ入力で録音する」 ( ページ) をご 覧ください。 光デジタル入力とアナログ入力の比較 LINE IN 光デジタル入力 アナログ入力 ( ) 入力の種類 相違点 LINE OUT つなぐことができる機器 光デジタル出力ジャックのある機 出力(... -
Page 25: アナログ入力で録音する (接続コードが必要
録音用ミニディスクを入れ、 つ アナログ入力で録音する まみの中央のボタンを押しながら右に (接続コードが必要) ずらす。 「 」 が表示され、本体の ラン つないだ機器の出力端子から録音する音 プが点灯し、録音が始まります。 はアナログ信号で送られますが、ミニデ ィスクにはデジタル方式で記録されま 録音したい やテープを再生する。 す。 その他の操作は 「録音する」 ページ つなぐには別売りの接続コードが必要で を参照してください。 す。コード類をつなぐときは、奥までし っかりと差し込んでください。 LINE IN (OPT) 本機の ジャックはデジタル・ アナログ両用です。 つなぐケーブルの種類により、光デジタル入 プレーヤー、 ラジカセなど LINE IN 力またはアナログ入力( )に自動的 (録音もとの機器) に切り換わります。 出力 (アナログ) へ ご注意... -
Page 26: 長時間録音する
MDLP 録音時に曲名の最 長時間録音する 初に 「 」をつけないよ 通常の ステレオ録音に加えて、録音 うにする (LP2) (LP4) 時間を 倍 または 倍 長くし MDLP 録音をすると、曲名の最初に自 てステレオ録音することができます MDLP 動的に「 」がつき、 録音に対 MDLP ( 録音) 。またモノラル録音でも 応していない機器でその内容を再生・編 通常の ステレオ録音よりも 倍長く録 集しようとすると 「 」 と表示され、 音することができます。 再生・編集できないことが一目でわかる 本機で長時間録音した内容は、長時間再 ようになります。お買い上げ時は自動的 生に対応していない他の機器では再生で に「... -
Page 27: グループ機能」を使って録音する
• 「グループ機能」 を使って 「 」をつけない設定にすると、制限入力 文字数を有効に使うことができます( ペ 録音する ージ) 。 • または ロゴのある機器が 「 ステレオ」 、 「 ステレオ」 に対応してい GROUP >/x ます。 • SP ステレオ録音 (またはモノラル録音)を すると、新開発 ATRAC 用 DSP TYPE-R * により、高音質で豊かな音質を再現するこ とができます。 SEARCH ATRAC DSP TYPE-R * 新開発 用... - Page 28 グループ情報の記録のされかた グループモードを にす グループ機能を使って録音すると、グル る (グループモード録音) −プ情報は 「ディスク名」 としてディスク 名の記録領域に記録されます。具体的に グループ機能を使って録音するには、ま は次のような文字列が書き込まれます。 ずグループモードを にします。 本体では ディスク名の記録領域 例) GROUP ボタンを 秒以上押す。 「 」 が点灯し、グループモードが になります。 もう一度 秒以上押すと になりま Favorites 1 ディスク名: 「 」 す。 Rock 曲めから 曲めのグループ名: 「 」 Pops 曲めから 曲めのグループ名:...
-
Page 29: 再生側に合わせて録音を始める/止める
録音を止めるときは 再生側に合わせて録音を xボタンを押す。 録音を止めると、そこまでが つのグル 始める/止める (シンクロ録 ープとして記録されます。 音) 既存のグループ内に曲を録 光デジタルケーブルを使ってつないだ プレーヤーなどのデジタル機器から 音する 本機へデジタル録音するときに、録音も とと本機のそれぞれを操作する手間を省 GROUP 停止中に ボタンを 秒以上押 き、簡単に録音できます。また、録音も す。 との音源と、同じ位置に頭出しマーク (曲番)が自動的につきます。 GROUP ボタンを短く押す。 「 」が点滅し、グループを選べる状 プレーヤー 態になります(グループスキップモー など ド) ( ページ) 。 秒以内に. >ボタンを繰り返し 押して、録音を追加したいグループを 表示させる。 つまみの中央のボタンを押しな がら右にずらす。 ジョグダイヤル... -
Page 30: 上書きをせずに録音する
ご注意 SYNC ジョグダイヤルを回して「 • シンクロ録音中は、手動で一時停止および 」 を点滅させ、ジョグダイヤルを 一時停止を解除することはできません。録 押す。 音をやめるにはxボタンを押します。 • SYNC REC 録音中は、 「 」の設定を切り換 えないでください。正しく録音されないこ 30:03 とがあります。 • シンクロ録音中に録音もとで無音状態 ( ページ)が続いても、録音もとのノイズレ シンクロ録音表示 ベルが原因で、自動的に録音一時停止にな らない場合があります。 SYNC 「 」 が表示されます。光デジタ • CD や 以外からのシンクロ録音中に、録 ルケーブルが本機につながれていない 音もとの同一曲内で約 秒の無音が続く SYNC と 「 」... -
Page 31: マイクで録音する
上書き録音にするには 録音用ミニディスクを入れ、 つ From Here 手順 で 「 」 を点滅させ、ジ まみの中央のボタンを押しながら右に ョグダイヤルを押します。 ずらす。 その他の操作は 「録音する」 ( ペー From Here 録音開始位置が「 」に設定されて ジ) をご覧ください。 いても、一時的に上書き録音したくないとき END SEARCH は、 ボタンを押してから録音 マイク感度を変える を開始すると、録音済み部分の後ろから録音 を始めることができます。また SEARCH ボタンを押したとき、録音できる 停止中または録音中にジョグダイヤル 残り時間が表示されます。 MIC SENS を押し、回して 「 」を点 滅させ、もう一度押す。... -
Page 32: 一定時間ごとに頭出しマークをつけながら録音する (オートタイムトラックマーク
録音中のオートタイムトラックマー クの付きかた 一定時間ごとに頭出しマ 時間を設定したときに、録音の経過時間 ークをつけながら録音す が設定時間を越えていたときは、手順 る (オートタイムトラックマーク) の後から設定時間毎に頭出しマークがつ きます。 (例えば、録音の経過時間が 長い録音をするときに、一定時間ごとに 分のときに 分毎で頭出しマークをつけ 頭出しマークを自動的につけて、途中に る設定をすると、まず、設定したところ 区切りをつけることができます。マイク で頭出しマークがつき、以後 分毎に頭 録音、またはアナログ録音中にのみ設定 出しマークがつきます。) することができます。 また、録音開始からの経過時間が設定時 ジョグダイヤル 間より短いときは、経過時間が設定した 時間に達したときから、設定時間毎に頭 出しマークがつきます。 (例えば、録音 の経過時間が 分のときに 分毎で頭出 しマークをつける設定をすると、録音の 録音中または録音一時停止中にジョグ 経過時間が 分になったところから 分 TIME ダイヤルを押し、回して「 毎に頭出しマークをつけます。) MARK 」を点滅させ、もう一度押... -
Page 33: 手動で録音レベルを調節する (マニュアル録音
表示窓を見ながらジョグダイヤルを回 手動で録音レベルを調節 して録音レベルを調節する。 する (マニュアル録音) 録音レベルは、AからBの間を目安 にレベル表示のバーが点灯するように 録音するときは、録音レベルは最適な値 調整します。Bより右が点灯すると になるように自動的に調整されますが、 きは、録音レベルを下げてください。 画面に表示されるレベル表示のバーは 必要に応じて手動で調整できます。アナ 次のように分かれています。 ログ録音のときはもちろん、デジタル録 上段: (左)のレベル 音のときでも調整できます(デジタル 下段: (右) のレベル レベルコントロール) 。 REC 23/30 Xボタンを押して録音を始める。 ジョグダイヤル 手順 では録音は始まっていません。 他の機器とつないで録音するときは、 Xボタンを押しながら、 つまみ 本機が録音を始めた後で、録音元の音 の中央のボタンを押しながら右にずら を最初から出し直してください。 す。 自動調節にするには 録音一時停止になります。 Auto REC 手順... -
Page 34: 残り時間や録音位置を調べる
ご注意 残り時間や録音位置を調 ON/OFF グループモード の状態や動作状態に より、表示が選択できないことがあります。 べる ジョグダイヤルを押す。 録音または停止中、表示窓で残り時間や ジョグダイヤルを押すと手順 で選ん 曲番などの情報を確認できます。グルー だ情報が表示されます。Cには手順 プ機能に関係する表示は、グループ設定 で選んだものが表示されます。ただ された曲を再生し、停止したときに表示 LapTime し、手順 で を選んだとき されます。 は、Cには何も表示されません。 本体の表示窓 本体で操作する ランプ — (LapTime) 曲番 経過時間 RecRemain 曲番 録音できる残り 時間 ジョグダイヤル GP Remain グループ グループ内で再 内の残り 生できる残り時 ジョグダイヤルを押し、回して... - Page 35 録音状態を確認する 表示D ランプが点灯または点滅して、録 録音中 音の状態をお知らせします。 < 曲番 経過時間 録音の状態 表示 録音中 点灯 曲番 録音できる残り時間 マイク録音中は音の強 弱に合わせて点滅 (ボ —/ 現在時刻 イスミラー) 録音一時停止 点滅 停止中 録音中ディスクが残 ゆっくり点滅 < 曲番 経過時間 り 分以下のとき 頭出しマーク 曲番 一瞬 消灯 曲番 曲名 が追加されたとき グループの全曲数/グループ名 再生中の表示については、 ページの「残り 時間や再生位置を調べる」をご覧ください。...
-
Page 36: 録音日時を記録する (時計合わせ
途中で間違えたときは 録音日時を記録する CANCEL ボタンを押し、もう一度手順 からやり直してください。変更する必 (時計合わせ) 要のない数字はジョグダイヤルを押して 先に進めてください。 時計を合わせておくと、録音の際に録音 日時が自動で記録されます。録音日時 現在の日時を表示するには は、一度時計を合わせると常に記録され 停止中または録音中にジョグダイヤルを るようになります。録音日時を記録しな DISPLAY 押し、回して「 」を点滅さ いときは、この操作は不要です。 せ、もう一度押します。ジョグダイヤル ジョグダイヤル Clock を回して「 」 を点滅させ、押すと 現在の日時が表示されます。 時計を 時間表示に変えるには T MARK 時計合わせ中に ボタンを押し ます。もう一度押すと 時間表示に戻 停止中にジョグダイヤルを押し、回し ります。 OPTION て 「 」を点滅させ、もう一度 押す。 時計の設定を保つために... -
Page 37: Cd の曲名などを記録しながら録音する
本機の つまみの中央のボタンを の曲名などを記録し 押したまま右にずらして録音を始め、 ながら録音する ウォークマンの再生を始める。 SYNC 「 」 、 「 」が点灯し、 「 (ジョイントテキスト機能) ( テキ TEXT 」 と数秒間表示されたあと、 スト接続ケーブル、 テキスト対 TEXT? 「 (録音中の曲の曲番) 」 応 とジョイントテキスト対応 PushENTER が点灯、 「 」が点滅しま ウォークマンが必要) す。 ジョイントテキスト機能対応のソニー製 録音中の曲に曲名情報がないときは、 D-E999 ウォークマン( など) か 「 NO TEXT 」と表示され、その曲の... - Page 38 ご注意 ジョグダイヤルを押す。 • ジョイントテキスト機能は次のマークが記 TOC Edit 「 」 が点滅し、記録されたデ 載された機器にのみ対応しています。 ィスク名がスクロールして表示されま す。 ジョイントテキスト対応機種 によっては、手順 でディスク名、曲名が D-E01 、 D-E999 、 D-E990 、 D-E888 、 自動的に表示され、そのまま テキストの D-E880 D-E777 D-E770 D-F700 、 、 、 2001 ( 年 月現在) 情報を記録しながらの録音が始まることがあ ります。その場合は録音が終ったら、または • CD ソフトは次のマークが記載された「...
-
Page 39: いろいろな再生のしかた
いろいろな再生のしかた 曲番や曲名を見ながら聞き 聞きたい曲や場所を高速 たい曲を探す (インデックス で探す (高速サーチ) サーチ) > インデックスサーチを行うには、あらか じめ「サーチモードを選ぶ」 の手順 で Index 「 」 を選んでください(このペー ジ) 。 本体で操作する(ダイレクト選曲) ジョグダイヤル DISPLAY ジョグダイヤルを回し、聞きたい曲が 表示されたらジョグダイヤルを押す。 ジョグダイヤルを回すと本体の表示窓 に曲番と曲名が表示され、押すと選ん だ曲の再生が始まります。曲名がつい ていないときは曲番のみが表示されま 回転つまみ す。 高速サーチは 種類あります。 リモコンで操作する • インデックスサーチ:曲番や曲名を見 ながら聞きたい曲を探す。 再生中にXボタンを押す。 • タイムサーチ:経過時間を見ながら聞 再生が一時停止します。 きたい場所を探す。... -
Page 40: 「グループ機能」 を使う
経過時間を見ながら聞きた 「グループ機能」 を使う い場所を探す (タイムサーチ) グループ設定されたディスクでは「グル タイムサーチを行うには、あらかじめ ープ機能」を使っていろいろな再生を行 「サーチモードを選ぶ」 の手順 で うことができます。グループ機能につい Time 「 」を選んでください ( ペー て、詳しくは 「 「グループ機能」 を使って ジ) 。 録音する」 ( ページ) をご覧ください。 GROUP 本体で操作する 再生中にXボタンを押す。 再生が一時停止します。 .または>ボタンを押したままに して、聞きたい場所を表示させる。 ジョグダイヤル Xボタン押して一時停止を解除する。 DISPLAY 選んだ場所から再生が始まります。 PLAYMODE リモコンで操作する 再生中にXボタンを押す。 再生が一時停止します。... - Page 41 リモコンで操作する ご注意 グループモードが のとき、ディスク中の グループ設定されたディスクを本機に グループ設定されていない曲は一時的に つ 入れ、再生する。 のグループとしてまとめられ、一番最後のグ Group ループとして扱われます。このとき 「 DISPLAY ボタンを 秒以上押し、回 – – 」と表示されます。曲番はグループごとの 転つまみを.またはN>側に回 番号ではなく、ディスクの通し番号で表示さ れます。 GROUP して 「 」 を点滅させ、xボタ ンを押す。 聞きたいグループを選んで 回転つまみを.またはN>側に 聞く (グループスキップモード) GROUP ON 回して「 」 を点滅させ、 xボタンを押す。 グループ設定されたディスクは、再生中 リモコンの表示窓に曲の経過時間と に次のグループに進んだり、前のグルー 「...
-
Page 42: 再生モードを選ぶ
リモコンで操作する 再生モードを選ぶ グループ設定されたディスクを本機に 入れ再生する。 通常の再生のほか、 曲再生、シャッフ ル再生、プログラム再生ができ、さらに PLAYMODE ボタンを「−−−」 が表 各再生状態のままくり返すことができま 示されるまで押したままにする。 す。 グループスキップモードが になり ます。 本体で操作する ジョグダイヤル 秒以内に回転つまみを.または N>側に回して、再生したい曲が あるグループ名またはグループ番号を 表示させる。 グループモードが のときにグルー プスキップモードを使用した場合は、 再生状態を選ぶ 選んだグループの 曲めから再生が始 まり、そのグループの最後の曲まで再 再生中にジョグダイヤルを押し、回し 生して停止します。 PLAY MODE て 「 」 を点滅させ、も グループモードが のときにグル う一度押す。 ープスキップモードを使用した場合... - Page 43 本体の表示窓 好きな順に曲を並べかえて聞く(プ ログラム再生) ジョグダイヤルを回すとAが変わる 「再生状態を選ぶ」の手順 で「 」 を表示させ、ジョグダイヤルを押す。 Shuffle Shuf.Rep ジョグダイヤルを回して曲を選ぶ。 ジョグダイヤルを押す。 ジョグダイヤルを押すとBが点灯する。 選んだ曲が確定します。 手順 、 をくり返して、好きな順に 曲を選ぶ。 20:51 ジョグダイヤルを 秒以上押す。 プログラムが設定され、 曲目から再 表示A (再生状態) 生が始まります。 Normal /— < (通常の再生) • 再生が終わったとき、または途中で止めた ALLRepeat/ (全曲をくり返し再 ときもプログラム設定は残っています。 生) • 全部で 曲までプログラムできます。 • 設定は、パーソナルディスクメモリーに登...
- Page 44 好きな順に曲を並べかえて聞く(プ リモコンで操作する ログラム再生) PLAYMODE RPT/ リモコンの ボタン、 再生中に 「 」 が表示されるまで ボタンを使っていろいろな聞き方 PLAYMODE ボタンをくり返し押 ができます。 す。 PLAYMODE 回転つまみを.またはN>側に RPT/ENT 回して曲番を選ぶ。 曲番 プログラムの順番 回転つまみ RPT/ENT ボタンを押し、曲を決定す る。 再生状態を選ぶ 手順 、 をくり返して好きな順に曲 PLAYMODE 再生中に ボタンを押 を選ぶ。 す。 押すたびに表示は次のように変わり、 RPT/ENT ボタンを 秒以上押す。 選んだ表示の状態で再生します。 設定した...
-
Page 45: 音質を設定する (デジタルサウンドプリセット
設定した音質を選ぶには ご注意 • ふたを開けると設定は解除されます。 本体では • 停止状態での設定の途中、 分間何も操作 ジョグダイヤルを押し、回して されなかったときは、そこまでの設定でプ SOUND 「 」を点滅させ、もう一度押 ログラムが確定します。 す。 • プログラム設定中にグループ機能を SOUND ジョグダイヤルを回して「 できません。 」 または「 SOUND 2 」を選び、も • プログラム再生中、グループモードを う一度ジョグダイヤルを押す。 にすると、プログラム再生の設定は解除さ れます。 リモコンでは 1 SOUND ボタンをくり返し押して、 SOUND 1 SOUND 2 「 」 または「 」を... - Page 46 SOUND ジョグダイヤルを回し、 「 」 ボタンを 秒以上押す。 (Treble) (Bass) Bass – または「 」 の強弱を 「 」 ( 低音) の設定画面にな SOUND 設定する。 ります。さらにもう一度 ボ Treble タンを 秒以上押すと、 「 」 ( カーソルが動きます。 ( + の位置) – 高音) の設定画面になります。 SOUND 1 T-===== + B-== ===+ Bass Treble のときは...
-
Page 47: 再生速度を変える (スピードコントロール
デジタルサウンドプリセットを解除 するには 再生速度を変える • 本体では (スピードコントロール) SOUND OFF 手順 で 「 」 を選びま す。 語学学習などで再生速度を変えたいとき • リモコンでは に便利です。速度は 段階 ( 〜 手順 で何も表示されない状態を選び 110% まで ごと) から選ぶことがで ます。 きます。 DISPLAY • 設定は、パーソナルディスクメモリーに登 録することができます。 • 再生一時停止中でも設定することができま す。 • 約 分間操作をしないと、設定が登録さ 回転つまみ れ、再生表示に戻ります。... -
Page 48: パーソナルディスクメモリー
xボタンを押す。 ディスクごとに設定を記 再生速度が設定されます。 録する (パーソナルディスクメ リモコンの表示窓 モリー) ディスクの設定情報を本体に登録しま 100% 以外を選んでいると 「 」 が点灯します。 す。一度登録したディスクを再度入れな 本体の表示窓 おすと、設定情報は自動的に呼び出され 100% 以外を選んでいると 「 」 が点灯します。 ます。次の設定情報が登録できます。 • 音量 • 再生モード S 03:40 • グループモード再生 • プログラム再生 • 音質(デジタルサウンドプリセット) 設定は、パーソナルディスクメモリーに登録 • 再生速度 (スピードコントロール) することができます(このページ) 。 本体で操作する... -
Page 49: 残り時間や再生位置を調べる
リモコンで操作する 残り時間や再生位置を調 DISPLAY べる 再生中に、表示窓で曲名・ディスク名な どの情報を確認できます。グループ機能 に関係する表示は、グループ設定された 回転つまみ 曲を再生中の表示です。 停止中、再生中、再生一時停止中に 本体で操作する DISPLAY ボタンを 秒以上押す。 ジョグダイヤル 回転つまみを.またはN>側に PERSONAL 回して「 」 を点滅させ、 xボタンを押す。 Entry? 「 」が点滅します。 再生中にジョグダイヤルを押し、回し DISPLAY て「 」を点滅させ、もう一 xボタンを押す。 度押す。 Entry OK 「 」 と表示され、現在のディ スクの設定情報が登録されます。 ジョグダイヤルを回して確認したい表 示モードを点滅させる。 登録から削除するには ジョグダイヤルを回すたびに、表示は 登録から削除したいディスクを入れ、内... - Page 50 リモコンで操作する ジョグダイヤルを押す。 ジョグダイヤルを押すと手順 で選ん DISPLAY だ情報が表示されます。Cには手順 で選んだものが表示されます。ただ LapTime し、手順 で を選んだとき は、Cには何も表示されません。 本体の表示窓 DISPLAY 再生中に ボタンを押す。 DISPLAY ボタンを押すたびに、表示 は次のように変わります。 リモコンの表示窓 — 曲番 経過時間 (LapTime) 1 Remain 曲番 曲中の残り時 間 表示D GP Remain グループ内 グループ内で再 曲番 経過時間 < の残り曲数 生できる残り時 間 曲番...
-
Page 51: お手持ちのシステムで聞く ( Line Out
ジョグダイヤルを押し、回して お手持ちのシステムで聞 AUDIO OUT 「 」 を点滅させ、もう一 く LINE OUT ( ) 度押す。 LINE 本機の再生音を、他のオーディオ機器で ジョグダイヤルを回して、 「 聞いたり録音したりすることができま 」 を点滅させ、ジョグダイヤル RK-G129 す。別売りの接続コード また を押す。 RK-G136 /LINE OUT は をi ジャックに ご注意 つなぎます。出力はアナログです。本機 • /LINE OUT AUDIO OUT 出力 ( 「 」... -
Page 52: 編集する前に
編集する 入力できる文字の種類 • カタカナ (日本国内向けモデルのみ) 編集する前に • アルファベット 〜 の大文字、小文字 • 数字 〜 ミニディスクに頭出しマーク (曲番) を • " 記号 ! # $ % & ( ) * ; < つけたり、曲名やディスク名をつけたり = > ? @ _ `+ − / : することができます。ただし、再生専用 (スペース)... - Page 53 名前をつける ジョグダイヤルを回して次の表示を点 滅させ、押して決定する。 本体で操作する • : Name 曲名の場合: 「 」 • : Name > グループ名の場合: 「 」 GROUP/ T MARK CANCEL • ディスク名の場合: 「 : Name 」 カーソルが入力エリアで点滅し、文字 の入力準備状態になります。 カーソルが点滅する。 VOL +/– ジョグダイヤル ディスクを入れ、次の操作を行う。 • 曲名を入力するとき 名前をつけたい曲の再生または録音 xボタンを押す。 を開始し、曲の再生・録音中に名前 入力エリアから文字パレットにカーソ をつける。...
- Page 54 文字入力に使うボタンと機能は次のと 途中でやめるときは おりです。 CANCEL CANCEL? ボタンを押し、 「 」 PushENTER 「 」 が表示されたらジョグ 機能 ボタン ダイヤルを押します。 • 文字パレット上で、 x (下) X(上) カーソルを移動す > (右) .(左) る。 を押す。 リモコンで操作する • ジョグダイヤルを回 す(上下移動のみ) 。 DISPLAY 入力エリアで直接 ジョグダイヤルを回 PLAYMODE 文字を選ぶ。 す。 • 文字を決定する。 Nを押す。 •...
- Page 55 回転つまみを.またはN>側に 手順 をくり返して文字を入力する。 回して次の表示を選び、xボタンを押 xボタンを 秒以上押したままにする。 して決定する。 名前が入力されます。 • : Name 曲名の場合: 「 」 • グループ名の場合: 「 GP : Name 」 途中でやめるときは • : Name ディスク名の場合: 「 」 DISPLAY ボタンを 秒以上押したまま カーソルが点滅し、文字の入力準備状 にします。 態になります。 回転つまみを.またはN>側に ご注意 回して文字を選び、xボタンを押して • 録音中に曲名、グループ名、ディスク名を 決定する。 入力している途中で録音が終了した場合...
-
Page 56: よく使う言葉を登録して使う (ネームバンク機能
名前を変更する よく使う言葉を登録して 使う (ネームバンク機能) ディスクを入れ、次の操作を行う。 • 曲名を変更するとき 曲名、グループ名、ディスク名によく使 名前を変更したい曲を再生し、曲の う言葉を登録できます。登録した言葉 再生中に名前を変更する。 は、その一部または全部を使って曲名な • グループ名を変更するとき どをつけるときに利用します。 ( 「登録し グループモードを にし( ペー た言葉を呼び出して使う」 ( 、 ペー ジ) 、名前を変更したいグループ中の ジ) ) 文字程度の文字数の言葉の場 曲の再生または録音を開始し、再 合、約 種類登録できます (最大約 生・録音中に名前を変更する。 文字) 。文字数によって、登録できる言 • ディスク名を変更するとき 葉の種類の数は異なります。 停止状態のまま手順 へ進む。グル... - Page 57 ◆ 曲名などの入力中に登録する ご注意 この方法で文字を入力中は、すでにネームバ 「名前をつける」 ( ページ)の手順 ンクに登録してある言葉を呼び出して利用す 〜 を行って文字を入力する。 ることはできません。 CANCEL ボタンを押す。 登録した言葉を呼び出して使う カーソルが入力エリアに戻ります。 言葉を呼び出して使う方法は 通りあり END SEARCH ボタンを約 秒間押 ます。 したままにする。 • 言葉で探して使う 「 Entry! 」と表示され、カーソルのある 登録済みの言葉を探して曲名などをつ 位置の直前までの言葉が登録されます。 けるときに使います。 名前の入力を続けるときは、 「名前を • 先頭文字で探して使う つける」 ( ページ) の手順 〜 を行...
- Page 58 ジョグダイヤルを 秒以上押したまま ジョグダイヤルを回して BankErase にする。 「 」を点滅させ、押して決 選んだ言葉が決定します。 定する。 名前の入力を続けるときは、 「名前を ジョグダイヤルを回して削除したい言 つける」 ( ページ)の手順 〜 を行 葉を点滅させ、押して決定する。 Erase! う。 「 」 と表示され、言葉が削除さ れます。 ◆ 先頭文字で探して使う 途中でやめるときは 「名前をつける」 ( ページ) の手順 CANCEL ボタンを押します。 〜 を行う。 CANCEL? PushENTER 「 」 が点灯、 「 」...
- Page 59 登録した言葉を呼び出して使う ◆ すでに入力した曲名などの言葉を 登録する ◆ 言葉で探して使う 「名前を変更する」 ( ページ) の手順 「名前をつける」 の 「リモコンで操作す 、 を行って登録したい言葉を表示 る」 ( ページ) の手順 〜 を行う。 する。 文字の入力状態になります。 VOL + – 回転つまみを引き、 または 側 Xボタンをくり返し押して登録した言 に回して登録したい言葉の直後にカー 葉を表示させる。 ソルを移動する。 回転つまみを.またはN>側に 秒間押したままにする。 Xボタンを約 くり返し回す。 回転つまみを回すたびに、登録済みの ◆ あらかじめ登録しておく 言葉が...
-
Page 60: グループ設定
入力したい言葉が表示されたら、xボ 曲やグループを つのグ タンを押して決定する。 ループにまとめる 秒間押したままにす xボタンを約 (グループ設定) る。 選んだ言葉が決定します。 すでに録音してある曲をグループにまと めたり、複数のグループを1つのグルー 名前の入力を続けるときは、 「名前を プにまとめることができます。初めにグ つける」 の 「リモコンで操作する」 ループの先頭にしたい曲を選び、次に最 ( ページ) の手順 〜 を行う。 後にしたい曲を選びます。 ただし、まとめることができるのは連続 登録した言葉を削除する している曲(またはグループ)のみで す。連続していない曲をまとめたい場合 DISPLAY 停止中に ボタンを 秒以上 は、曲順を変え( 「曲順を変える」 ( ペ 押す。 ージ) ) 、まとめたい曲やグループを連続 EDIT 「... -
Page 61: グループを解除する
ジョグダイヤルを回して「 : 」 グループを解除する を点滅させ、ジョグダイヤルを押す。 「 」が点滅します。 GROUP STR:001 END:001 ジョグダイヤルを回してグループの先 頭にしたい曲を選んで点滅させ、ジョ ジョグダイヤル グダイヤルを押す。 まとめたいグループの先頭曲が選ばれ GROUP ボタンを 秒以上押す。 ます。 「 」 が点灯し、グループモードが グループモードが になっていて になります。 も、曲番はグループごとの番号ではな 「聞きたいグループを選んで聞く」 の く、ディスクの通し番号で表示されま 「本体で操作する」 ( ページ) の手順 す。 、 を行い、解除したいグループの ジョグダイヤルを回してグループの最 内容を確認し、xボタンを押す。 後にしたい曲を点滅させ、ジョグダイ ジョグダイヤルを押し、回して ヤルを押す。... -
Page 62: 曲順を変える (ムーブ
ジョグダイヤルを押す。 曲順を変える (ムーブ) 指定した位置に移動したい曲が移りま す。 曲を移動して、曲順を変更できます。 例 曲目 ( 曲) を 曲目に移動するとき 途中でやめるときは CANCEL 手順 で ボタンを押します。 リモコンで操作する DISPLAY 本体で操作する ジョグダイヤル 回転つまみ DISPLAY 移動したい曲の再生中に、 ボタンを 秒以上押す。 移動したい曲の再生中に、ジョグダイ 回転つまみを.またはN>側に EDIT ヤルを押し、回して 「 」 を点滅 EDIT 回して「 」 を点滅させ、xボタ させ、もう一度押す。 ンを押す。 曲リピート再生になります。 曲リピート再生になります。... -
Page 63: 別のグループに曲を移動する
リモコンで操作する 別のグループに曲を移動 する DISPLAY 本体で操作する GROUP 回転つまみ DISPLAY 移動したい曲の再生中に、 ボタンを 秒以上押す。 ジョグダイヤル 回転つまみを.またはN>側に GROUP 回して「 」 を点滅させ、xボ GROUP 移動したい曲の再生中に、 タンを押す。 ボタンを 秒以上押す。 回転つまみを.またはN>側に 「 」 が点灯し、グループモードが GROUP ON になります。 回して「 」を点滅させ、 xボタンを押す。 ジョグダイヤルを押し、回して グループモードが になります。 EDIT 「 」 を点滅させ、もう一度押す。 DISPLAY 曲リピート再生になります。... -
Page 64: グループの順番を並べかえる (グループムーブ
リモコンで操作する グループの順番を並べか DISPLAY える (グループムーブ) 本体で操作する GROUP 回転つまみ DISPLAY ボタンを 秒以上押す。 回転つまみを.またはN>側に GROUP 回して「 」 を点滅させ、xボ タンを押す。 ジョグダイヤル 回転つまみを.またはN>側に GROUP ボタンを 秒以上押す。 GROUP ON 回して「 」 を点滅させ、 「 」が点灯し、グループモードが xボタンを押す。 になります。 グループモードが になります。 移動したいグループ内の曲を再生中 DISPLAY ボタンを 秒以上押し、回 に、ジョグダイヤルを押し、回して 転つまみを.またはN>側に回 EDIT 「... -
Page 65: 頭出しマーク (曲番) をつける
頭出しマーク (曲番) をつ 頭出しマーク (曲番) を消 ける す LINE IN 曲の途中に頭出しマークをつけて、そこ アナログ入力( ) やマイク入力 から後ろを次の曲にすることができま で録音したときは、静かな音が続く部分 す。曲番は次のようになります。 などに不要な頭出しマークがつくことが あります。その場合は、頭出しマークを 消すと、前後の曲を つの曲にまとめる ことができます。曲番は次のようになり マークをつける ます。 曲番が つ増える マークを消す T MARK 曲番が つ減る T MARK 再生中または再生一時停止中に、マー T MARK クをつけたい位置で ボタン を押す。 MARK ON 「... -
Page 66: 曲やグループを消す
ご注意 もう一度ジョグダイヤルを押す。 • 別々のグループに登録された つの曲をつ 曲が消去され、次の曲の再生になりま なぐと、前の曲が属するグループに登録さ す。消した曲より後の曲番は つずつ れます。また、グループ登録された曲とさ くり上がります。 れていない曲をつなぐと、後ろの曲は前の 曲の属性と同じになります。 曲の一部分を消すには • システム上の制約により、頭出しマークが 無音部分など不要な部分だけを消したい 消せない場合があります。その場合は 「シ ステム上の制約による症状と原因」 ( ペー ときは、不要な部分の始まりと終わりに ジ)をご覧ください。 頭出しマークをつけて( ページ) 、そ の部分を消してください。 曲やグループを消す 全曲を消す CANCEL ディスク上の全ての曲を消します。 一度消したディスクは元に戻すことがで きません。必ずディスクの内容を確認し てから行ってください。 消したいディスクを再生し、ディスク の内容を確認してから、xボタンを押 ジョグダイヤル す。 曲を消す 停止中に、ジョグダイヤルを押し、回... - Page 67 グループを消す 一度消したグループは元に戻すことがで きません。必ずグループの内容を確認し てから行ってください。 GROUP ボタンを 秒以上押す。 「 」 が点灯し、グループモードが になります。 「聞きたいグループを選んで聞く」の ( ページ)の手順 、 を行い、削除 したいグループの内容を確認し、xボ タンを押す。 停止中にジョグダイヤルを押し、回し EDIT て 「 」 を点滅させ、もう一度押 す。 Erase ジョグダイヤルを回し 「 : 」 を点滅させ、ジョグダイヤルを押す。 GP Erase? 表示窓にグループ名と 「 」 PushENTER が点灯し、 「 」 が点滅し ます。消すのを止めるときは...
-
Page 68: G-Protection 機能
その他の機能 ジョグダイヤルを動かして、音の種類 音飛びを抑える を選ぶ。 G-PROTECTION ( 機能) TIMER 1 G-PROTECTION はジョギング時の衝 TIME:05 撃を想定して開発された音飛びガード機 能です。従来の音飛びガード機能よりさ 音の種類は次の 種類から選ぶことが らに音飛びに強くなっています。 できます。 表示 音の種類 ご注意 TIMER 1 メロディ(トルコ行進曲) 次のような場合、音が飛ぶことがあります。 TIMER 2 メロディ(きらきら星変奏曲) • 強い衝撃が連続的に与えられた場合 • 傷や汚れのあるディスクを聞いている場合 TIMER 3 ビープ音 ジョグダイヤルを押す。 タイマーを使う 音の種類が確定します。 (メロディタイマー) ジョグダイヤルを回して、音が鳴るま での時間を選ぶ。... - Page 69 リモコンで操作する xボタンを押す。 メロディタイマーが設定されます。 DISPLAY 停止中は音が鳴るまでの時間が表示さ れます。 再生中に残り時間を確認するには 手順 までをもう一度行ってください。 回転つまみ 音が鳴るまでの時間が表示されます。 停止中、再生中、再生一時停止中に 途中でやめるときは DISPLAY ボタンを 秒以上押す。 DISPLAY ボタンを 秒以上押します。 回転つまみを.またはN>側に 予約を解除するには M-TIMER 回して「 」を点滅させ、x 手順 で「 」を選び、本体ではジョ ボタンを押す。 グダイヤルを、リモコンではxボタンを 回転つまみを.またはN>側に 押します。 回して「 」を点滅させ、xボタン を押す。 タイマーの音を止めるには ,が点灯し、音の種類を設定できるよ いずれかのボタンを押します。ボタンを うになります。 押すと、音は止まりますが、そのボタン 本来の機能は働きません。 回転つまみを.またはN>側に...
-
Page 70: 音量リミット - Avls
回転つまみを.またはN>側に 音もれを抑え耳にやさし OPTION 回して「 」 を点滅させ、xボ い音にする タンを押す。 — AVLS (音量リミット ) 回転つまみを.またはN>側に AVLS 回して「 」を点滅させ、xボタ 音量の上げすぎによる音もれや、耳への ンを押す。 圧迫感、周囲の音が聞こえないことへの 危険を少なくし、より快適な音量で聞く 回転つまみを.またはN>側に ことができます。 AVLS ON 回して「 」 を点滅させ、x ジョグダイヤル ボタンを押す。 設定を解除するには 本体では手順 で、リモコンでは手順 AVLS OFF で「 」 を点滅させてジョグダ イヤル(本体) またはxボタン(リモコ ン) を押します。 DISPLAY リモコンの確認音を消す... -
Page 71: 表示窓の濃淡を調節する (コントラスト調整
BEEP ジョグダイヤルを回して 「 ジョグダイヤルを回して CONTRAST 」を点滅させ、ジョグダイヤル 「 」を点滅させ、ジョグ を押す。 ダイヤルを押す。 ジョグダイヤルを回して表示窓の濃淡 リモコンで操作する を選び、ジョグダイヤルを押す。 DISPLAY ボタンを 秒以上押す。 ご注意 回転つまみを.またはN>側に リモコンで本体のコントラストは調節できま OPTION 回して「 」 を点滅させ、xボ せん。また、リモコンの表示窓のコントラス トは調節できません。 タンを押す。 回転つまみを.またはN>側に BEEP 回して「 」 を点滅させ、xボタ 誤操作を防ぐ (ホールド) ンを押す。 カバンに入れて使うときなどに、誤って 回転つまみを.またはN>側に ボタンが押されて動作するのを防ぎま BEEP OFF 回して「 」... -
Page 72: 電池の持続時間
電源について 再生 家庭用電源(コンセント)以外に本機で 使用電池 使える電源は、以下の通りです。 ステレオ ステレオ ステレオ • … 本体に入れて 充電式ニッ 約 時間 約 時間 約 時間 −充電式ニッケル水素電池 ケル水素電 池 NH-14WM(A) • … バッテリーケースを使って アルカリ 約 時間 約 時間 約 時間 乾電池 −単 形アルカリ乾電池 充電式ニッ 約 時間 約 時間 約 時間... -
Page 73: 使用上のご注意
その他 取り扱いについて • 落としたり、強いショックを与えたりしない 使用上のご注意 でください。故障の原因になります。 • リモコンやヘッドホンのコードを強く引っぱ 分解しないでください らないでください。 ミニディスクレコーダーに使われているレー • 次のような場所には置かないでください。 ザーが目にあたると危険です。 — 温度が非常に高いところ ( ℃以上) 。 レンズに触れないでください — 直射日光のあたる場所や暖房機具の近 く。 レンズが汚れると音飛びが起きたり、再生で — 窓を閉めきった自動車内 (特に夏期) 。 きなくなったりする場合があります。 — 風呂場など湿気の多いところ。 また、ほこりがつかないように、ディスクの — 磁石、スピーカー、テレビなど磁気を帯 出し入れ以外はふたを必ず閉じておいてくだ びたものの近く。 さい。 — ほこりの多いところ。 パワーアダプターについて(付 •... - Page 74 — 置き場所について 端子のお手入れ 直射日光があたるところなど温度の高い 定期的に各端子を綿棒ややわらかい布などで ところや湿度の高いところには置かない きれいにしてください。 でください。また、砂浜など、ディスク に砂が入る可能性があるところには放置 端子 しないでください。 — 定期的にお手入れを カートリッジ表面についたほこりやゴミ を、乾いた布でふきとってください。 • ディスクに付属のラベルは所定以外の位置 万一故障した場合は、内部を開けずに、テク に貼らないでください。必ず、ラベル用の ニカルインフォメーションセンターまたはお くぼみに合わせて貼ってください。 買い上げ店、ソニーのサービス窓口にご相談 ヘッドホンについて ください。 (ディスクが本体に入っていると きに故障した場合は、故障原因の早期解決の • 付属のヘッドホンをご使用中、肌に合わな ため、ディスクを入れたままご相談されるこ いと感じたときは早めに使用を中止して医 とをおすすめします。) 師またはお客様ご相談センターに相談して ください。 • 付属のヘッドホンは、音量を上げすぎると 音が外にもれます。音量を上げすぎてまわ りの人に迷惑にならないように気をつけま しょう。 雑音の多いところでは音量を上げてしまい がちですが、ヘッドホンで聞くときはいつ も呼びかけられて返事ができるくらいの音...
-
Page 75: 故障かな ? と思ったら
故障かな と思ったら サービス窓口にご相談になる前にもう一度チェックしてみてください。ご不明な点が あるときは裏表紙に記載されているテクニカルインフォメーションセンターへお問い 合わせください。 症状 原因 処置 ふたが開かない 録音・編集中に電源をはずしたり電池 電源を入れ直し、消耗した電池は新 が消耗している。 しいものと交換する。 ふたがしっかりと閉まっていない。 カチッと音がするまでふたを閉めて から OPEN ボタンを押す。 HOLD 操作を受けつけない、また ホールド機能が働いている 本体の スイッチを矢印と逆の HOLD は正しく動作しない (本体の操作ボタンを押すと 「 」 方向にしてホールド機能を解除する 表示が出る) 。 ( 、 ページ) 。 ふたがしっかりと閉まっていない。 カチッと音がするまでふたを閉めて OPEN から ボタンを押す。 結露... - Page 76 症状 原因 処置 ディスクの 曲目から再生 前回再生したときディスクの途中で 一度停止させ、本体のNボタンを しない 止めた。 秒以上押したままにする。またはリ モコンのN>ボタンを 秒以上回 したままにする。 グループモードが になっている。 グループモードを にしてから一 度停止させ、本体のNボタンを 秒 以上押したままにする。またはリモ コンのN>ボタンを 秒以上回し たままにする。 パーソナルディスクメモリーに登録 パーソナルディスクメモリーから削 した。 除する。 再生中に音がとぎれる 振動の多い場所に置いている。 振動の少ない場所で使う。 — ナレーションやイントロなど 曲の 録音時間が極端に短い。 雑音が多い テレビなど強い磁気を帯びたものの テレビなどから離して置く。 近くに置いている。 充電ができない、または充 充電スタンドの充電用端子が汚れて 充電用端子を乾いた布などで拭いて...
- Page 77 症状 原因 処置 ヘッドホンから音が出ない 音量が小さすぎる。 + −ボタンで音量を調節する。 リモコンプラグが汚れている。 リモコンプラグをからぶきする。 音が大きくならない AVLS が働いている ジョグダイヤルを使って 「 AVLS 」を選択する ( ページ) 。 ヘッドホンからの音に雑音 /LINE OUT 出力 ( 「 AUDIO /LINE OUT 出力 ( 「 AUDIO LINE OUT HeadPhone が入る 」 ) の設定が、 「 」に...
-
Page 78: システム上の制約による症状と原因
システム上の制約による症状と原因 ミニディスクシステムでは、従来のカセットや とは異なる方式で録音が行われま す。そのため、いくつかのシステム上の制約があり、次のような症状が出る場合があ ります。これらは、故障ではありませんので、あらかじめご了承ください。 症状 原因 最大録音可能時間 分、 分、 曲録音されるとそれ以上の録音はできません。 分 に達していなくても、 「 さらに曲を追加するには、不要な曲を消して録音してくださ FULL 」表示が出て録音が開始でき い。 ない。 曲数も録音時間も余裕があるの 同じディスクで録音、消去をくりかえすと、 曲のデータが連 TR FULL に、 「 」表示が出て、録音 続して記録されず、空いているところに分割して記録される が止まる。 ことがあります。ミニディスクは、このような場合でも離れ たデータをすばやく探し出し、順に再生します。ただし、分 割したそれぞれのデータは曲の区切り ( 曲) と同じ扱いにな り、データが全部で 個になると、録音できなくなりま す。さらに曲を追加するには、不要な曲を消して録音してく ださい。 頭出しマーク 曲番... -
Page 79: メッセージ一覧
メッセージ一覧 本体の表示窓にメッセージが出たら、下の表にしたがってチェックしてみてください。 表示 意味 対策 BANK FULL ネームバンクに登録されている文字 文字数を減らして入力しなおす。 が約 文字を超えた。 BLANK DISC — 何も録音されていないディスクが 入っている。 BUSY 録音または編集の内容の処理をして しばらく待つ。まれに 分ほどかか いる。 る場合があります。 Data Save 録音した情報 (音声)をディスクに記 しばらく待つ (衝撃を与えたり、 録している。 電源を抜いたりしない) 。 DISC ERR 損傷しているディスク、録音や編集 ディスクを入れなおす。録音しな の内容などの情報が正しく入ってい おす。 ないディスクが入っている。 DISC FULL ディスクの残り時間が... - Page 80 表示 意味 対策 NO BATT 充電式電池が入っていない 充電式電池を入れる NO COPY シリアルコピーマネージメントシステム アナログ入力 ( LINE IN ) を使っ SCMS ( )によりダビングは禁止されてい て録音する ( ページ) 。 る。 NO DISC ディスクが入っていない。 ディスクを入れる。 No Entry! — パーソナルディスクメモリーを登録して いないディスクでパーソナルディスクを 操作しようとした。 NO SIGNAL デジタル入力信号が途切れた。 光デジタル入力の接続を確かめ LINE IN る。アナログ入力...
-
Page 81: 保証書とアフターサービス
保証書とアフターサービ ス 保証書 • この製品には保証書が添付されていますの で、お買い上げの際お買い上げ店でお受け 取りください。 • 所定事項の記入および記載内容をお確かめ のうえ、大切に保存してください。 • 保証期間は、お買い上げ日より 年間で す。 アフターサービス • 調子が悪いときはまずチェックを この説明書をもう一度ご覧になってお調べ ください。 • それでも具合の悪いときは テクニカルインフォメーションセンターま たはお買い上げ店、添付の「ソニーご相談 窓口のご案内」にあるお近くのソニーサー ビス窓口にご相談ください。 • 保証期間中の修理は 保証書の記載内容に基づいて修理させてい ただきます。詳しくは保証書をご覧くださ い。 • 保証期間経過後の修理は 修理によって機能が維持できる場合は、ご 要望により有料修理させていただきます。 • 部品の保有期間について 当社ではポータブルミニディスクレコーダ ーの補修用性能部品 製品の機能を維持する ために必要な部品 を、製造打ち切り後... -
Page 82: 主な仕様
入力端子 主な仕様 :ステレオミニジャック (最小入 0.25mV 力レベル ) LINE IN :アナログ時 ステレオミニ 形式 49mV ジャック(最小入力レベル ) ミニディスクデジタルオーディオシス 光デジタル時 光ミニジャック テム 出力端子 録音方式 /LINE OUT :ステレオミニジャック 磁界変調光学方式 194mV (専用リモコンジャック) 、 再生読み取り方式 (10k Ω 非接触光学読み取り 半導体レーザー使 実用最大出力( 時) 用 5mW+5mW ヘッドホン: ( Ω) レーザー... - Page 83 別売りアクセサリー 解説 NH-14WM 充電式ニッケル水素電池 ここでは、技術用語やミニディスクの特 BC-9HM ガム型ニッケル水素充電池用充電器 徴的な動作について解説します。 光デジタルケーブル 光角形プラグy光ミニプラグ ATRAC DSP TYPE-R 用 とは? POC-5/10/15AB DSP (Digital サウンドの心臓部 光ミニプラグy光ミニプラグ Signal Processor) に、ソニーのハイ POC-5/10/15B スペック デッキなどに搭載されてい 光ミニプラグ (入/出力)y 型 TYPE-R る 「 」を採用。信号処理能力が POC-DA12SP ピンコネクター 接続コード アナログ 従来比約 倍にアップし、 デッキに ステレオミニプラグyピンプラグ...
- Page 84 マイクロホン、 レコー DAT:48kHz など)は、コンバータによ ドプレーヤー、 チュー っ て 、 の サ ン プ リ ン グ レ ー ト ナーなど (アナログ出 44.1kHz ( ) に変換されて録音されます。 力端子付き) の曲番のつきかた アナログ録音 など曲番のついたメディアから録音 した場合、レコーダーは次のような条件 親世代の で 曲番を作成し記録します。 デジタル入力からの録音→入力ソースの トラック番号が変化したとき デジタル録音可 アナログ入力からの録音→ 秒間以上無 音状態が続き、その後音声が入ってき たとき。 -0:03 なお、...
- Page 85 English 6 Battery level indication BOperating Instructions Shows approximate battery condition. While charging the rechargeable battery, this indication shows the Looking at the controls charging condition. 7 SYNC (synchro-recording) indication The numbers are keyed to the illustrations in Lights up while synchro-recording. the Japanese text (pages 5 to 7).
- Page 86 M-TIMER/ Setting the alarm (Melody How to use the jog dial M-TIMER timer) (pages 111 and 112). AUDIO OUT/ Selecting i/LINE OUT jack See the illustrations in Japanese text (page 8). — output (page 102). The jog dial on the recorder can be used to SOUND/—...
- Page 87 To check the menus and menu items that • Though the battery charging stand and the battery may become hot during the charging can be selected at each menu level, see the procedure, this poses no danger. following pages in Japanese text. •...
- Page 88 BMD recording To stop recording, press x. After you press x to stop, the recorder will automatically turn off in about 10 seconds Recording an MD right away! (when using batteries) or about 5 minutes (when using AC power adaptor). See the illustrations in Japanese text (pages 19 and 20).
- Page 89 BMD playing Notes • “Data Save” or “TOC Edit” flashes while data of the recording (the track’s start and Playing an MD right away! end points, etc.) is being recorded. Do not move or jog the recorder or disconnect the See the illustration in Japanese text (page 22).
- Page 90 BVarious ways of You can turn off the beep sound. If you press . during the first track of the recording disc, the recorder goes to the beginning of the last track on the disc. If you press > during the last track of the Connecting digital (optical) disc, the recorder goes to the beginning of and analog (line) inputs...
- Page 91 Recorded Same as the Adjusted Recording for long times sound level source. automatically. You can also You can also See the illustration in Japanese text (page 26). adjust it adjust it Select each recording mode according to manually manually. the recording time that you want. (Digital REC Stereo recording is possible at 2 times (LP2) level...
- Page 92 Notes • During monaural recording of a stereo sound source connected through the digital • The group function setting is stored even if (optical) input jack, you can still monitor the you eject the MD or turn off the recorder. recorded sound in stereo by using •...
- Page 93 Notes Recording a track into an • The pause function cannot be turned on or existing group off manually during synchro-recording. • Do not switch the “SYNC REC” setting 1 While the recorder is stopped, press while recording. Recording may not be done GROUP for 2 seconds or more.
- Page 94 • When the group mode is on, recording 3 Turn the jog dial repeatedly until the always starts after the current contents. desired time interval flashes in the display. Select one of the following intervals: Recording from a microphone “OFF” “5 min.
- Page 95 5 While observing the level meter in the 3 Turn the jog dial until “CLOCK SET” display, adjust the recording level by flashes in the display, and then press the turning the dial. dial. Set the level so that the meter segments The digits of the year flash.
- Page 96 See the illustrations in Japanese text (pages 37 7 Press the jog dial. and 38) “TOC Edit” flashes. By connecting the recorder to a Sony Afterwards, the disc name scrolls in the portable CD player that supports Joint Text display.
- Page 97 BVarious ways of 2 Turn and hold the control towards . or N> until the desired track playback number or track name appears in the display. 3 Press X to cancel the pause. Searching for a specific track Playback starts from the selected track. or a position quickly (Quick Search) Searching for a specific point...
- Page 98 On the remote control On the remote control 1 Insert a disc which has group settings 1 Insert a disc which has group settings into the recorder and play the disc. into the recorder and play the disc. 2 Press DISPLAY for 2 seconds or more, 2 Press and hold PLAYMODE until turn the control towards .
- Page 99 play mode/indication On the remote control “Normal”/“(none)” (All the < tracks are played once) You can select variouse play mode using the PLAYMODE and RPT/ENT buttons on “AllRepeat”/“ ” (All the the remote control. tracks are played repeatedly) Selecting a play mode Press PLAYMODE during playback.
- Page 100 3 Turn the jog dial to adjust the sound level. To adjust the sound quality Press x to move the cursor from “T” to (Digital Sound Preset) “B” (from the middle row to the bottom See the illustrations in Japanese text (pages 45 row in the display) and press X to move and 46).
- Page 101 On the recorder To change playback speed 1 While the recorder is stopped, playing, (Speed Control) or play-paused, press the jog dial. 2 Turn the jog dial until “PERSONAL” See the illustrations in Japanese text (pages 47 and 48). flashes in the display, and then press the dial.
- Page 102 BEditing recorded tracks Connecting to a stereo system You can edit your recordings by adding/ (LINE OUT) erasing track marks or labeling tracks and discs. See the illustration in Japanese text (page 51). Premastered MDs cannot be edited. Connect the i/LINE OUT jack of the Notes on editing recorder to the LINE IN jacks of an •...
- Page 103 • If you enter the symbol “//” between the To enter a letter in the characters in disc names such as “abc// character palette. def,” you may be unable to use the group To enter the text string in the function.
- Page 104 3 To label a track, press the jog dial while 4 Press x. The disc is ready to be labeled. “ : Name” is flashing. 5 Turn the control towards . or N> To label a group, turn the jog dial until to select a letter and press x to enter.
- Page 105 Notes 5 Follow steps 5 to 7 of “Labeling a disc during stop”. • Track and disc titles that were entered in Japanese katakana characters will appear in Roman letters on minidisc players that do Labeling a track, a disc, or a group not support the display of katakana during recording characters.
- Page 106 Retrieving phrases 4 Press the jog dial while the desired phrase flashes in the display. You can retrieve a phrase stored in the The phrase is selected and lights up in recorder’s memory anytime you want to the letter input area. use it in a track, group, or disc name.
- Page 107 Retrieving phrases 4 Press x while the phrase you want is shown in the display, and then press x Note for 2 seconds or more. Phrases stored in the name bank cannot be The cursor flashes after the phrase you retrieved by the procedure described in just retrieved.
- Page 108 3 Turn the jog dial until the number or name of the desired first track flashes in Moving recorded tracks the display, and then press the jog dial. See the illustrations in Japanese text (page 62). This selects the first track of the new group.
- Page 109 Moving a track to a different Changing the order of a group group on a disc (Group move) See the illustration in Japanese text (page 63). See the illustrations on Japanese text (page 64). On the recorder On the recorder 1 Press GROUP for 2 seconds or more.
- Page 110 To add track marks while recording (except while synchro- Erasing tracks or groups recording) See the illustration in Japanese text (page 66). Press T MARK at the point you want to You can quickly erase a recorded tracks, all add a track mark. You can use Auto Time the tracks and data of the MD, or groups.
- Page 111 BOther operation To erase a group 1 Press GROUP for 2 seconds or more. G-PROTECTION function 2 Follow steps 1 and 2 of the procedure described under “On the recorder” in The G-PROTECTION function was developed to provide a higher level of “Selecting and playing desired groups (Group skip function)”...
- Page 112 Notes 7 Press the jog dial. Melody timer is set. • The settings will be lost when you start recording. The time remaining until the alarm is • The timer will begin counting down (using the shown in the display while the recorder factory setting) from the moment you select is stopped or play-paused.
- Page 113 When using a 100% fully charged DISC ERR : rechargeable battery. When using a Sony LR6 (SG) “STAMINA” The recorder cannot read the MD (it is alkaline dry battery (produced in Japan). scratched or dirty). Reinsert the MD. If...
- Page 114 LINE OUT : NO SIGNAL : You pressed VOL +/– while the The recorder could not detect digital “AUDIO OUT” parameter is set to input signals. Make sure that the “LINE OUT.” Use the jog dial to set source is connected firmly. If the the “AUDIO OUT”...
- Page 115 TOC Edit : The MD recorder is recording information (track start and end position) from the memory to the disc. Wait until this process is completed. Do not expose the recorder to physical shock, nor disrupt power supply. TR FULL: You tried to record more than 254 tracks.
- Page 116 ご案内 ソニーではお客様技術相談窓口として 「テクニカルインフォメーションセンター」 を開設しています。 お使いになってご不明な点、技術的なご質問、故障と思 われるときのご相談は下記までお問い合わせください。 テクニカルインフォメーションセンター 5194 電話: − − 受付時間:月〜金 午前 時から午後 時まで (祝日、年末、年始、弊社休日を除く) ご相談になるときは次のことをお知らせください。 ● 型名 ● ご相談内容:できるだけ詳しく ● お買い上げ年月日 Printed in Japan...