Table of Contents
Advertisement
Quick Links
Advertisement
Table of Contents

Related Manuals for Fujitsu DL3100


Summary of Contents for Fujitsu DL3100
- Page 1 FUJITSU DL3100 DOT MATRIX PRINTER USER'S MANUAL...
- Page 2 While FUJITSU ISOTEC has sought to ensure the accuracy of all information in this manual, FUJITSU ISOTEC assumes no liability to any party for any damage caused by any error or omission contained in this manual, its updates or supplements, whether such errors or omissions result from negligence, accident, or any other cause.
- Page 3 FUJITSU DL3100 Following notes for United States are valid for 100-120V model only. Federal Communications Commission Radio Frequency Interference Statement for United States Users This equipment has been tested and found to comply with the NOTE: limits for a Class B digital device, pursuant to Part 15B of the FCC Rules.
- Page 4 FUJITSU DL3100 Für den Anwender in Deutschland Das Gerät ist nicht für die Benutzung im unmittelbaren Gesichtsfeld am Bildschirmarbeitsplatz vorgesehen. Um störende Reflexionen am Bildschirmarbeitsplatz zu vermeiden, darf dieses Produkt nicht im unmittelbaren Gesichtsfeld platziert werden. User’s Manual...
- Page 5 Every effort has been made to ensure that the information included here is complete and accurate at the time of publication; however, Fujitsu Isotec Limited cannot be held responsible for errors and omissions. Printer model specifications differ with the power supply input voltage (M33342A;...
- Page 6 FUJITSU DL3100 ABOUT THIS MANUAL Thank you for buying the FUJITSU DL3100 dot matrix printer. You can expect years of reliable service with very little maintenance. This manual explains how to use your printer to full advantage. It is written for both new and experienced printer users.
- Page 7 FUJITSU DL3100 ORGANIZATION This manual is organized as follows: Chapter 1, Unpacking Guide, introduces the good location for place printer,unpacking the printer,the printer components, the explanation of symbols on the printer. Chapter 2, Setting Up Printer, gives step-by-step procedures for setting up the printer for immediate use and identifies the main parts of the printer.
- Page 8 FUJITSU DL3100 CONVENTIONS Special information, such as warnings, cautions, and notes, are indicated as follows: WARNING A WARNING indicates that personal injury may result if you do not follow a procedure correctly. CAUTION A CAUTION indicates that damage to the printer may result if you do notfollow a procedure correctly.
- Page 9 FUJITSU DL3100 Warning symbols Various graphic symbols are used in this manual. They serve as signs to help users of this product use the product safely and correctly as well as prevent damage and personal injury to the users or bystanders.The following tables show and explain each symbol.
- Page 10 FUJITSU DL3100 Notes on Safety WARNING WARNING Do not place a container containing water, such as a vase, potted plant, and drinking glass, or a metal object on or near the printer. Otherwise, electric shock or fire may result. Do not place the printer in a humid or dusty area, in an area with explosive fumes, an area with poor ventilation or close to a fire.
- Page 11 When mounting or removing ribbon, turn off the power to the printer and personal computer and disconnect their power plugs from the outlets beforeperforming the work. Otherwise, electric shock may result. Connect only Fujitsu-recommended ribbon. Otherwise, electric shock or fire may result. CAUTION Do not block openings in the printer (e.g., ventilation openings)
- Page 12 FUJITSU DL3100 Notes about the printer in operation WARNING If the printer is making a strange noise, which indicates a problem, discontinue printer operation. Request your printer dealer to fix the problem. Continued operation of the printer without repairs may result in electric shock or fire.
- Page 13 FUJITSU DL3100 WARNING If excessive heat, smoke, a strange odor, or a strange noise is coming the printer or any other abnormality is observed, immediately turn off the power to the printer by using the power switch, and be sure to disconnect the power plug from the outlet.
- Page 14 FUJITSU DL3100 CAUTION Insert the power plug completely into an outlet so that it is securely connected. Otherwise, electric shock or fire may result. Exercise caution to keep loose clothing, hair, neckties, etc. away from paper feed- or ejection openings, and tractors while the printer is operating.
- Page 15 Operate the printer with the paper thickness set to the appropriate paper thickness. Use only an original ribbon cassette that is specified as suitable by Fujitsu. Textile fibers accumulate on components inside the printer and parts of the roller, so clean these parts regularly.
-
Page 16: Table Of Contents
FUJITSU DL3100 TABLE OF CONTENTS CHAPTER 1 UNPACKING GUIDE ................ 1-1 Selecting a good location ................1-2 Unpacking the printer .................. 1-3 Printer components ..................1-6 The explanation of symbols on the printer ..........1-8 CHAPTER 2 SETTING UP PRINTER ..............2-1 Install Ribbon .................... - Page 17 FUJITSU DL3100 Hex Dump ..................... 5-45 Self Test / Status Page ................5-45 DLMENU ....................5-46 CHAPTER 6 CUSTOMIZED FORM ..............6-1 Customize Cut Sheet Form Length ............... 6-2 Customize Cut Sheet TOF ................6-4 Customize Cut Sheet Bottom Margin ............6-5 Customize Cut Sheet Left Margin..............
- Page 18 FUJITSU DL3100 User’s Manual...
-
Page 19: Chapter 1 Unpacking Guide
FUJITSU DL3100 CHAPTER 1 UNPACKING GUIDE UNPACKING GUIDE If this is your first printer, you should read the entire chapter before attempting to use the printer. In this chapter, you will learn how to: - Select a good location for the printer... -
Page 20: Selecting Agood Location
FUJITSU DL3100 This printer is suitable for most business, office, and home SELECTING A environments. GOOD To obtain peak performance from the printer, select a LOCATION location that meets the following guidelines: - Place the printer on a sturdy, level surface. -
Page 21: Unpacking The Printer
FUJITSU DL3100 UNPACKING Unpack the printer as follows: THE PRINTER 1. Place your packaged printer on a solid base. 2. Make sure that the “Up” symbols point in the correct direction. 3. Open the packaging, lift the printer out of the cardboard box and remove the remaining packaging material. - Page 22 FUJITSU DL3100 Remove the packaging materials from the printer as follows: 1.Open and remove the top covers of the printer following the below picture. Remove the shipping cardboard from around the print head. 3.Rotate the paper feed knob to make it fix with the latch.
- Page 23 FUJITSU DL3100 4.If you use the single sheet paper, tilt the sheet feeder slightly and push it to the corresponding positioning slot on both sides of the printer until it can no longer move forward. If you use the continuous forms,remove the sheet feeder,install the sheet feeder downward after paper loading until you heard "click",the installation is in place.
-
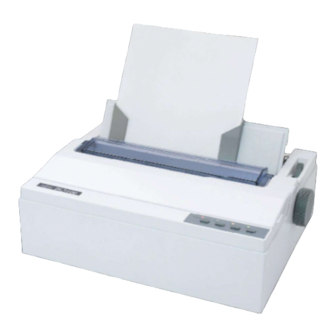
Page 24: Printer Components
FUJITSU DL3100 PRINTER COMPONENTS Sub Guide Please for the explanation of each parts, see the table of next page. User’s Manual... - Page 25 FUJITSU DL3100 Component Function Gap Lever Adjusts the print gap lever according to the thickness of paper Paper Guides Adjusts positioning of single sheet paper Sub Guide Pull the sub-guide out as required to the paper size Sheet Feeder Place the single paper, in order to load and eject.
-
Page 26: The Explanation Of Symbols On The Printer
FUJITSU DL3100 - Power Switch EXPLANATION OF SYMBOLS Turms the printer power ON ( Printable Condition ) / OFF ON THE ( Unprintable Condition ). PRINTER - Print Head The print head become extremely hot during printer operation and remain so immediately afterwards. Do not touch these parts until sufficient time has passed to allow them to cool. -
Page 27: Chapter 2 Setting Up Printer
FUJITSU DL3100 CHAPTER 2 SETTING UP PRINTER SETTING UP PRINTER Your new printer is easy to install and set up. This chapter tells you how to set up the printer and start printing right away. In this chapter, you will learn how to:... -
Page 28: Install Ribbon
FUJITSU DL3100 INSTALL Installing the Ribbon cartridge RIBBON CAUTION <HOT> The print head and metal frame is hot during printing or immediately after printing. Do not touch (HOT) them until it cools down. 1. Ensure the power to the printer is off. Open the printer’s cover backward and remove it upward. - Page 29 FUJITSU DL3100 3. Install the recess positions ①-② on the ribbon cassette into the printer mounting. Press the ribbon frame to install it properly. 4. Pull out the ribbon guide stuck on the ribbon case with holding both ends of the ribbon guide.
- Page 30 FUJITSU DL3100 6. Adjusting the print gap lever according to the paper thickness. 7. Close the printer’s cover. When printer is in operation, ensure the printer’s cover is closed to keep the noise level to a minimum, to ensure the user security when the printer is operated.
-
Page 31: Install The Single Sheet Feeder
FUJITSU DL3100 INSTALL THE Install the single sheet feeder into the rear of the printer. If SINGLE SHEET you intend to use this paper way, assure having removed the FEEDER fanfold paper out of the rear tractor paper way by pressing [Load/Eject]Key. -
Page 32: Connecting The Interface Cable
FUJITSU DL3100 CONNECTING The USB port is located at the rear of the printer. INTERFACE IMPORTANT: Make sure the printer and the computer are switched off before connecting or disconnecting the CABLE interface cable to prevent electrical damage to the interface ports. -
Page 33: Connecting The Power Supply
FUJITSU DL3100 CONNECTING Checking the printer voltage THE POWER SUPPLY Make sure that the device has been set according to your country’s power supply voltage. To do this, check the rating plate at the back of the printer. Contact your dealer if the setting is incorrect. -
Page 34: Installing The Printer Driver
- These printer drivers run with ESC/P2 emulation. Be sure to specify ESC/P2 emulation for the printer mode. - The DL3100 printer driver is a printer driver for monochrome printing. - The color data printing result may differ from its print preview or the monochrome data printing result. - Page 35 FUJITSU DL3100 1. Select the installation document “dlsetup” in the driver folder, double click it. The following window will appears, click ”OK”. 2. Select ”Add a Printer Driver package” and click ”OK” . User’s Manual...
- Page 36 3. If the following window appears, choose the “Always trust software…….”, click “Install”. 4. Connect the printer to the computer and switch on the printer. When the printer power on, it will install the DL3100 driver automatically. When the installation is finished, click “ok”. User’s Manual 2-10...
- Page 37 FUJITSU DL3100 5. You can find you printer in the print device in your computer. Right click and then select the Printer properties. Click the “Print Test Page” can print the Driver Test Page. User’s Manual 2-11...
- Page 38 FUJITSU DL3100 User’s Manual 2-12...
-
Page 39: Chapter 3 Paper Installation Guide
FUJITSU DL3100 CHAPTER 3 PAPER INSTALLATION GUIDE PAPER INSTALLATION GUIDE The printer can handle either single sheets or continuous forms. Single sheets, also called cut sheets, include envelopes and non-continuous, multipart forms. Continuous forms include labels and multipart forms fed into the printer using the forms tractors. The printer is able to print 1~5 plies multipart paper. -
Page 40: Adjusting The Print Gap Lever
FUJITSU DL3100 ADJUSTING THE PRINT Remove any paper clip or staple. Do not load paper that GAP LEVER has been folded or damaged, wrinkled, or curled. The print gap lever is on the left side of the printer inside the top cover. Take care to adjust the print gap lever to a suitable position whenever you change the number of copies being printed. -
Page 41: Friction Feed Handling
FUJITSU DL3100 There are 2 paper feed modes: friction feed and tractor FRICTION FEED feed. HANDLING Raise the single sheet feeder until it locks into its mounting. Move the paper select lever forward to “ ” for friction feed mode. Make sure that no paper is in the printer when you switch the paper path. -
Page 42: Tractor Feed Handling
FUJITSU DL3100 TRACTOR FEED 1. Remove the sheet feeder. HANDLING 2. Move the paper select lever backward to “ ” for continuous paper position. 3. Adjust the print gap lever if necessary. 4. Raise the tractor doors and fit the first 3 paper holes onto the left tractor pins. - Page 43 FUJITSU DL3100 6. Installing the sheet feeder horizontally. 7. Press the [Load/Eject] key to load the paper to the starting print position. The printer is now ready to print in the online state. Attention: If you want to use continuous paper, make sure that the sheet feeder is not standing.If the sheet feeder is in...
-
Page 44: Continuous Paper Placement
FUJITSU DL3100 CONTINUOUS 1. Place the printer on a solid base. The minimum suitable PAPER height of the solid base is 75 cm. PLACEMENT 2. Left and right positioning: The direction of continuous paper should be parallel with the sheet feeder. The tolerance should be less than 3 cm. -
Page 45: Tips On Paper Handling
FUJITSU DL3100 TIPS ON PAPER General Tips HANDLING Use high-quality paper. Do not use paper that is wrinkled or curled at the edges. Do not use paper with staples or metal parts. Do not use paper with unpredictable variations in... - Page 46 FUJITSU DL3100 User’s Manual...
-
Page 47: Chapter 4 Control Panel Operation
FUJITSU DL3100 CHAPTER 4 CONTROL PANEL OPERATION CONTROL PANEL OPERATION This chapter describes the following everyday printing operations: - LED Indicators - Control Panel Keys - Panel Operation - Online State - Setup State - Power-on State User’s Manual... - Page 48 FUJITSU DL3100 There are 4 switches S1~S4 and 4 LEDs L1~L4. The meaning and application of each switch and LED are described below pages. Attention: The LED may sometimes light when the platen knob rotates or the carrier moves, even when the power is OFF.
-
Page 49: Led Indicators
FUJITSU DL3100 Function INDICATORS Power/Paper Out (Red) Font1 (Orange) Font2 (Orange) Online (Green) 1.“Power/Paper Out” LED: On: Power on Flashing: Paper out, Energy saving mode. Flashing + buzzer: Paper jam 2. Font 1 and Font 2” LED Flashing together: Indicates continuous paper is at tear-off position;... -
Page 50: Control Panel Keys
FUJITSU DL3100 CONTROL Switch Label PANEL KEYS Tear off LF/FF Load/Eject Online 1.“Tear Off” Key: This is valid for tractor mode only. It feeds the form to the tear-off position. After tearing off the form, printing starts on the next TOF by pressing any key or receiving print data from the host. - Page 51 FUJITSU DL3100 3.“Load/Eject” Key: Load: Automatically loads the paper (according to path selection) when no paper is on the platen. Eject: For rear tractor, it retracts the form from the platen to allow users to install cut sheets. (NOTE: Users have to toggle the path selection lever.) For cut sheets, it ejects the form on...
- Page 52 FUJITSU DL3100 5.“Clear Buffer and Reset” Key: In offline state, press switch S1 while holding S4. Clears the print buffer. beeps once upon completion Pressing S1 longer initializes the printer to default settings. Beeps 3 times upon completion. User’s Manual...
-
Page 53: Panel Operation
FUJITSU DL3100 PANEL There are 3 states of operation: Online, Setup and Power OPERATION In the Online state, the keys provide the following functions: Go to Tear Off position, Line Feed/Form Feed, Load/Eject, Clear Buffer and switch to offline state for accessing to Setup state. -
Page 54: Online State
FUJITSU DL3100 ONLINE STATE Function Switch Function Description Name Operation This is valid for tractor mode only. It feeds the form L2, L3 to the tear-off position. After tearing off the form, Tear Off {S1} flash printing starts on the next TOF by pressing any key or receiving print data from the host. -
Page 55: Setup State
FUJITSU DL3100 SETUP STATE 3 seconds setup state Function Switch Function Description Name Operation Toggling to the Online state will cause the printer to go into a ready-to-print state. Any changes made in Setup Online state {S4} L4 on state will be saved permanently. Lighting up L4 indicates the Online state. - Page 56 FUJITSU DL3100 2 Seconds setup state Hold the S3 key for 2 seconds,toggles to 2s Setup state. Indicated by flashing L1.In the 2 seconds setup state,Press S1(Tearoff button)can choose the silent mode, the buzzer will call, you can set the automatic silent mode,print once,print twice, and print thrice.
-
Page 57: Power-On State
FUJITSU DL3100 POWER-ON STATE Function Switch Function Description Name Operation Beeps once to indicate going into hex dump mode: Prints data from host in hexadecimal representation. Pressing S4 suspends the printing. Hex Dump [S3] When the hex dump has finished, pressing S4 forces the printing of the last line of data, as any line termination control code from host has no function. - Page 58 FUJITSU DL3100 User’s Manual 4-12...
-
Page 59: Chapter 5 Printer Setting Changes
FUJITSU DL3100 CHAPTER 5 PRINTER SETTING CHANGES PRINTER SETTING CHANGES In order to meet specific print requirements, the printer configurations may be changed as follows: Hold down the [ Tear off] key while powering on the printer and then release the key when the print head starts to move. -
Page 60: System Setup
FUJITSU DL3100 SYSTEM SETUP System setup Valid Settings Function Language English, Deutsch, Allows user to select one of the following Poccия, Italiano, languages: English, German, Russian, Italian, Français, Español, French, Spanish and Turkish, Portuguese Türkçe, Português ESC/P2, IBM Emulation Selects the printer emulation. This should be the same as the host printer driver. - Page 61 FUJITSU DL3100 System setup Valid Settings Function OFF, 1min, 2min, Power-Saving Defines the idle period before the printer gets 5min, 10min into Save-energy Mode. OFF: The printer never goes into Save-energy Mode. MultiPaper Disable, Standard, Disable: The printer ignores the determination Enhance of paper thickness sensor;...
-
Page 62: Paper Setup
FUJITSU DL3100 PAPER SETUP Paper Setup Valid Settings Function Single FormLen 2.5, 11/4, 3, 3.5, 11/3, 4, 5, Sets the page length in inches for 5.5, 6, 7, 8, 9, 10, 11, 12, 14, single paper A4, B4, Define -1, 0, 1, 1.8, 2, 3, 4, 5, 6, 7, 8,... - Page 63 FUJITSU DL3100 Paper Setup Valid Settings Function Fanfold Left 0, 1, 2, 3, 4, 5, 6, 7, 8, 9, 10, Compensation value added to Mrg (1/90inch) Define Fanfold Left Mrg. 0, 1, 2, 3, 4, 5, 6, 7, 8, 9, 10,...
- Page 64 FUJITSU DL3100 Paper Setup Valid Settings Function Compress Disable, 11:8, 13.6:8, Auto Disable: No compression on the print line exceeding the printable width. Auto: The print squeezes an over-width print line (not exceeding 22" in contents) to the printable width.
- Page 65 FUJITSU DL3100 Paper Setup Valid Settings Function No, Yes Yes: Measures the width of the paper (Auto Paper automatically after loading the Width detection) paper. No: Disables page width measurement. NOTE: The printer is equipped with a page width sensor called “APW”.
- Page 66 FUJITSU DL3100 Paper Setup Valid Settings Function Bail mode Invalid, Standard, Special The bail mode presses the paper against the print platen during printing, but it is released for paper loading. Invalid: If you uninstall the lever or want to disable the function, set this setting to “invalid”.
- Page 67 FUJITSU DL3100 Paper Setup Valid Settings Function Set the line feed correction quantity Fanfold LF Adj Level+D, Level+C, for continuous paper. (Correct the Level+B, Level+A, line feed deviation when the line Normal, Level-A, feed is approximately 0.5 inch. If the...
-
Page 68: Interface Setup
FUJITSU DL3100 INTERFACE SETUP Interface setup Valid Settings Function No, Yes No: Disables plug and play for USB Yes: Enables plug and play. No, Yes USB ID No: Disables USB ID. Yes: Enables USB ID *The following options can only be set when carrying the RS232C Interface... - Page 69 FUJITSU DL3100 * The following options can only be set when carrying the Parallel interface Interface setup Valid Settings Function Interface Share,LPT,USB Share: Printer can detect the type of input signal and activate USB port or LPT port automatically. LPT: Printer can only use LPT port.
-
Page 70: Character Setup
FUJITSU DL3100 CHARACTER SETUP Character setup Valid Settings Function Character Table Italic, Graphic Italic: Selects standard character sets. Please refer to Standard character set 2 table in Chapter E for details. Graphic: Selects IBM character sets. Please refer to IBM character set 2 table in Chapter E for details. - Page 71 FUJITSU DL3100 Character setup Valid Settings Function CP437, CP737, Code Page Code page selections CP850, CP851, CP852, CP857, CP858, CP860, CP861,CP863, CP864, Extend864, CP865, CP866, Bulgaria866, CP1250, CP1251, CP1252, CP1253, CP1254, 8859_1, 8859_1SAP, 8859_2, 8859_5, 8859_7, 8859_9, 8859_15, BRASCII, Abicomp, Roman8,...
-
Page 72: Other Setup
FUJITSU DL3100 OTHER SETUP Other setup Valid Settings Function No, Yes Form Length No: Form length commands are invalid. Ctrl Yes: Form length commands are valid. Print Speed Ctrl No, Yes No: Print speed commands are invalid. Yes: Print speed commands are valid. -
Page 73: German (Deutsch)
FUJITSU DL3100 German (Deutsch) Systemeinstellung Gültige Werte English, Deutsch, Poccия, Italiano, Français, Español, Sprache Türkçe, Português Emulation ESC/P2, IBM Nein, Ja Auto CR (ESC/P2) Nein, Ja Auto CR (IBM) Nein, Ja Auto LF Bi-Dir, Uni-Dir Druck Dir Tabellenlinien Gestrichelt, Verbunden, Gepunktet, Deaktiviert Null 0, Ø... - Page 74 FUJITSU DL3100 Papier Setup Gültige Werte Perforationssprung Nein, Ja Auto, Manuelles, Kurz, Auto@FF Abreißen Nein, Ja Papierendeerkennung Ungültig, 11: 8, 13.6: 8, Auto Komprimieren Papierhandhabung Aus, Anti-Stau, Anti-Schräg, Ein Summer Nein, Ja Abreißposition Nein, Erkennen, Speichern Nein, Ja Nein, Ja BlackMark 8.0inch, Papierbreite...
- Page 75 FUJITSU DL3100 Zeichensatz CP437, CP737, CP850, CP851, CP852, CP857, CP858, CP860, CP861, CP863, CP864, Extend864, CP865, CP866, Bulgaria866, CP1250, CP1251, CP1252, CP1253, CP1254, 8859_1, 8859_1SAP, 8859_2, 8859_5, 8859_7, 8859_9, 8859_15, BRASCII, Abicomp, Roman8, CoaxTwinax, New437, NewDig850, OldCode860, Flarro863, Hebrew865, CP1257, Ukraine866, Kazakhst866, Kamenicky, Mazovia,...
-
Page 76: Russian (Россия)
FUJITSU DL3100 Russian (Россия) обновление системы Правильные значения English, Deutsch, Poccия, Italiano, Français, Español, язык Türkçe, Português Эмуляция ESC/P2, IBM НET, ДA Авто CR ( ESC/P2) НET, ДA Авто CR (IBM) НET, ДA Авто LF oднoнaпpB, дByнaпpB Направленниe пeчати Контурная линия... - Page 77 FUJITSU DL3100 Настройка стpaницы Правильные значения Пропуск перфорации НET, ДA Авто, ручной, короткий, Авто@FF Отрыв бумаги HET, ДA Oлpeдел конeц бумаг Недейств, 11: 8, 13.6: 8, Auto Сжатие Обpaшeниe c бумагой Лoдключен, Aнти-застой, Aнти-cклoн, отключен Сигнал HET, ДA Позиции отрыва...
- Page 78 FUJITSU DL3100 Настройка знаков Правильные значения Koдoвaя cтpaницa CP437, CP737, CP850, CP851, CP852, CP857, CP858, CP860, CP861, CP863, CP864, Extend864, CP865, CP866, Bulgaria866, CP1250, CP1251, CP1252, CP1253, CP1254, 8859_1, 8859_1SAP, 8859_2, 8859_5, 8859_7, 8859_9, 8859_15, BRASCII, Abicomp, Roman8, CoaxTwinax, New437, NewDig850, OldCode860, Flarro863, Hebrew865,...
-
Page 79: Italian (Italiano)
FUJITSU DL3100 Italian (Italiano) Setup sistema Impostazioni Valide English, Deutsch, Poccия, Italiano, Français, Español, Linguaggio Türkçe, Português Emulazione ESC/P2, IBM No, Si Auto CR (ESC/P2) No, Si Auto CR (IBM) No, Si Auto LF Bi-Dir, Uni-Dir Direz.Stampa Linee Formato Disconnessa, Connessa, riga aghi, Non stampa Zero 0, Ø... - Page 80 FUJITSU DL3100 Imposta carta Impostazioni Valide Salto Perforazione No, Si Auto STP, STP manuale, STP corto, Auto@FF Strappo No, Si Vede fine carta Non valido, 11:8., 13.6:8, Auto Comprime Gestione carta Invalido, Non inceppa, Antiscivolo, Valido, , Cicalino No, Si...
- Page 81 FUJITSU DL3100 Imposta caratteri Impostazioni Valide Code Page CP437, CP737, CP850, CP851, CP852, CP857, CP858, CP860, CP861, CP863, CP864, Extend864, CP865, CP866, Bulgaria866, CP1250, CP1251, CP1252, CP1253, CP1254, 8859_1, 8859_1SAP, 8859_2, 8859_5, 8859_7, 8859_9, 8859_15, BRASCII, Abicomp, Roman8, CoaxTwinax, New437, NewDig850, OldCode860,...
-
Page 82: French (Français)
FUJITSU DL3100 French (Français) Configuration Système Paramètres Valides Language English, Deutsch, Poccия, Italiano, Français, Español, Türkçe, Português ESC/P2, IBM Emulation Non, Oui RC-Auto (ESC/P2) Non, Oui RC-Auto (IBM) Non, Oui SL-Auto Bidir, Unidir Dir Impr Ligne forméà Discontinue, Continue, Pointillé, Non imprime 0, Ø... - Page 83 FUJITSU DL3100 Réglage papier Paramètres Valides Saut perforation Non, Oui Auto, Manuelle, Courte, Auto@FF Coupe Non, Oui Détect. Fin Papier Non, 11:8, 13.6:8, Auto Condense Gestion Papier Non, Bourrage, Anti-biais, Oui, Alarma Non, Oui Position de Coupe Non, Détecter, Enregistrer...
- Page 84 FUJITSU DL3100 Parametrage Caractere Valid Settings Code Page CP437, CP737, CP850, CP851, CP852, CP857, CP858, CP860, CP861, CP863, CP864, Extend864, CP865, CP866, Bulgaria866, CP1250, CP1251, CP1252, CP1253, CP1254, 8859_1, 8859_1SAP, 8859_2, 8859_5, 8859_7, 8859_9, 8859_15, BRASCII, Abicomp, Roman8, CoaxTwinax, New437, NewDig850, OldCode860,...
-
Page 85: Spanish (Español)
FUJITSU DL3100 Spanish (Español) Menu. Sistema Ajustes validos English, Deutsch, Poccия, Italiano, Français, Español, Lenguage Türkçe, Português Emulación ESC/P2, IBM No, Si Auto CR (ESC/P2) No, Si Auto CR (IBM) No, Si Auto LF Bi-Dir, Uni-Dir Direccion Imp Linea del Formato Desconect, Conectado, Línea Punto, Sin Impr. - Page 86 FUJITSU DL3100 Config. Papel Ajustes validos Corte Automatico, Manual, Corto, Auto@FF No, Si Detec. Fin de Papel Inválido, 11:8, 13.6:8, Auto Condensado Inválido, Anti-atasco, Anti-desvío, Válido, Manejo de Papel Alarma No, Si Posición de Corte Inválido, Detectar, Registrar Det. Ancho de Papel...
- Page 87 FUJITSU DL3100 Pagina Codigos CP437, CP737, CP850, CP851, CP852, CP857, CP858, CP860, CP861, CP863, CP864, Extend864, CP865, CP866, Bulgaria866, CP1250, CP1251, CP1252, CP1253, CP1254, 8859_1, 8859_1SAP, 8859_2, 8859_5, 8859_7, 8859_9, 8859_15, BRASCII, Abicomp, Roman8, CoaxTwinax, New437, NewDig850, OldCode860, Flarro863, Hebrew865, CP1257, Ukraine866,...
-
Page 88: Turkish (Türkce)
FUJITSU DL3100 Turkish (Türkce) Sistem Ayar Durumu Valid Settings Lisan English, Deutsch, Poccия, Italiano, Français, Español, Türkçe, Português Emülasyon ESC/P2, IBM Hayır, Evet Otom. Satırbaşı (ESC/P2) Hayır, Evet Otom. Satırbaşı (IBM) Otom. Satır besleme Hayır, Evet Baskı Yönü Ÿki-Yöne, Tek-Yöne Kağıt satırı... - Page 89 FUJITSU DL3100 Kağıt Ayarı Geçerli ölçüler Sür. Form Oto Kğt Hayır, Evet Hayır, Evet Delik atlama Oto. kesim, Elle kesim, Kısa kesim, Auto@FF Kağıt kesme Hayır, Evet Sayfa sonu algı Gnş Baskı sıkıştma Geçersiz, 11:8, 13.6:8, Auto Eğrilik önleme Sıkışıklık, engel, Geçerli, Geçersiz Ikaz Hayır, Evet...
- Page 90 FUJITSU DL3100 Karakter Ayarı Geçerli ölçüler Kod Sayfası CP437, CP737, CP850, CP851, CP852, CP857, CP858, CP860, CP861, CP863, CP864, Extend864, CP865, CP866, Bulgaria866, CP1250, CP1251, CP1252, CP1253, CP1254, 8859_1, 8859_1SAP, 8859_2, 8859_5, 8859_7, 8859_9, 8859_15, BRASCII, Abicomp, Roman8, CoaxTwinax, New437, NewDig850, OldCode860, Flarro863, Hebrew865,...
-
Page 91: Portuguese (Português)
FUJITSU DL3100 Portuguese (Português) Config. Sistema Valores válidos Linguagem English, Deutsch, Poccия, Italiano, Français, Español, Türkçe, Português Emulação ESC/P2, IBM Não, Sim Auto CR (ESC/P2) Não, Sim Auto CR (IBM) Não, Sim Auto LF Bi-Dir, Uni-Dir Direção Imp. Linha forma... - Page 92 FUJITSU DL3100 Config. Papel Valores válidos Salte perfuração Não, Sim Automático, Manual, Corto, Auto@FF Corte Não, Sim Detec. Fim de Papel Desativo, 11:8, 13.6:8, Auto Condensado Manuseio de Papel Inválido, Anti-atola, Anti-desvio, Válido Cigarra Não, Sim Posição de corte Inválido, Detectar, Registrar Não, Sim...
- Page 93 FUJITSU DL3100 Config. Caráter Valores válidos Página de Código CP437, CP737, CP850, CP851, CP852, CP857, CP858, CP860, CP861, CP863, CP864, Extend864, CP865, CP866, Bulgaria866, CP1250, CP1251, CP1252, CP1253, CP1254, 8859_1, 8859_1SAP, 8859_2, 8859_5, 8859_7, 8859_9, 8859_15, BRASCII, Abicomp, Roman8, CoaxTwinax,...
-
Page 94: Black Mark Paramenters
FUJITSU DL3100 BLACK MARK This printer uses tractors to load fanfold forms with pre-printed PARAMENTERS black marks. The printer requires 3 parameters to print on paper with black marks: 1. Horizontal offset of black mark from the edge of page (called Black Mark Physical Horizontal Position);... - Page 95 FUJITSU DL3100 The procedures to set the parameters: 1. Hold down the [Tear off] key while powering on the printer and then release the key when the print head starts to move. After loading paper, the printer prompts the Printer Settings...
- Page 96 FUJITSU DL3100 5. Ensure to place the lever at position. Then press the [Load/Eject] key to load the black marked form. The top edge of the form will then align with the printer’s tear-off blade. Press Next or Back until you see the black mark marginally exposed out of the tear-off blade.
- Page 97 FUJITSU DL3100 7.When you respond with “OK” to set the vertical offset, the printer prompts you to reload a black marked fanfold form: Press any key to eject the paper, and load paper with black mark in the Fanfold Path.
-
Page 98: Bidirectional Alignment
FUJITSU DL3100 BIDIRECTION When wiggling vertical grids appears in tabular reports, you should adjust the Bidirectional Alignment. The procedures to ALIGNMENT adjust bi-directional alignment across adjacent line grids: 1. Hold down the [Tear off] key while powering on the printer and then release the key when the print head starts to move. - Page 99 FUJITSU DL3100 Take “Single paper text” as an example: Press [Load/Eject] to confirm the current settings, choose “Single paper text” bidirection test and longitudinal correction mode. Due to “Single paper text” bidirection test and longitudinal correction mode contains five modes: “LQ (360DPI)”, “NLQ (180DPI)”, “Draft (120DPI)”, “Hight Draft...
- Page 100 FUJITSU DL3100 6. When the printing character “|” forms a continuous line, the bi-directional printing of this pattern has been corrected. Press [Load/Eject] key , the printer will indicates: Save the parameter setting ( [LOAD/EJECT] or [ONLINE] = OK ,[LF] = Next) Press [LF/FF] or [Tear Off] to choose “Yes”...
- Page 101 FUJITSU DL3100 Bi-directional Alignment: Single paper text LQ (360DPI) Single paper text NLQ (180DPI) Single paper text Draft (120DPI) Single paper text High Draft (80DPI) Single paper text Dual density graph (240DPI) Single paper graphy LQ (360DPI) Single paper graphy...
-
Page 102: Restore Factory Default
FUJITSU DL3100 RESTORE The procedures to restore factory default settings: FACTORY 1. Hold down the [Tear off] key while powering on the printer DEFAULT and then release the key when the print head starts to move. After loading paper, the printer prompts the Printer Settings... -
Page 103: Hex Dump
FUJITSU DL3100 Hex Dump Beeps once to indicate going into hex dump mode: Prints data from host in hexadecimal representation. Pressing S4 suspends the printing. When the hex dump has finished, pressing S4 forces the printing of the last line of data, as any line termination control code from host has no function. -
Page 104: Dlmenu
Connect the printer to the system using USB or Parallel cable. Power up the printer. Run the tool from the Windows Start menu by selecting All Programs, and then FUJITSU Printer Setup. For more information on how to use the tool, go to the Help menu and select User Guide. -
Page 105: Chapter 6 Customized Form
FUJITSU DL3100 CHAPTER 6CUSTOMIZED FORM CUSTOMIZED FORM This printer allows the customization on the form length, TOF, bottom margin and left margin for single sheets and fanfold. Selecting the Define value(s) in section 5.2 (Paper Setup menu) allows the printer to take up the customized page formatting value(s). -
Page 106: Customize Cut Sheet Form Length
FUJITSU DL3100 CUSTOMIZE 1. Hold down both the [Online] and [Load/Eject] keys while CUT SHEET powering on the printer and then release the keys when the FORM carriage initializes and beeps once. After loading a form the printer prompts: LENGTH... - Page 107 FUJITSU DL3100 Illustrations for above step 1 and step 2. 4. Follow the given prompt to unload the conversation form. Load the customized form to allow the printer to scan the page length. After the measurement, load another conversation form to let the printer print out the measured length.
-
Page 108: Customize Cut Sheet Tof
FUJITSU DL3100 1. After you follow through all the steps in 6.1 or you input “Next” CUSTOMIZE in step 3 in 6.1, the printer prompts: CUT SHEET Top Margin 2. You may skip to other customized settings by pressing “Next” or “Back”. -
Page 109: Customize Cut Sheet Bottom Margin
FUJITSU DL3100 CUSTOMIZE 1.After you follow through all the steps in 6.2 or you input “Next” twice in step 3 in 6.1, the printer prompts: CUT SHEET BOTTOM Bottom Margin MARGIN 2. The remaining operations are nearly the same as described in section 6.2. -
Page 110: Customize Fanfold Page Formatting Parameters
FUJITSU DL3100 The customizations of the form length, TOF, bottom and left CUSTOMIZE margins for fanfold are exactly the same as describe. All you FANFOLD need is to bypass the Single Sheet menu under Customize PAGE Form. Follow step 1 in section 6.1:... -
Page 111: Customize Tear Position
FUJITSU DL3100 1. Press the [Online] and [Load/Eject] together when turning CUSTOMIZE on the printer, release the buttons until the print head is reset TEAR and the sound is heard. POSITION 2. Put on paper, printer will load the paper will be transferred and printed automatically. - Page 112 FUJITSU DL3100 The printer returns the paper first, a. If using the tractor paper, press [Load/Eject] to feed paper. b. If using paper is single paper, move the paper feeding lever until the“ ” appears, Switch to tractor paper, then press [Load/Eject] button to Load the paper. When...
-
Page 113: Chapter 7 Maintenance
FUJITSU DL3100 CHAPTER 7 MAINTENANCE MAINTENANCE Your printer requires very little care. Occasional cleaning and replacement of the ribbon cartridge are all that is required. Cleaning is recommended approximately every 6 months or 300 hours of operation, whichever is sooner. -
Page 114: Cleaning
FUJITSU DL3100 CLEANING Cleaning and Vacuuming the Printer WARNING To avoid any possibility of injury, before cleaning the printer, turn off the power to both the printer and the computer, and unplug the printer. CAUTION<HOT> The print head and metal frame is hot during printing or immediately after printing. - Page 115 FUJITSU DL3100 4. Open the cover of the printer and remove the ribbon cartridge. Using a soft vacuum brush, gently vacuum the platen, the print head carriage and shaft, and surrounding areas. You can easily slide the print head to the left or right when the power is off.
-
Page 116: Cleaning The Platen ( Paper Rollers )
FUJITSU DL3100 Clean the platen and paper bail rollers occasionally or CLEANING THE when stains or smudges appear on the paper. Use a mild PLATEN ( PAPER detergent as appropriate. ROLLERS ) Use the platen cleaner recommended by your supplier and proceed as follows: 1. -
Page 117: Replace The Ribbon
FUJITSU DL3100 REPLACE THE There are two ways of replacing the ribbon. You can install a new ribbon cassette in the printer or refill the old ribbon RIBBON cassette with new fabric. Chapter A lists order numbers for ribbon cassettes. The following procedure is for ribbon cassettes. - Page 118 FUJITSU DL3100 3. Remove the ribbon guide 4. To remove the ribbon cassette, pull the underside of ribbon cassette and carefully lift the cartridge out ofthe printer. 5. Remove the ribbon guide (blue part)from the ribbon cassette. Don’t turn the ribbon feed knob before installation...
- Page 119 FUJITSU DL3100 6. Put the blue ribbon guide into the space in front of print head. And then place the mounting pins (both side of ribbon cassette) on the slot of the printer cover. And then push the ribbon cassette so that the ribbon cassette is installed horizontally.
- Page 120 8. Turn the ribbon feed knob clockwise to take up any slack in the ribbon. 9. Close the front cover. NOTE A Fujitsu ribbon cassette is recommended. Don’t use other cassettes.If other cassettes are used, operating problems or a damage of the print head may be caused. User’s Manual...
-
Page 121: Chapter 8 Trouble-Shooting
FUJITSU DL3100 CHAPTER 8 TROUBLE-SHOOTING TROUBLE-SHOOTING Your printer is extremely reliable, but occasional problems may occur. You can solve many of these problems yourself, Using this chapter. If you encounter problems that you cannot resolve, contact your dealer for assistance. -
Page 122: Solving Problems
FUJITSU DL3100 SOLVING Print Quality Problems PROBLEMS Poor print quality or other printing problems are often caused by incorrect printer setup or incorrect software settings. A gradual decrease in print quality usually indicates a worn ribbon. Table 8.1 identifies common print quality problems and suggests solutions. - Page 123 FUJITSU DL3100 Problem Solution Printing is vertically misaligned Use the printer's vertical alignment (jagged). function to check the vertical print alignment. If necessary, adjust the print alignment. The top margin is wrong. Check whether the application top margin setting and the setting of top margin is correct,and enter the margin setting again.
-
Page 124: Paper Handling Problems And Solutions
FUJITSU DL3100 Paper Handling Problems and Solutions Table 8.2 describes common paper handling problems and suggests Table 8.2 Paper Handling Problems and Solutions Problem Solution Paper cannot be loaded or fed. Make sure that the paper select lever located on the top right of the printer is set correctly. - Page 125 FUJITSU DL3100 Problem Solution An ejection error occurs even It is conceivable that the paper after the paper has been sensor is malfunctioning. In this completely ejected. case, carry out the following Or, printing continues even after corrective action.
-
Page 126: Operating Problems And Solutions
FUJITSU DL3100 Operating Problems and Solutions Table 8.3 identifies common operating problems and suggests solutions. If you cannot resolve a problem, contact your dealer. Table 8.3 Operating Problems and Solutions Problem Solution The power does not turn on. Check whether the mains voltage is ... -
Page 127: Printer Failures
FUJITSU DL3100 Printer Failures A user cannot generally resolve a problem involving defective printer hardware. Power off and on again the printer to recover any fatal error. If the problem cannot be resolved, contact your dealer or service partner Error Indications on LEDs... -
Page 128: Diagnostic Functions
FUJITSU DL3100 The printer diagnostic functions are Self-Test page, DIAGNOSTIC hex-dump mode and print alignment adjustment. FUNCTIONS Self-Test page: Tells you whether the printer hardware is functioning correctly. If the printer hardware is functional, any problems you are having are probably caused by incorrect printer settings, incorrect software settings, the interface, or the computer. -
Page 129: Chapter A Supplies And Options
FUJITSU DL3100 CHAPTER A SUPPLIES AND OPTIONS SUPPLIES AND OPTIONS This chapter lists the supplies and options available for the printer. Contact your dealer for information on ordering any of these items. SUPPLIES Supplies Order Number Ribbon cassette Black ribbon KA02100-0201 User’s Manual... - Page 130 FUJITSU DL3100 Use’s Manual...
-
Page 131: Chapter B Printer And Paper Specifications
FUJITSU DL3100 CHAPTER B PRINTER AND PAPER SPECIFICATIONS PRINTER AND PAPER SPECIFICATIONS This chapter gives the physical, functional, and performance specifications for the printer. It also gives detailed paper specifications. PHYSICAL Dimensions: SPECIFICATIONS Height: 146mm Width: 369mm Length: 283.3mm Weight: 5.48kg... -
Page 132: Functional Specifications
FUJITSU DL3100 FUNCTIONAL Print method Impact dot matrix with a 0.20 mm, SPECIFICATIONS 24-wire head Print direction Bidirectional logic-seeking or unidirectional seeking Character cell Horizontal × vertical LQ (10cpi): 24 × 24 dots NLQ (10cpi): 18 × 24 dots Draft (10cpi): 12 × 24 dots High speed draft (10cpi): 8 ×... - Page 133 FUJITSU DL3100 Paper size Cut sheet 3.75~10.5 inch (W) x 4.5~14.3 inch (L) 95~ 267 mm (W) x 114.3~364 mm (L) Fanfold paper 3.75~10.5inch (W) x 4.5~22.0 inch (L) 95~267 mm (W) x 101.6 mm ~ (L) Paper thicknes Cut sheet/Fanfold paper: 0.065~0.14mm Copy paper: 0.06~0.065mm...
- Page 134 FUJITSU DL3100 Characters per line 10cpi: 80cpl 12cpi: 96cpl 15cpi: 120cpl 17.1cpi: 136cpl 20cpi: 160cpl cpi: characters per inch cpl: characters per line User’s Manual...
-
Page 135: Performance Specifications
FUJITSU DL3100 PERFORMANCE Print speed SPECIFICATIONS High speed Draft Pitch draft 10cpi 450(80dpi) 300(120dpi) 200(180dpi) 120(240dpi) 12cpi 360(120dpi) 360(120dpi) 240(180dpi) 120(360dpi) 15cpi 450(120dpi) 450(120dpi) 300(180dpi) 150(360dpi) 17.1cpi 340(180dpi) 340(180dpi) 340(180dpi) 170(360dpi) 20cpi 400(180dpi) 400(180dpi) 400(180dpi) 200(360dpi) cpi: characters per inch... - Page 136 FUJITSU DL3100 Certification Safety: Model Certification Regulation country M33342A UL60950-1 United States CSA 60950-1 (for 100 to 120VAC) Canada M33342B CE-LVD EN60950-1 (for 220 to 240VAC) Europe EN60950-1 (for 220 to 240VAC) Germany EMI regulation: Model Certification Regulation country M33342A...
- Page 137 FUJITSU DL3100 PAPER Print Area SPECIFICATIONS This section illustrates the recommended print area for single sheets and continuous forms. Feeding paper by friction (single paper) Printing area printable area Min. Max. Title Paper width 3.75 10.5 Printable width 203.2 Top margin 0.17...
-
Page 138: Paper Specifications
FUJITSU DL3100 Paper specifications Type of Paper Number of Parts Ream weight (kg) Remark Single sheet 45,55,70 Ream weight paper Carbonless 34,43,55,70* with * mark only can 34,43,55*,70* be used as the bottom layer under carbon 34,43*,55*,70* paper. 34,43*,55* Attention 1: Ream weight means weight of 1000 sheets of full-sized paper (788*1091) (Kg). - Page 139 FUJITSU DL3100 Push/pull tractor paper feeding (continuous paper) Printing area Title inches inches Paper width 3.75 10.5 Printable width 203.2 Top margin 25.4 Page length 101.6 363.2 Bottom margin Left margin (0 scale position) 12.7 Right margin (0 scale position) 12.7...
- Page 140 FUJITSU DL3100 Paper specifications Ream weight (kg) The weight of square Type of Paper Number of Parts Remark meters is shown in brackets. (g) Attention 1) Single sheet 45,55,70(52,64,81) Carbonless Ream weight paper 34,43,55,70* with * mark only can 34,43,55*,70*...
-
Page 141: Chapter C Command Sets
FUJITSU DL3100 CHAPTER C COMMAND SETS COMMAND SETS This chapter describes printer commands and their parameters. This printer has three resident command sets: ESC/P2 Emulation Command List IBM Emulation Command List User’s Manual... - Page 142 FUJITSU DL3100 ESC/P2 Function Command EMULATION Mechanical control COMMAND Beeper ESC U (n) Turn unidirectional mode on/off LIST n = 0 Bidirectional printing 1 Unidirectional printing Notes • Unidirectional printing provides better alignment of vertical lines, while bidirectional printing is faster.
- Page 143 FUJITSU DL3100 Function Command Set relative horizontal print position ESC \ (nL) (horizontal position) = (nH) ((nH × 256) + nL) × (defined unit) +(current position) (0 ≤ nH ≤ 127, 0 ≤ nL ≤ 255) Notes • Set the defined unit with the ESC ( U command.
- Page 144 FUJITSU DL3100 Function Command Set relative vertical print position ESC ( v (nL) (vertical position) = (nH) (mL) ((mH × 256) + mL) × (defined unit) + (top-margin (mH) position) (nL = 2, nH = 0,0 ≤ mL ≤ 255, 0 ≤ mH ≤ 127) Notes •...
- Page 145 FUJITSU DL3100 Function Command Selecting characters Select double-width printing (one line) ESC SO Select double-width printing (one line) Cancel double-width printing (one line) ESC W (n) Turn double-width printing on/off n = 1 Turns on double-width 0 Turns off double-width...
- Page 146 FUJITSU DL3100 Function Command ESC – Turn underline on/off n = 1 Turns underline on 0 Turns underline off ESC G Select double-strike printing ESC H Cancel double-strike printing ESC ! (n) Master Select Selects any combination of several font attributes and...
- Page 147 FUJITSU DL3100 Function Command ESC 4 Select italic font ESC 5 Cancel italic font ESC E Select bold font ESC F Cancel bold font ESC p (n) Turn proportional mode on/off n = 0 Returns to current fixed character pitch...
- Page 148 FUJITSU DL3100 Function Command ESC x (n) Select LQ ,NLQ or draft Selects either LQ, draft or NLQ printing according to the following values: n = 0 Draft printing 1 Letter-quality printing 2 Near Letter-quality printing ESC y (n) Select Draft/Super Draft Selects draft/super draft for ANK characters in accordance with the value for n.
- Page 149 FUJITSU DL3100 Function Command Define user-defined characters ESC & NUL Sets the parameters for user-defined characters and then (n) (m) (a0 a1 sends the data for those characters,as described below: a2.d1.d2 ..n = Character code of the first character to be...
- Page 150 FUJITSU DL3100 Function Command ESC R (n) Select an international character set Selects the set of characters printed for specific character codes, as listed below: n = 0 USA 1 France 2 Germany 3 United Kingdom 4 Denmark I 5 Sweden...
- Page 151 FUJITSU DL3100 Function Command Assign character table ESC ( t (nL) Assigns the d2 registered character table to the d1 (nH) (d1) (d2) character table according to the following values (the d1 (d3) character table is one of the three tables selectable with...
- Page 152 FUJITSU DL3100 Function Command Table name ELOT_928 TABLE_1252 TABLE_1253 TABLE_1254 NEW_437 NEW_DIG_850 TABLE_866 TABLE_737 TABLE_864 FARSI URDO OLD_CODE_860 FLARRO_863 TABLE_865 BULGARIA_866 User’s Manual C-12...
- Page 153 FUJITSU DL3100 Function Command ESC t (n) Select character table Selects the character table to be used for printing from among the three character tables described below: n = 0 Character table 0 1 Character table 1 2 Character table 2...
- Page 154 FUJITSU DL3100 Function Command Set MSB to 1 ESC > Sets the MSB (bit number 7) of all incoming data to 1 Notes • This is a nonrecommended command; most computer systems no longer require MSBcontrol. • All data is affected, including graphics data.
- Page 155 FUJITSU DL3100 Function Command Set n/360 inch line spacing ESC + (n) Sets the line spacing to n/360 inch (0 ≤ n ≤ 255) ESC A (n) Set n/60-inch line spacing Sets the line spacing to n/60 inch (0 ≤ n ≤ 85)
- Page 156 FUJITSU DL3100 Function Command Setting the page format ESC ( C (nL) Set page length in defined unit (nH) (mL) (page length) = ((mH × 256) + mL) × (defined unit) (mH) (nL = 2, nH = 0,0 < ((mH × 256) + mL) × (defined unit) ≤...
- Page 157 FUJITSU DL3100 Function Command ESC N (n) Set bottom margin Sets the bottom margin on continuous paper to n lines (in the current line spacing) from the top-of-form position on the next page. (0 < n ≤ 127, 0 < (current line spacing) × n < (page...
- Page 158 FUJITSU DL3100 Function Command Printing color and graphics ESC ( G (nL) Select graphics mode (nH) (m) Selects graphics mode (allowing you to print raster graphics)(nL = 1,nH = 0,m = 1) ESC .c (v h m Print raster graphics •...
- Page 159 FUJITSU DL3100 Function Command Counter specifies the number of times to repeat the next byte of data according to the formula below. 256 – (counter byte) + 1 = (number of times to repeat next byte) (counter byte) = 257 – (number of times to repeat next...
- Page 160 FUJITSU DL3100 Function Command Select bit image ESC * (m nL Prints dot-graphics in 8, 24-dot columns, depending on nH d1 . . . dk) the following parameters: m Specifies the dot density (see table below) nL, nH Specifies the total number of columns of graphics data that follow (number of dot columns) = ((nH ×...
- Page 161 FUJITSU DL3100 Function Command Select 60-dpi graphics ESC K (nL nH Prints bit-image graphics in 8-dot columns, at a density d1 d2 . . . dk) of 60 horizontal by 60 vertical dpi,according to the following parameters: nL, nH Specify the total number of columns (k) of graphics data following,according to the formula k = ((nH ×...
- Page 162 FUJITSU DL3100 Function Command Select 120-dpi, double-speed graphics ESC Y (nL nH Prints bit-image graphics in 8-dot columns, at a density d1 d2 . . . dk) of 120 horizontal by 60 vertical dpi,according to the following parameters: nL, nH Specify the total number of columns (k) of graphics data following, according to the formula k = ((nH ×...
- Page 163 FUJITSU DL3100 Function Command Barcode Space Adjustment ESC e 5 n 1. Description (1) Value of p defines the adjust amount on the width of a space in barcode. (Use two’s complement for negative values.) Space Adjustment -3<FD>16 -3/360 inch -1<FE>16...
- Page 164 FUJITSU DL3100 Function Command Barcode Control ESC+DC4+b+ 1. Description R+c+w+h+a+c a. Define and print barcode. h1…+chn 2. Valid values a. b number of data, in byte = actual data +6 b. R (fixed) c. c defines type of barcode. (Invalid c causes no printing.)
- Page 165 FUJITSU DL3100 Function Command f. a check digit and OCR control Description Value Function Attached Indicate if the check digit is attached *1 Not attached Printed OCR (by default, OCR-B) Blank Barcode’s left Position of flag centererd. characters for EAN, Below barcode’s left...
- Page 166 FUJITSU DL3100 Function Command g. (ch1)…(chn) Max. character and character set for different type of barcodes.: n Character Type Encoded Characters Length Numbers: 0~9 1≤n≤34 Symbols: + - . $ / : Codabar Start/Stop : Start/Stop A,a,B,b,C,c,D,d, symbols, T,t,N,n,*,E,e included.
-
Page 167: Ibm Emulation Command List
FUJITSU DL3100 Function Command EMULATION Mechanical control COMMAND Beeper LIST ESC BEL Beeper ESC U (n) Turn unidirectional mode on/off n = 0 Bidirectional printing 1 Unidirectional printing Moving the print position Carriage return ESC CR Carriage return Line feed... - Page 168 FUJITSU DL3100 Function Command Selecting characters Select double-width printing (one line) ESC SO Select double-width printing (one line) Cancel double-width printing (one line) ESC DC4 Cancel double-width printing (one line) ESC W (n) Turn double-width printing on/off n = 1 Turns on double-width...
- Page 169 FUJITSU DL3100 Function Command Set initial condition ESC [ K (n1) Format 1BH 5BH 4BH n1 n2 init id parm1 parm2 (n2) (init) Function Resets the printer to its initial state according (id) (parm1) to the following parameters. (parm2) n1 and n2 specify the number of mode bytes in the escape sequence.
- Page 170 FUJITSU DL3100 Function Command init=FEH; The printer condition is initialized to the user default setting. The parm bytes overwrite the user default setting. The values used for initialization are saved in NV RAM. The download font is cleared. init=FFH; The printer Condition is initialized to the factory default setting.
- Page 171 FUJITSU DL3100 Function Command parm2 7 : Discard byte Ignore this byte Process this byte 6 : Code Page 5 : Reserved 4 : Reserved 3 : Reserved 2 : Reserved 1 : Line Length 8.0 inches 9.4 inches 0 : Reserved id = B1H, B4H parm1 is valid.
- Page 172 FUJITSU DL3100 Function Command No Change Single-high Character Double-high Character Single Line Feed Double Line Feed No Change Single-wide Character Double-wide Character Single Line Feed Double Line Feed Select condensed printing ESC SI Select condensed printing ESC S Select superscript/subscript printing...
- Page 173 FUJITSU DL3100 Function Command Decimal fH fL Hex fH fL Font and Pitch 0 12 00 0C Prestige 10CPI 1 239 01 EF Prestige 12CPI 1 240 01 F0 Prestige 15CPI 1 201 01 C9 Prestige 17CPI 1 202 01 CA...
- Page 174 FUJITSU DL3100 Function Command Set Print Quality ESC [ d 1 0 This command sets the print quality to draft or letter quality. the value of n can be any of the following: Decimal Speed No change 1~63 01~3F High draft...
- Page 175 FUJITSU DL3100 Function Command ESC G Select double-strike printing ESC H Cancel double-strike printing ESC I (n) Select character font This command enables you to select a font and choose the print quality. n (HEX) n (DEC) Font and print quality...
- Page 176 FUJITSU DL3100 Function Command ESC 7 Select character set 1 This command selects IBM Character set I for use in subsequent printing operations. Define user-defined characters ESC = (n1) • This command enables you to define and download (n2) 20 (n3) characters for printing.
- Page 177 FUJITSU DL3100 Function Command • If bits 1 and 2 of n4 are 00 and bit 8 is set to 0 the bytes that make up the character definition define rows 2 to 9 of the grid, the most significant bit representing the second dot, and the least significant bit representing the ninth dot down.
- Page 178 FUJITSU DL3100 Function Command Setting the units ESC [ \ 4 0 0 0 Set Vertical Units The digits 4 0 0 0 (decimal), 04 00 00 00 (n1) (n2) (hexadecimal) are constants. This command lets you set the size of the increments for the following commands: •...
- Page 179 FUJITSU DL3100 Function Command Set vertical tabs ESC B n1…nk • Use ESC B to set the tabulation stops and to NULL advance paper to the next tabulation stop (VT) to activate them. • ESC R (Set Default Tabulation Stops) will clear all vertical tab stops.
- Page 180 FUJITSU DL3100 Function Command ESC N (n) Set bottom margin This command specifies the number of lines to be skipped at the bottom of each page, which creates a bottom margin. ESC O Cancel bottom margin ESC X n1 n2...
- Page 181 FUJITSU DL3100 Function Command Printing graphics ESC [ g nL nH Select graphics mode Use this command to select the mode and horizontal mode data density for dot matrix graphics. • nL and nH identify the number of bytes in mode and data.
- Page 182 FUJITSU DL3100 Function Command Select 60 dpi graphics ESC K nL nH Use this command to print normal density bit images data at 60 dots per inch (dpi) horizontally and 72 dpi vertically. • nL and nH identify the number of bytes in data.
- Page 183 FUJITSU DL3100 Function Command k: specifies barcode types k(Hex) Barcode Type CODABAR(NW7) EAN-13 EAN-8 CODE 39 INDUSTRIAL 2 OF 5 INTERLEAVED 2 OF 5 UPC-A UPC-E POST-NET(Barcode) CODE128 m: specifies the module width. Unit 1/120 inch Width 2dots 0.015” 2dots 0.012”...
- Page 184 FUJITSU DL3100 Function Command Stops printing. ESC j After printing, this command activates the buzzer and disables printing. Set n/216" or n/180" line spacing ESC 3 (n) This command sets the line spacing to n/216". All subsequent line feed operations will move the print position n/216"...
-
Page 185: Chapter D Interface Information
FUJITSU DL3100 CHAPTER D INTERFACE INFORMATION INTERFACE INFORMATION This printer can communicate with a computer through a Centronics parallel interface, a RS-232C serial interface, a USB interface, or a LAN interface. You can specify the interface selection mode so that the printer uses which interface or it can automatically select the interface from which it first recrives data. -
Page 186: Usb Interface
FUJITSU DL3100 USB INTERFACE USB interface pin assignment Signal name Description VBUS +5V power supply data data S.GND ground Transmission mode: Full speed(Maximum 12 Mbps) / High speed (Maximum 480 Mbps) USB interface connector diagram Note: 1. Use a standard USB interface cable to connect the printer and the computer. -
Page 187: Parallel Interface
FUJITSU DL3100 PARALLEL ¯¯¯¯¯¯¯¯¯ STROBE INTERFACE Normally synchronous input signal is used to prompt that the data is sending to the port. Normal state is high logic level, while low logic level indicates DATA1 ~ DATA8 will read the current data. The minimum pulse width is 1 microsecond. - Page 188 FUJITSU DL3100 SELECT Signal to indicate online or offline state. High logic level indicates online state. If no mechanical defect and PE error, the signal turns to high logic level in the following case: Press [Online] if the printer is offline.
- Page 189 FUJITSU DL3100 FUSE Signal connect to +5V through 3.3KΩ resistance. ¯¯¯¯¯¯¯¯ (Valid for Epson ESC/P2 emulation only) SLCTIN When the signal is low logic level, no DC3 control code or DC1 control code is received. Clock and signal logic level...
-
Page 190: Serial Interface
FUJITSU DL3100 SERIAL RS-232C can be used as serial interface. Settings INTERFACE Data bit: 7 or 8 Buffer: 128K Max. Baud Rate: 9600BPS, 19200BPS, 38400BPS, 300BPS, 600BPS, 1200BPS, 2400BPS, 4800BPS Protocol: DTR Xon/Xoff Stop bit: 1 or 2 Error detection... - Page 191 FUJITSU DL3100 Serial interface wiring diagram Note: 1. The serial cable length should not exceed 15 meters. 2. Make sure the “Interface Setup” selects serial interface and the settings are the same as PC communication port settings. Shown as below:...
- Page 192 FUJITSU DL3100 Signal description The signal electrical level of the interface pin is defined as follow: 1 is low level (Mark) -25V~-3V 0 is high level(Space) +3V~+25V DTR protocol(RS-232C) Pin2(receiving data) Receiving the serial data sent from the host with this line, so when no data is sent, the host must be set to MARK.
-
Page 193: Ethernet Interface
FUJITSU DL3100 ETHERNET Connector pin alignment INTERFACE Green LED: LINK/ACK Amber LED: 100Mbps Signal line name Function TXO+ NIC-HUB Transmit data + TXO- NIC-HUB Transmit data - RXI+ HUB-NIC Receive data + − − − − − − RXI- HUB-NIC Receive data - −... - Page 194 FUJITSU DL3100 Ethernet I/O 10/100 Mulitprotocol The Ethernet interface enables the printer to connect to local area networks. Its attributes are: Hardware LAN/Ethernet: RJ45, Ethernet 100BASE-TX with 100 Mbps (IEEE802.3u), 10BASE-T with 10 Mbps (IEEE802.3) Supported Windows® 10 operating Windows Server® 2016 Systems Windows®...
- Page 195 FUJITSU DL3100 Ethernet TCP/IP When using your printer in a local network with Ethernet connections and the TCP/IP protocol, you have to assign address information. Address information for the Ethernet Port can only be made available by your network administrator, who has the necessary rights to install Printers on the network and/or make any changes.
- Page 196 FUJITSU DL3100 3. Set printer IP address to be the same net segment as PC IP address in step 2. Disconnect DLMENU after the Ethernet parameters are setup. The printer restarts automatically. Follow following instructions to add the print port in the driver.
- Page 197 FUJITSU DL3100 5. Select “Standard TCP/ Port”in step 4 and click “New Port...”. Below window will pop up. 6. Type in the printer IP address in step 5 and click “Next”. The added port is shown as below. User’s Manual...
- Page 198 FUJITSU DL3100 7. Click “Print Test Page” to print. Note: When DHCP is ON, two network cables should be connected with the router. One is connected to PC while the other one is connected to the printer. Enter the router...
-
Page 199: Character Sets
FUJITSU DL3100 CHAPTER E CHARACTER SETS & CODE PAGES CHARACTER SETS & CODE PAGES CHARACTER SETS Standard character set 1 Standard character set 2 User’s Manual... - Page 200 FUJITSU DL3100 IBM character set 1 IBM character set 2 User’s Manual...
- Page 201 FUJITSU DL3100 OCR-A character set 1 OCR-A character set 2 User’s Manual...
- Page 202 FUJITSU DL3100 OCR-B character set 1 OCR-B character set 2 User’s Manual...
- Page 203 FUJITSU DL3100 International Character Set Commands Country Basic Command <ESC>“R”CHR$(0) FRANCE <ESC>“R”CHR$(1) GERMANY <ESC>“R”CHR$(2) <ESC>“R”CHR$(3) DENMARK 1 <ESC>“R”CHR$(4) SWEDEN <ESC>“R”CHR$(5) ITALY <ESC>“R”CHR$(6) SPAIN 1 <ESC>“R”CHR$(7) JAPAN <ESC>“R”CHR$(8) NORWAY <ESC>“R”CHR$(9) DENMARK 2 <ESC>“R”CHR$(10) SPAIN 2 <ESC>“R”CHR$(11) LATINAMERICA <ESC>“R”CHR$(12) DENMARK/NORWAY <ESC>“R”CHR$(13) CHINA <ESC>“R”CHR$(16)
- Page 204 FUJITSU DL3100 CODE PAGE Code Page ESC R Parameter COMMANDS CP 437 CP 737 CP 850 CP 851 CP 852 CP 857 CP 858 CP 860 CP 861 CP 863 CP 864 CP 864 Extended CP 865 CP 866 Cyrillic...
- Page 205 FUJITSU DL3100 Code Page ESC R Parameter CP 1257 866 Ukraine 866 Kazakhstan Kamenicky Mazovia CP 775 CRO-ASCII Arabic Farsi Arabic Urdu Greek DEC Greek ELOT 928 UK_ASCII US_ASCII Swedish German Portuguese French Italian Norwegian Spanish SiemensTurk DECTurkish User’s Manual...
- Page 206 FUJITSU DL3100 CP 437 CODE PAGE TABLES CP 737 CP 850 User’s Manual...
- Page 207 FUJITSU DL3100 CP 851 CP 852 CP 857 User’s Manual...
- Page 208 FUJITSU DL3100 CP 858 CP 860 CP 861 User’s Manual E-10...
- Page 209 FUJITSU DL3100 CP 863 CP 864 Extend 864 User’s Manual E-11...
- Page 210 FUJITSU DL3100 CP 865 CP 866 Bulgaria 866 User’s Manual E-12...
- Page 211 FUJITSU DL3100 CP 1250 CP 1251 CP 1252 User’s Manual E-13...
- Page 212 FUJITSU DL3100 CP 1253 CP 1254 8859-1 User’s Manual E-14...
- Page 213 FUJITSU DL3100 8859-1 (SAP) 8859-2 8859-5 User’s Manual E-15...
- Page 214 FUJITSU DL3100 8859-7 8859-9 8859-15 User’s Manual E-16...
- Page 215 FUJITSU DL3100 BRASCII Abicomp Roman 8 User’s Manual E-17...
- Page 216 FUJITSU DL3100 Coax/Twinax New-437 New-Dig 850 User’s Manual E-18...
- Page 217 FUJITSU DL3100 Old-Code 860 Flarro 863 Hebrew 865 User’s Manual E-19...
- Page 218 FUJITSU DL3100 CP 1257 Ukraine 866 Kazakhstan 866 User’s Manual E-20...
- Page 219 FUJITSU DL3100 Kamenicky Mazovia Baltic 775 User’s Manual E-21...
- Page 220 FUJITSU DL3100 CRO-ASCII Farsi Urdu User’s Manual E-22...
- Page 221 FUJITSU DL3100 Greek DEC ELOT 928 UK_ASCII User’s Manual E-23...
- Page 222 FUJITSU DL3100 US_ASCII Swedish German User’s Manual E-24...
- Page 223 FUJITSU DL3100 Portuguese French Italian User’s Manual E-25...
- Page 224 FUJITSU DL3100 Norwegian Spanish Siemens Turk User’s Manual E-26...
- Page 225 FUJITSU DL3100 DEC Turkish Tarama User’s Manual E-27...
- Page 226 FUJITSU DL3100 User’s Manual E-28...
-
Page 227: Chapter F Resident Fonts
FUJITSU DL3100 CHAPTER F RESIDENT FONTS RESIDENT FONTS This chapter provides print samples of the printer's nineteen resident fonts. Roman 10 Sanserif 10 Courier 10 Prestige 10 Script 10 OCR B 10 OCR A 10 Orator 10 Draft 10 Gothic 10 Souvenir 10 User’s Manual... - Page 228 FUJITSU DL3100 Use’s Manua...
-
Page 229: Fujitsu Offices
FUJITSU OFFICES Please send your comments on this manual or on Fujitsu products to the following addresses: North American Contact: Asian Contact: FUJITSU CANADA INC. FUJITSU HONG KONG LTD. 6975 Creditview Road, Unit 1 10/F., Lincoln House, 979 King's Road... - Page 230 KA02100-Y890-01EN...