
Related Manuals for Kenwood KDC-4590R/RV


Summary of Contents for Kenwood KDC-4590R/RV
- Page 1 KDC-4590R KDC-4590RV KDC-4090R KDC-3090RG KDC-3090RA KDC-305RG KDC-305RA CD-RECEIVER INSTRUCTION MANUAL B64-1835-00 (EN) COMPACT DIGITAL AUDIO...
-
Page 2: Table Of Contents
Contents Safety precautions...3 Handling Compact discs ...5 General features Power...7 Volume ...7 Attenuator ...7 Switching Modes ...8 Loudness ...8 System Q ...8 Mobile Preset...9 TEL Mute ...9 Audio Control Setting...10 Theft Deterrent Faceplate...10 Tuner features Tuning ...12 Station Preset Memory...12 Clock display ...12 RDS features RDS (Radio Data System) ...13... -
Page 3: Safety Precautions
DNPS, DNPP, Magazine random play, and CD Text display. Note that none of the KDC-C100, KDC-C302, C205, C705, and non-Kenwood CD changers can be connected. 2CAUTION You can damage both your unit and the CD changer if you connect them incorrectly. - Page 4 Safety precautions NOTE • If you experience problems during installation, consult your Kenwood dealer. • If the unit does not seem to be working right, try pressing the reset button first. If that does not solve the problem, consult your Kenwood dealer.
-
Page 5: Handling Compact Discs
Handling Compact discs Playing a CD that is dirty, scratched or warped can cause the sound to skip and the unit to operate incorrectly, resulting in worsened sound quality. Take the following precautions to prevent your CDs from getting scratched or damaged. Handling CDs •... - Page 6 Handling Compact discs Do Not Load CD Accessories in Slot Do not use commercially available CD accessories that can be loaded into the CD slot, such as stabilisers, protective sheets, or CD cleaning discs, since they can cause the unit to malfunction. Removing the CD Only remove the CD from the machine in a horizontal direction.
-
Page 7: General Features
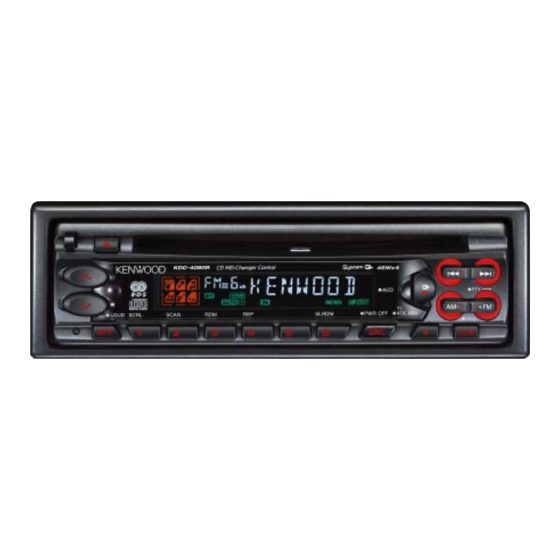
General features Release button ATT/ LOUD LOUD indicator ATT indicator SYSTEM Q indicator Power Turning on the power: Press the SRC button. 4/¢ NOTE Turn the power on before carrying out the following procedures. Turning off the power: Hold down the PWR OFF button for one second or more. Volume Increasing Volume: Press the u button to turn up the volume. -
Page 8: Switching Modes
General features Switching Modes Switching Modes: Each time you press the SRC button, the mode switches as follows: Tuner mode CD mode External disc control mode 1(KDC-4590R/4590RV/4090R only) External disc control mode 2 / AUX mode (KDC-4590R/4590RV/4090R only) Standby mode Selecting the standby mode: Press the SRC button repeatedly to select to "ALL OFF"... -
Page 9: Mobile Preset
factor, treble centre frequency, and treble level. Note that some of these parameters cannot be controlled by the audio control setting feature. Their setting values are different depending on the setting of the mobile preset plan mode. (KDC-4590R/4590RV only) Function of the KDC-4590R/KDC-4590RV Mobile Preset This function allows you to adjust the setting that is recalled with the System Q, according to types of speakers. -
Page 10: Audio Control Setting
General features Audio Control Setting Adjust various parameters of sound quality. Hold down the AUD button for one second or more to enter the control mode. Selecting mode Press either the FM or AM button. Each time the button is pressed, the adjustment mode will change as follows: Pressing the FM button advances the display, and pressing the AM button reverses it. - Page 11 • Do not expose the faceplate or its storage case to direct sunlight or excessive heat or humidity. Also avoid places with too much dust or the possibility of water splashing. Reattaching Faceplate: Align the projections on the unit with the grooves on the faceplate.
-
Page 12: Tuner Features Tuning
Tuner features Tuning Press the SRC button repeatedly until the tuner mode is obtained. "TUNER" is displayed only when the tuner mode is selected. Press either the FM or AM button to select the band. Each time you press the FM button, the band switches between the FM1, FM2 and FM3. -
Page 13: Rds Features
RDS features RDS (Radio Data System) RDS is a digital information system that lets you receive signals besides those of regular radio programmes, such as 4/¢ network information being transmitted from radio stations. When listening to an RDS station (ie, a station with RDS capability), the programme service name of the station is displayed along with the frequency, advising you quickly which station is being received. -
Page 14: Traffic Information Function
RDS features Traffic Information Function You can listen to traffic information. If you are listening to tapes or discs, they will continue playing until a traffic bulletin is broadcast. Turning TI function On/Off: Press the TI button to turn the function on and off. When the function is on, the TI indicator is turned on. -
Page 15: Enhanced Other Network
18. Children’s programmes (CHILDREN) 19. Social Affairs (SOCIAL A) 20. Religion (RELIGION) 21. Phone In (PHONE IN) 22. Travel (TRAVEL) 23. Leisure (LEISURE) 24. Jazz Music (JAZZ) 25. Country Music (COUNTRY) 26. National Music (NATION M) 27. Oldies Music (OLDIES) 28. -
Page 16: Presetting Volume For Traffic Information/News
RDS features Presetting Volume for Traffic Information/News Preset the volume level to be used for traffic information and news broadcasts. Tune into the station for which you want to set the volume. Adjust the volume to the desired level. Hold down the TI VOL ADJ button for two seconds or more. The volume level blinks once in the display to indicate that the data has been stored. -
Page 17: Playing Cds
Playing CDs Playing CDs: If no CDs are inserted, insert one in the slot with the label facing up. If a CD is already inserted, press the SRC button repeatedly until the CD mode. "CD" is displayed when the CD mode has been selected. The CD will start playing. -
Page 18: Switching Display For Discs
CD/External disc control features Switching Display for Discs Switch the display that appears whilst discs are playing. Switching Display for Discs: Each time you press the CLK button, the display during disc play switches as follows: Track time Disc name (DNPS) (only when being preset) (Function of disc changers : KDC-4590R/4590RV/4090R only) Disc title (Units featuring CD text/MD only) (Function of disc changers : KDC-4590R/4590RV/4090R only) -
Page 19: Disc Search
Function of the KDC-4590R/KDC-4590RV/KDC-4090R Disc Search Function of disc changers) Search forwards or backwards through the discs in a disc changer until you reach the one that you want to listen to. Making a Reverse Disc Search: Press the AM button to display the desired Disc number. Each time the button is pressed, the displayed Disc number decreases by one. -
Page 20: Random Play
CD/External disc control features Random Play Play all the tracks on the current disc in random order. Press the RDM button to switch the random play function on and off. "RDM ON" is displayed when random play is turned on. The display of the Track number changes continuously as the next track is being selected. -
Page 21: Text Scroll
NOTE You can enter up to 8 characters for each name. Assigning Names Press the MENU button. The disc name is stored and the Presetting Disc Names mode is ends. If you make no entry in a 10-second period, the name will be stored with the characters input so far. -
Page 22: Menu Settings
Menu settings #1-6 Menu display AUTO indicator NEWS indicator Menu System You can set the defaults for additional functions in the menu mode. Make a setting for each function, referring to the 4/¢ following operations. Enter the menu mode Hold down the MENU button for one second or more. "MENU"... -
Page 23: Touch Sensor Tone
Touch Sensor Tone This function produces a beep sound that accompanies button operation. It can be switched on or off. Display and setting: "BEEP ON" : Beep setting is on. (Default setting) "BEEP OFF" : Beep setting is off. NOTE The beep sound is not output from the preout jacks. -
Page 24: Selectable Illumination
Menu settings Function of the KDC-4590R/KDC-4590RV/KDC-4090R Selectable Illumination You can switch the colour of the button illumination between green and red. Display and setting: "COL GRN" : The colour of the illumination is green. "COL RED" : The colour of the illumination is red. News Bulletin Function with PTY News Timeout Setting You can arrange to have news bulletins interrupt your current... -
Page 25: Af (Alternative Frequency) Function
When all the stations in a certain band are stored in the preset memory, the auto memory entry stops. The tuner then plays the last station received. NOTE • When the AF function is turned on whilst auto memory entry takes place, only RDS stations (i.e., stations with RDS capability) are stored. -
Page 26: Monaural Reception
Menu settings Monaural Reception <In FM reception of Tuner mode> When poor stereo reception is experienced, this function will reduce noise and improve listening conditions. Display and setting: "MONO ON" : The monaural reception is on. "MONO OFF" : The monaural reception is off. (Default setting) Function of the KDC-4590R/KDC-4590RV/KDC-4090R Text Scroll <In External disc control mode>... -
Page 27: Accessories
Number of items 2CAUTION • If your car is not prepared for this special connection-system, consult your Kenwood dealer. • Only use antenna conversion adapters (ISO-JASO) when the antenna cord has an ISO plug. • Make sure that all cable connections are securely made by inserting jacks until they lock completely. -
Page 28: Connecting Cables To Terminals
Rear right output (Red) Antenna Cord (ISO) Antenna Conversion Adaptor FM/AM antenna (ISO–JASO) (Accessory3) input KENWOOD disc changer input (KDC-4590R/4590RV/4090R only) NOTE To connect the Disc changer, consult your Disc changer manual. Connect to the terminal that is TEL MUTE... -
Page 29: Installation
Connecting Cables to Terminals 2WARNING Connecting the ISO Connector (see p.28) The pin arrangement for the ISO connectors depends on the type of vehicle you drive. Make sure to make the proper connections to prevent damage to the unit. The default connection for the wiring harness is described in 1 below. - Page 30 Installation Removing the hard rubber frame Engage the catch pins on the removal tool and remove the two locks on the lower level. Lower the frame and pull it forward as shown in the figure. Lock Accessory2 Removal tool When the lower level is removed, remove the upper two locations.
-
Page 31: Troubleshooting Guide
Troubleshooting Guide What might appear to be a malfunction in your unit may just be the result of slight misoperation or miswiring. Before calling service, first check the following table for possible problems. PROBLEM The power does not turn on. The fuse has blown. - Page 32 Troubleshooting Guide PROBLEM A CD ejects as soon as it is The CD is upside-down. loaded. The CD is quite dirty. The sound skips on a CD. The CD is scratched or dirty. The specified track does not Random play has been selected. play.
- Page 33 Troubleshooting Guide CD/External disc control mode PROBLEM The disc control mode cannot No cable has been connected to the disc changer input be selected. terminal on the unit. The specified disc does not The specified CD is very dirty. play, but another one plays The CD is upside-down.
- Page 34 Troubleshooting Guide The following messages are displayed when certain problems are occurring in your system. Take the recommended actions. No disc magazine has been loaded in the changer. The disc magazine is not completely loaded. EJECT Load the disc magazine properly. No CD in the unit.
-
Page 35: Specifications
Specifications Specifications subject to change without notice. FM tuner section Frequency range (50 kHz space) ...87.5 MHz – 108.0 MHz Usable sensitivity (S/N = 26dB) ...0.7 µV/75 Ω Quieting Sensitivity (S/N = 46dB) ...1.6 µV/75 Ω Frequency response (±3.0 dB) ...30 Hz – 15 kHz Signal to Noise ratio (MONO) ...65 dB Selectivity (DIN) (±400 kHz)...≥...