Table of Contents
Advertisement
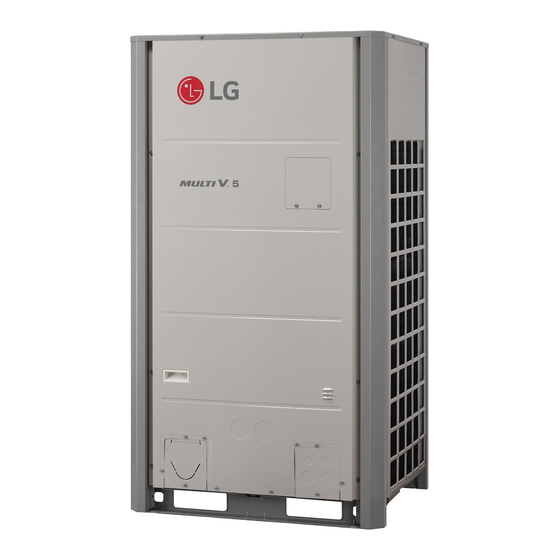
INSTALLATION MANUAL
AIR
CONDITIONER
Please read this installation manual completely before installing the product.
Installation work must be performed in accordance with the national wiring
standards by authorized personnel only.
Please retain this installation manual for future reference after reading it
thoroughly.
For Heat Pump / Heat Recovery system
Original instruction
MFL67221448
Rev. 01_091818
Copyright © 2018 LG Electronics Inc. All Rights Reserved.
www.lg.com
Advertisement
Table of Contents

Related Manuals for LG MULTI V 5 ARUM160LTE5


Summary of Contents for LG MULTI V 5 ARUM160LTE5
- Page 1 Installation work must be performed in accordance with the national wiring standards by authorized personnel only. Please retain this installation manual for future reference after reading it thoroughly. For Heat Pump / Heat Recovery system Original instruction www.lg.com MFL67221448 Rev. 01_091818 Copyright © 2018 LG Electronics Inc. All Rights Reserved.
-
Page 2: Important Safety Instructions
WARNING TIPS FOR SAVING ENERGY • Installation or repairs made by unqualified Here are some tips that will help you minimize the power consumption when you use the air conditioner. You can use your air conditioner persons can result in hazards to you and more efficiently by referring to the instructions below: others. - Page 3 • Do not install, remove, or re-install the • Ventilate before operating air conditioner unit by yourself (customer). when gas leaked out. - There is risk of fire, electric shock, - It may cause explosion, fire, and burn. explosion, or injury. •...
- Page 4 • Do not touch the power switch with wet • Use power cables of sufficient current hands. carrying capacity and rating. - There is risk of fire, electric shock, - Cables that are too small may leak, explosion, or injury. generate heat, and cause a fire.
- Page 5 Operation • Safely dispose of the packing materials. • Do not use the air conditioner in special - Packing materials, such as nails and environments. other metal or wooden parts, may cause - Oil, steam, sulfuric smoke, etc. can stabs or other injuries. significantly reduce the performance of - Tear apart and throw away plastic the air conditioner or damage its parts.
-
Page 6: Table Of Contents
TABLE OF CONTENTS Low Ambient Kit High Efficiency Mode (Cooling Operation) TIPS FOR SAVING ENERGY Auto Dust Removal Mode Compressor Max. Frequency Limit IMPORTANT SAFETY INSTRUCTIONS ODU Fan Max. RPM Limit SLC (Smart Load Control) INSTALLATION PROCESS Humidity Reference Central Control Connection at Indoor Unit side OUTDOOR UNITS INFORMATION Compressor Input Current Limit Power Consumption Display on wired remote controller... -
Page 7: Installation Process
INSTALLATION PROCESS OUTDOOR UNITS INFORMATION CAUTION Indicate clearly who will be responsible for switch setting. Determination of division work Combination Ratio(50~200 %) Make connection clearly between outdoor, indoor, Preparation of contract drawings remote controller and option. Outdoor Number Connection Ratio Single outdoor units 200 % Take account of gradient... - Page 8 • Avoid unit installation in a place where acidic solution and spray (sulfur) are often used. • Do not use unit under any special environment where oil, steam and More than 100 (3-15/16) More than 100 (3-15/16) More than 100 (3-15/16) (Servicing space) (Servicing space) (Servicing space)
-
Page 9: Installation Space
INSTALLATION SPACE Seasonal wind and cautions in winter • Sufficient measures are required in a snow areas or severe cold areas in winter so that product can be operated well. Individual Installation • Get ready for seasonal wind or snow in winter even in other areas. During the installation of the unit, consider service, inlet, and outlet •... -
Page 10: Installation
Foundation for Installation CAUTION • Fix the unit tightly with bolts as shown below so that unit will not fall Be very careful while carrying the product. down due to earthquake or gust. • Do not have only one person carry product if it is more than •... -
Page 11: Preparation Of Piping
Preparation of Piping Tightening Torque Pipe size A [mm (inch)] Flare shape N . m (lbs . ft) [mm (inch)] Main cause of gas leakage is defect in flaring work. Carry out correct 90° ±2 flaring work in the following procedure. Ø9.52 (3/8) 38±4 (28±3.0) 12.8 (0.5)~13.2 (0.52) -
Page 12: Plumbing Materials And Storage Methods
Precautions in high humidity circumstance: Nitrogen substitution method This air conditioner has been tested according to the "ISO Conditions with Mist" and confirmed that there is not any default. Welding, as when heating without nitrogen substitution a large However, if it is operated for a long time in high humid atmosphere amount of the oxide film is formed on the internal piping. -
Page 13: Refrigerant Piping Installation
REFRIGERANT PIPING Connection of Outdoor units When installing ODU series, refer below picture. INSTALLATION For Heat Pump System Installation (Master) (Slave1) (Slave2) (Slave3) Precautions on Pipe connection / Valve operation Pipe connection is done by connecting from the end of the pipe to the branching pipes, and the refrigerant pipe coming out of the outdoor unit is divided at the end to connect to each indoor unit. - Page 14 Caution The Multi V will stop due to an abnormality like excessive or insufficient refrigerant. At such a time, always properly charge the Use the following materials for refrigerant piping. unit. When servicing, always check the notes concerning both the - Material: Seamless phosphorous deoxidized copper pipe piping length and the amount of additional refrigerant.
-
Page 15: Precautions On Pipe Connection / Valve Operation
2, 3, 4 Outdoor Units For Heat Recovery System Installation Outdoor units Model Low Pressure Gas Pipe Liquid Pipe High Pressure Gas Pipe Precautions on Pipe connection / Valve operation O.D.15.88 I.D. 19.05 O.D.22.2 I.D.15.88 I.D.22.2 O.D. 28.58 I.D.34.9 I.D.19.05 Pipe connection is done by connecting from the end of the pipe to the I.D.15.88 I.D.15.88... -
Page 16: Installation Of Outdoor Unit, Hr Unit, Indoor Unit Refrigerant Pipe
Installation of Outdoor Unit, HR Unit, Indoor Unit Joint Method of HR Unit (Big Duct : ARNU76GB8-, ARNU763B8-, ARNU96GB8-, ARNU963B8-) Refrigerant Pipe Joint Method is required when the big duct chassis is installed. In Joint 3 pipes are connected to the HR unit from the outdoor unit, classified Method, two neighboring outlets of one HR unit are linked by Y branch into liquid pipe, low pressure gas pipe and high pressure gas pipe pipe and connected to one indoor unit. - Page 17 [Reducers for indoor unit and HR unit] Unit : mm (inch) Gas pipe Models Liquid pipe High pressure Low pressure Indoor unit – reducer OD9.52(3/8) Ø6.35(1/4) OD15.88(5/8) Ø12.7(1/2) To Outdoor Unit OD19.05(3/4) Ø15.88(5/8) Ø12.7(1/2) OD22.2(7/8)Ø19.05(3/4) Ø15.88(5/8) PRHR022 PRHR022A OD9.52(3/8) Ø6.35(1/4) Sealed Piping OD12.7(1/2) Ø9.52(3/8)
-
Page 18: Pipe Connections Between Indoor And Outdoor Unit
PIPE CONNECTIONS BETWEEN Remove leakage prevention cap • Remove the leakage prevention cap attached to the outdoor unit INDOOR AND OUTDOOR UNIT service valve before pipe work. • Proceed the leakage prevention cap removal as follows: - Verify whether all the pipes are locked. - Pipe connections can be done on the front side or on the side - Extract remaining refrigerant or air inside using the service port. -
Page 19: Refrigerant Piping System
Series Outdoor Units (2 Units ~ 4 Units) Method of drawing out pipes on the bottom side - Drawing out common pipe through side panel Y branch method ODU Capacity No Use Slave3 Master ≥ Slave 1 ≥Slave 2 ≥Slave 3 Liquid pipe Slave2 (Weld with supplied accessory pipe cap) -
Page 20: Preparation Work
Pipe Drawing Out during Single / Series connection For Heat Recovery System Installation Method of drawing out pipes on the front side Preparation Work - Proceed with the pipe work as shown in the below figure for front side pipe drawing out. - Use Knock Outs of Base Pan of the outdoor unit for Left/Right or Bottom pipe drawing outs. -
Page 21: Refrigerant Piping System
Refrigerant piping system Refrigerant pipe diameter from branch to branch (B,C,D) 4 Outdoor Units WARNING Example : 12 Indoor Units connected * : Serial connection of HR units : Capacity sum of indoor units ≤ Ⓐ : Outdoor Unit 192.4 kBtu/hr Ⓑ... - Page 22 Refrigerant pipe diameter from outdoor unit to first Pattern 3 branch. (A) Pipe diameter when pipe length is ≥ Standard Pipe Diameter 90 m (295 ft) or when height differential ODU. (ODU÷IDU) is > 50 m (164 ft) Capacity Low pressure High pressure Low pressure High pressure...
-
Page 23: Pipe Connection Method Between Outdoor Unit/Indoor Unit
Pattern 7 For Heat Pump And Heat Recovery System Installation Pipe Connection Method between outdoor unit/indoor unit Slave1 Master Slave2 Slave3 48 k 48 k 48 k 48 k 48 k 48 k • * : Serial connection of HR units : Capacity sum of indoor units ≤ 56.4 kW (192 kBtu/h) Pattern 8 Indoor Unit... - Page 24 (Table 2) Refrigerant pipe diameter from outdoor unit to first branch. (A) WARNING Pipe diameter when pipe Pipe diameter when height differential Pipe diameter when pipe • In case of pipe diameter B connected after first branch is bigger length is < 90 m (295 ft) length is ≥...
- Page 25 CAUTION Examples of Wrong Pipe Connections • Bending radius should be 500mm [19.7 inch] 500mm [19.7 inch] at least twice the diameter or more or more If the main pipe is of the pipe. higher than the outdoor units, oil is •...
-
Page 26: Branch Pipe Fitting
Branch pipe Fitting - When connecting the pipes between the outdoor units, the accumulation of oil in the slave outdoor unit should be avoided. Otherwise, the unit may not operate properly. Y branch Ⓐ To Branch Piping or Indoor Unit (Example 1) Ⓑ... - Page 27 • Header should be insulated with the insulator in each kit. Header [Unit:mm(inch)] Models Gas pipe Liquid pipe Insulate the header using the insulation material attached to the 360(14-5/32) branch pipe kit ID9.52(3/8) 120(4-23/32) ID12.7 as shown in the figure. ID6.35(1/4) ID9.52(3/8) ID12.7...
-
Page 28: Distribution Method
Distribution Method Vacuum Mode Horizontal Distribution This function is used for creating vacuum in the system after compressor replacement, ODU parts replacement or IDU Slave addition/replacement. Master Vacuum mode setting method 3rd main pipe distribution DIP switch 01 Slave Master 7 Segment SW04C (X : cancel) SW03C ( : forward) -
Page 29: Leak Test And Vacuum Drying
Leak Test and Vacuum drying NOTE If the ambient temperature differs between the time when pressure is Leak test applied and when the pressure drop is checked, apply the following Leak test should be made by pressurizing nitrogen gas to 3.8 MPa correction factor (38.7 kgf/cm ). -
Page 30: Refrigerant Charging
Refrigerant charging Series Installation (Heat Recovery) Slave 1 outdoor unit Master outdoor unit For Heat Pump System Installation Ⓐ Manifold Gauge Vacuum pump Close Ⓑ Low Pressure Side Handle Ⓒ High Pressure Side Handle Close Close Close Close Close Vacuum pump Liquid side Indoor unit... -
Page 31: Thermal Insulation Of Refrigerant Piping
Thermal insulation of refrigerant piping The amount of Refrigerant The calculation of the additional charge should take into account the Be sure to give insulation work to refrigerant piping by covering liquid length of pipe and CF(correction Factor) value of indoor unit. pipe and gas pipe separately with enough thickness heat-resistant polyethylene, so that no gap is observed in the joint between indoor unit and insulating material, and insulating materials themselves. - Page 32 Penetrations Master Slave Inner wall (concealed) Outer wall Outer wall (exposed) Indoor Indoor Unit Unit Remote Remote control control Master Slave Floor (fireproofing) Penetrating portion on fire Roof pipe shaft Indoor Indoor limit and boundary wall Unit Unit Remote Remote control control (3.28 ft)
-
Page 33: Electrical Wiring
ELECTRICAL WIRING Master Slave1 Slave2 Indoor Indoor Caution Unit Unit - Follow ordinance of your governmental organization for technical Remote Remote standard related to electrical equipment, wiring regulations and control control guidance of each electric power company. Master Slave1 Slave2 WARNING Indoor Indoor... -
Page 34: Control Box And Connecting Position Of Wiring
Control box and connecting position of wiring Communication and Power Cables - Remove all of the screws at front panel and remove the panel by Communication cable pulling it forward. - Types : shielded wires - Connect communication cable between main and sub outdoor unit - Cross section : 1.0 ~ 1.5 mm (1.55 ×... -
Page 35: Wiring Of Main Power Supply And Equipment Capacity
Wiring of main power supply and equipment CAUTION capacity • Some installation site may require attachment of an earth leakage breaker. If no earth leakage breaker is installed, it may cause an - Use a separate power supply for the Outdoor Unit and Indoor Unit. electric shock. - Page 36 WARNING WARNING • Indoor Unit ground wires are required for preventing electrical • Indoor Unit ground wires are required for preventing electrical shock accident during current leakage, Communication disorder by shock accident during current leakage, Communication disorder by noise effect and motor current leakage (without connection to noise effect and motor current leakage (without connection to pipe).
-
Page 37: Checking The Setting Of Outdoor Units
Example) Connection of power and communication cable (UXA) Front Side Bottom Side Main power terminal block Ground wire Main power terminal block When connecting Communication wires When connecting Ground wire / Ground wire from Main power lines front guide panel / Ground wire from left side Gap : Over Gap : Over... -
Page 38: Switch For Setup Of Hr Unit
Quick control Setting Setting For Heat Recovery Unit (Refer Only Heat Recovery Installation) In the factory setting, main PCB DIP switch setting is all “OFF”. [Heat Recovery (HR) Unit Board] - Check and make sure that all the indoor unit model name are ARNU******4. - Page 39 Y branch pipe (Unit: mm [inch]) Selection of the model of HR unit Models Low pressure Gas pipe Liquid pipe High pressure Gas pipe I.D19.05(3/4) I.D22.2(7/8) I.D19.05(3/4) I.D19.05(3/4) I.D22.2(7/8) I.D22.2(7/8) I.D15.88(5/8) I.D12.7(1/2) I.D15.88(5/8) I.D25.4(1) I.D19.05(3/4) I.D12.7(1/2) I.D9.52(3/8) I.D9.52(3/8) I.D6.35(1/4) I.D19.05(3/4) I.D12.7 I.D15.88 I.D19.05(3/4)
-
Page 40: Automatic Addressing
The Procedure of Automatic Addressing S/W No. Setup No.1 Manual addressing of valve #1 No.2 Manual addressing of valve #2 Power On No.3 Manual addressing of valve #3 SW01M Waiting 3 minutes No.4 Manual addressing of valve #4 Increase in the digit of 10 of valve SW03M SW03M Press RED Button for 5 s... -
Page 41: Flow Chart Of Auto Pipe Detection Process
Manual pipe detection Setting For Heat Recovery Unit Enter the central control address into each indoor unit using its (Refer Only Heat Recovery Installation) wired remote controller. Automatic pipe detection Turn No.1 of DIP s/w SW02M of HR unit PCB on. Turn No.1 of DIP s/w SW02M of HR unit PCB off. -
Page 42: Flow Chart Of Manual Addressing For Pipe Detection
Example of manual valve addressing (Zoning DIP switch 01 setting) 7 Segment SW04C (X : cancel) (In case that an indoor unit of central control address "11" is connected SW03C ( : forward) to a valve #1 of an HR unit) SW02C ( : backward) Zoning control is connecting 2 or more indoor units at one pipe of HR SW01C ( : Confirm /... -
Page 43: Example Of Checking Valve Address
Example of checking valve address Group Number setting (In case that an indoor unit of central control address "11" is connected Group Number setting for Indoor Units to a valve #1 of an HR unit) - Confirm the power of whole system(Indoor Unit, Outdoor Unit) is OFF, otherwise turn off. -
Page 44: Cool & Heat Selector
CAUTION Optional Mode Selection Function Selection Option Selection Remarks Display Optional Content Display (◎) Content Default • To perform the otional funtion should be sure that All the IDU is off (◀, ▶ ’ ◎) (◀, ▶ ’ ◎) mode, unless the function will not be performed. Automatic Refrigerant Fd 1 Charging (Cooling) -
Page 45: High Static Pressure Compensation Mode
High Static Pressure Compensation mode Time Settings Step Judgment Time(Hr) Operation Time(Hr) This function secures the air flow rate of ODU, in case static pressure has been applied like using duct at fan discharge of ODU. 10.5 Static pressure compensation mode setting method Master unit PCB DIP switch on : No.5 10.5 Select the mode using ‘▶’, ‘◀’... -
Page 46: Snow Removal & Rapid Defrost
Target pressure adjusting CAUTION Mode setting method • Ask an authorized technician to setting a function. Master unit PCB DIP switch on : No.5 • If use a function, first install a Central controller. Select the mode using ‘▶’, ‘◀’ Button : “Func”... -
Page 47: High Efficiency Mode (Cooling Operation)
High Efficiency Mode (Cooling Operation) Compressor Max. Frequency Limit Target low pressure will change according to ODU temperature during Mode setting method the cooling operation. Master unit PCB DIP switch on : No.5 Mode setting method Master unit PCB DIP switch on : No.5 Select the mode using ‘▶’, ‘◀’... -
Page 48: Slc (Smart Load Control)
MAX. RPM Limit Setting Mode setting - on:using humidity sensor Chassis - oFF:not setting 1000 <Using of humidity sensor> -100 - When used cooling operation of SLC function,it will improve energy -150 Fan MAX. RPM effcience because evaporation temperature wll be decreased Limit (RPM) -200 - When used heating operation in case of high humidity condition,... -
Page 49: Power Consumption Display On Wired Remote Controller
Base pan Heater operation CAUTION • Ask an authorized technician to setting a function. Master unit PCB DIP switch on : No.5 • If do not use a function, set an off-mode. • If use a function, capacity may go down. Select the mode using ‘▶’, ‘◀’... -
Page 50: Self-Diagnosis Function
Self-Diagnosis Function Error Indicator - This function indicates types of failure in self-diagnosis and occurrence of failure for air condition. - Error mark is displayed on display window of indoor units and wired remote controller, and 7 segment LED of outdoor unit control board as shown in the table. - Page 51 Display Title Cause of Error The first start failure by Outdoor Unit Inverter Compressor Outdoor Unit Inverter Compressor Start Failure abnormality or Compressor locked Outdoor Unit Inverter Compressor Over Current Outdoor Unit Inverter Compressor Fault OR Drive Fault Outdoor Unit Inverter Compressor1 High Outdoor Unit Inverter Compressor1 High Discharge Temperature Discharge Temperature Outdoor Unit Inverter Compressor2 High...
- Page 52 Display Title Cause of Error Outdoor Unit Fan DC Link Low Voltage Error Outdoor Unit Fan DC Link Input Voltage is under 380V Outdoor Unit Liquid pipe Temperature Sensor Error Liquid pipe temperature sensor of Outdoor Unit is open or short Outdoor Unit Subcooling Inlet Temperature Outdoor Unit Subcooling Inlet Temperature Sensor Error Sensor Error...
-
Page 53: Caution For Refrigerant Leak
CAUTION FOR REFRIGERANT LEAK Calculate refrigerant concentration Total amount of The installer and system specialist shall secure safety against leakage replenishedrefrigerant in according to local regulations or standards. refrigerant facility [kg(lbs)] The following standards may be applicable if local regulations are not = Maximum concentration limit available. -
Page 54: Installation Guide At The Seaside
INSTALLATION GUIDE AT THE Model Designation SEASIDE Product information • Product Name : Air conditioner CAUTION • Model Name : • Air conditioners should not be installed in areas where corrosive gases, such as acid or alkaline gas, are produced. Product Sales Name Model Factory Name •...