
Related Manuals for Philips CID3691/00


Summary of Contents for Philips CID3691/00
- Page 1 Register your product and get support at www.philips.com/welcome EN User manual ES Manual del usuario PT-BR Manual do Usuário ZH-HK ZH-CN CID3691...
-
Page 2: Table Of Contents
Contents 1 Important Safety Notice 2 Your in-car entertainment system Introduction What’s in the box Overview of the main unit 3 Get started Install the car audio Turn on Set date and time 4 Use map Upgrade the map 5 Play Load discs Connect USB device Insert USB or SD/MMC card... -
Page 3: Important
Do not place any sources of danger on lighted candles). Notice device that are not expressly approved by Philips Consumer Lifestyle may void the user’s authority to operate the equipment. Environmental information All unnecessary packaging has been omitted. We have tried to make the packaging easy to... - Page 4 Dolby Laboratories. Other trademarks and trade names are those of their respective owners. This apparatus includes this label: 2010 © Koninklijke Philips Electronics N.V. All rights reserved. notice. Trademarks are the property of Koninklijke Philips Electronics N.V. or their respective owners.
-
Page 5: Your In-Car Entertainment System
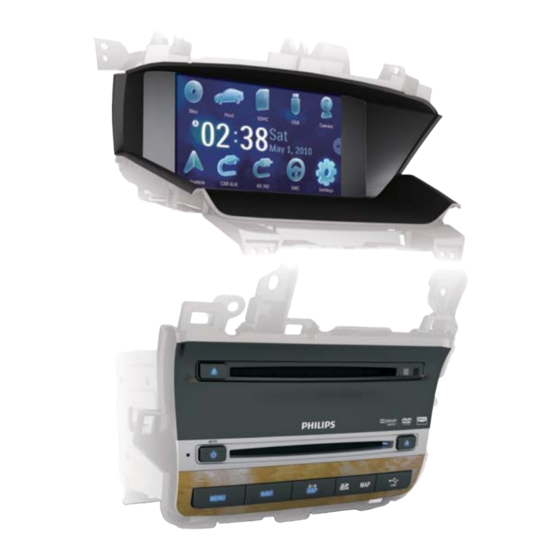
2 Your in-car entertainment system at www.philips.com/welcome. Introduction navigation system enjoy audio/video/JPEG pictures from USB devices SD/SDHC/MMC cards easily access host car audio system What’s in the box Check and identify the contents of your package: a Main unit b Display screen... -
Page 6: Overview Of The Main Unit
k Printing materials (include User manual, Quick start guide, Installation guide) l QC card / Guarantee card Overview of the main unit Eject disc. Open the cover and connect the AV IN/USB device. /MAP Open the cover and insert/remove the SDHC/GPS map card. d DISP/ / Adjust screen brightness. -
Page 7: Get Started
Install the car audio These instructions are for a typical installation. make the corresponding adjustment. If you have your Philips car audio dealer. Caution This unit is designed for negative ground (earth) 12 V DC operation only. Always install this unit in the car dashboard. -
Page 8: Mount In The Dashboard
make the other connections. to HOST to HOST to HOST to HOST to HOST to CAN to HOST Connect GPS antenna supplied GPS antenna to your car and the system. Connect the supplier GPS antenna to the Main unit Stick the other end of the GPS antenna to a metal surface of the car. -
Page 9: Turn On
bare wires do not touch each other. Ensure that the horizontal slant of the car dashboard opening is between 0 and 20 degrees. The unit cannot be used if the dashboard opening’s slant angle is above 20 degrees. Install the supplied screen brackets and Remove the disc loader from the host car audio system and then install the disc loader to the unit. -
Page 10: Use Map
Set clock mode Tap [Clock mode]. Tap on [12Hr] or [24Hr] to select clock mode. Set time Tap [Time]. Tap on the displayed time. » A submenu is displayed. to set hour and minute. main menu. 4 Use map Note You may need to upgrade the map (sold separately) before using it (see “Upgrade the map”... -
Page 11: Play
Insert the upgraded map card back into the map card slot. Turn on the car audio. » The map upgrades in a few minutes. 5 Play Load discs the following discs: Note Ensure that the disc contains playable content. Insert a disc into the disc slot with the label side facing up. -
Page 12: Connect Usb Device
Countries where you Supported DVD bought the unit region code China Korea Latin America Connect USB device Note Ensure that the device contains playable content. Open the USB socket cover. Insert the USB device to the USB socket. » Play starts automatically. Remove the USB device Switch to another (non-USB) source. - Page 13 item to start play. Skip/search to return to playlist menu. : To display all available audio folders/track. : To display all available picture : To display all available video to select a folder/track. to start play. Search within a title/folder Direct search Tap anywhere except for the upper left necessary.
-
Page 14: Rotate Pictures
For VCD karaoke: to select: [Repeat one]: play the current track repeatedly. [Repeat all]: play all tracks repeatedly. [Repeat off]: cancel repeat play. to select: -1: play the current track repeatedly. -Folder: play all the tracks in the current folder repeatedly. (in grey color): cancel repeat play. -
Page 15: Listen To Other Devices
Zoom You can zoom in pictures for a close view. except for the upper left corner to display repeatedly to zoom in the picture. to pan through the enlarged picture. Select slide show duration Tap anywhere except for the upper left necessary. -
Page 16: Adjust Fader/Balance
to select an EQ. to adjust below settings: [Bass] bass range: -14 to +14. [Mid] middle range: -14 to +14. [Treb] treble range: -14 to +14. [LPH] [MPF] [HPF] to restore the above settings into default settings. to exit. Adjust fader/balance You can also adjust the front and rear speaker subwoofer settings. -
Page 17: Adjust Settings
7 Adjust settings Display system setup menu to display main menu. Tap [Settings]. » The settings menu is displayed. to main menu. Adjust general settings Tap [General] to highlight a setting. Tap on the option to display/select an option. General settings [Blackout] [Dimmer... -
Page 18: Adjust Sound Settings
Adjust sound settings Tap [Sound]. Tap an option repeatedly to select: Sound Options Description settings [DBB] [On] The Dynamic Bass Boost (DBB) function is on. [Off] The DBB function is off. [DRC] [On] Makes loud sound level softer and soft sound level louder so that you can watch the DVD movies disturbing others... -
Page 19: Adjust Language Settings
Adjust language settings Tap [Language]. Tap an option repeatedly to select: Language Options Description settings [OSD] [English] Select on-screen- display language. Español Português [DVD [English] Select DVD audio audio] language. Options available depend on DVD disc. Español Português [DVD [English] Select DVD subtitle] subtitle language. -
Page 20: Adjust Dvd Rating
Adjust DVD rating Tap [DVD rating]. Tap an option repeatedly to select: DVD rating Options Description [Set Set password to password] restrict the play of discs. The default password is 0000. [Rating [Kid Acceptable for level] safe] children. Acceptable for general viewers. -
Page 21: Remove The Unit
Remove the unit remove it from the dashboard. Screw off the four (4) screws on the left/ right side of the unit. Pull the unit out from the dashboard. Replace fuse and need to be replaced. Take out the unit from dashboard. Check the electric connection. -
Page 22: Troubleshooting
Screen size 8 inches (16:9) Display resolution 800 x 480 dots Contrast ratio Brightness 350 cd/m2 Compatible USB devices: memory cards (SD / MMC / SDHC) Supported formats: MP3 bit rate (data rate): 32-320 Kbps and variable bit rate WMA v9 or earlier Directory nesting up to a maximum of 8 levels Number of albums/ folders: maximum 99... -
Page 23: Glossary
Fuse is broken The Fuse type is incorrect. Replace it with a 15A fuse. Speaker wire or power wire is grounded. Check the connections. Display show ERR-12 USB/SD/MMC data error. Check the USB device or SD/MMC card. 11 Glossary Bite rate The max data transfer through the USB port. - Page 24 Secure Digital. A type of memory card with a SDHC Secure Digital High Capacity (SDHC) is a enables SD cards to reach higher capacities WMA (Windows Media Audio) part of Microsoft Windows Media technology. Includes Microsoft Digital Rights Management encoding technology.
- Page 25 © 2010 Koninklijke Philips Electronics N.V. All rights reserved. CID3691_00_UM_V1.0...