Advertisement
Advertisement
Table of Contents

Related Manuals for Toshiba ESTIA A09-01P


Summary of Contents for Toshiba ESTIA A09-01P
- Page 1 FILE NO : A09-01P Quick reference ATER...
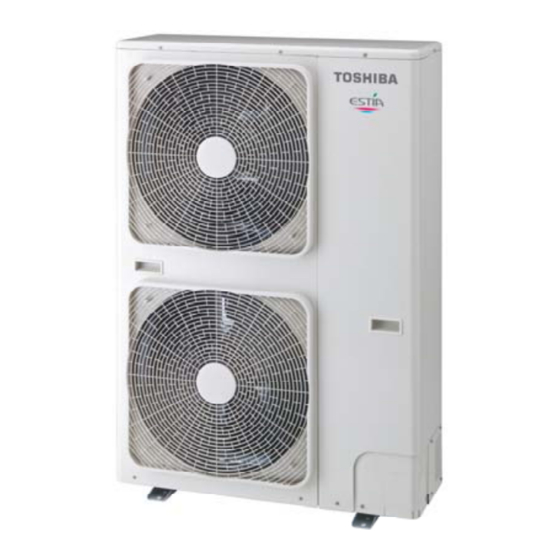
- Page 2 Estia System Outdoor unit Hydro unit Estia Outdoor Unit HWS-802H-E HWS-1102H-E HWS-1402H-E Estia Hydro Unit HWS-802XWHM3-E HWS-802XWHT6-E HWS-1402XWHM3-E HWS-1402XWHT6-E HWS-1402XWHT9-E Estia Hot Water Cylinder (EU) HWS-1501CSHM3-E HWS-2101CSHM3-E HWS-3001CSHM3-E Estia Hot Water Cylinder (UK) HWS-1501CSHM3-UK HWS-2101CSHM3-UK HWS-3001CSHM3-UK Note: Under floor heating, Fan Coil units, Radiators, valves and Hot Water Piping are procured locally. Domestic Hot Water Hot water cylinder...
- Page 3 Domestic Hot Water 210L Hot water cylinder 300L Hot water cylinder 300L Hot water cylinder 2-zone control Interlocking with Output control board kit boiler Interlocking with booster heater Toshiba Supply Part name Model code HWS-1501CSHM3-E HWS-1501CSHM3-UK HWS-2101CSHM3-E HWS-2101CSHM3-UK HWS-3001CSHM3-E HWS-3001CSHM3-UK TBC-PCIN3E...
-
Page 4: Installation Examples
Quick Reference Guide - Page 4 Installation Examples Space Cooling and Space Heating with Domestic Hot Water When both cooling and heating are used, install a 2-way valve (for cooling) to the pipe to the room for heating only. - Page 5 Quick Reference Guide - Page 5 Installation Examples (cont.) 2-Zone Space Heating with Domestic Hot Water The following shows an example of the 2-zone temperature control. A buffer tank and a water pump are required for the 2-zone temperature control. This example is Heating only, if the Fan Coils are to be used for Cooling then a 2-Way valve must be fitted.
- Page 6 Quick Reference Guide - Page 6 Hydro Unit – Exploded View 1 : Expansion vessel 2 : Hi pressure switch (4.15 MPa) 3 : Temperature sensor (for Heat pump outlet -TWO) 4 : Pressure sensor 5 : Heat exchanger 6 : Flow switch (13.0 L/min 17.5 L/min) 7 : Temperature sensor (for refrigerant -TC) 8 : Temperature sensor (for water inlet -TWI) 9 : Drain nipple...
-
Page 7: Refrigerant Piping
Refrigerant Piping Refrigerant Pipe Lengths and Height The length and height of the refrigeration pipe must be within the following values. Refrigeration and Water Cycle Diagrams Hydro Unit Expansion vessel Hi_P_Switch Refrigerant pipe at gas side (Outer ø15.88) P_Sensor Sensor Refrigerant pipe at liquid side (Outer ø9.52) - Page 8 Quick Reference Guide - Page 8 Outdoor Unit HWS-802H-E HWS-1102H-E, 1402H-E...
-
Page 9: Water Piping
Water Piping • Install water pipes according to the regulations of respective countries. • Install water pipes in a freeze-free place. • Make sure that water pipes have sufficient pressure resistance (The setting value of the pressure relief valve is 0.3 MPa). •... - Page 10 Checking water volume and initial pressure of expansion vessel The expansion vessel of the Hydro Unit has a capacity of 12 litres. The initial pressure of the expansion vessel is 0.1 MPa (1 bar). The suggested initial water charge is 0.2MPa (2 bar). The pressure of the safety valve is 0.3 MPa (3 bar).
-
Page 11: Water Quality
Quick Reference Guide - Page 11 Pump operation / configuration Change Pump speed, so that water flow is always greater than the minimum flow rate. If water flow is lower than the minimum rate during operation, the unit detects error. Water charging Charge water until the pressure gauge shows 0.2 MPa (2 bar). -
Page 12: Electrical Connections
Quick Reference Guide - Page 12 Electrical Connections E Box layout Terminal Block Connections... - Page 13 Quick Reference Guide - Page 13 Power Lines Schematic Control Lines Schematic...
- Page 14 Electrical supply / cable specifications Wiring specifications (power line) POWER Description SUPPLY 14 kW 230 V ~ 50 Hz Outdoor unit power 11 kW 230 V ~ 50 Hz 8 kW 230 V ~ 50 Hz Outdoor-Hydro – 3 kW 230 V ~ 50 Hz Hydro inlet heater 6 kW...
- Page 15 Input line specifications Description Emergency stop control Cylinder thermostat input Cooling thermostat input Heating thermostat input Earthing arrangements The Hydro Unit and related equipment must be earthed in accordance with your local and national electrical regulations. It is essential that the equipment is earthed to prevent the electric shock and damage to the equipment.
- Page 16 Electrical connection for external booster heater The maximum current available from the booster heater output is 1 A. Do not connect the booster heater directly to Terminal Block 05 on the Hydro Unit. The AC230 V 1 A output from the Hydro Unit must only be used to energize an external contactor (Supplied locally). •...
- Page 17 2-way valve (for cooling) connection Required Valve Specification: Electrical Specification: 230 V; 50 Hz; <100 mA Return Mechanism: 2-wire spring return. • The Hydro Unit has the facility to connect a 2-way valve to isolate Space Conditioning Units that do not perform cooling, when Cooling Mode is selected.
- Page 18 Quick Reference Guide - Page 18 3-way mixing valve connection Required Actuator Specification Electrical Specification:230 V; 50 Hz; <100 mA The 3-way mixing valve is used to achieve the temperature differential needed in a 2-zone heating system. • Connect the 3-way mixing valve in accordance with the diagrams below:- Hot water cylinder connection (optional) •...
- Page 19 Setting DIP Switches on the Board in the Hydro Unit • Detach the front cover and the electric parts box cover of the Hydro Unit. • Set the DIP switches on the main board. SW10 Description Internal pump P1 operating mode External P2 pump operation SW11...
- Page 20 Hydro Unit Remote Control Buttons and Functions 1. TEMP. button: Changes the set temperature for each operation mode (ZONE1/2 hot water) by 1°C step. 2. SCHEDULE button: Sets the current time and scheduled weekly operation. Changes time for current time 3.
-
Page 21: Display Explanation
Display Explanation 18: ZONE1, ZONE2 Display Description Lights when floor heater or radiator is connected (when the system has floor heater or radiator). ZONE1 selected for Temperature to be changed. Lights when system configured to have 2 zones. ZONE2 selected for Temperature to be changed. - Page 22 Display Explanation (cont.) 19: TIMER Display Description Clock: Displays the current time (AM or PM). Displays days of the week (Sunday to Saturday). Lights when the NIGHT button is pressed and goes out when the button is pressed again. Lights when night time quiet operation is set.
- Page 23 Main setting items ) Setting Hot Water Temperature Range (function code 18 to 1F) • Set the temperature range for heating (zone 1, zone 2), cooling, and h • The upper-limit and lower-limit temperatures of each mode can be set. ) Setting Heat Pump Operation Conditions for Hot Water Supply (func •...
- Page 24 Main setting item (cont.) 1)Setting 2-Way Valve (for Cooling) Operation (function code 3C) • When using both cooling and heating operations and there is an indoor heating), install the 2-way valve and set this function code. 2)Setting 3-Way Valve Operation (function code 54) •...
- Page 25 Function Code List (cont.) Outside temperature T1 °C Outside temperature T2 °C Outside air temperature T3 °C Setting temperature A at -20 °C Heating Setting temperature B at T1°C Auto Curve Setting temperature C at T2°C Settings Setting temperature D at T3°C Setting temperature E at +20°C Ratio of Zone 2 in Zone 1 Auto mode (%) Temperature shift of entire Auto curve (°C)
- Page 26 Function Code List (cont.) Remote Controller 24 hour or 12 hour remote control display. Indication 0=24hr; 1=12hr 0 = Function invalid Outdoor Night Time 1 = Function valid Low Noise Start time (hour) Operation End time (hour) Alarm Tone Tone Switching 0: OFF, 1: ON Pump P2 remote 0 = Not Shown;...
-
Page 27: Test Run
Settings by Purpose (cont) Settings for 2-zone temperature control • Procure a motorized mixing valve locally and perform piping. Connect the valve cables (as described in Electrical section). • Procure a buffer tank locally. • Procure a water pump locally, and connect its cables (as described in Electrical section). To inhibit interlocking the water pump with the internal pump of the Hydro Unit, set DIP SW10-3 on the Hydro Unit board to OFF. -
Page 28: Sensor Temperature Monitoring Function
Sensor Temperature Monitoring Function The sensor sensing temperature is displayed on the remote controller. This function allows you to make sure whether the sensor is installed properly. 1) Press the TEST + CL 2) Select the Code No. with the TEMP. 3) Press the TEST button to exit the test mode. -
Page 29: Alarm Indications
Alarm Indications Alarm indication Regular communication error between hydro unit and remote controller (system controller) If there is no regular communication from the remote controller for three minutes, the hydro unit regards it as no remote controller. If there is no communication from both sides, alarm E03 occurs. Auto-reset: When successful regular communication is made Regular communication error between hydro unit and outdoor unit When serial signal from the outdoor unit cannot be received though normal serial signal is sent to the outdoor unit 1) When serial signal... - Page 30 Alarm Indications (cont) Overheat preventive operation malfunction Auto-reset: When operation mode is changed Release preventive operation malfunction This alarm occurs when the Hydro Unit enters the forced- stop zone 10 times. Self-hydro unit is stopped due to alarm of other hydro unit. When alarm occurs in an hydro unit in the group, other hydro units must also be stopped with refrigerant control.
- Page 31 Outdoor Fault Diagnosis You can perform fault diagnosis of the outdoor unit with the LED's on the P.C. board of the outdoor unit in addition to check codes displayed on the wired remote controller of the hydro unit. Use the LED’s and check codes for various checks. Check of the current abnormal status 1.