Table of Contents
Advertisement
Quick Links
Advertisement
Table of Contents

Related Manuals for Toshiba SG-1981


Summary of Contents for Toshiba SG-1981
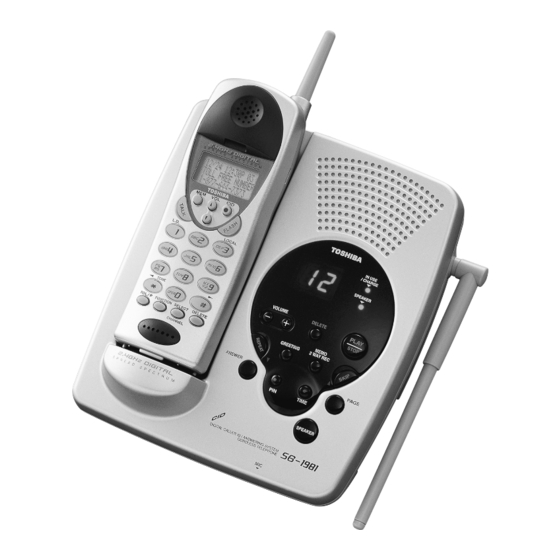
- Page 1 OWNER S MANUAL 2.4GHz DIGITAL SPREAD SPECTRUM CORDLESS TELEPHONE DIGITAL ANSWERING SYSTEM SG - 1981 The FIRST thing to do after unpacking your new cordless telephone is: CHARGE THE BATTERY ! Please read and follow the few instructions on PAGE 2 BEFORE YOU DO ANYTHING ELSE.
- Page 2 GETTING STARTED: DO THIS FIRST! FIRST, CHARGE THE HANDSET BATTERY! • Set your new phone in an out-of-the-way place near a power outlet where it will not be disturbed. • Plug the AC adaptor into the wall outlet. • Plug the AC adaptor cord into the power jack on the base unit.
-
Page 3: Introduction
Toshiba America Consumer Products, Inc., takes pride in presenting the new 2.4 GHz cordless telephone and digital answering system. The Toshiba cordless telephone features a 16-digit x 3-line dot matrix liquid crystal display (LCD) for caller ID on Call Waiting and speed dial programming and calling. -
Page 4: Table Of Contents
TABLE OF CONTENTS Preparation INTRODUCTION ......... .3 Features . - Page 5 If you make a mistake while entering a name ....27 Dialing a stored number ........27 Editing and deleting stored numbers .
-
Page 6: Important Safety Instructions
IMPORTANT SAFETY INSTRUCTIONS When using your telephone equipment, basic safety precautions should always be followed to reduce the risk of fire, electric shock and injury. 1 Read and understand all instructions. 2 Follow all warnings and instructions marked on the product. 3 Unplug this product from the wall outlet before cleaning. -
Page 7: Save These Instructions
The RBRC Seal The RBRC (contained in our product) indicates that Toshiba America Consumer Products, Inc. (TACP) is voluntarily participating in an industry program to collect and recycle these batteries at the end of their useful lives, when taken out of service within the United States. The RBRC program provides a convenient alternative to placing used nickel- cadmium batteries into the trash or municipal waste, which is illegal in some areas. -
Page 8: Location Of Controls
LOCATION OF CONTROLS HANDSET Headset jack (Memory) button (page 24) TALK button (page 18) button (page 32) L.D./1 (TONE) button (page 20) TONE/ ( ) button (Left arrow button) (page 24 to 28) (Redial/Pause) button RDL/P (page 19 to 20) button (page 15 to 16, 36) FUNCTION charging contacts... -
Page 9: Base Unit
(page 40) Microphone RING TIME switch (2/4/TS) (page 38) REC TIME switch (ANN/4/1) (page 39) For purchase of accessories, please call 1-877-644-7373. Rechargeable Battery Pack Toshiba TRB-1981 Part # RC009814 LOCATION OF CONTROLS PAGE SPEAKER TIME button (page 39) Owner’s manual... -
Page 10: Installation
INSTALLATION SETTING UP THE BASE UNIT (DESK TOP MOUNTING) For setting up the base unit follow the instructions below. Snap the bracket’s tab into the notches on the base. Raise the antenna to vertical position. • Plug the AC adaptor firmly into the base unit and the AC 120V outlet. •... -
Page 11: Setting Up The Base Unit (Wall Mounting)
SETTING UP THE BASE UNIT (WALL MOUNTING) MOUNTING ON A STANDARD WALL PLATE: Insert the bracket’s tabs into the base’s lower tab slots, then press down on the top of the bracket to snap it into the clip slots. Flip the hook tab over so the tab holds the handset. -
Page 12: Charging The Battery Pack
INSTALLATION CHARGING THE BATTERY PACK It is important to charge the battery for 12-16 hours continuously without any interruption before you use the handset for the first time. Black IN USE/ CHARGE Charging contacts Remove the battery cover on the back of the handset by sliding it down. - Page 13 NOTES: • Use only the supplied battery pack (TRB-1981 power source 800mAh, 3.6VDC) • The battery pack is not charged properly if the charging contacts are dirty or tarnished. Clean the contacts occasionally with a dry cloth. After the battery pack is fully charged; Operation While in use (Talk mode) While not in use (Standby mode)
-
Page 14: Setting The Tone/Pulse Switch
INSTALLATION Before using the Handset, make sure to read the following instructions. SELECT/CHANNEL FUNCTION SETTING THE TONE/PULSE SWITCH Set the TONE/PULSE switch to TONE. Place a call. If the call does not connect with the TONE setting, set the TONE/PULSE switch to PULSE. TONE/PULSE switch... -
Page 15: Setting Or Canceling The Auto Talk Function
SETTING OR CANCELING THE AUTO TALK FUNCTION If the handset is placed on the base unit, you can answer a call by lifting the handset from the base unit (Auto Talk). If the handset is not on the base unit, you can answer a call by pressing any one of the buttons (Any-key Answer function). -
Page 16: Setting The Area Code
INSTALLATION SETTING THE AREA CODE It is necessary to program your area code so that local calls will be displayed properly on caller ID. Press FUNCTION Press to move the pointer to Area Code. Press SELECT/CHANNEL Enter your 3-digit area code. For example, enter “615.” If you enter a wrong number, press Press SELECT/CHANNEL... -
Page 17: Using The Headset And Belt Clip (Option)
USING THE HEADSET AND BELT CLIP (OPTION) For purchase of an optional accessory, please call 1-877-644-7373. HEADSET You can use an optional headset (part#: RC008260) that has a 3/32- inch (2.5mm) plug. NOTES: • The handset's earspeaker and microphone are turned off with a headset connected. -
Page 18: Basic Operation
BASIC OPERATION Before using the Handset, make sure to read the following instructions. TALK TONE/ RDL/P MAKING A CALL Handset On The Base 1) Pick up the handset. 2) Press TALK 3) Listen for the dial tone. 4) Dial the number. 1) Pick up the handset. -
Page 19: 3-Number Redial
3-NUMBER REDIAL You can redial any of the last three numbers dialed from the handset: Press in standby mode. The last dialed number (Redial 1) RDL/P appears. Each time you press dialed numbers (Redial 1 to Redial 3). After the desired number has been selected, press connected. -
Page 20: Tone/Pause
BASIC OPERATION TONE/PAUSE To temporarily switch to tone dial (When the base is set to pulse mode), see page 14. To enter a pause within the dialing sequence EXAMPLE : To make a call “0 pulse mode, press INTERFERENCE OR STATIC Static interference can be caused by many different things, such as cordless phones in neighboring homes or apartments, microwave ovens, certain kinds of lighting, etc. -
Page 21: Base Speakerphone
BASE SPEAKERPHONE Press . To hang up, press SPEAKER VOLUME –/+ SWITCHING FROM THE SPEAKERPHONE TO THE HANDSET To switch to the handset while you are using the base unit speakerphone, pick up the handset from the base unit. Then you can continue talking with the handset. -
Page 22: 3-Way Conversation
BASIC OPERATION 3-WAY CONVERSATION The phone permits 3-way conversation between the handset, base, and outside line. When speaking on the handset Press on the base to join the 3-way conversation. SPEAKER To hang up, press connected to the call. When speaking on the base Press on the handset to join the 3-way conversation. -
Page 23: Paging The Handset
PAGING THE HANDSET To locate the handset while it is off the base, press . The handset beeps for 60 PAGE seconds. To stop paging, press return the handset to the base unit. NOTES: • You cannot page the handset during a call. •... -
Page 24: Memory Dialing
MEMORY DIALING You can store up to 20 telephone numbers. NOTES: • Always press a button within 20 seconds or the phone will return to standby. • If you press a wrong button, an error tone sounds and the handset returns to standby mode. - Page 25 Press SELECT/CHANNEL To enter a name, use the number keys. • See the steps for storing names and special characters. (see page 25) • If a name is not required, go to step 5. Press SELECT/CHANNEL Enter a telephone number to be stored. NOTES: •...
-
Page 26: Steps For Entering Names And Special Characters
MEMORY DIALING STEPS FOR ENTERING NAMES AND SPECIAL CHARACTERS Refer to the letters on the number buttons to select the desired letter. Each button selects a character as shown below. Keys For example, to enter “ Pick up the handset and press and hold sounds. -
Page 27: If You Make A Mistake While Entering A Name
Press five times. When finished, press Press stored. Press SELECT/CHANNEL IF YOU MAKE A MISTAKE WHILE ENTERING A NAME to move the cursor to the incorrect character. Press to erase the wrong entry, then enter the correct character. To DELETE delete all characters, press and hold DIALING A STORED NUMBER Pick up the handset and press... -
Page 28: Editing And Deleting Stored Numbers
MEMORY DIALING EDITING AND DELETING STORED NUMBERS You can delete a number or simply store another one in its place. When you store a new phone number, the data stored in that memory location is deleted automatically. Pick up the handset and press and hold The confirmation tone sounds. - Page 29 DELETING THE STORED DATA (1) Press to move the pointer to select (2) Press DELETE SELECT is selected: a confirmation tone sounds and the number is erased. is selected: the LCD returns to the “ ” display. (3) Press , or return the handset to the base unit. MEMORY DIALING...
-
Page 30: Caller Id/Call Waiting
CALLER ID/CALL WAITING VOL/RING TALK L.D./1 FUNCTION NOTES • Before you can take advantage of the Caller ID and Call Waiting features, you must subscribe to these services from your local telephone company. • Name and number caller ID only work in conjunction with service provided by your local telephone company. -
Page 31: Searching Caller Id Memory
SEARCHING CALLER ID MEMORY To review who has called, follow the steps below. The caller ID memory retains a listing of the 50 most recent callers. Pick up the handset and press If new caller ID data does not exist: If there is new caller ID data: Press to display the latest incoming call. -
Page 32: Editing Caller Id Data
CALLER ID/CALL WAITING EDITING CALLER ID DATA You can edit the Caller ID data. Pick up the handset and press repeatedly to display the Caller ID data you want to edit. Press for a long distance call prefix “1” and L.D./1 for area code setting and cancellation. -
Page 33: Transfering Cid Number To Memory
TRANSFERING CID NUMBER TO THE MEMORY Pick up the handset and press to indicate the number you want to store in the memory. Press Enter a two-digit number (01-20) or press to select memory location. Press SELECT/CHANNEL ID data is stored. Press If you select a memory location which is already stored: Press to select “... -
Page 34: Deleting Caller Id Data
CALLER ID/CALL WAITING DELETING CALLER ID DATA DELETE INDIVIDUAL CALLER ID DATA: Pick up the handset and press to display the caller ID number you want to delete from the memory. Press DELETE Press to select Press SELECT/CHANNEL select “ , ”... -
Page 35: Call Waiting
CALL WAITING "Caller ID" and "Call waiting" are separate services. CIDCW (Caller ID on Call Waiting) performs the same as regular Caller ID on a call waiting number. You must subscribe to the CIDCW services before you can use the following features. The "Call waiting" service can also be used independently. -
Page 36: Call Waiting Options
You may be required to subscribe to a call waiting and call waiting options to use these features. Follow these steps to use call waiting options. This is an example for “Conference.” Talk 0:02 TOSHIBA CORP 817-858-3300 FUNCTION Press 1s s Ask to Hold 2 Tell Busy... - Page 37 The options you can choose are shown below: Option Ask to Hold Tell Busy Answer / Drop 1 Conference Drop First Drop Last NOTES: • When using each of the options listed above, an extra charge might apply. • Not all options are available in all areas. Check with your local telephone company for details.
-
Page 38: Setting The Answering Machine
SETTING THE ANSWERING MACHINE LED Display VOLUME/+ VOLUME/– REPEAT GREETING ANSWER SETTING THE NUMBER OF RINGS RING TIME REC TIME 2/4/TS ANN/4/1 RING TIME switch TS (TOLL SAVER MODE): The phone answers at the second ring when there are new messages, and the fourth ring when there are no new messages. -
Page 39: Setting The Recording Time
SETTING THE ANSWERING MACHINE SETTING THE RECORDING TIME RING TIME REC TIME 2/4/TS ANN/4/1 REC TIME switch ANN (Announce Only): If you set the switch to ANN, the selected greeting message will be announced and no message will be accepted. The LED display shows "A". SETTING THE CLOCK The answering machine announces the day and time that each message was recorded during a play back. -
Page 40: Setting The Pin Number
SETTING THE ANSWERING MACHINE SETTING THE PIN NUMBER To access to your answering machine when you are away from home, you need to identify yourself with a Personal Identification Number (PIN). You can select any two digit number between 00 and 99 as your PIN. -
Page 41: Using The Answering Machine
SETTING THE ANSWERING MACHINE TURNING THE ANSWERING MACHINE ON & OFF Press to turn the answering machine on. The number of ANSWER messages appears on the LED display. The greeting message will be played and you hear a long beep. To turn the answering machine off, press off. -
Page 42: Checking And Switching Greeting Message
SETTING THE ANSWERING MACHINE CHECKING AND SWITCHING GREETING MESSAGE You can check the message and switch from the Pre-recorded message to the user greeting message. Press in the standby mode. GREETING The current greeting message will be played. During playback, press message. -
Page 43: Deleting Recorded Messages
USING THE ANSWERING MACHINE DELETING RECORDED MESSAGES To delete all messages: Press and hold DELETE messages. If there are messages that you have not listened to, an error tone sounds and the messages will not be deleted. To delete individual messages: During playback of the message you want to delete, press The message is deleted and the next message will be played. -
Page 44: Leaving A Memo Message
USING THE ANSWERING MACHINE LEAVING A MEMO MESSAGE You can use the base unit to record a memo (up to 10 minutes), as a reminder to yourself or as a message for someone else in the household. A memo is stored and played back like any other incoming message, and the LED display will blink to indicate that a message has been received. -
Page 45: Calling In From A Remote Location
USING THE ANSWERING MACHINE CALLING IN FROM A REMOTE LOCATION You can retrieve messages or change answering machine settings by calling your phone from a touch-tone phone. Even if the answering machine has been left off, you can still access it by turning it on first. IF THE ANSWERING MACHINE IS OFF: Let the phone ring at least 10 times. -
Page 46: Table Of Commands
USING THE ANSWERING MACHINE TABLE OF COMMANDS OPERATION To repeat an incoming message; (during playback) To playback an incoming message (up to 4 minutes) To skip to the next message (during playback) To delete individual messages (during playback) To stop operation To turn the answering system on To record a memo message (up to 4 minutes) -
Page 47: Troubleshooting
Should any problem occur with the unit, use the following simple tests to determine whether or not servicing is required. PROBLEM The handset battery • The charging contacts of the handset and base are not clean. pack does not charge. •... - Page 48 TROUBLESHOOTING PROBLEM CHARGE LED will not • The charging contacts of the handset and the base are light when the handset is placed on the base. • The AC adaptor of the base unit is disconnected. • The handset is not on the base. •...
- Page 49 PROBLEM The answering • The recording capacity is full. → Delete some or all of the recorded messages. machine does not answer the call. Answering machine • No message is recorded. → This is normal. does not play. The messages are not •...
- Page 50 CALLER ID CORDLESS TELEPHONE DIGITAL ANSWERING SYSTEM Setting The Tone/Pulse Switch GUIDE SG-1981 Set the TONE/PULSE switch to TONE. Read the Owner’s Manual for details. Place a call. If the call does not connect with the TONE setting, set the...
-
Page 51: Warranty/Service
If the unit is still in warranty, the remainder of the warranty period will also be null and void. It is the responsibility of users requiring service to report the need for service to the Toshiba dealer. - Page 52 TELEPHONE/TELEPHONE ANSWER MACHINE LIMITED WARRANTY Toshiba America Consumer Products, Inc. (“TACP”), and Toshiba Hawaii, Inc. (“THI”), make the following limited warranties. These limited warranties extend to the original consumer purchaser or any person receiving this set as a gift from the original consumer purchaser and to no other purchaser or transferee.
-
Page 53: Remote Operation Cards
(# and number) by pressing the keypad. To playback incoming and memo messages, press #2. To skip, press #3 OPERACIONES POR CONTROL REMOTO SG-1981 Llame a su teléfono desde un teléfono de teclado. Después que su teléfono conteste, introduzca # y el código de seguridad (PIN) presionando cada dígito durante 1 segundo como... - Page 54 REMOTE OPERATION CARDS WHILE PLAYING THE OGM, KEY-IN MESSAGE MESSAGE REPEAT PLAYBACK RECORD STOP/ MESSAGE DELETE OPERATION STOP (during playback) GREETING MEMO RECORD RECORD ROOM MONITOR DURANTE LA REPRODUCCIÓN DEL MENSAJE DE CONTESTACIÓN, PRESIONE REPETICIÓN DE REPRODUCCIÓN MENSAJE DE MENSAJE BORRADO DE DETENCIÓN DE MENSAJE...
- Page 55 We suggest you record the following information and retain for your records along with your bill of sale or equipment document. Model no. Purchase date Dealer address © 2001 TOSHIBA AMERICA CONSUMER PRODUCTS, INC. UCZZ01739BZ RC009820 Serial no. Dealer Printed in China...