Table of Contents
Advertisement
Quick Links
Introduction
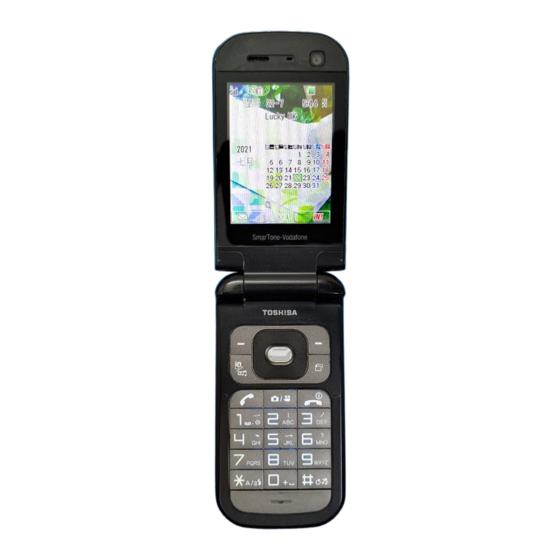
Congratulations on choosing the Toshiba TX80.
Thank you for choosing the Toshiba TX80 mobile phone, which
incorporates 3G technology, also known as UMTS.
Toshiba TX80 brings together the mobile phone and a music player in
one package. The music player is easy to use, offering simple access
to music on the move.
Toshiba TX80 also provides entertainment features like video telephony,
video and picture messaging, as well as browser service for quick
access to the Internet.
The Toshiba TX80 has a high-quality 260,000 colour display and 3.2
mega pixel camera.
We hope that you will be very happy with your new Toshiba mobile phone.
Network services
To use the phone you must have service from a wireless service
provider. Many of the features in this device depend on features in the
wireless network to function. These Network Services may not be
available on all networks or you may have to make specific
arrangements with your service provider before you can utilize
Network Services. Your service provider may need to give you
additional instructions for their use and explain what charges will
apply. Some networks may have limitations that affect how you can
use Network Services. For instance, some networks may not support
all language dependent characters and services.
This wireless device is a 3GPP GSM Release 99 terminal supporting
GPRS service, and is designed to support also Release 97 GPRS
networks. However, there may be some compatibility issues when
used in some Release 97 GPRS networks. For more information,
contact your service provider.
Before Using the Toshiba TX80
THIS PRODUCT CONTAINS SOFTWARE WHICH ALLOWS YOU TO
TRANSFER SPECIFIED MUSIC DATA STORED ON YOUR PC TO YOUR
TOSHIBA TX80. THIS DOES NOT INCLUDE THE CAPABILITY TO
RECORD CDs TO YOUR PC. RECORDING MUSIC FILES CAN BE DONE
USING WINDOWS MEDIA™ PLAYER BY MICROSOFT CORPORATION
OR OTHER SIMILAR SOFTWARE AND APPLICATIONS. WINDOWS
MEDIA IS A TRADEMARK OF MICROSOFT CORPORATION IN THE
UNITED STATES AND OTHER COUNTRIES.
MUSIC IS PROTECTED BY COPYRIGHT LAWS IN THE IRRESPECTIVE
COUNTRIES AND THE TRANSFER AND REPRODUCTION OF
COPYRIGHTED MATERIALS IS PERMITTED FOR PRIVATE PERSONAL
USE ONLY. ANYONE FOUND DUPLICATING OR DISTRIBUTING MUSIC
DATA OVER A NETWORK (OR ASSISTING OTHERS TO DO SO)
WITHOUT THE AGREEMENT OF THE RIGHTS HOLDER, WILL BE IN
VIOLATION OF COPYRIGHT LAWS. TOSHIBA DISCLAIMS ALL
RESPONSIBILITY FOR ANY CONSEQUENCES ARISING FROM ILLEGAL
USE OF TOSHIBA OR THIRD PARTY SOFTWARE.
Copyright©2006 TOSHIBA CORPORATION, All rights reserved.
1
Advertisement
Table of Contents

Related Manuals for Toshiba TX80


Summary of Contents for Toshiba TX80
-
Page 1: Introduction
The Toshiba TX80 has a high-quality 260,000 colour display and 3.2 mega pixel camera. We hope that you will be very happy with your new Toshiba mobile phone. Network services To use the phone you must have service from a wireless service provider. -
Page 2: Your Mobile Phone
This End User License Agreement (“EULA”) is a legal agreement between you (as the user) and TOSHIBA CORPORATION (“Toshiba”) with regard to the copyrighted software as installed in a Toshiba 3G mobile phone supplied to you (the “Phone”). Use or disposal of any software installed in the Phone and related documentations (the “Software”) will constitute your acceptance of... - Page 3 7. Third Party Beneficiary. You agree that certain suppliers of the Software to Toshiba have a right as a third party beneficiary to enforce the terms of this EULA against you as a user. 8. Transfers. The Software may be transferred only as installed on the Phone to a lawful third party user, where that party accepts the terms of this EULA which will continue to apply.
- Page 4 Licensed by QUALCOMM Incorporated under one or more the following United States Patents and/or their counterparts in other nations : 4,901,307 5,504,773 5,109,390 5,535,239 5,267,262 5,600,754 5,416,797 5,778,338 5,490,165 5,101,501 5,511,073 5,267,261 5,568,483 5,414,796 5,659,569 5,056,109 5,506,865 5,228,054 5,544,196 5,337,338 5,657,420 5,710,784 Java™...
- Page 5 Copyright © 1998-2003 The OpenSSL Project. All rights reserved. Copyright © 1995-1998 Eric Young (eay@cryptsoft.com) All rights reserved. THIS SOFTWARE IS PROVIDED BY THE OpenSSL PROJECT AND/OR BY ERIC YOUNG “AS IS” AND ANY EXPRESSED OR IMPLIED WARRANTIES, INCLUDING, BUT NOT LIMITED TO, THE IMPLIED WARRANTIES OF MERCHANTABILITY AND FITNESS FOR A PARTICULAR PURPOSE ARE DISCLAIMED.
-
Page 7: Safety Instructions
• Interference may affect your Phone’s performance. This is perfectly normal and once you move away from the source of the interference, the Phone should operate as usual. • Do not attempt to disassemble your product. Only Toshiba authorised personnel should perform service. FCC Notice This device complies with Part 15 of the FCC rules. -
Page 8: Information To User
Information to User This equipment has been tested and found to comply with the limits of a Class B digital device, pursuant to Part 15 of the FCC Rules. These limits are designed to provide reasonable protection against harmful interference in a residential installation. This equipment generates, uses and can radiate radio frequency energy and, if not installed and used in accordance with the instructions, may cause harmful interference to radio communications. -
Page 9: Table Of Contents
Contents Introduction ... 1 Safety Instructions... 7 Contents... 9 What’s in the Box ... 12 About This Manual ... 12 1 Basic Operations... 13 Parts & Functions... 14 Indicators... 17 SIM Card ... 19 Codes... 20 Emergency Calls ... 21 Battery Pack ... - Page 10 5 Message ... 77 Messaging Capabilities... 78 Creating & Sending an MMS Message... 79 Creating & Sending an SMS Message... 81 Reading Received MMS & SMS Messages... 82 Checking Sent MMS & SMS Messages... 83 MMS/SMS Settings & Common Operations... 84 6 Browser ...
- Page 11 11 Appendix ... 125 Troubleshooting... 126 Specifications ... 127 Index ... 128 Health and Safety Information ... 131 Menu Structure ... 135...
-
Page 12: What's In The Box
What’s in the Box Your box contains the following items: Phone Battery Pack Battery Cover AC Adapter USB Cable for PC Connection CD-ROM User Guide About This Manual Symbols This manual uses the following symbol. indicates to use G to select an item and press @ or J (Select) to confirm the selection. -
Page 13: Basic Operations
1 Basic Operations This chapter explains the basic operations and functions of your phone. In This Chapter Parts & Functions Indicators SIM Card Codes Emergency Calls Battery Pack Memory Card Turning On/Off the Power Date & Time Settings Main Menu Making a Call Answering a Call Operations during Calls... -
Page 14: Parts & Functions
Parts & Functions Basic Operations... - Page 15 1: Earpiece 2: Main Display 3: Navigation Key E: Moves the cursor up, down, left or right. Press A to access shortcuts (page 103). Centre Key @: Confirms selections and performs selected operations. Displays the main menu. 4: Left Soft Key: Performs the operation indicated at the left bottom of the main display.
-
Page 16: Using The Navigation Key
Using the Remote Control Keys (Optional Accessory) You can use the remote control keys for operations such as making calls and playing music (pages 52, 54, 107). 1: Send/End Key: Makes and answers calls. Ends calls. 2: Play/Pause Key 3: Hold Switch: Disables the remote control keys. 4: Belt Clip 5: Volume Keys 6: Rewind Key/Forward Key... -
Page 17: Indicators
Indicators Main Display The following indicators appear on the main display. : Indicates the signal strength is at one of five levels. : Indicates Flight mode (page 105) is set to On. : Indicates data is being synchronised with an external device. (Voice/Video Call): Indicates a voice or video call in progress. -
Page 18: External Display
(Phone Lock): Indicates the phone lock (page 108) is set. : Indicates the alarm (page 116) is set. : Indicates both Silent and Vibration are set or either Silent or Vibration is set (pages 101, 102). : Indicates a missed call. : Indicates the SMS and MMS message inbox (page 82) is full. -
Page 19: Sim Card
Information Prompt This feature notifies you of missed calls, unread messages or other unconfirmed information. If you have unconfirmed information, the information prompt appears in standby mode. While the information prompt is displayed, select the item you want to confirm and press J (Select). The information prompt contains the following items. -
Page 20: Codes
Inserting & Removing the SIM Card Before inserting or removing the SIM card, remove the battery pack. For details on removing the battery pack, see page 22. Make sure the power is turned off before removing the SIM card. 1. Draw out the tray by pulling the tab. 2. -
Page 21: Emergency Calls
Codes Your security code, centre access code and call barring service code are required for using your phone. Security Code Your security code is “0000” or the four-digit number you selected when you concluded your contract. It is required to use functions and perform operations on your phone. -
Page 22: Battery Pack
Note • Most GSM networks support the internationally recognised emergency numbers of 112 and 911 (for the USA), consult your service provider in the country you are in for the correct number to dial in an emergency. • Calls cannot be made to emergency services while data communication is being performed within a GSM area. -
Page 23: Charging The Battery Pack
Charging the Battery Pack Charging indicator 1. Open the cover of the cable and phone charging terminal and insert the connector of the AC adapter. 2. Insert the plug of the AC adapter into an AC outlet. The charging indicator lights up and charging begins. 3. -
Page 24: Memory Card
Memory Card About the Memory Card You can save pictures taken and videos recorded with the camera of your phone and various downloaded data to the memory card. This manual refers to the microSD™ memory card as the “memory card.” Your phone supports memory cards with a storage capacity of up to 1 GB. -
Page 25: Turning On/Off The Power
Turning On/Off the Power Turning On the Power 1. Press and hold O. The standby screen appears on the main display. If the PIN code request (page 108) is set to On, enter your PIN code after you press and hold O. Note •... -
Page 26: Main Menu
Note • When you set the date and time displayed in standby mode to the summer time, set the DST setting to On. If the DST setting is left set to Off, the correct reception date and time cannot be displayed for SMS and MMS messages received during the summer time period even if the date and time of your phone are set to the summer time. -
Page 27: Making A Call
Camera: Allows you to take pictures and record videos (page 67). Gallery: Allows you to check the pictures you took, videos you recorded and other data stored in data folders (page 93). Media Player: Allows you to play music and video files, as well as stream playback (page 50). -
Page 28: Answering A Call
• You can perform the following operations if you press (Options) after entering a phone number in standby mode. • Voice Call: Makes a voice call. • Video Call: Makes a video call (page 62). • Save to Contacts: Saves the phone number to the Contacts list (page 40). -
Page 29: Operations During Calls
Rejecting a Call You can manually reject an incoming call. To automatically reject calls from specific phone numbers, add the phone numbers to the Rejection list (page 108). 1. A call is received. 2. Press O. Operations during Calls Adjusting the Earpiece Volume during a Call You can use G or the side keys (P, Q) to adjust the earpiece volume to one of five levels. -
Page 30: Call Log
Other Operations during a Call You can perform the following operations if you press J (Options) during a call. Hold: Places the call on hold. Mute My Voice: Mutes the outgoing sound. Mute All: Mutes both the outgoing and incoming sound. Contacts List: Allows you to refer to the Contacts list. -
Page 31: Optional Services
Note • Some items may be unavailable depending on the SIM card inserted. • You can perform the following operations if you press (Options) while viewing dialled numbers, missed calls or received calls. • View: Displays the details. • Voice Call: Makes a voice call. •... - Page 32 Call Divert Service This service allows you to divert calls you are unable to answer to a preset phone number. Starting the Call Divert Service 1. In standby mode, press @. The main menu appears. Settings Call Settings Call Diverting 3.
-
Page 33: Call Waiting Service
Stopping the Call Divert Service 1. After Step 2 of “Starting the Call Divert Service” (page 32), select Deactivate All and press J (Request). After a network connection is established, the settings complete screen appears and all call divert services are stopped. To stop call divert services individually, select Deactivate after Step 3 of “Starting the Call Divert Service”... - Page 34 Using the Call Waiting Service 1. The call waiting tone is heard during a call. 2. Press J (Options). 3. Select Answer and press J (Select). The original caller is placed on hold and a connection is established with the second caller. Both names appear on the display.
-
Page 35: Character Input
Caller ID Service This service allows you to set whether to notify the other party of your phone number when you make a call. 1. Before the phone number, dial *31# if you want to notify the other party of your phone number and dial #31# if you do not want to notify the other party of your phone number. - Page 36 abc/Abc/ABC (Multi Tap mode): Allows you to directly enter letters of the alphabet. Each press of a digit key switches the letter to the next letter assigned to that key. Select abc for all lowercase characters, Abc for initial caps and ABC for all uppercase characters.
- Page 37 1. In a character input screen, switch to T9 mode (page 35). 2. Enter characters. Example: To enter “toshiba”, press 8674422. If the word you want to enter does not appear, press B to display the next prediction.
-
Page 38: Entering Symbols
1. In a character input screen, switch to Multi Tap mode (page 36). 2. Enter characters. Example: To enter “toshiba”, press 8 once, 6 three times, 7 four times, 4 twice, 4 three times, 2 twice and 2 once. -
Page 39: Call Manager
Setting the Input Language The language displayed in character input screens is the display language set for the language setting (page 103). You can also change the input language temporarily during character input. 1. In a character input screen, press J (Options), select Input Language and press J (Select). - Page 40 Settings: Allows you to add an entry to the Speed Calling list, set the storage place of the Contacts list and set the scroll speed for the Contacts list screen. Memory Status: Displays the number of Contacts list entries in each of your phone, SIM card and memory card. Service Dial No.: Displays the service phone number list preinstalled in your SIM card and allows you to make a call.
- Page 41 Postcode: Allows you to enter a postcode. Job Title: Allows you to enter a job title. Company: Allows you to enter a company name. Birthday: Allows you to enter a birthday. URL: Allows you to enter a URL. Category: Allows you to set the category. Picture: Allows you to set a picture to appear on the display for an incoming call.
-
Page 42: Renaming A Category
Editing Categories Your phone has preset categories. In addition, you can set your own categories. You can edit and set the options of categories. For each category, you can set the incoming external light, ringtone volume, ringtone pattern and vibration. Renaming a Category 1. -
Page 43: Setting Groups
Setting Groups You can set the groups (broadcast lists) to use for MMS addresses. There are five groups and you can add up to ten members to each group. For details on using the Group list, see “Creating & Sending an MMS Message”... -
Page 44: The Contacts List
Renaming & Resetting a Group 1. After Step 2 of “Adding a New Member to a Group” (page 43), select a group, press J (Options) and perform one of the following operations. Rename: Allows you to rename the group. Reset: Allows you to reset the group name and delete all members from the group. -
Page 45: Editing Contacts List Entries
Note • Only Contacts list entries in your phone can be added to the Speed Calling list. Using Speed Calling to Make Calls 1. In standby mode, enter the speed calling number of the phone number you want to call. 2. - Page 46 Options Available from the Contacts List You can perform the following operations if you press J (Options) from the Contacts list. View: Displays the details screen for one entry. Search by: Allows you to search for an entry in the Contacts list.
-
Page 47: Owner Information
Owner Information You can display and edit owner information such as the phone number and email address of your phone. 1. In standby mode, press @. The main menu appears. Call Manager My Details 3. Press J (Options). 4. Select Edit and press J (Select). Perform Steps 3 and 4 of “Adding an Entry to the Contacts List”... - Page 48 Basic Operations...
-
Page 49: Media Player
Media Player allows you to play music and video files. In This Chapter Media Player Menu Playback Screen of Media Player Playing Music & Videos Using Music Player Transferring Music from a PC to a Memory Card Using Playlists Other Operations & Settings 2 Media Player... -
Page 50: Media Player Menu
Media Player Menu In standby mode, you can display the Media Player menu if you press H. The Media Player menu has three tabs (sub menus). To switch between the tabs, press F. Music Tab More Music: Starts the browser and connects to a download site. -
Page 51: Playback Screen Of Media Player
Playable Music Files You can play the following music files. However, some music files may not be able to be played. Also, the Toshiba TX80 cannot play variable bit rate (VBR) encoded music files other than at the supported bit rate (kbps). -
Page 52: Playing Music & Videos
Playing Music & Videos 1. In standby mode, press H. The Media Player menu appears. 2. Use F to switch to the Music tab or Video tab, select Playlists, Music Library, My Sounds, My Video or Recent and press J (Select). 3. -
Page 53: Using Music Player
Switching to Background Playback You can switch to background playback in order to use other functions if you press H while a track is playing/paused. The indicator appears on the display during background playback. Press H to access playback operations after returning to standby mode or use the remote control keys. - Page 54 Starting Music Player 1. Close your phone while a music file is being played on Media Player. Note • When the battery level is low, Music Player won’t start. • You can press remote control key start Music Player and play the music file that was being played when Music Player or Media Player ended.
-
Page 55: Transferring Music From A Pc To A Memory Card
Switching Play Modes You can switch the play mode in sequence each time you press and hold W while a track is playing or paused. For details on play modes, see page 52. : Repeat : Repeat All : Randam : Current Only : Normal Note... -
Page 56: Transferring Music Files
Using Music Transfer Mode to Connect to a PC To transfer music files from a PC to your phone, you need to use music transfer mode to establish a connection between the PC and your phone. 1. End all functions, display the standby screen and use the USB cable to connect your phone to the PC. -
Page 57: Using Playlists
Updating Music File Information You can update the file management information of music files transferred from a PC. 1. Display the Music tab (page 50) of the Media Player menu, select Music Library and press J (Select). 2. Select Update List and press J (Select). The music file information is updated. -
Page 58: Editing A Playlist
Editing a Playlist You can add new tracks to a playlist you have already created, as well as change the playback order and delete tracks. 1. In Step 2 of “Creating a Playlist” (page 57), select the playlist you want to edit and press J (Options). 2. -
Page 59: Other Operations & Settings
Other Operations & Settings Other Operations You can perform various operations if you press J (Options) while a playlist or file list is displayed or a file is playing/paused. Media Player Settings 1. In standby mode, press @. The main menu appears. Settings Media Player Set Priority Setting: If Incoming Call is set, playback pauses... - Page 60 Media Player...
-
Page 61: Video Telephony
Video Calling allows both you and the other party to see each other’s image during the call. In This Chapter Video Calling Making a Video Call Answering a Video Call Convenient Functions for Video Calling Video Calling Settings 3 Video Telephony... -
Page 62: Video Calling
Video Calling Video Calling allows two parties with Video Calling compatible phones to see each other’s image during the call. Note • A video call is only possible in areas with 3G-network coverage. • The Video Calling function of your phone complies with the 3G- 324M international standard for 3G mobile videophones. -
Page 63: Answering A Video Call
Answering a Video Call When a video call is received, the ringtone plays, the external light flashes and the Video Call screen appears on the main display. 1. Press N when a video call is received. The sound automatically switches from the earpiece to the speaker, thus enabling you to begin a handsfree call. -
Page 64: Adjusting The Speaker Volume
Adjusting the Speaker Volume You can adjust the speaker volume during a call. 1. Press the side key (P or Q) during a call. 2. Use G or side keys (P and Q) to adjust the volume. Turning On/Off the Outgoing Voice You can turn on/off the outgoing voice during a call. -
Page 65: Video Calling Settings
Video Calling Settings You can set the outgoing video, auto answer, backlight, hold guidance and appearance check settings for Video Calling. 1. In standby mode, press @. The main menu appears. Settings Call Settings Video Call Outgoing Video: Allows you to specify whether to send live video or a picture from Gallery during a video call. - Page 66 Video Telephony...
-
Page 67: Camera/Video Camera
4 Camera/Video Camera You can use the camera to take pictures and record videos, and attach them to messages. You can also edit and use pictures as wallpaper, etc. In This Chapter Camera Taking a Picture Recording a Video Picture & Video Settings... -
Page 68: Camera
Camera You can use the camera to take pictures and record videos. Modes for Taking Pictures Landscape Mode: Allows you to take high-quality pictures at W640 × H480 or larger size. Portrait Mode: Allows you to take pictures at W240 × H320 size or smaller for use as wallpaper, etc. -
Page 69: Camera Indicators
Camera Indicators Camera Mode Landscape Mode Sub Camera On Multi Shots High Speed Low Speed Picture Size W2048 × H1536 W1280 × H960 W240 × H320 W120 × H160 W112 × H112 W96 × H128 Picture Quality Fine Economy Night Mode Video Camera Indicators Video Mode Sub Camera On... -
Page 70: Taking A Picture
Taking a Picture There are two modes for taking pictures: Landscape mode and Portrait mode (page 68). You can also edit the pictures you take and set them for Contacts list entries. 1. In standby mode, press L or the side key (R). The monitor screen appears. -
Page 71: Recording A Video
Preview Screen Options You can perform the following operations if you press J (Options) from the preview screen. To Monitor Screen: Takes you back to the camera monitor screen. Send: Allows you to use the MMS and infrared functions to send a picture. -
Page 72: Preview Screen Options
Monitor Screen Options You can perform the following operations if you press J (Options) from the monitor screen. Record Mode: Allows you to change the record mode (size). My Videos: Allows you to see the videos you recorded previously. Self-view: Allows you to record videos of yourself using the sub camera. -
Page 73: Picture & Video Settings
Picture & Video Settings Settings for Taking Pictures 1. In standby mode, press @. The main menu appears. Camera Settings Camera Settings Picture Settings: Allows you to set the picture quality, picture size, picture effects, date stamp or whether to show a preview after you take a picture. - Page 74 Note • If a video was recorded in For MMS mode, forward, rewind, and slow playback are unavailable. • The maximum recording time varies depending on the video quality setting. Settings for Pictures & Videos You can set the following items if you press J (Options) from the monitor screen for pictures/videos and select Advanced.
- Page 75 Shortcut Key Assignment The following keypad shortcuts are available while you are taking pictures and recording videos. Taking Pictures Key Guide Camera Mode Delay Timer Picture Effects Picture Quality White Balance Night Mode Picture Size Colour Control Mobile Light Self-view Video Mode * Press and hold L to switch between camera mode and video recording mode.
- Page 76 Camera/Video Camera...
-
Page 77: Message
Message allows you to send and receive text messages, pictures, sounds, vObjects and other data. In This Chapter Messaging Capabilities Creating & Sending an MMS Message Creating & Sending an SMS Message Reading Received MMS & SMS Messages Checking Sent MMS & SMS Messages MMS/SMS Settings &... -
Page 78: Messaging Capabilities
Messaging Capabilities Via the Service Centre, you can exchange text messages, pictures, sounds, vObjects and other data with other phones or PCs and other devices connected to the Internet. For details on the messaging service, contact your service provider. Note •... -
Page 79: Creating & Sending An Mms Message
Creating & Sending an MMS Message The Multimedia Messaging Service (MMS) allows you to exchange multimedia messages containing data such as text, pictures, sounds, animations and video clips. For details on MMS, contact your service provider. You can send a message up to 300 KB including body text and attachment files. - Page 80 Managing Pages You can add, delete and replace pages. You can set up to 20 pages for each message. 1. From the Create MMS Message screen (page 79), press J (Options). 2. Select Add Page and press J (Select). A page is added. When there is more than one page, you can perform the following operations if you select Page Control.
-
Page 81: Creating & Sending An Sms Message
Creating & Sending an SMS Message The Short Message Service (SMS) allows you to exchange text messages with other phones. For details on SMS, contact your service provider. 1. In standby mode, press J ( The Message menu appears. Create Message The Create Message screen appears. -
Page 82: Reading Received Mms & Sms Messages
Reading Received MMS & SMS Messages When a message is received in standby mode, you are notified by the ringtone and vibration. At the top of the display, the appears for an MMS message and the SMS message. Received messages are saved to Inbox. 1. -
Page 83: Checking Sent Mms & Sms Messages
Inbox Operations You can perform various operations such as replying to, forwarding or deleting a received message or saving a received message to Templates if you press J (Options) from the Inbox list or a message. To set your phone so that your phone number is not included in the Recipients list each time you choose to “reply to all”... -
Page 84: Mms/Sms Settings & Common Operations
Sent Messages Operations You can perform various operations such as resending to, forwarding or deleting a sent message or saving a sent message to Templates if you press J (Options) from the Sent Messages list or a message. Message MMS/SMS Settings & Common Operations Common Settings You can set various settings common to MMS and SMS. -
Page 85: Sms Settings
each of the settings, you can select Immediate, Deferred or Always Ask. • Auto-extract File: Allows you to set whether to automatically display/play picture and sound files attached to messages. • Reply for Delivery: Allows you to set whether to reply to requests for delivery confirmation. - Page 86 Using an SMS/MMS Template to Create a Message Templates allow you to enter messages easily. 1. In standby mode, press J ( The Message menu appears. Templates SMS Templates or MMS Templates 3. Select a template and press @. To edit or delete an MMS template, press J (Options). For details on the following procedure, see “Creating &...
-
Page 87: Browser
You can browse information or download pictures, melodies and applications. In This Chapter Accessing Browser Bookmarks Other Operations Game & Application 6 Browser... -
Page 88: Accessing Browser
Accessing Browser 1. In standby mode, press @. The main menu appears. 2. Select Browser and press J (Select). Homepage: Displays the home page. Enter URL: Allows you to access a Web page by directly entering the address. Bookmarks: Allows you to bookmark your favourite Web pages and access bookmarked Web pages (page 89). -
Page 89: Bookmarks
Key Assignments for Browsing the Web The following shows the key assignments for browsing the Web. J: Selects an item or displays the Options menu. K: Takes you back to the previous screen. @: Selects an item. G: Scrolls up or down. F: Scrolls left or right. -
Page 90: Other Operations
Other Operations You can perform various operations such as moving to another page or clearing the cache if you press J (Options) while a Web page is displayed. Using Files in Web Pages You can perform various operations such as saving and displaying/ playing picture and animation files in Web pages. -
Page 91: Setting The Screensaver
Note • When you use a network Java™ application, a communication fee is charged each time the application connects to the network. The communication fee is the same as that for using the Web. Downloading Java™ Applications 1. In standby mode, press @. The main menu appears. - Page 92 Java™ Application Settings 1. In standby mode, press @. The main menu appears. Game&Application Settings Priority Settings: Allows you to set the priority for when there is an incoming call, incoming message or alarm while a Java™ application is running. To give priority to voice calls, video calls, messages or alarm and to pause the Java™...
-
Page 93: Gallery
The data you save in your phone is stored in Gallery. You can move the data stored in the folders of Gallery and edit it for use with other functions. In This Chapter Gallery Using vObjects Using the Memory Card Using the SIM Card 7 Gallery... -
Page 94: Gallery
Gallery Gallery of your phone contains folders for storing files. You can create your own folders (personal folders). Gallery can store a total combination of approximately 500 files and personal folders. You can also use Gallery of the memory card (page 24). You can connect to the Web from More Pictures, More Videos, More Sounds and More Games. -
Page 95: Using Vobjects
Using vObjects vObject is a collective name for file formats that enable your phone and other vObject compatible phones, PCs and other devices to exchange and mutually use data such as Contacts list entries and Calendar data. vObject compatible software is required to use the data of vObjects on a PC or other device. -
Page 96: Using The Memory Card
Using the Memory Card You can check and edit pictures and other data saved to the memory card. You can also save a backup of Gallery, Contacts list and other data in your phone to the memory card. Formatting the Memory Card You can use your phone to format the memory card. - Page 97 8. Select To Phone Memory, To SIM or To Memory Card and press J (Select). • To move or copy Contacts list entries in the memory card to the SIM card, select Memory Card after Step 3. After the Contacts list in the memory card appears, proceed from Step 3.
- Page 98 Gallery...
-
Page 99: Settings
You can make various settings to personalise your phone. In This Chapter Display Settings Phone Profiles Language Setting Shortcut Function External Light Settings Flight Mode Setting Call Settings Using the Stereo Handsfree Headset Security Settings Network & Internet 8 Settings... -
Page 100: Display Settings
Display Settings Setting the Main Display 1. In standby mode, press @. The main menu appears. Settings Display Settings Wallpaper: Allows you to set a picture preinstalled in your phone or taken with the camera as the wallpaper for standby mode. -
Page 101: Phone Profiles
Phone Profiles This feature allows you to change the sound and vibration to match your surrounding conditions. Your phone has four preset profiles. You can change the sound and vibration settings of each profile. Normal: Profile for ordinary use. Silent: Profile for when you do not want your phone to emit any sound. - Page 102 Personalising Profiles You can personalise profiles. The items you can personalise vary depending on the profile. 1. In standby mode, press @. The main menu appears. Settings Phone Profiles 3. Select the profile you want to set and press J (Options). 4.
-
Page 103: Language Setting
Language Setting You can change the display language. 1. In standby mode, press @. The main menu appears. Settings Phone Settings 3. Select the language you want to set or Automatic and press J (Select). • If the language is set to Automatic, the language is set automatically in accordance with the language priority setting of the SIM card. -
Page 104: External Light Settings
Setting the Shortcut Key Function 1. In standby mode, press @. The main menu appears. Settings Phone Settings Side Up Key: Allows you to change the function accessed when you press and hold the side key (P) in standby mode. Navigation Keys: Allows you to change the functions accessed when you press the navigation keys A, B, D and C in standby mode. -
Page 105: Flight Mode Setting
Flight Mode Setting You can use Flight mode to block signal reception and transmission without turning off the power. Flight mode disables the use of network services for making and receiving calls, sending and receiving messages, etc. 1. In standby mode, press @. The main menu appears. -
Page 106: Common Settings
Setting the Auto Answer You can answer a call without having to press a key while the stereo handsfree headset is connected. You can also change the length of time before a call is answered. When Auto Answer is set, the auto answer tone plays regardless of the setting for the phone profile (page 101). -
Page 107: Using The Stereo Handsfree Headset
Using the Stereo Handsfree Headset Simply pressing the send/end key ( headset allows you to dial a preset phone number or answer a call without even opening your phone. Send/end key 1. Open the earphone microphone jack cover. 2. Insert the plug of the stereo handsfree headset into the earphone microphone jack. -
Page 108: Security Settings
Security Settings You can configure security related settings such as setting call barring or changing the PIN/PIN2 codes and security code for your phone. 1. In standby mode, press @. The main menu appears. Settings Security Settings PIN Code Request: Allows you to set whether to request the entering of your PIN code to perform verification each time a SIM card is inserted into the phone and the power is turned on. -
Page 109: Key Guard
Key Guard Setting the Key Guard The key guard can prevent unintentional operations while your phone is in your bag or pocket by disabling the side keys and Music Player keys for operating your phone when it is closed. 1. While your phone is closed, press and hold R. indicator appears on the external display. -
Page 110: Network & Internet
Network & Internet You can set the network (telecommunications carrier) and system mode to use. You can also set the network connection information for using the Web. Note that you may no longer be able to connect to the home network if the settings are set incorrectly. -
Page 111: Convenient Functions
9 Convenient Functions Your phone includes various convenient functions. In This Chapter Calendar Voice Recorder Multi Task Other Convenient Functions... -
Page 112: Calendar
Calendar Calendar allows you to save your appointments and use your phone as an organiser. Adding a New Appointment You can save up to 100 appointments. 1. In standby mode, press @. The main menu appears. Organiser Calendar 3. Press J (Options). 4. -
Page 113: Voice Recorder
Checking Appointments 1. In standby mode, press @. The main menu appears. Organiser Calendar The month view screen appears. Press * to switch to the previous month and press # to switch to the next month. 3. Use E to select a date and press @. A list of appointments for the selected date appears. -
Page 114: Sending A Voice Message
Note • If a call is received during recording, the call takes priority and recording stops. All recording data is saved automatically. To prohibit the reception of calls, set Flight mode (page 105). • You can also display the Voice Memo screen if you press and hold ) in standby mode. -
Page 115: Multi Task
Multi Task This feature allows you to run up to two functions (applications) simultaneously and switch between them. Starting a New Application You can start another application without ending the application you are using. 1. Press S while an application is in use. The Multi Task screen appears. -
Page 116: Other Convenient Functions
Other Convenient Functions Accessing Other Functions from the Organiser Menu The following functions are also available in the Organiser menu. 1. In standby mode, press @. The main menu appears. 2. Select Organiser and press J (Select). The Organiser menu appears. You can also access functions such as the following from the Organiser menu. -
Page 117: File Transfer & Synchronisation
10 File Transfer & Synchronisation You can use infrared, a USB cable or a memory card to transfer data between your phone and other phones, PCs and other devices. These capabilities allow you to back up data and manage the same data on multiple devices. In This Chapter File Transfer File Synchronisation... -
Page 118: File Transfer
File Transfer Using Infrared for Transferring Data You can use infrared to exchange the Calendar data of your phone, Contacts list entries of your phone, memory card or SIM card, pictures/videos taken or recorded with the camera and Gallery data that can be forwarded with an infrared compatible phone, PC or other device. - Page 119 Note • The following files cannot be sent. • Files in Game&Application, My Saved Pages and Templates of Gallery • Copyright protected files • Your phone does not support the sending and receiving of all data by infrared simultaneously. Using Infrared for Receiving Data 1.
- Page 120 Using a USB Cable for Transferring Data As shown in the illustration below, you can use a USB cable to connect your phone to a PC, then send and receive the Contacts list, Calendar and Gallery data. For details on transferring music data, see “Transferring Music from a PC to a Memory Card”...
- Page 121 Using a USB Cable for Receiving Data You can receive data to the Contacts list, Calendar and Gallery. 1. After Step 3 of “Using a USB Cable for Sending Data” (page 120), follow the instructions on the PC to send data from the PC to your phone.
- Page 122 5. Press J (Options). 6. Select Backup and press J (Select). 7. Enter your security code (page 21). A confirmation screen appears. 8. Press J (Yes). A confirmation screen appears. 9. Press J (Yes) or K (No) in accordance with the confirmation screen.
-
Page 123: File Synchronisation
File Synchronisation You can use the network of a service provider or infrared/USB cable to synchronise the data on a network server or PC with the Contacts list and Calendar of your phone. The supplied data management software My Mobile needs to be installed. Using a Network for Synchronisation You can register a server on your phone to synchronise the Contacts list via the network of a service provider. - Page 124 Synchronising the Contacts List 1. In standby mode, press @. The main menu appears. Call Manager Synchronise Server Profile: Allows you to select a server and perform synchronisation. Phone Name: Allows you to change your phone name. Sync. Log: Allows you to confirm the last five synchronisations.
-
Page 125: Appendix
11 Appendix In This Chapter Troubleshooting Specifications Index Health and Safety Information Menu Structure... -
Page 126: Troubleshooting
Troubleshooting Problem Possible Causes and Remedies Cannot turn the power on. • Make sure the battery pack is inserted correctly (page 22). • Make sure the battery is charged (page 23). Cannot charge the battery. • Make sure the battery pack is inserted correctly (page 22). •... -
Page 127: Specifications
Specifications Toshiba TX80 Frequency Range Within 3G (UMTS) 2100 1920 - 2170 MHz Within GSM 900 880 - 960 MHz Within DCS 1800 1710 - 1880 MHz Within PCS 1900 1850 - 1990 MHz Continuous Talk Time Within 3G (UMTS) area Approx. -
Page 128: Index
Index Alarm 116 Attachment 79 Audio remote control keys 16, 52, 54 Auto answer 106 Auto launch 88 Background playback 53 Backing up data 119, 121 Bookmarks 89 Browser 88 Calculator 116 Calendar 112 Adding a new appointment 112 Managing appointments 113 Call Answering a call 28 Answering a video call 63... - Page 129 Incoming voice calls during data communication 106 Indicators Camera 69 External display 18 Main display 17 Video Calling 62 Video camera 69 Information prompt 19 Infrared 118 Transferring data 118 Input language 39 International call 28 Java™ application 90 Downloading 91 Reset settings 92 Settings 92 Language 39, 103...
- Page 130 Theme 100 Troubleshooting 126 Unsent messages 78, 86 USB 120 Cable 12, 23, 120, 123 Transferring data 120 Vibration 41, 102 Video Calling 62 vObject 95 Voice recorder 113 Recording 113 Sending a voice message 114 Voicemail 31 WAP Push 82 Warranty 3 World Clock 116 Appendix...
-
Page 131: Health And Safety Information
Health and Safety Information Safety Guidelines Follow the guidelines below to use your phone in a safe and legal manner. General • Use your phone in the intended manner (holding it to your ear). Incorrect usage may affect its performance. Only qualified service personnel should install or repair the phone and its accessories. -
Page 132: Battery Safety
+5°C (+41°F) and +35°C (+95°F). • Only use batteries approved by Toshiba and only recharge the battery with the recommended charger supplied by Toshiba. • When the charger is not in use disconnect it from the power source. -
Page 133: Fcc Rf Exposure Information
• Do not dispose of the battery in an ordinary bin. The battery contains toxic chemicals and must be disposed of in the correct manner. Contact your local authority for more information. Emergency Calls Calls cannot be made to emergency services (page 21) while data communication is being performed within a GSM area. -
Page 134: European Rf Exposure Information
Additional information on Specific Absorption Rates (SAR) can be found on the Cellular Telecommunications & Internet Association (CTIA) website at http://www.phonefacts.net. European RF Exposure Information Your mobile device is a radio transmitter and receiver. It is designed not to exceed the limits for exposure to radio waves recommended by international guidelines. -
Page 135: Menu Structure
Menu Structure 1. Game & Application Applications Screensavers Settings Java Information 2. Browser Homepage Enter URL 4. Message Bookmarks News Music Games Sports PLUS Email History 5. Camera Browser Settings 3. Organiser SIM Tool Kit Calendar Alarms Memory Status Calculator 6. - Page 136 MEMO...
- Page 137 MEMO...
- Page 138 MEMO...
- Page 139 MEMO...
- Page 140 MEMO...
- Page 141 MEMO...
- Page 142 MEMO...
- Page 143 MEMO...
- Page 144 MEMO...
-
Page 145: Purchase Record
Purchase Record For your future reference, we recommend that you fill in your purchase details in the form below. Serial Number* Dealer Name Purchase Date * The serial number is printed on the bottom of the battery compartment. 11/06...