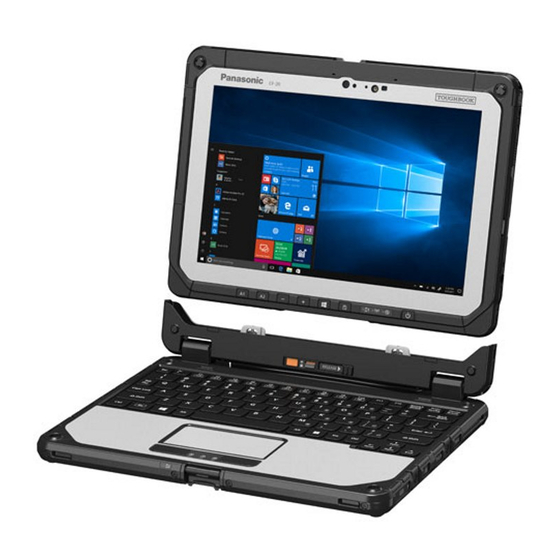
Panasonic CF-20 Series Operating Instructions And Reference Manual
Personal computer
Hide thumbs
Also See for CF-20 Series:
- Operating instructions manual (148 pages) ,
- Get connected (12 pages) ,
- Operating instructions manual (56 pages)
Table of Contents
Advertisement
Quick Links
Personal Computer
Model No. CF-20 Series
Operating Instructions - Reference Manual
We recommend that this Reference Manual be printed.
Disclaimer
Computer specifications and manuals are subject to change without notice. Panasonic Corporation assumes no liability for damage incurred directly or
indirectly from errors, omissions or discrepancies between the computer and the manuals. Refer for the latest information about optional products to the
catalogs, etc.
Trademarks
Microsoft, Windows, and the Windows logo are registered trademarks or trademarks of Microsoft Corporation of the United States and/or other
countries.
Intel, Core, and PROSet are either registered trademarks or trademarks of Intel Corporation.
SDXC and microSDXC Logos are trademarks of SD-3C, LLC.
®
MobileMark
is a U.S. Registered Trademark of the Business Applications Performance Corporation.
The terms HDMI and HDMI High-Definition Multimedia Interface, and the HDMI Logo are trademarks or registered trademarks of HDMI Licens-
ing Administrator, Inc. in the United States and other countries.
®
Bluetooth
is a registered trademark owned by Bluetooth SIG, Inc., U.S.A. and licensed to Panasonic Corporation.
Names of products, brands, etc., appearing in this manual are trademarks or registered trademarks of their respective own companies.
Panasonic Corporation
Osaka, Japan
Web Site :
https://panasonic.net/cns/pc/
Advertisement
Table of Contents

Related Manuals for Panasonic CF-20 Series


Summary of Contents for Panasonic CF-20 Series
- Page 1 Disclaimer Computer specifications and manuals are subject to change without notice. Panasonic Corporation assumes no liability for damage incurred directly or indirectly from errors, omissions or discrepancies between the computer and the manuals. Refer for the latest information about optional products to the catalogs, etc.
- Page 2 © Panasonic Corporation 2018 HS0318-2088 20170267ZCD...
-
Page 3: Illustrations And Terminology In This Manual
Introduction Illustrations and Terminology in this manual This manual explains using the default setting. In principle, this manual explains based on the following conditions: When the tablet and keyboard base have been installed When the keyboard and Touchpad are used for operation Some illustrations are simplified to help your understanding and may look different from the actual unit. - Page 4 10 is updated, the screen display or operation procedures may be changed. For the latest information on Windows 10, see the following web page. http://pc-dl.panasonic.co.jp/itn/addendum/ Sound and Video Sound (e.g. MP3, WMA) and video (e.g. MPG, WMV) recorded in SD Memory Cards may be interrupted during playback. If this hap- pens, copy them to the flash memory drive and play back.
-
Page 5: Windows Update
6. Change settings of [On battery] and [Plugged in] to [Enabled]. 7. Click [OK] and exit the “Advanced settings” screen. About the Ambient Light Sensor The ambient light sensor is used to adjust the display screen brightness automatically. To configure the automatic adjustment function, proceed as follows. 1. - Page 6 3. Set a disc into the commercially available optical drive. 4. Click (Start) - [Panasonic PC Recovery Disc Creation Utility]. Alternatively, click [Panasonic PC Recovery Disc Creation Utility] in the tablet mode. If “User Account Control” is displayed, click [Yes]. C A U T I O N Do not remove the tablet during operation.
- Page 7 If you fail to create a recovery disc or an error message appears, try either of the following procedures. Insert the disc correctly. Check the disc condition. Restart the computer and try to create a recovery disc again. Contact Panasonic Technical Support.
- Page 8 About the Partition Structure You can shrink a part of an existing partition to create unallocated disk space, from which you can create a new partition. In the default setting, you can use a single partition. C A U T I O N Do not add or delete partitions in Windows 10, as the Windows area and recovery partition must be adjacent to each other in Windows...
- Page 9 Flash Memory Backup/Restore Function Panasonic Corporation will bear no responsibility for any damage suffered (including loss of data) as a result of the use of this function. Creating a Backup of the Flash Memory Data You can create a backup of the flash memory data, which can be used to recover from hardware failure.
- Page 10 Description of Parts <Front> Tablet Keyboard Base A. Wireless WAN Antenna / GPS Antenna <Only for model with wireless WAN/GPS> B. Microphone C. RGB Camera D. Ambient Light Sensor E. Camera Indicator F. IR LED G. IR Camera H. LCD I.
- Page 11 N. Detach Lock O. Release Lever P. Function (Fn) Keys Q. Keyboard R. Touchpad ( Touchpad) S. Display Latch T. Security Slot (Clamshell) When the tablet is connected, both the tablet and keyboard base can be secured at the same time. U.
- Page 12 A. DC-IN Jack B. SD Memory Card Indicator (Blinking: During access or a password is requested) C. SD Memory Card Slot Keep SD Memory Cards away from infants and small children. D. HDMI Port E. USB 2.0 Port F. VGA Port <Keyboard Base (Bottom Side)>...
- Page 13 Rear Camera <Only for model with Rear Camera> A. Camera Indicator B. Camera Light C. Camera Lens D. Back Cover The shape of this may vary depending on the model. E. Release Latch F. nanoSIM Card Slot <Only for model with wireless WAN> G.
- Page 14 C. Barcode Reader <Only for model with Barcode Reader>...
-
Page 15: Turning On / Turning Off
Turning On / Turning Off Turning On Press and hold the power switch until the power indicator lights. ( Description of Parts) N O T E Do not press the power switch repeatedly. The computer will forcibly be turned off if you press and hold the power switch for four seconds or longer. Once you turn off the computer, wait for ten seconds or more before you turn on the computer again. - Page 16 20 minutes (when AC adaptor is connected) of inactivity 15 minutes (when operating on battery power) of inactivity...
-
Page 17: Handling The Touchpad
Touchpad Use the touchpad to move the cursor on the screen and perform computer operations. A. Work Surface (touchpad) B. Left Button C. Right Button Function Operation Move cursor Move the tip of your finger lightly over the work surface. Click (Tap) Tap a touchpad or press a left button. -
Page 18: Key Combinations
Key Combinations N O T E Do not repeatedly press the keys in quick succession. Do not use the key combinations together with touchpad (external mouse), touchscreen (only for model with touchscreen), digitizer (only for model with digitizer), tablet buttons, or other key operations. Do not use the key combinations before you sign in to Windows. - Page 19 Function Pop-up display ≪ Fn≫ + ≪ F4≫ Speaker on/off A slide bar appears. You can check the status of speaker by seeing an icon on the task tray. ≪ Fn≫ + ≪ F5≫ Volume A slide bar appears. ≪ Fn≫ + ≪ F6≫ (≪...
-
Page 20: Hotkey Settings
When you press ≪ Fn≫ , the key is locked (pressed-down) until you press another key. Use this when pressing difficult key combinations. 1. Start up the Hotkey Settings. Click (Start) - [Panasonic PC Settings Utility], and click (Settings) - (Button / Key). - Page 21 (included). And you can use the touchscreen function to perform the same operation as the touchpad and mouse by touching the screen with your finger etc. You can select the screen input mode. 1. Click (Start) - [Panasonic PC Settings Utility], and click (Settings) - (Touch Screen). Alternatively, click [Panasonic PC Settings Utility], and click (Settings) - (Touch Screen) in the tablet mode.
- Page 22 In the default settings, the button function of digitizer pen (included) is the erasing the screen. To change the button function, perform as follows. 1. Click (Start) - [Panasonic PC Settings Utility], and click (Settings) - (Touch Screen) - [Digitizer Button Mode].
-
Page 23: Handling The Screen
Spread / Touch an image or document with two fingers, and spread your fingers apart to zoom in or pinch pinch them together to zoom out. Drag Touch an object (file, icon, etc.) and drag your finger to the desired location before removing it to move the object. - Page 24 Screen”. Change Touch Screen Mode You can select the suitable operation mode in Touch Screen Mode. 1. Click (Start) - [Panasonic PC Settings Utility], and click (Settings) - (Touch Screen). Alternatively, click [Panasonic PC Settings Utility], and click (Settings) - (Touch Screen) in the tablet mode.
-
Page 25: Calibrating The Screen
Use this mode when operating with a glove on. Depending on the type of glove, operation may be ignored. With finger operation, the screen may not respond properly. [Touch (Water)] mode Use this mode when the screen or finger is wet with water drops in operation. Depending on the water drop condition, operation may be ignored. - Page 26 N O T E At first, sign in to Windows as an administrator, and perform this calibration. Return the rotated display to landscape before performing the screen calibration. 1. Open "Tablet PC Settings". Click (Start) - [Windows System] - [Control Panel] - [Hardware and Sound] - [Tablet PC Settings]. 2.
- Page 27 Opening the zoom window 1. Perform a two-finger tap on the area of the screen you want to expand. A rectangular zoom window with a diagonal length equal to the distance between the two tapped points appears. (1) Perform two-finger tap. (2) Display expands.
-
Page 28: Additional Functions
You can also use mouse and perform operation inside the zoom window. In that case, the displayed area in the zoom window follows mouse cursor movement. Closing the zoom window 1. Tap outside the zoom window. The zoom window closes. N O T E If you are displaying the edge of the screen in the zoom window and you tap the edge of the screen outside the zoom window, an operation identical to that inside the zoom window may be performed and the zoom window may not close in some cases. -
Page 29: Changing Settings
(2) Dotted line appears. (3) Expanded view appears when you slow your drag speed. Changing settings 1. Click (Start) - [Panasonic PC Settings Utility], and click (Settings) - (Touch Screen). Alternatively, click [Panasonic PC Settings Utility], and click (Settings) - (Touch Screen) in the tablet mode. - Page 30 Tablet Buttons Button Function While operating OS Launch Panasonic PC Settings Utility You can change the button assign using Panasonic PC Settings Utility ( To change the A1 / A2 button functions) When launching the Setup Utility Same as F12 key While operating the Setup Utility You can change the button assign to Concealed Mode Trigger/Alt+Ctrl+Del.
- Page 31 On the Windows sign in screen and Welcome screen, the tablet buttons are enabled and work in default irrespective of the settings you made. To change the A1 / A2 button functions You can change the functions of A1 and A2 buttons. 1. Click (Start) - [Panasonic PC Settings Utility], and click (Settings) - (Button / Key). Alternatively, click [Panasonic PC Settings Utility], and click (Settings) - (Button / Key) in the tablet mode.
- Page 32 Click [Browse...] to select the application if you select [Start a program]. 5. Click [OK]. 6. Click [OK]. N O T E If you click [Reset], the setting will be the factory default. You can also open the setting screen by the following steps. Click (Start) - [Windows System] - [Control Panel] - [Hardware and Sound] - [Set tablet buttons to perform certain tasks].
-
Page 33: Important Tips
Important Tips Important Battery Tips N O T E <Only for model with Built-in Bridge Battery> The computer is equipped with a built-in bridge battery (not replaceable) and a battery pack (replaceable). How to use the battery with minimal deterioration The battery is a consumable and, as such, its performance will gradually deteriorate. - Page 34 Click in the task tray, and select the Best battery life(the power plan using the power saving function) on the left side of the power mode slide bar. We recommend against using applications or screen saver that place a significant load on the CPU Some screen savers place a large load on the CPU.
-
Page 35: Battery Power
Battery Power Battery Indicator Battery indicator (situation in use): (A) and Battery indicator Battery status The battery pack is not inserted or not being charged. Not lit Concealed mode is set to ON. Orange Charging is in progress. Green The battery is fully-charged. Blinking green In order to stop the battery from deteriorating, power supply from another battery or AC adaptor has been shut off, and the battery power is being consumed. -
Page 36: Checking The Remaining Battery Power
<Tablet> Battery indicator Battery status Green The battery pack can be replaced. (When the battery latch (D) and battery latch (E) is slid with the AC adaptor disconnected, either battery pack remains the battery power.) <Only for model with built-in bridge battery> The battery pack can be replaced. - Page 37 When the battery pack is inserted (example) N O T E The battery display may not correspond to the actual remaining battery power in the cases as below. To correct the display, perform the Battery Recalibration ( Correcting the Battery Display (Battery Recalibration)).
- Page 38 Windows.) 1. Restart the computer. 2. Press and hold ≪ F9≫ while the “Panasonic” boot screen is displayed just after the computer starts the startup procedure. 3. When the remaining battery capacity is displayed, press ≪ Enter≫ . 4. Follow the on-screen instructions.
-
Page 39: Replacing The Battery Pack
Replacing the Battery Pack C A U T I O N The battery pack is not charged when you first purchase it. Be sure to charge it before using for the first time. Charging starts auto- matically when the AC adaptor is connected to the computer. Use only the specified battery pack with your computer. -
Page 40: Keyboard Base
1. Insert the battery pack until it securely fits the connector. Use the battery pack instead of the dummy battery. 3. Slide the back cover back. 1. Place the cover horizontally. 2. Slide the cover while pushing it. Keyboard Base 1. - Page 41 3. Open the cover. 2. Remove/Insert the battery pack. To remove 1. Slide the latch (A). When the replacing the battery pack without turning off the computer, check the battery indicator (C). Replacing the battery pack without turning off the computer) Depending on the models, the dummy battery may be inserted.
- Page 42 Push the cover until it clicks. C A U T I O N Make sure the latch is securely locked, otherwise the battery pack may fall when you carry the computer. Do not remove the battery pack forcibly when the latches are locked. Doing so may damage the battery pack. Replacing the battery pack without turning off the computer <When using multiple batteries>...
- Page 43 *1: Not equipped or no battery power. During battery replacement, the LCD backlight turn off. C A U T I O N In the following cases, the tablet will turn the power off after detaching the tablet from the keyboard base (regardless of the presence of the bridge battery).
- Page 44 Sleep/Hibernation Functions Starting Up Your Computer Quickly The sleep or hibernation functions allow you to shut off the computer without closing programs and documents. You can quickly return to the programs and documents that you were working on before sleep or hibernation. Function Data is saved to Recovery time...
- Page 45 The password you set in the Setup Utility will be requested upon resuming from hibernation (but not from sleep), if [Password On Resume] is set to [Enabled] in the [Security] menu of the Setup Utility. To disable it, set [Password On Resume] to [Disabled]. The [Password On Resume] setting is valid when you shut down the computer by clicking (Start) - [Power] - [Shut down].
- Page 46 1. On the desktop screen, right-click on the task tray, and click [Power Options]. 2. Click [Choose what the power button does] - [Change settings that are currently unavailable]. 3. Add check mark for [Hibernate] and click [Save changes]. C A U T I O N While the computer is entering sleep or hibernation Do not: Touch the keyboard, touchpad, screen, tablet buttons, or power switch.
-
Page 47: Ignition Mode
If the computer enters sleep while a USB keyboard or mouse is connected, touching the USB keyboard keys or mouse will resume the computer. Ignition Mode You can turn on the computer by connecting the AC adaptor. 1. Click (Start) - (Settings) - [Update &... - Page 48 Panasonic PC Settings Utility You can perform the following operations easily by using the Panasonic PC Settings Utility. When starting up this application for the first time, connect to the Internet for initial setup. If it is first started up without Internet connection, the initial setup may take time, and several minutes may be required for startup.
- Page 49 Enable or Disable the built-in camera. If the camera is disabled by the Setup Utility, you cannot enable the camera by clicking [Enable]. Camera) Utilities You can use Panasonic applications that display icons. To use these applications, click an icon. Support Manual Launch Manual Selector For further information about the computer, you can refer to the on-screen manual.
- Page 50 If “User Account Control” is displayed, click [Yes]. The new settings will be activated after restarting this application. You can export or import the display items that can be used by XML files on this utility. About Panasonic PC Settings Utility: Display the version information.
- Page 51 Attaching/Detaching the Tablet from the Keyboard Base Detaching the tablet from the keyboard base When detaching the tablet from the keyboard base while it is turned on, note the following points. C A U T I O N Before detaching the tablet, confirm the following things. Save the necessary data.
- Page 52 4. Detach the tablet from the keyboard base. C A U T I O N When detaching the tablet from the keyboard base, hold the position at the locations dashed line circled in the illustration. Attach/detach the tablet on a flat surface. When attaching/detaching the tablet, securely hold the keyboard.
- Page 53 C A U T I O N When inserting the tablet, place the keyboard base on a hard stable surface or hold the bottom side of the keyboard base securely with your hand. Correct Incorrect 2. Raise the detach lock (A) above to the locked position. N O T E Confirm that the orange-colored signs near the detach lock and the release lever can not be seen.
- Page 54 N O T E Do not attach the tablet in the rain.
-
Page 55: Connecting Lan
<Only for model with LAN> Connecting LAN C A U T I O N Do not connect the telephone cable to the LAN port. 1. Turn off the computer. Do not use sleep or hibernation. 2. Slide the cover and open it. 3. -
Page 56: Disabling/Enabling Wireless Communication
Disabling/Enabling Wireless Communication <Only for model with wireless LAN, Bluetooth, and/or wireless WAN> There are several ways of disabling and enabling wireless communication. Using airplane mode Setting [Wireless Configuration] in the [Advanced] menu of the Setup Utility Settings in the Network and Sharing Center ( Using the Wireless LAN Function) N O T E... -
Page 57: Using The Wireless Lan Function
Wireless LAN <Only for model with wireless LAN> C A U T I O N Do not use wireless LAN on airplanes, in hospitals, or in other locations where wireless LAN signals may affect devices. Follow the instructions of airline companies and hospitals. If you use the computer in these locations, turn off the wireless LAN. To avoid unauthorized access to the computer through wireless LAN We recommend you to make security settings such as encryption before using wireless LAN. - Page 58 For further information, ask the system administrator or the person in charge of the network. Enabling/Disabling the Wireless LAN Standard IEEE802.11a (802.11a) 1. Click (Start) - [Panasonic PC Settings Utility], and click (Settings) - (Network). Alternatively click [Panasonic PC Settings Utility], and click (Settings) - (Network) in the tablet mode.
-
Page 59: Using The Bluetooth Function
Bluetooth <Only for model with Bluetooth> You can access internet and other Bluetooth devices without connecting cables. N O T E Communication is established through the Bluetooth antenna (A). Do not block the antenna area with your hand or body. To use Bluetooth, set [Bluetooth] of [Wireless Configuration] to [Enabled] (default) in the [Advanced] menu of the Setup Utility. -
Page 60: Wireless Wan
Wireless WAN <Only for model with wireless WAN> This computer is equipped with the Wireless WAN enabling you to communicate using radio frequencies. N O T E Communication is established through the Wireless WAN antenna (A). Do not block the antenna area with your hand or body. To use wireless WAN, set [Wireless WAN] of [Wireless Configuration] to [Enabled] (default) in the [Advanced] menu of the Setup Utility. - Page 61 5. Insert the nanoSIM card into the nanoSIM card slot. C A U T I O N Do not insert the nanoSIM card upside down. 6. Close the nanoSIM card cover. 7. Insert the battery pack.( Replacing the Battery Pack) To remove a nanoSIM card 1.
- Page 62 7. Close the nanoSIM card cover. 8. Insert the battery pack. ( Replacing the Battery Pack) Connecting to a network 1. Click (Start) - (Settings) - [Network & Internet] - [Cellular]. Alternatively, click (Settings) - [Network & Internet] - [Cellular] in the tablet mode. 2.
- Page 63 4. Click arrow upper left (return to previous page). 5. Select created APN profile, and then click [Apply]. Disconnecting to a network 1. Click , and then click ISP. 2. Click (Start) - (Settings) - [Network & Internet] - [Cellular], and then click ISP. Alternatively, click (Settings) - [Network &...
- Page 64 (Start) - [Panasonic PC GPS Viewer]. Alternatively, click [Panasonic PC GPS Viewer] in the tablet mode. You can start up the “Panasonic PC GPS Viewer” from Panasonic PC Settings Utility. Launch Panasonic PC Settings Utility, and then click (Utilities) - (GPS Viewer).
-
Page 65: Saving Power
Saving Power You can extend battery life and save power also during AC adaptor usage. Reducing Power Consumption Use the methods below to reduce power consumption. Click in the task tray, and select the Best battery life (the power plan using the power saving function) on the left side of the power mode slide bar. - Page 66 [Change advanced power settings]: You can make more detailed settings. 4. Click [Save changes]. Creating Your Own Power Setting 1. Click on the task tray and click [Battery settings] - [Power & sleep] - [Additional power settings]. 2. Click [Create a power plan], click the basic plan and input the name of power plan. 3.
-
Page 67: Security Measures
6. Press ≪ F10≫ , and then click [Yes]. C A U T I O N Do not forget your password. If you forget your Supervisor Password, you will not be able to use your computer. Contact Panasonic Technical Support. - Page 68 Setting the Supervisor Password/User Password). When you have your flash memory drive repaired Contact Panasonic Technical Support. Before sending back the flash memory drive, be sure to set the [Hard Disk Lock] to [Disabled]. N O T E The flash memory lock function works with the built-in flash memory. It does not work with the external hard disk.
-
Page 69: Device Encryption
® ® Using Intel Identity Protection Technology (Intel IPT) ® With Intel IPT, a six-digit One-Time Password is generated every 30 seconds. Using this One-Time Password can perform two-factor authentication to ® prevent unauthorized access. Thus, stronger authentication is enabled. To use Intel IPT, a dedicated solution or application software provided by a ser- vice provider is required. - Page 70 In the file encryption using the TPM, encryption keys can be stored on a TPM chip separated from the internal disk. This will allow you to increase the security level. To use the TPM function, perform the following steps. For more information about the usage, follow the instructions by a system administrator. 1.
-
Page 71: Display Rotation
Display Rotation The screen display rotates automatically when this unit is the tablet or convertible mode. Rotation Lock The Rotation Lock button allows you to lock the screen display when this unit is the tablet mode. 1. Press the Rotation button (A). -
Page 72: Change The Settings
Concealed Mode You can make your computer inconspicuously using the concealed mode. You can select on/off of LCD backlight, LED, Sound, Wireless Radio and Backlit Keyboard. C A U T I O N Concealed Mode is enabled as the factory default. The camera indicator cannot be turned off. -
Page 73: Setup Utility
Setup Utility You can make the settings of the computer's operating environment (password settings, startup drive selection, etc.) Start the Setup Utility 1. Click (Start) - (Settings) - [Update & Security] - [Recovery]. Alternatively, click (Settings) - [Update & Security] - [Recovery] in the tablet mode. 2. -
Page 74: Information Menu
However, if the LID (display) is closed, it will come to be displayed on an external display. The “Panasonic” boot screen may not appear when only the external display is being used. In this case, as soon as the computer starts up, press ≪... - Page 75 BIOS Information BIOS Computer information (cannot be changed.) BIOS Configuration Embedded Controller Intel(R) ME Firmware Accumulative Operating Time Access Level Main Menu Underlined items are the factory presets. System Date [xxx xx/xx/xxxx] Day of the Week/Month/Day/Year. You can use ≪ Tab≫ to move the cursor. System Time [xx:xx:xx] 24-hr.
- Page 76 Preboot Key Binding Not Assigned A2 Button Disabled Application2 (Only for model without Barcode Reader) Ctrl+Alt+Del Wireless Switch Barcode Reader Trigger (Only for model with Barcode Reader) Preboot Key Binding Not Assigned Up/Down Buttons Disabled Volume Up/Down Brightness Up/Down Windows Button Disabled Enabled Rotation Lock Button...
- Page 77 Preboot Key Binding Not Assigned Table of Preboot Key Bindings The settings for [A1 Button], [A2 Button], and [Rotation Lock Button] can be changed on [Tablet Button Configuration]. The settings for [Down Button], [UP Button] and [Windows Button] cannot be changed. You can change the button assign.
- Page 78 LCD Backlight Minimum Can be changed only when [Concealed Mode] is set to [Enabled]. When [LCD Backlight] is set to [OFF], touch operation is disabled. Can be changed only when [Concealed Mode] is set to [Enabled]. Except for the camera indicator and the LED of external devices. Sound Can be changed only when [Concealed Mode] is set to [Enabled].
-
Page 79: Advanced Menu
Optional Kit Configuration Enter the sub-menu. Normally do not change this setting. A separately provided password is required to enter the sub-menu. Advanced Menu Underlined items are the factory presets. CPU Configuration Enter the sub-menu. The submenu appears when this item is selected. Sub-menu (CPU Configuration) Intel(R) Hyper-Threading Technology Disabled... - Page 80 I/O IRQ 3F8/IRQ4 2F8/IRQ3 Only for model with GPS 3E8/IRQ7 Can be changed only when [GPS] is set to [Enabled]. 2E8/IRQ5 Tablet LAN Disabled Enabled Only for Tablet Power On by LAN Deny Allow Can be changed only when [Tablet LAN] is set to [Enabled]. Wireless Configuration Enters the sub-menu.
- Page 81 Legacy USB Support Disabled Enabled Camera Configuration Camera (Front) Disabled Enabled Only for model with camera. Camera (Rear) Disabled Enabled Only for model with rear camera. Boot Menu Underlined items are the factory presets. Boot Mode Normal Compatible If the startup from USB devices is not possible, set [Compatible] and retry. However, setting [Compatible] will require longer time to display the Windows boot screen than setting [Normal].
-
Page 82: Security Menu
You can select the boot device during start-up of the computer, too. Press ≪ Esc≫ key or soon after “Panasonic” boot screen is dis- played. “Boot Menu” appears and you can select the device. To use this function, set [Boot Popup Menu] to [Enabled]. - Page 83 Enter the sub-menu. Fingerprint Security Can be changed only when [Set Supervisor Password] is set. Sub menu items: Sub-Menu Protection Power-on Security AMT Configuration Enter the sub-menu. Only for model that supports Intel(R) AMT. Can be changed only when [Set Supervisor Password] is set. Secure Boot Enter the sub-menu.
-
Page 84: Handling And Maintenance
Handling and Maintenance Operation environment Place the computer on a flat stable surface not subject to shock, vibration, and danger of dropping. Do not place the computer upright or turn it over. If the computer is exposed to an extremely strong impact, it may become damaged. Operating environment Temperature: *1*2... - Page 85 screen. The pointer cannot follow the pen (included) movement if you move the pen (included) too quickly. <Only for model with digitizer> The digitizer uses electromagnetic induction and may not work properly near strong electrical field or magnetic field such as: Near AM radio base station or relay station antennas Near CRT displays that generate strong electromagnetic field noise Move the digitizer away from such locations so it will work properly.
-
Page 86: Maintenance
Sensors This computer is equipped with four sensors (acceleration sensor, gyro sensor, magnetic sensor, ambient light sensor), and you can use these sensors with any software that is compatible. As the accuracy of each sensor output is dependent on the operating environment and other conditions, the results should only be used as a reference. The acceleration sensor, gyro sensor, and magnetic sensor are located at the bottom left of the LCD. - Page 87 To clean areas other than the LCD panel Wipe with a soft dry cloth such as gauze. When using detergent, dip a soft cloth in water-diluted detergent and wring it thoroughly. C A U T I O N Do not use benzene, thinner, or rubbing alcohol since it may adversely affect the surface causing discoloration, etc. Do not use commercially avail- able household cleaners and cosmetics, as they may contain components harmful to the surface.
-
Page 88: Inserting/Removing The Sd Memory Card
Note that Panasonic assumes absolutely no liability for any loss of data recorded by the user, or any other damages, direct or indirect. - Page 89 Confirm that the label side is facing down. Keyboard Base Confirm that the label side is facing up. To remove the card Preparation Save the data and close all applications. Open the cover and confirm the SD Memory Card indicator (A) is off. 1.
- Page 90 Keyboard Base...
-
Page 91: Smart Card
Smart Card C A U T I O N Do not: Hit, bend, or drop the card. Touch the contact part with fingers or metal object. Place the card in very hot location for a long time. Remove the card immediately after inserting it. Inserting/Removing the Smart Card <Only for model with Smart Card slot>... - Page 92 To remove the card 1. Slide the latch (A). 2. Draw the card straight out using your finger. C A U T I O N Do not open using your finger as illustrated below. Doing so may cause malfunction. 3. Close the cover. To close the cover, push on the “CLOSE POSITION”...
- Page 93 To insert the card 1. Slide the latch (A), and lift the cover. 2. Insert the Smart Card to the slot (B) with the contact part (C) on the back. 3. Close the cover. Insert the card until it securely fits into the slot. To remove the card 1.
-
Page 94: Magnetic Stripe Card Reader
Magnetic Stripe Card Reader <Only for model with Magnetic Stripe Card Reader> You need software to use a Magnetic Stripe Card Reader. C A U T I O N Do not: Hit, bend, or drop the card. Touch the contact part with fingers or metal object. Place the card in very hot location for a long time. -
Page 95: Barcode Reader
(Start) - [Panasonic] - [Barcode HID Language Settings]. Alternatively, click (All apps) - [Panasonic] - [Barcode HID Language Settings] in the tablet mode. 2. Set the language of the barcode reader according to the Default Input Local. N O T E If the barcode cannot be read following the above steps, change the language of the barcode reader according to the Input Locale of the application to be used. -
Page 96: Reading Barcodes
(Start) - [Panasonic] - [Barcode HID Mode Setting]. Alternatively, click (All apps) - [Panasonic] - [Barcode HID Mode Setting] in the tablet mode. 2. When using POS API: Click and add a check mark for [USB HID POS], and then click [OK]. -
Page 97: Cleaning The Reading Window
Hold the reader farther away when reading a larger barcode, and closer in when reading a smaller barcode. Perform reading so that the entire symbol falls within the center of the red Barcode Reader light. The reader can still read a barcode even if the barcode is not in the center of the red Barcode Reader light. However, if a part of the barcode lies outside the Barcode Reader light, the barcode cannot be read. -
Page 98: Using Software
(Start) - [Panasonic] - [Barcode Configuration Utility]. Alternatively, click (All apps) - [Panasonic] - [Barcode Configuration Utility] in the tablet mode. If you want to reflect/create a barcode configuration file, right-click [Barcode Configuration Utility], and then click [Run as administrator]. - Page 99 Direct application of the barcode configuration file 1. Create the barcode configuration file (*.INI file) using Barcode Configuration Utility. 2. Drag and drop the *.INI file to the following application file. C:\Program Files (x86)\Panasonic\BCR2D_B_Set\BCR2D_B_Set.exe 3. If the “User Account Control” screen appears, click [Yes].
-
Page 100: External Display
External Display The external display (HDMI/VGA) connected to the keyboard base cannot display until Windows starts up. HDMI Port You can switch the output destination to an external HDMI display. Tablet 1. Slide the cover to the arrow direction. The cover is unlocked. 2. -
Page 101: Switching The Display Mode
3. Connect the external display to the external display port (VGA) (C). N O T E If you connect VGA display after connecting high resolution HDMI display, such as 4K display, images could not be displayed. In such cases, connect VGA display first, and then connect high resolution HDMI display. Switching the display mode Using key function 1. -
Page 102: Extended Desktop
After switching the display mode, the display resolution may change. After resuming from sleep or hibernation, or restarting the computer, the output destination may not be the same as selected in the pre- vious status. When using the HDMI or VGA of the keyboard base for extended display, the extended display may appear on the tablet side after resuming from sleep or hibernation. - Page 103 1. Click (Start) - (Settings) - [Devices] - [Bluetooth & other devices] - [Sound settings]. 2. Select the sound output destination. 3. If you have changed the sound output destination, click [Set Default], and then click [OK].
-
Page 104: Usb Devices
USB Devices Connecting/Removing USB Devices To connect the USB device Tablet 1. Slide the cover to the arrow direction. The cover is unlocked. 2. Open the cover. 3. Connect the USB device to one of the USB port (A) on the computer. Keyboard Base 1. -
Page 105: Charging Usb Devices
To remove the USB device 1. Disable the USB device. 1. Click on the task tray and click 2. Select the USB device. These steps are not necessary when; Removing the device after turning off the computer. is not displayed. The device does not appear in the list in step 2. - Page 106 3. Connect the USB device to one of the USB port (A) on the computer. USB Charge Setting 1. Click (Start) - [Panasonic PC Settings Utility], and click (Settings) - (USB). Alternatively, click [Panasonic PC Settings Utility], and click (Settings) - (USB) in the tablet mode.
- Page 107 For some USB devices in USB quick charging, even though the computer is connected to the AC adaptor, it may temporarily switch to battery operation. If this happens, disable USB quick charging.
-
Page 108: Serial Port
Serial Port Connecting Serial device Keyboard Base 1. Slide the cover to the arrow direction. The cover is unlocked. 2. Open the cover. 3. Connect the serial device to the serial port (A). 4. Connect the serial device to the connector of the serial cable. Tablet <Only for model with Serial Port>... -
Page 109: Description Of Parts
Camera Description of Parts Front Camera (Tablet) RGB Camera (A) Ambient Light Sensor (B) Camera Indicator (C) IR LED (D) IR Camera (E) Rear Camera (Tablet) <Only for model with rear camera> Camera Indicator (A) Camera Light (B) Camera Lens (C) Using the Camera N O T E When the camera is in use, the Camera Indicator lights up. - Page 110 4. Click [OK]. Panasonic PC Camera Utility The Panasonic PC Camera Utility can be used to shoot photos and videos. When you use pictures and videos recorded using this utility at Web conferences, or other services, use specialized applications accordingly.
- Page 111 Start/Stop shooting videos 1. Click The camera switches to the video shooting mode. 2. Click During shooting, the icon is shown as 3. To stop shooting, click If the save destination storage space becomes less than 100 MB during video shooting, shoot- ing will automatically stop.
-
Page 112: Other Functions
Other Functions OCR Scanning 1. Click . The icon is shown as 2. Point the window at the target text you want to scan, and click on the right side of the screen. When the target text has been scanned, the scanned OCR text is displayed above the preview window. - Page 113 Barcode Reader 1. Click . The icon is shown as 2. Point the on-screen guide at the barcode. You can turn on the light. Click When the barcode has been scanned, the scanned barcode text is displayed on the right side of the preview window.
-
Page 114: Changing The Settings
Changing the Settings 1. Click The “Settings” menu is displayed. A. Mirror setting <Only for model with front camera> Make the preview screen mirror-reversed (flip horizontal). (Recorded images will not be reversed) B. Camera shake correction <Only for model with front camera> Enable the image stabilizer when shooting photos. - Page 115 Add geotagging to the Exif data of still images. L. Photo storage folder Specify the destination of recorded photo data to save. The default value is the “Pictures” folder. M. Video storage folder Specify the destination of recorded video data to save. The default value is the “Videos” folder. If you specify the FAT32 formatted storage as destination to save, video files cannot be correctly created when the storage data capacity exceeds 4 GB.
- Page 116 Contactless Smart Card Reader/RFID Reader <Only for model with Contactless Smart Card Reader/RFID Reader> You can read the data from RFID (Radio Frequency Identification) tags / Smart Card. N O T E Contactless Smart Card Reader is typically used with specialized applications. For further information, ask the system administrator. 1.
-
Page 117: Fingerprint Reader
If you forget your sign in password you will be unable to use the device or Windows, so be absolutely certain that you will not forget it. If you are using Windows Hello: When you have installed the Fingerprint Authentication Utility (DDS EVE FA Standalone for Panasonic), Windows Hello will become deactivated. Fingerprint Authentication Function Use fingerprint authentication to improve security and convenience by replacing the conventional password entry required to sign in to windows or provide authentication on websites. - Page 118 If you use fingerprint authentication only to sign in to Windows, you do not need to install the Fingerprint Authentication Utility (DDS EVE FA Stan- dalone for Panasonic). In that case, however, automatic sign in to websites using fingerprint authentication for verification is not available.
- Page 119 Standard user Some operations and settings are partially prohibited by standard user (restricted user) accounts. Step 2. Set up the Fingerprint Authentication Utility (DDS EVE FA Standalone for Panasonic). 1. Sign in to Windows with an account having Administrator rights.
- Page 120 Enabling the Pre-boot authentication (PBA) will register the fingerprint data on BIOS. To erase the fingerprint data that has been registered on BIOS, uninstall the fingerprint authentication utility (DDS EVE FA Standalone for Panasonic). (The fingerprint data is not erased even if the OS is recovered or the data on the built-in disk is erased) (...
- Page 121 To open the Control Panel, proceed as follows. Click (Start) - [Windows System] - [Control Panel]. 2. Click [Uninstall a program] in the Control Panel, double click “EVE FA Standalone for Panasonic (xxx) x.x.x.xxxxx” in the program list. (x.x.x.xxxxx indicates the version number) Follow the on-screen instructions.
-
Page 122: Port Replicator
Port Replicator You can use an optional port replicator (CF-VEB201). This device frees you from being bothered by a lot of cable connections when you carry the com- puter. It also allows you to connect various peripherals. Connect the port replicator to the expansion bus connector (A) on the bottom of the computer. Read the instruction manual of the port replicator before using. -
Page 123: Connecting/Disconnecting The Computer
C. LAN Port D. USB 3.0 Ports (2 ports) E. HDMI Port Connector for HDMI compatible digital display. It is not compatible with the analog display. The display specifications of the maximum resolution, etc. that can be output differ according to the specifications of the device con- nected. - Page 124 If the computer malfunctions while the port replicator is attached, disconnect the port replicator and check to see if the computer oper- ates normally. If the computer operates normally, the port replicator may be malfunctioning. Contact Panasonic Technical Support. N O T E See Reference Manual of the computer for connecting and setting USB devices, external displays and LAN.
- Page 125 If the computer malfunctions while the port replicator is attached, disconnect the port replicator and check to see if the com- puter operates normally. If the computer operates normally, the port replicator may be malfunctioning. Contact Panasonic Tech- nical Support.
- Page 126 Cradle In combination of the computer and Cradle, you can connect variety of devices. Read operating instructions for each device carefully when connecting each device to the Cradle. Names and Functions of Parts Connecting/Disconnecting the Computer Battery Charging Names and Functions of Parts C A U T I O N Do not touch the expansion bus connector or pins of the Cradle.
- Page 127 G. Expansion Bus Connector This connects to the expansion bus connector on the bottom of the computer. H. Lever Use this lever when disconnecting the cradle from the computer. I. Security slot (Side front) A Kensington cable can be connected. If the cable for security is connected to this security slot after the computer is connected, the computer cannot be disconnected because the lever is locked.
- Page 128 Do not attempt to move the Cradle while connecting the computer to the Cradle. If the computer malfunctions while the Cradle is attached, disconnect the Cradle and check to see if the computer operates normally. If the computer operates normally, the Cradle may be malfunctioning. Contact Panasonic Technical Support. Disconnecting 1.
-
Page 129: Battery Charging
2. Push the lever in and lift the computer up. N O T E If it is difficult to disconnect the computer, push the lever while holding the computer from top for easy disconnection. Battery Charging The battery can be charged using the cradle. When you attach the computer with the AC adaptor attached to the Cradle ( Connecting/Disconnecting the Computer), the battery attached to the... -
Page 130: Installing The Hand Strap
Strap Attaching the strap helps you stably hold the computer. Installing the hand strap Before installing the hand strap, detach the tablet from the keyboard base. And then turn over the tablet. C A U T I O N Place the computer on a soft cloth with the panel side down. In addition, make sure that there is no item under the tablet. 1. - Page 131 5. <Only for model with the tether> Attaching the tether to the hand strap. 1. Pass one of the loops through the hole. 2. Pass one of the loops through another loop. 3. Pass the loop through the ring of the hand strap.
-
Page 132: Installing The Shoulder Strap
4. Pass the pen and tether through the second loop. Installing the shoulder strap Before installing the hand strap, detach the tablet from the keyboard base. And then turn over the tablet. C A U T I O N Place the computer on a soft cloth with the panel side down. In addition, make sure that there is no item under the tablet. 1. - Page 133 3. Pass the belt which has the Velcro straps through the strap holes (C) located on the side of the back of the tablet. 4. Securely attach the bonded part of the belt so it does not loosen. Insert the tip of belt into the cut hole of the hand strap. 5.
- Page 134 3. Pass the loop through the ring of the hand strap. 4. Pass the pen and tether through the second loop. 6. Pass the shoulder belt through the ring of the shoulder strap. Pass the belt through the adjuster and securely tighten it so it does not loosen. Installing the hand strap MSR <Only for model with Magnetic Stripe Card Reader>...
- Page 135 1. Pass the belt (A) which has an adjuster through the strap holes located on the upper side of the back of the tablet. 2. Pass the belt through the adjuster and securely tighten it so it does not loosen. 3.
-
Page 136: Using The Hand Strap
5. Pass the belt (C) which has an adjuster through the strap holes located on the upper side of the back of the tablet. 6. Pass the belt through the adjuster and securely tighten it so it does not loosen. Using the hand strap When using the computer holding with hand, insert your hand to the hand strap. - Page 137 1. Remove (D) from the strap joint and next remove (E). 2. Move (E) and adjust the position (F). Attach (E), then (D) to the joint. Attach the hand strap firmly so that the strap does not come off. When Inserting/Removing the Battery Pack C A U T I O N Place the computer on a soft cloth with the panel side down.
-
Page 139: Battery Charger
Battery Charger The battery charger is designed for charging the battery pack for the Panasonic computer series. To recharge a battery pack, you will need the AC adaptor and AC cord included with this product. Read both this Operating Instructions and the computer’s Operating Instructions before using. -
Page 140: Charging The Battery Pack
Charging the battery pack 1. Connect the AC Adaptor. 2. Insert the battery pack(s). Insert the battery pack firmly with its battery connector (B) facing the indicator (A) of the charger. C A U T I O N Do not insert the battery pack vertically or at an angle. The terminal of the battery charger may be damaged. - Page 141 If the battery pack got lodged in the slots, push the middle of the battery pack. The battery indicator lights when the battery pack is properly inserted with the AC adaptor connected. Four battery packs can be inserted simultaneously. Each of them can be inserted in any slot. When removing the battery pack, pull it out in the opposite direction of attaching the battery pack.
-
Page 142: Troubleshooting
Troubleshooting Refer to the following instructions when a problem occurs. If the remedies indicated in the chart do not solve the problem, contact Panasonic Technical Support. For a software problem, refer to the instruction manual of the software. Refer to Checking the Computer's Usage Status. - Page 143 A standard user needs to enter an administrator password. 6. Follow the on-screen instructions. Entering Password Supervisor Password or User Password: Contact Panasonic Technical Support You have forgotten the password. Administrator password: If you have a password reset disk, you can reset the administrator password. Set the disk and enter any wrong password, then follow the on-screen instructions and set a new password.
- Page 144 Select [Enabled] in [Password On Resume] in the [Security] menu of the Setup Utility. [Enter Password] does not appear when resuming from sleep/hibernation. The Windows password can be used instead of the password set in the Setup Utility. 1. Add a password. 1.
- Page 145 Sound Press ≪ Fn≫ key or tablet buttons to cancel mute. No sound. Turn off the concealed mode. Restart the computer. Beeping sounds are not emitted by this device. Performing ≪ Fn≫ key combinations sometimes causes sound distortion. Stop and restart Distorted sound.
- Page 146 Install the driver. A peripheral device does not work. Contact the manufacturer of the device. When is displayed in the Device Manager, remove and insert the device. If the problem persists, restart the computer. When you set [Tablet USB Port] to [Disabled] in the [Advanced] menu of the Setup Utility, USB ports of port replicator are also disabled.
- Page 147 Handling. The fingerprint sensor may be malfunctioning when it continues to perform poorly after the steps described above have been performed. Contact Panasonic Technical Support. If none of your enrolled fingers can be used, follow this procedure: User cannot use enrolled finger. (e.g.
-
Page 148: Checking The Computer's Usage Status
Detaching the Tablet from the Keyboard Base) Checking the Computer's Usage Status You can check the computer's usage status in the PC Information Viewer. You may need this information when calling Panasonic Technical Support for advice. N O T E... - Page 149 1. Click (Start) - [Panasonic PC Settings Utility], and click (Support) - (System) - [Launch PC Information Viewer]. Alternatively, click [Panasonic PC Settings Utility] in the tablet mode, and click (Support) - (System) - [Launch PC Inform- ation Viewer]. 2. Select the item to display the detailed information.
-
Page 150: Hardware Diagnostics
If it appears that the hardware installed in this computer is not operating properly, you can use the PC-Diagnostic Utility to determine whether or not there is a problem. If the utility discovers a problem in the hardware, contact Panasonic Technical Support. Software cannot be checked using this utility. - Page 151 Running the Diagnostic Check Run this utility using the default settings in the Setup Utility. If the Setup Utility or other settings will not allow hardware to be executed, the hardware icon will be displayed in gray. 1. Connect the AC adaptor, and be enabled the wireless function. During the diagnostic check, do not remove the AC adaptor, or attach any peripheral devices.
- Page 152 If the display is red and the message “TEST FAILED” is displayed, you can assume that there is a problem with the computer's hardware. Con- firm which hardware component is displayed as red, and contact Panasonic Technical Support. If the display is green and the message “TEST PASSED” is displayed, the computer's hardware is operating normally. Continue using the com- puter as it is.
-
Page 153: Reset Your Computer
Reset your computer If operations on the unit become unstable, we recommend refreshing Windows. This involves reinstalling the operating system while retaining personal files and settings (Personalization). Preparation Remove all peripherals and SD memory card, etc. Connect the AC adaptor and do not remove it until installation is complete. 1. -
Page 154: Installing Software
3. Press ≪ F10≫ . At the confirmation message, select [Yes] and press ≪ Enter≫ . Computer will restart. 4. Press ≪ F2≫ or ≪ Del≫ while “Panasonic” boot screen is displayed. The Setup Utility starts up. If the password is requested, enter the Supervisor Password. -
Page 155: Using Recovery Disc
5. Press ≪ F10≫ . At the confirmation message, select [Yes] and press ≪ Enter≫ . Computer will restart. 6. Press ≪ F2≫ or ≪ Del≫ while “Panasonic” boot screen is displayed. The Setup Utility starts up. If the password is requested, enter the Supervisor Password. - Page 156 then click [Reboot]. Follow the on-screen instructions. 14. On the “Finish Recovery Process.” screen, click [Shutdown.]. 15. Turn on the computer. 16. Perform Setup Windows ( OPERATING INSTRUCTIONS - Read Me First ). 17. Start the Setup Utility and change the settings as necessary.
-
Page 157: Error Message
Error Message Follow the instructions below when an error message appears. If the problem persists or if the error message is not shown here, contact Panasonic Tech- nical Support. Error Message Solution Bad System CMOS An error has occurred in the memory of system settings. This occurs when the memory content is changed by an unexpected program operation, etc. -
Page 158: Technical Information
Technical Information Network Connections and Communications Software Close the communications software before using the power saving function. If the power saving function (sleep or hibernation) is activated while communications software is used, the network connection may be inter- rupted, or the performance may be adversely affected. In this case, restart the computer. In a network environment, set [Never] for [Sleep after] and [Hibernate after] ( Setting Sleep or Hibernation). -
Page 159: Limited Use License Agreement
No personally identifiable information shall be transferred between this Program and Panasonic. In the event of an alert being generated by this Program, you will be sent a link to a secure Panasonic website where you can provide the information that is necessary for Panasonic to provide you with the level of support required via an online form. - Page 160 License”. At least three (3) years from delivery of this product, Panasonic will give to any third party who contacts us at the contact information provided below, for a charge no more than our cost of physically performing source code distribution, a complete machine-readable copy of the corresponding source code covered under GPL V2.0, LGPL V2.1 or the other licenses with the obligation to do so, as well as the respective copyright notice thereof.
- Page 161 About Lib PNG This copy of the libpng notices is provided for your convenience. In case of any discrepancy between this copy and the notices in the file png.h that is included in the libpng distribution, the latter shall prevail. COPYRIGHT NOTICE, DISCLAIMER, and LICENSE: If you modify libpng you may insert additional notices immediately following this sentence.
- Page 162 There are also specialized devices that may be able to read data that has been erased using this method. If you need to erase highly confidential data, we recommend that you contact a company that specializes in this process. Panasonic Cor- poration will bear no responsibility for losses or damages suffered as a result of the use of this function.
- Page 163 Dispose of Computer Preparation Remove all peripherals and SD memory card, etc. Erase the stored data. ( Erasing Flash Memory Data) When disposing of this product, accord with your national legislation. <Only for model with Built-in Bridge Battery> <For Europe and U.S.A./Canada> Attention Customers Don’t remove the battery by yourself.
- Page 164 7. Pull out the built-in bridge battery in the sheet cover, and then remove the connector of the built-in bridge battery. 8. Insulate the connectors of the built-in bridge battery by covering them with plastic tape, for example.
-
Page 165: Main Specifications
Specifications This page provides the specifications for the basic model. The model number is different according to the unit configuration. To check the model number: Check the bottom of the computer or the box the computer came in at the time of purchase. To check CPU speed, memory size and the flash memory drive (SSD) size: Run the Setup Utility ( Setup... - Page 166 , Panasonic PC GPS Viewer Panasonic PC Manual Selector, Microsoft Office Trial , Wireless Manager Mobile Edi- *22*23 tion , Panasonic PC Recovery Disc Creation Utility, DDS EVE FA Standalone for *20*22 Panasonic , Panasonic PC Settings Utility , Barcode Integrated Utility...
-
Page 167: Optional Devices
Wireless LAN IEEE802.11a : 54 Mbps Data Transfer Rates IEEE802.11b : 11 Mbps IEEE802.11g : 54 Mbps IEEE802.11n HT20 = 144.4 Mbps HT40 = 300 Mbps IEEE802.11ac : VHT20 : 173.3 Mbps VHT40 : 400 Mbps VHT80 : 866.7 Mbps Standard Supported IEEE802.11a / IEEE802.11b / IEEE802.11g / IEEE802.11n / IEEE802.11ac Transmission Method... - Page 168 *7: Only for model with Bluetooth. Does not guarantee operation of all Bluetooth peripherals. *8: Operation has been tested and confirmed using Panasonic SD/SDHC/SDXC Memory Cards with a capacity of up to 64 GB. Operation on other SD equipment is not guaranteed.
- Page 169 *30: The specifications may differ depending on the model. A nanoSIM card (12.3 mm {0.48”} × 8.8 mm {0.35”}) must be inserted in the nanoSIM card slot. *31: Exclusively configurable by selecting one from Smart Card, Contactless Smart Card and Fingerprint Reader. *32: The specifications may differ depending on the model.
- Page 170 4. Check the model number. The model number (D) starting with “CF-20” is described.
-
Page 171: Warranty
Section 1: Limited Warranty - Hardware PSSNA, referred to hereinafter as "Panasonic", will repair the computer products listed below (“Product(s)”) with new or rebuilt parts, free of charge in a Global Panasonic designated service location or Panasonic Authorized Service Center for the period specified below from the date of original purchase in the event of a defect in materials or workmanship. - Page 172 All modems must be approved by the wireless carrier prior to use. Any use or attempted use of a wireless modem not approved and activated by the car- rier for use on their network is strictly prohibited and is not sanctioned or warranted by Panasonic and may result in legal action. In addition, all modems must be approved by Panasonic as compatible with the device hardware before installation or use.
-
Page 173: For Canada
This limited warranty only covers failures due to defects in materials or workmanship which occur during normal use. If a unit is sent to a Panasonic Author- ized Service Center and no hardware failure is found, the customer will be billed for labor to correct a software issue or reimage the applicable Hard Disk, or Solid State Drive plus shipping and applicable administrative fees at the current rates set by the service provider. - Page 174 Claim Procedure – In the event of a defect in material or workmanship in the media during the sixty (60) days warranty period, and you return it, trans- portation costs prepaid, to Panasonic Canada Inc., Computer Products Marketing, 5770 Ambler Drive, Mississauga, Ontario L4W 2T3, within the war- ranty period, together with a copy of your purchase receipt, and an explanation of the suspected defect, PCI will replace in Canada the defective disk(s) or other media.
-
Page 175: Pour Le Canada
No Coverage – This limited warranty does not apply if the disk(s) or other media has been used in other than a Panasonic product, or in environmental conditions other than those specified by PCI or the manufacturer, or if subjected to misuse, neglect, mishandling, modification or attempted modification of the program, or if damaged by accident or act of God. -
Page 176: For Europe
GARANTIE LIMITÉE – SUPPORTS DES LOGICIELS Couverture – Panasonic Canada Inc. (« PCI ») garantit à l’acheteur original que la ou les disquettes ou tout autre support sur lequel le ou les programmes sont fournis sont exempts de défauts de pièces et de fabrication dans des conditions normales d’utilisation au Canada, et ce, pour une période de soix- ante (60) jours suivant la date de réception indiquée sur la preuve d’achat. - Page 177 We strongly recommend that customers backup their data before sending back their unit to an Authorised Service Provider. Panasonic shall not be liable for loss of data or other incidental or consequential damages resulting from the use of this product, or arising out of any breach of this warranty.
- Page 178 Purchaser, its quality, performance, merchantability, or fitness for a particular purpose. Panasonic does not warrant that the functions contained in the software will be uninterrupted or error free. Panasonic assumes no risk of and shall not in any case be liable for any damages, including, without limitation,...
- Page 179 Slovakian speaking service +421 (0) 800 42672627 E-mail address toughbooksupport@csg.de Payments toughbookservicepayments.cardiff@eu.panasonic.com...