Sony DHG-HDD250 Marketing Operation Manual
Hi definition digital video recorder
Hide thumbs
Also See for DHG-HDD250 Marketing:
- Operation manual (112 pages) ,
- Instructions manual (9 pages) ,
- Instructions for use manual (8 pages)

Related Manuals for Sony DHG-HDD250 Marketing


Summary of Contents for Sony DHG-HDD250 Marketing
- Page 1 Connecting Additional Equipment 2-176-411-22(1) High-Definition Digital Video Recorder Operation Manual DHG-HDD250 DHG-HDD500 © 2005 Sony Corporation...
- Page 2 This device may not cause harmful interference, and (2) this device must accept any interference received, including interference that may cause undesired operation. If you have questions about this Sony product, please contact the Sony Customer Information Service Center at 1-800-222-SONY (7669).
- Page 3 TV service provider. Trademarks and Copyrights Sony is a trademark of Sony Corporation. In the United States, TV Guide On Screen and other related marks are registered marks of Gemstar-TV Guide International, Inc.
-
Page 4: Important Safety Instructions
IMPORTANT SAFETY INSTRUCTIONS For your protection, please read these instructions completely, and keep this manual for future reference. Carefully observe and comply with all warnings, cautions and instructions placed on the unit, or described in the operating instructions or service manual. -
Page 5: Connecting Additional Equipment
Placement precautions • Inadequate ventilation or proximity to a heat source will cause decreased performance and reliability. Although the HD DVR is designed to automatically power off in extreme heat conditions, adequate care must be taken to avoid excessive heat build up. - Do not place the recorder on a soft surface, such as a rug and do not place on an uneven surface in which all four of the feet do not... - Page 6 User Guide...
-
Page 7: Table Of Contents
Guide On Screen System...70 References Learning About Available Video Services...73 Learning About Screen Modes...76 TROUBLESHOOTING ...79 Specifications ...84 END-USER LICENSE AGREEMENT FOR SOFTWARE INCLUDED WITH YOUR SONY HIGH-DEFINITION DIGITAL VIDEO RECORDER ...85 GNU GENERAL PUBLIC LICENSE...86 Index...93 LIMITED WARRANTY ...97... - Page 8 User Guide...
-
Page 9: Introduction To High-Definition Digital Video Recorder (Hd Dvr)
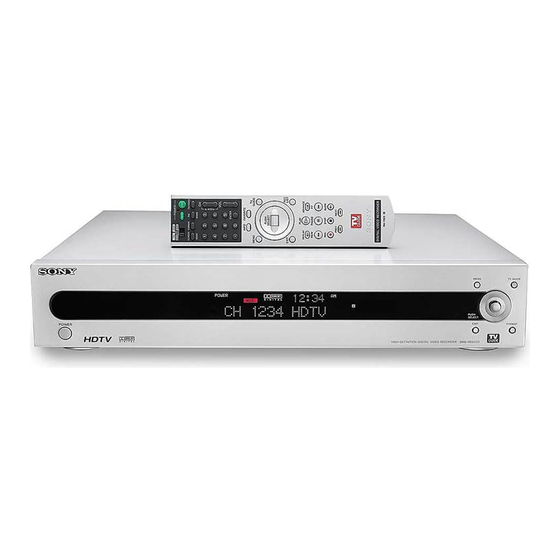
Introduction to High-Definition Digital Video Recorder (HD DVR) Congratulations on your purchase of the Sony® HD Digital Video Recorder. This manual is to be used for the following models: DHG-HDD250 and DHG-HDD500. Although there is a difference in the recording capacity between the two models, both models feature the same operation. -
Page 10: Features
Operating Instructions Features Some of the features you will enjoy with your new HD DVR include: ❏ Digital Reception — You can watch digital television programs and enjoy the improved audio/video quality offered by these programs. With high-definition signal reception, you can watch TV signals broadcast in HDTV for the clearest possible broadcast picture. -
Page 11: Front Panel Indicators And Controls
Introduction to High-Definition Digital Video Recorder (HD DVR) Front Panel Indicators and Controls Control Panel Description 1 POWER button Turns the HD DVR on or into inactive standby (off). 2 Display Window Shows the current status of the HD DVR with the following indicators: Power, Recording, Dolby Digital®, Clock, Channel Number and Name (if available);... -
Page 12: Display Window
Operating Instructions Display Window Display Description 8 Power indicator Shows that the HD DVR is on. Note that your HD DVR may continue to record programming even when the Power indicator is off. 9 REC indicator Shows that the HD DVR is currently recording a program. Recorded programs can be found in the Recordings List by pressing the REC LIST button or by selecting “RECORDINGS”... -
Page 13: Rear Panel Connectors
Introduction to High-Definition Digital Video Recorder (HD DVR) Rear Panel Connectors Connection Description qd CABLE IN Connects to a coaxial cable coming directly from your cable TV service outlet. Connection from a cable box that is supplied by your cable TV service provider is not recommended. - Page 14 CONTROL S OUT function. For example, it may be useful to connect to the CONTROL S OUT jack of a Sony TV so that you may point your HD DVR remote control at the TV and remote control commands will be passed directly to your HD DVR.
-
Page 15: Remote Control
Introduction to High-Definition Digital Video Recorder (HD DVR) Remote Control Inserting Batteries Insert two AA (R6) batteries (supplied) into the remote control as shown in the illustration below. Be sure to match the + and - terminals on the batteries to the diagram inside the battery compartment. -
Page 16: Operating Instructions
Operating Instructions Remote Control Description POWER SCREEN FORMAT TV/VIDEO MODE MODE ENTER FAVORITE INFO MENU GUIDE PUSH SELECT EXIT LIST PLAY REPLAY ADVANCE PAUSE STOP SLOW PREV NEXT RM-Y823 Button Description DEVICE SWITCH Select the equipment (DVR, TV, DVD or AMP) that you want to operate. - Page 17 If you lose your remote control, you may use the front panel buttons to operate your HD DVR (see page 5). Contact your nearest Sony dealer to order a suitable replacement remote control. To find the dealer nearest you, please refer to “Contacting Sony” on page 79.
-
Page 18: Programming The Remote Control
Operating Instructions Programming the Remote Control If you would like to use your HD DVR’s remote control to control other equipment, you may need to program your remote control. Follow the steps below to program the remote control. ✍ The equipment must have infrared (IR) remote capability in order to be used with the remote control Turn to “Manufacturer’s Codes”... - Page 19 Introduction to High-Definition Digital Video Recorder (HD DVR) To Search for a Code to Program the Remote Control If your device is not listed in the Manufacturer’s Code list, try the following: Power on the HD DVR and the device that you want to operate with the HD DVR’s remote control.
-
Page 20: Manufacturer's Codes
When the batteries are removed from the remote control, it is possible that the programmed manufacturer's codes may be lost and would need to be reprogrammed. TV Codes Manufacturer Code Sony Admiral 102, 114, 109 (M. Wards) Bell & Howell 114, 109, 138 (M. - Page 21 Toshiba 312, 311 Wards 327, 328, 335, 331, 332 Yamaha 330, 314, 336, Zenith DVD Players Manufacturer Code Sony 601, 617, 621 Magnavox 603, 607, 608 Panasonic 604, 609, 610 Philips 603, 607, 611, Pioneer 605, 613, 614 Manufacturer Code...
-
Page 22: Using Your Dvr Remote Control With Other Equipment
Operating Instructions Using your DVR Remote Control with Other Equipment Operating a TV Move the device switch to the TV position. Press To Do This... Power the TV on/off ENTER Enter a channel number Change channels on the TV Adjust the volume MENU Display TV menu Operating a DVD Player (or VCR) -
Page 23: Connections
Connections The connections you choose to make will depend on the video services you receive and on the connections available with your TV, audio amplifier, or recording device (VCR or DVD Recorder). Select the appropriate examples for your conditions in the following pages. Basic Connection Connecting to Antenna/Cable Connect the RF coaxial cable from your antenna to the HD DVR ANT IN connector. - Page 24 Operating Instructions Connecting TV/Monitor Connect the HD DVR’s HDMI output jack to the HD TV’s HDMI input jack using the HDMI cable (supplied). ✍ If you are connecting an audio system, connect the digital audio optical cable to your audio system for your home theater.
- Page 25 HD TV with DVI connector Securely connect the DVI adapter (supplied) to the HD TV’s DVI input. Connect the HD DVR’s HDMI output jack to the HDMI-DVI adapter attached to the HD TV using the HDMI cable (supplied). Connect the HD DVR’s Audio OUT to the HD TV’s Audio IN using an audio cable . ✍...
- Page 26 Operating Instructions TV with component connector Connect the HD DVR’s component output jacks to the TV’s component video input jacks using a component video cable (Y, P Connect the HD DVR’s Audio OUT to the HD TV’s Audio IN using an audio cable. ✍...
- Page 27 TV with composite connector Connect the HD DVR’s composite output jacks to the TV’s composite input jacks using a composite video cable (supplied). ✍ If your TV comes with an S Video input, use the S Video connection instead of the composite video connection for better picture quality.
- Page 28 Operating Instructions Inserting and Removing a CableCARD™ Device Inserting a CableCARD device Remove tape and insert the CableCARD into the CableCARD slot on the HD DVR. Gently push the card into the slot until it clicks into place. For more information about using CableCARD and activation, see “Activating CableCARD Service” on page 26.
-
Page 29: Connecting Additional Equipment
Connecting Additional Equipment Connecting a DVD Recorder or VCR Connect your HD DVR’s composite A/V output to your DVD recorder/VCR’s composite A/V input using the composite A/V cable (supplied). ✍ If your DVD or VCR recorder is equipped with an S Video jack, use the S Video cable to connect to the HD DVR instead of the composite video cable for better picture quality. - Page 30 Operating Instructions Connecting a Video and Digital Audio System Connect your HD DVR’s Digital Audio Optical OUT to Digital Audio Optical IN of your audio system using a Digital Audio Optical cable (not supplied). Connect your Audio System’s Audio OUT to Audio IN of your TV using an Audio cable. Connect the HD DVR’s component output jacks to the Audio System’s component input jacks using a component video cable (Y, P Connect the Audio System’s composite output jacks to the TV’s composite input jacks...
- Page 31 Connecting the AC Power Cord When all necessary connections are completed be sure to connect the power cord. Connect the supplied AC power cord to the HD DVR rear panel AC IN. Connect the other end into the nearest AC power outlet. ✍...
-
Page 32: About Cablecard™ Devices
Operating Instructions About CableCARD™ Devices The CableCARD device provides cable subscribers with access to digitally encrypted cable channels — without the use of a cable box — this will enable you to receive not only standard definition but also high-definition television where available. The CableCARD device, which is provided by your cable TV service provider, can be inserted into the HD DVR’s rear panel CableCARD slot (see page 22). - Page 33 CableCARD™ Messages Here are some of the messages you might see on your screen. When you see them, follow the actions required. Message Do This... If your CableCARD device is inserted correctly, select OK to Make sure you have a cable connection.
-
Page 34: Auto Setup
Operating Instructions Auto Setup Before you can enjoy the TV Guide On Screen™ System, you will need to perform the Auto Setup. When your HD DVR is first powered on, the set up screen will automatically appear. ✍ If you do not see any image, check the connections to the TV. Also check the FORMAT setting by pressing the FORMAT button until the Front Panel Window displays a Format setting that is compatible with your TV and TV connections (see page 73 for more information about Format settings). -
Page 35: Changing Tv Channels With Your Hd Dvr Remote Control
Changing TV channels with your HD DVR Remote Control After you have successfully performed the remote control programming on page 12 you will be able to operate your HD DVR and other home theater equipment with the remote control. Refer to “Using your DVR Remote Control with Other Equipment” on page 16. To Do This... - Page 36 Operating Instructions...
-
Page 37: Using The Menus
Using the Menus This section covers the MAIN MENU of the HD DVR. It is the gateway to all of the applications available on the HD DVR to customize and enjoy them. The screen is shown in 4:3 aspect ratio. The screen may appear differently depending on your TV, Format and Wide Mode settings. -
Page 38: Using The Recent Channels Menu
Operating Instructions Using the Recent Channels Menu The Recent Channels feature lists up to 18 of the most recently viewed channels. Only channels that have been viewed about a minute will be listed. The Recent Channels list can also be accessed as a Favorite category. -
Page 39: Using The Favorite Menu
Using the Favorite Menu The Favorite feature lets you create up to 13 categories of favorite channels that you specify. You may then quickly tune your favorite channels by selecting a category and then selecting a channel within that category. Creating a List of Favorite Channels While Viewing a Program While you are viewing a broadcast program and you wish to add the channel to your list: While no other menus are displayed, press b to open the Options menu. -
Page 40: Accessing The Recordings List
Operating Instructions Accessing the Recordings List For information on how to use the Recordings List feature, see “Using the RECORDINGS Service” on page 67. Accessing the TV Guide On Screen™ Feature For information on how to use the TV Guide On Screen system feature, see “Using the TV Guide On Screen™... -
Page 41: Using The Recording History Menu
Using the Recording History Menu The Recording History menu displays up to 100 of the most recent recording events. The Recording History may be a useful reference to any Recording Event that may have been scheduled. Recording events are programs that have been recorded or for some reason did not record as planned. -
Page 42: Using The Preferences Menu
IR code of the remote control and of the HD DVR. You may select code 50 (factory default) or code 51. This setting may be useful if you have more than one Sony® HD DVR or Sony Digital Cable Receiver in your home and you wish to avoid interference between the two devices. - Page 43 Options Descriptions Live TV Pause Time: The Live TV Pause Time feature allows you Recording to set the amount of time of live TV programming that will be saved. For example, if you set the Live TV Pause Time to 30 minutes, you will be able to pause live TV for up to 30 minutes before the paused point is no longer available.
- Page 44 Operating Instructions Options Descriptions Closed Caption On/Off: Select Off to turn off Closed Screen Captioning display or select On to display analog closed captioning with Basic Only On or digital closed captioning with Advanced and Basic On. Closed Caption Options: Basic Analog Services: Select CC1-CC4 to display basic Closed Captioning, if available.
- Page 45 Options Descriptions Screen Mode: You may select a picture size that best suits your TV for both standard-definition and high-definition programming. See page 76 for more information about Screen Mode settings: High Def to Standard Def: The Screen Mode settings when viewing 1080i or 720p content output in a 480p or 480i Format include Letterbox, Side Crop and Squeeze.
- Page 46 Operating Instructions Options Descriptions Dolby Digital: If you are using an external audio system or TV Audio that supports Dolby Digital® audio, select Auto On (The unit is shipped with factory setting of Off.). If you are using an audio system or TV that only receives PCM digital audio signals, select Off.
- Page 47 Options Descriptions You must first create an initial password to use this function. Parental Lock Once your password is set, you can select from the following options to block the programs with Rating Options, Restricted by Channel, Restrict by Time. Change Password allows you to change the existing password.
- Page 48 Operating Instructions Options Descriptions Video Lock: Select Unlock to allow channels to be changed as Recent Channels Options you move through the Recent Channels List. Select Lock to keep the current channel tuned until a new channel is selected from the Recent Channels List. Favorite Options Sort: Select Channel Number Sort to order channels by number.
-
Page 49: Using The Help Menu
Using the Menus Using the Help Menu Press MENU, highlight HELP and press SELECT to display Help Topics. Highlight a topic and then select OK. -
Page 50: Parental Lock
Operating Instructions Parental Lock Creating a Password You must first create a password to use the Parental Lock feature. Parental Lock passwords are comprised of four digits. Press the MENU button and the main menu will appear. Highlight Preferences and press SELECT. Highlight Parental Lock and press SELECT to display the Password entry box. - Page 51 Forgot or Lost Your Password? See lost password under troubleshooting section of this manual (see page 83). Options Description See "Rating Guidelines" on page 46 Rating Options Allows you to restrict viewing of the selected channels. Select the Restrict Restrict by Channel by Channel under the Parental Menu to display all the receivable channels and you can press SELECT to Lock the channel.
-
Page 52: Rating Guidelines
Operating Instructions Rating Guidelines There are different ratings for Movies and TV programs. Make your rating selections according to the table below. You also have the option of blocking unrated TV programs or movies by selecting “Allow” or “Block”. ✍ If you choose to block unrated TV programs, the following programs may be blocked: emergency broadcasts, political programs, news programs, public service announcements, religious programs and weather. - Page 53 Using the Menus Viewing blocked programs When you try to view a blocked channel there will be a message indicating the restriction. The restriction can be temporarily removed until a channel change or playback ends by entering the correct password when asked. Recording a program with Parental Locks Your HD DVR will also record blocked programs.
- Page 54 Operating Instructions...
-
Page 55: Digital Video Recorder
Digital Video Recorder Understanding the Status Bar The Status Bar provides information about the currently displayed program. While viewing a program, press the V button or any of the Trick Play buttons (such as PLAY, PAUSE, etc.) to display the status bar. While the status bar is displayed, press the V button again to display the Chapter Mark area of the status bar. -
Page 56: Pausing Tv
Operating Instructions Pausing TV Using the Pause Feature Do not let small interruptions cause you to miss a moment of your favorite show. Use the pause feature to pause a live or recorded program until you are ready to begin viewing again. Press the PAUSE button. -
Page 57: Using Trick Play Features
Using Trick Play Features m REW and FF M (Rewind) (Fast Forward) Press the REW (Rewind) or FF (Fast Forward) button to rewind or fast forward live or recorded programs. Each time the REW or FF button is pressed, the next available rewind or fast forward speed begins. - Page 58 Operating Instructions ------ REPLAY and ADVANCE Press the REPLAY or ADVANCE button to jump back or forward while viewing live or recorded programs. Available jump times include 2, 5, 15, 30, 60 and 300 seconds (see page 37). The previous playback mode returns after the program has jumped back or forward. .
-
Page 59: Recording Programs
x STOP Press the STOP button to stop playback of a recorded program. The STOP button has no function when viewing live TV. Select EXIT TO LIVE TV to begin watching live TV or select DELETE to delete the recorded program before returning to live TV. Recording Programs Scheduled Recordings Programs can be recorded for future viewing in several ways. - Page 60 Operating Instructions Options Menu or REC (Record) Button While no other menus are displayed, press the b button on the remote control to display the Options Menu or press and hold the REC (Record) button for one second. Select the RECORD option. The TV Guide On Screen Manual Recording menu appears.
-
Page 61: Playing Recorded Programs
Playing Recorded Programs Programs that have been recorded can be accessed from the RECORDINGS List. See “Using the RECORDINGS Service” on page 67 for more information. Press the REC LIST button on the remote control. Highlight a program to play back. Press button to begin playback. -
Page 62: Using Chapter Marks
Operating Instructions Using Chapter Marks Chapter Marks can be used to mark favorite points in both live and recorded programs. Setting Chapter Marks While viewing a program and no other menus are displayed, press the SELECT button on the remote control to set a Chapter Mark at the current point of the program. The status bar appears, showing where in the program the Chapter Mark has been added. - Page 63 Using Chapter Marks To Do This... Do This... While viewing a program, press the PREV (Previous) or NEXT buttons Skip to the next Chapter Mark on the remote control to jump back or jump forward to the next available Chapter Mark. ✍...
- Page 64 Operating Instructions...
-
Page 65: Using The Tv Guide On Screen™ System
Using the TV Guide On Screen™ System Your HD DVR features the TV Guide On Screen interactive program guide that provides an 8- day rolling list of TV programming. This makes recording as easy as highlighting a program title. To record the program, press RECORD button on the remote control. Use the TV Guide On Screen system to find the shows you want to watch, and set them for automatic recording. - Page 66 Operating Instructions The Initial Guide Setup The Guide uses Setup information to provide you with show listings and lineups in your area- --which are updated several times a day. Welcome Screen Initial TV setup leads you to the Welcome screen or press the Guide key to begin setup. •...
-
Page 67: Tv Guide On Screen System Components
TV Guide On Screen System Components Approximately 24 hours after the Auto Setup is completed, you will see this TV Guide On Screen LISTINGS screen whenever you press the TV Guide button on your remote control or on the front panel of your HD DVR. Screen Components Descriptions Video Window Displays the current TV video while the TV Guide On Screen system is... - Page 68 Operating Instructions Screen Components Descriptions Time Slot Provides program airing time. Title Displays the show’s title. Highlighted title indicates the active title. Info Box Provides information on the highlighted program. Info Button Press the INFO button on the remote control to cycle through the various Info Box sizes, Small (default setting), Large, No.
- Page 69 Screen Components Descriptions Record Icon When this icon is displayed, it indicates that the program will be recorded. Once: Indicates that the program is set to record once. Daily: Select to set Monday through Sunday manual recording only. Weekly: Indicates that the program is set to record once a week on the same day of the week, on the same time and channel.
-
Page 70: Using The Listings Service
Operating Instructions Using the LISTINGS Service When the LISTINGS appear, press the INFO button to display a Help screen for detailed guide. To exit the Help screen, press the INFO button again. Use the SELECT bar to scroll or V/v/B/b buttons to navigate within the LISTINGS. Up to 8 days of program listings can be viewed. -
Page 71: Using The Search Service
Using the SEARCH Service SEARCH service allows you to find a program from different categories. When SEARCH is highlighted on the Service Bar, some of the following categories may appear just below the Service Bar: KEYWORD, ALPHABETICAL, MOVIES, SPORTS, CHILDREN, EDUCATIONAL, NEWS, VARIETY, SERIES, HDTV. - Page 72 Operating Instructions To Do This... Do This... KEYWORD search 1. Highlight KEYWORD and choose SELECT to display the 2. Highlight New Search then press OK. The Search Options menu 3. Press the B or b button to select a category to search. Highlight 4.
-
Page 73: Using The Recordings Service
Using the RECORDINGS Service The RECORDINGS provides a list of previously recorded or currently recording programs on the HD DVR. With RECORDINGS highlighted on the Service Bar press the MENU button to display the panel menu. Choose “Group” or “List” to display the way you want the listing to appear on the RECORDINGS. -
Page 74: Using The Schedule Service
Operating Instructions Using the SCHEDULE Service SCHEDULE allows you to review, edit or delete record and remind upcoming events which you have already set. Highlight SCHEDULE on the Service Bar then highlight the event. Press the MENU button to display the options in panel menu To Do This... -
Page 75: Using The Setup Service
Using the SETUP Service You can customize the TV Guide On Screen system settings. If you have not completed the initial setup please do so now. This service is only available after you have completed the TV Guide On Screen system setup (see page 28). To Do This... -
Page 76: Recording A Program From Tv Guide On Screen System
Operating Instructions Recording a Program from TV Guide On Screen™ System A program can be recorded or the recording settings can be changed from any one of the following services: LISTINGS, SEARCH and SCHEDULE. There are three (3) ways to set a program for recording 1. - Page 77 2. Recording from a Panel Menu While in LISTINGS highlight a program which you want to record and press MENU to display an options menu. Highlight set recording and choose SELECT to view more options. Highlight the frequency option. You have the options of Once, Regularly, Weekly and Off. Press the B/b button to make your selection.
- Page 78 Operating Instructions Recording Starting! A notification of the recording will appear on the screen if you are watching a channel that is different than the upcoming scheduled recording. When the notice appears you can choose to start or cancel the recording.
-
Page 79: References
References In this section you will find frequently asked questions and troubleshooting, product specifications, license agreements and the limited warranty. Learning About Available Video Services Your HD DVR can receive a variety of programs and make them available to you on your schedule. The HD DVR can receive signals from both an antenna and from a cable TV service provider. - Page 80 Operating Instructions Signal Format Analog Active lines 480i Sound Stereo or Mono Aspect Ratio 4: 3 Broadcasts can be received in three formats: Analog, digital (standard definition) or digital (high definition). The "p" in case of 480p and 720p stands for "progressive" and "i" in the 480i and 1080i stands for "interlaced."...
- Page 81 Depending on the type of TV that the HD DVR is connected to , available Format settings may include the following: Display Format Mode Input Signal Format 1080i All Formats 720p All Formats 480p All Formats 480i All Formats Native 1080i 720p 480p...
-
Page 82: Learning About Screen Modes
Operating Instructions Learning About Screen Modes TV programs can be created in a variety of aspect ratios or Screen Modes. The most common are 4:3 and 16:9. TVs or monitors most often have an aspect ratio of 4:3 or 16:9. To allow a wide variety of programs to be best displayed on the various TV and monitor shapes, your HD DVR features several Screen Mode settings. - Page 83 SD Content to HD Output When standard-definition content is received and output in a high-definition format, the following Screen Mode settings are available: Table 5: SD Content/HD Output Normal Stretch Side Stretch Adjust ✍ Many TVs also have options that allow the screen image to be stretched, cropped, etc. The above illustrations assume that the TV's screen adjustments are in their default or normal mode and that the broadcast image is either a standard 16:9 or 4:3 aspect ratio.
- Page 84 Operating Instructions High-definition content output in high-definition format The following temporary Screen Mode settings are available when viewing high-definition content output in a high-definition format. Note that the setting is returned to Standard after each channel change. Table 6: HD Content/HD Output Standard (Factory Default)
-
Page 85: Troubleshooting
Contacting Sony If, after reading these operating instructions, you have additional questions related to the use of your Sony® HD DVR, please call our Customer Information Services Center at: For US residents only: 1-800-222-SONY (7669) For Canadian residents only: 1-877-899-SONY (7669) Before calling the Sony Customer Information Services Center, please write down the model and serial numbers of your HD DVR. - Page 86 There may be more than one code for the equipment that you are attempting to operate. There is a possibility that some non-Sony equipment cannot be operated by your Sony TV remote. You may need to use the equipment’s original remote control. Press the MENU button on the remote control.
- Page 87 CableCARD™ Device Symptoms Possible Remedies Problems using CableCARD Check that the CableCARD is inserted properly (see page 22). The CableCARD must be activated by your cable TV service provider before CableCARD services you can receive selected digital cable TV services. See the CableCARD activation instructions on page 26.
- Page 88 Operating Instructions Audio Symptoms Possible Remedies Make sure the Current Digital Audio or Current Analog Audio settings Good picture, no sound (Preferences/Audio) are set to a receivable audio track, such as “English” or “Stereo” (see page 40). If using an HDMI connection to a DVI-equipped TV, an additional analog or digital audio connection to the TV or audio system is required (see page 19).
- Page 89 General Symptoms Possible Remedies Press TV Guide > Setup > Change system settings to confirm your TV Guide Time does not display on the front panel On Screen settings so that it has the correct “zip code”, antenna on input “Air”, or Cable on input “CABLE”.
-
Page 90: Specifications
Operating Instructions Specifications Broadcast standards NTSC American TV Standard (480i), ATSC (8VSB terrestrial), ATSC Compliant 8VSB (1080i, 720p, 480p, 480i) QAM on cable ITU-T J.83 Annex B compliant 64/256QAM Channel coverage VHF: 2-13 UHF: 14-69 CATV: 1-125 Digital: 1-999 Antenna 75-ohm external antenna terminal for VHF/UHF and digital terrestrial Power requirements DHG-HDD250: ~AC 120 V, 60 Hz, 45W... -
Page 91: End-User License
EULA only as part of a sale or transfer of SONY SOFTWARE accompanying the sale or transfer of the SONY HD DVR that it is used with, provided you retain no copies, transfer all of the SONY SOFTWARE (including all copies,... -
Page 92: Gnu General Public License
This EULA shall be governed by the local law of the State of California, USA. Should you have any questions concerning this EULA or this limited warranty, you may contact SONY by writing to SONY at Sony Technical Response Center, 12451 Gateway Boulevard, Fort Myers, Florida 33913. - Page 93 copy of this License. (Exception: if the Program itself is interactive but does not normally print such an announcement, your work based on the Program is not required to print an announcement.) These requirements apply to the modified work as a whole. If identifiable sections of that work are not derived from the Program, and can be reasonably considered independent and separate works in themselves, then this License, and its terms, do not apply to those sections...
- Page 94 You can download the source code from the following site: http://www.sony.com/linux This LGPL software is governed by the following terms and conditions: GNU LESSER GENERAL PUBLIC LICENSE Version 2.1, February 1999 Copyright (C) 1991, 1999 Free Software Foundation, Inc., 59 Temple Place, Suite 330, Boston, MA 02111-1307 USA.
- Page 95 GNU LESSER GENERAL PUBLIC LICENSE TERMS AND CONDITIONS FOR COPYING, DISTRIBUTION AND MODIFICATION 0. This License Agreement applies to any software library or other program which contains a notice placed by the copyright holder or other authorized party saying it may be distributed under the terms of this Lesser General Public License (also called "this License").
- Page 96 Operating Instructions e) Verify that the user has already received a copy of these materials or that you have already sent this user a copy. For an executable, the required form of the "work that uses the Library" must include any data and utility programs needed for reproducing the executable from it.
- Page 97 The following special provisions apply to the FreeType2 Font Engine: Portions of this software are copyright© 1996-2002 The FreeType Project (www.freetype.org). All rights reserved. http://www.freetype.org libjpeg The following applies to the libjpeg software module: This software is based in part on the work of the Independent JPEG Group. libpng The following special provisions apply to the libpng software module: COPYRIGHT NOTICE, DISCLAIMER, and LICENSE:...
- Page 98 Operating Instructions...
-
Page 99: Index
Index Symbols . (dot) Numerics 1080i 480i 480p 720p AC IN Add to Favorite Adjust ADVANCE Advance Time Advanced Digital Services Advanced Digital Settings ALPHABETICAL AMP (Amplifier) ANT IN As Broadcast Audio AUDIO OUT Auto Add Auto Add from Antenna Auto HDMI Auto Scan Auto Setup... - Page 100 Edit Category Name Edit Channel Edit Channel List Editing Favorite EDUCATIONAL ENTER EXIT EXIT button Expand Factory Default FAVORITE Favorite category Favorite Menu Favorite Options FF/REW Speed FORMAT Format FORMAT button Format Settings Front Panel G-LINK IR Blaster HD DVR ANT IN HD DVR CABLE IN HDMI HDMI OUT...
- Page 101 Package Contents Panel Menu / Panel Ad Parental Control Parental Lock Password PAUSE Pause PCM digital audio signals PIC MODE PLAY Playing POWER button Power indicator Precautions Preferences Menu PREV Previous Quality Rating Guidelines Rating Options Ratings Unrated REC (record) REC indicator REC LIST Recent Channels...
- Page 102 Tile Time Slot Title Trick Play TV Codes TV GUIDE TV GUIDE button TV Guide Logo TV Guide On Screen TV Guide On Screen Components TV Guide On Screen Feature TV Rating TV/VIDEO U.S. Rating Guidelines Unlock Unrated USB (Universal Serial Bus) Variable 1 Variable 2 Variable 3...
- Page 104 Printed in U.S.A.