Table of Contents
Advertisement
SERVICE
Manual
Feature
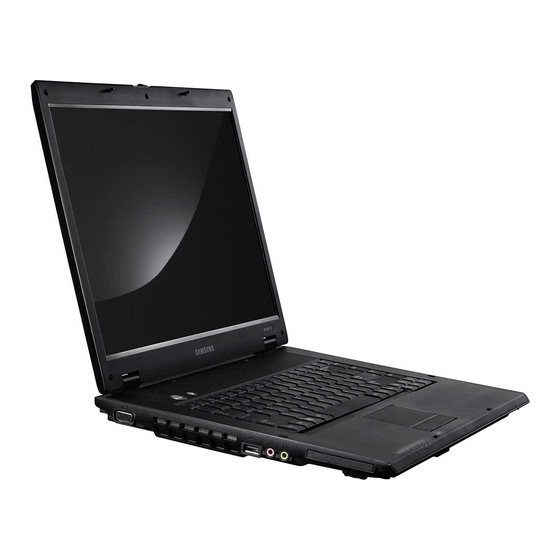
SENS R60 Plus
1. Simple & Essential Note PC
-. Intel Core2 Duo/Celeron M
Processor
-. AMD RS600ME + AMD SB600
-. ATI M64S Graphics
2. High Performance & Security
-. 15.4" WXGA/WXGA+ Super Bright
Glare LCD/Non Glare LCD
-. AVS now, Bluetooth.
If there are the contents not included in this book, please refer to K-zone Service Manual
Advertisement
Table of Contents

Related Manuals for Samsung SENS R60 Plus


Summary of Contents for Samsung SENS R60 Plus
- Page 1 SERVICE Manual Feature SENS R60 Plus 1. Simple & Essential Note PC -. Intel Core2 Duo/Celeron M Processor -. AMD RS600ME + AMD SB600 -. ATI M64S Graphics 2. High Performance & Security -. 15.4" WXGA/WXGA+ Super Bright Glare LCD/Non Glare LCD -.
-
Page 2: Table Of Contents
- 이 문서는 삼성전자의 기술 자산으로 승인자만이 사용할 수 있습니다 - - This Document can not be used without Samsung's authorization - - CONTENTS - 1. Precaution 1) General After-Sales Service Precaution............. 1-1 2) Safety cautions.................... 1-2 3) Ground connection item................1-3 4) Static caution....................1-3... -
Page 3: Introduction
- This Document can not be used without Samsung's authorization - 2. Introduction and Specification 1) Introduction (1) High Performance Note PC - Intel® Core™ 2 Duo Processor - Intel® Core™ Duo Processor - Intel® Pentium Dual Core™ Processor - Intel® Celeron® M Processor - Wireless LAN (Option), Bluetooth (Option). -
Page 4: Specification
- 이 문서는 삼성전자의 기술 자산으로 승인자만이 사용할 수 있습니다 - - This Document can not be used without Samsung's authorization - 2. Introduction and Specification 2) Specification Processor and Motherboard Description Intel® Core™ 2 Duo Processor Intel® Pentium Dual Core™ Processor+ AMD RS600ME + AMD SB600 Intel®... - Page 5 Average Access Time 13m sec. Speed 5400 / 7200 RPM , Hybrid HDD, TMR/PMR Type 80GB / 100GB / 120GB / 160GB / 200GB : HGST, Hitachi, Samsung Capacity - 80 ~ 160GB SATA 5400rpm - 200GB SATA 4200rpm (June '07) Optical Disk Drive DVD/CD-ROM/Combo / Super Multi (12.7mm) ;...
- Page 6 - 이 문서는 삼성전자의 기술 자산으로 승인자만이 사용할 수 있습니다 - - This Document can not be used without Samsung's authorization - 2. Introduction and Specification Average Access Time DVD 130ms Typ., CD 130ms Typ. Weight 180g or less S/W supplied...
- Page 7 - 이 문서는 삼성전자의 기술 자산으로 승인자만이 사용할 수 있습니다 - - This Document can not be used without Samsung's authorization - 2. Introduction and Specification Power and Power Management Battery (Standard) AA-PB3NC6B (6cells, Smart Li-Ion Battery) Dimension 204 x 48 x 20mm...
- Page 8 - 이 문서는 삼성전자의 기술 자산으로 승인자만이 사용할 수 있습니다 - - This Document can not be used without Samsung's authorization - 2. Introduction and Specification System Dimensions Dimensions (W X D X H) 358 x 265.2 x 31.3 ~ 35.8 (37.4)mm Weight 2.68Kg...
- Page 9 - 이 문서는 삼성전자의 기술 자산으로 승인자만이 사용할 수 있습니다 - - This Document can not be used without Samsung's authorization - 2. Introduction and Specification 3) Specification comparison 3-1) Subsidiary company model comparison 모델명 R40 plus R60 plus Intel Merom (FSB800, 2MB L2)
- Page 10 - 이 문서는 삼성전자의 기술 자산으로 승인자만이 사용할 수 있습니다 - - This Document can not be used without Samsung's authorization - 2. Introduction and Specification 3) Specification comparison 3-2) Other firm model comparison Model Name ACER Toshiba Sony 5611-300...
-
Page 11: Wireless Lan Specification
- This Document can not be used without Samsung's authorization - 2. Introduction and Specification 4) Wireless LAN Specification (1) Wireless LAN Standard (802.11BG card ) Atheros Wireless Network Adapter SENS R60 Plus < 2 - 9 >... -
Page 12: Option List
- 이 문서는 삼성전자의 기술 자산으로 승인자만이 사용할 수 있습니다 - - This Document can not be used without Samsung's authorization - 2. Introduction and Specification 5) Option list BA59-01999A HTS541660J9SA00 5400rpm, , 60G, SATA, 8M BA59-01946A MHV2060BH-PL 5400rpm, , 60G, SATA, 8M... - Page 13 - 이 문서는 삼성전자의 기술 자산으로 승인자만이 사용할 수 있습니다 - - This Document can not be used without Samsung's authorization - 2. Introduction and Specification MEMORY 1105-001683 DDR2 667Mhz 512MB M470T6554CZ3-CE6 1105-001684 DDR2 667Mhz 1GB M470T2953CZ3-CE6 1105-001783 DDR2 667MHz 512MB...
- Page 14 - 이 문서는 삼성전자의 기술 자산으로 승인자만이 사용할 수 있습니다 - - This Document can not be used without Samsung's authorization - 2. Introduction and Specification BA96-03223A S_MULTI(DV228EC) TEAC BA96-03241A S_MULTI(UJ-850) MATSUHITA BA96-03242A S_MULTI(TS-L632D) TSST BA96-03222A ROM(DW-224E-R) TEAC BA96-03239A COMBO(TS-L462D)
-
Page 15: S/W List
- 이 문서는 삼성전자의 기술 자산으로 승인자만이 사용할 수 있습니다 - - This Document can not be used without Samsung's authorization - 2. Introduction and Specification S/W List (Driver & Application) Item Specification ATI Graphic driver 8.383_RC2 Atheros Wireless LAN driver 7.3.0.64... -
Page 16: Description Of Main-Board
- 이 문서는 삼성전자의 기술 자산으로 승인자만이 사용할 수 있습니다 - - This Document can not be used without Samsung's authorization - 2. Introduction and Specification Description of Main-Board 7)-1. Top Power Button AVSNow Button CPU Support Touchpad FFC Connector... - Page 17 - 이 문서는 삼성전자의 기술 자산으로 승인자만이 사용할 수 있습니다 - - This Document can not be used without Samsung's authorization - 2. Introduction and Specification 7)-2. Bottom DC-in Connector J500 Battery Connector J505 USB Connector (x2) J502 Mini Card Socket...
-
Page 18: Disassembling And Reassembling
- 이 문서는 삼성전자의 기술 자산으로 승인자만이 사용할 수 있습니다 - - This Document can not be used without Samsung's authorization - 3. Disassembling and Reassembling Area Picture Description 1. Separate AC adaptor and battery certainly before disassembling system. 2. Push out battery on like figure 2 times after is compregnated KNOB to a finish to arrow direction like figure 1 times registered to picture. - Page 19 - 이 문서는 삼성전자의 기술 자산으로 승인자만이 사용할 수 있습니다 - - This Document can not be used without Samsung's authorization - 3. Disassembling and Reassembling Area Picture Description 8. Separate from Connector catches handle with picture and pushes HDD to arrow direction.
- Page 20 - 이 문서는 삼성전자의 기술 자산으로 승인자만이 사용할 수 있습니다 - - This Document can not be used without Samsung's authorization - 3. Disassembling and Reassembling Area Picture Description 12. After remove HDD, Wireless LAN, Memory, ODD Module image 13. When overturn System, use Hook of where is registered to picture for Top Cover and Keyboard separation.
- Page 21 - 이 문서는 삼성전자의 기술 자산으로 승인자만이 사용할 수 있습니다 - - This Document can not be used without Samsung's authorization - 3. Disassembling and Reassembling Area Picture Description 16. Lifts Keyboard FPC and Linked Connector Cover with picture and separates Keyboard.
- Page 22 - 이 문서는 삼성전자의 기술 자산으로 승인자만이 사용할 수 있습니다 - - This Document can not be used without Samsung's authorization - 3. Disassembling and Reassembling Area Picture Description 20. Catches LCD Cable and pulls to left and separates Cable.
- Page 23 - 이 문서는 삼성전자의 기술 자산으로 승인자만이 사용할 수 있습니다 - - This Document can not be used without Samsung's authorization - 3. Disassembling and Reassembling Area Picture Description 24. After separate LCD Ass' y image 25. Lifts on and separates Top from right side with picture.
- Page 24 - 이 문서는 삼성전자의 기술 자산으로 승인자만이 사용할 수 있습니다 - - This Document can not be used without Samsung's authorization - 3. Disassembling and Reassembling Area Picture Description 28. Lifts Main Board from right side part and separates from Bottom.
-
Page 25: Top Ass'y
- 이 문서는 삼성전자의 기술 자산으로 승인자만이 사용할 수 있습니다 - - This Document can not be used without Samsung's authorization - 3. Disassembling and Reassembling Area Picture Description 1. Remove Speaker. *Caution If Touchpad Module is not all-important Ass'y occasion because was fixed by Top and two faces tape, Module does not separate. - Page 26 - 이 문서는 삼성전자의 기술 자산으로 승인자만이 사용할 수 있습니다 - - This Document can not be used without Samsung's authorization - 3. Disassembling and Reassembling Area Picture Description 4. Separate + Inverter from LCD Back to LCD Module removing 7 Screws.
- Page 27 - 이 문서는 삼성전자의 기술 자산으로 승인자만이 사용할 수 있습니다 - - This Document can not be used without Samsung's authorization - 3. Disassembling and Reassembling Area Picture Description 8. Separate Connector 3 places in LCD Module. 9. Has pushed Connector to arrow direction and separates LCD Module and Inverter.
- Page 28 - 이 문서는 삼성전자의 기술 자산으로 승인자만이 사용할 수 있습니다 - - This Document can not be used without Samsung's authorization - 3. Disassembling and Reassembling Area Picture Description 12. Removes 6 side Screws and removes right and left Bracket.
-
Page 29: Main Board
- 이 문서는 삼성전자의 기술 자산으로 승인자만이 사용할 수 있습니다 - - This Document can not be used without Samsung's authorization - 3. Disassembling and Reassembling Area Picture Description 1. Main Board 2. Remove 8 Screws for HeatSink separation. - Special Screw : 8 EA *Caution HeatSink Screws couldn't be disassembled. - Page 30 - 이 문서는 삼성전자의 기술 자산으로 승인자만이 사용할 수 있습니다 - - This Document can not be used without Samsung's authorization - 3. Disassembling and Reassembling Area Picture Description 5. Separate relevant Screw to separate MDC. - M2 L6 : 1 EA 6.
- Page 31 - 이 문서는 삼성전자의 기술 자산으로 승인자만이 사용할 수 있습니다 - - This Document can not be used without Samsung's authorization - 3. Disassembling and Reassembling Area Picture Description 9. EXPRESS Frame with picture separates confidential talk to right. 10. After remove Thermal Duct, Heatsink, CPU,...
-
Page 32: Troubleshooting
- This Document can not be used without Samsung's authorization - 4. Troubleshooting 1) General (1) Tools used for repairing the product System Diagnostics Disk MS-DOS Booting Disk System Diagnostics Card Screwdrivers ( ┼ , ━ ) Tweezers Multi-meter Oscilloscope... -
Page 33: Debugging Flow Chart
- This Document can not be used without Samsung's authorization - 4. Troubleshooting 2) Debugging Flow Chart S t a r t P o w e r o n N o p r o b le m N o p r o b le m... - Page 34 - This Document can not be used without Samsung's authorization - 4. Troubleshooting N o p r o b l e m N o p r o b l e m C h e c k s p e a k e r...
- Page 35 - This Document can not be used without Samsung's authorization - 4. Troubleshooting 3) System Diagnosis (1) System Diagnostics Card The Diagnostics Card shows the system operations during the POST (Power On Self Test) in a 2 digit hexadecimal number by connecting the cable to the 10 pin connector below the PCMCIA slot after separating the Top part.
- Page 36 - This Document can not be used without Samsung's authorization - 4. Troubleshooting Shadow system BIOS ROM Auto size cache Advanced configuration of chipset registers Load alternate registers with CMOS values Initialize interrupt vectors POST device initialization 2-1-2-3 Check the ROM copyright notice...
- Page 37 - This Document can not be used without Samsung's authorization - 4. Troubleshooting Test and initialize PS/2 mouse Initialize floppy controller Determine number of ATA drives (optional) Initialize hard-disk controllers Initialize local-bus hard-disk controllers Jump to UserPatch2 Build MPTABLE for multi-processor boards...
- Page 38 - This Document can not be used without Samsung's authorization - 4. Troubleshooting (3) Use of Debug card -. Like upper picture, debug card is connected to DEBUG connector(as following) in Main board. -. Debug code is shown at the viewer in red line.
-
Page 39: Use Of Diagnostic Program
- This Document can not be used without Samsung's authorization - 4. Troubleshooting 4) Use of diagnostic program 4)-1 Execute OperatorInterface.exe after copy Windiag3 to free folder. SENS R60 Plus < 4 - 8 >... - Page 40 - This Document can not be used without Samsung's authorization - 4. Troubleshooting 4)-2 You can see screen such as lower part if click "OperatorInterface" Icon 4)-3 Click the "Open" Button to open Script file. In Note PC relationship occasion : Select TestScript_NotePC_Burnin.xml In Desktop relationship occasion : Select TestScript_Desktop_Burnin.xml...
- Page 41 - This Document can not be used without Samsung's authorization - 4. Troubleshooting 4)-4 If select enumeration, show relevant script on left side screen in OperatorInterface . SENS R60 Plus < 4 - 10 >...
- Page 42 - This Document can not be used without Samsung's authorization - 4. Troubleshooting 4)-5 Start by go test if do click start. 4)-6. If do click stop, test disengages. If all modules do not disengage normally normally in 30 drafts 2 minutes, message will be lance that ask whether will end Windiag3 compulsorily appears.
- Page 43 - This Document can not be used without Samsung's authorization - 4. Troubleshooting 4)-7 End Windiag because EXIT does click. SENS R60 Plus < 4 - 12 >...
- Page 44 - This Document can not be used without Samsung's authorization - 4. Troubleshooting 5) Hardware Troubleshooting For the procedures to disassemble each part, refer to the descriptions of Chapter 4, “Disassembly and Reassembly”. ◆ LCD Related Troubles 1. The screen is dark or the colors of the screen are distorted.
- Page 45 - This Document can not be used without Samsung's authorization - 4. Troubleshooting 4. The LCD blinks while the system is in operation. → Check if there is a magnetic body near the touch pad button or the system or check if there is an exterior defect to the LCD or system.
- Page 46 - This Document can not be used without Samsung's authorization - 4. Troubleshooting 7. The Express card is not inserted or the Eject button does not work. → This may occur when the insulator within the Express card slot is enwrapped.
- Page 47 - This Document can not be used without Samsung's authorization - 4. Troubleshooting 11. The HDD is not recognized. → Check the connection status of the HDD connector. fixup HDD, check whether the system can be found. if not,change the connector on the motherboard and check again.
- Page 48 - This Document can not be used without Samsung's authorization - 4. Troubleshooting 13. The battery is not charged or the battery charge LED malfunctions. → Check the standard voltage of the adapter. → Check if the battery is defective.
- Page 49 - This Document can not be used without Samsung's authorization - 4. Troubleshooting 17. The Fan does not work normally → Check if the Thermal is locked tightly. → Check if the Fan cable is properly connected FAN Control Table...
- Page 50 - This Document can not be used without Samsung's authorization - 4. Troubleshooting ◆ When booting up the computer 18. The "Invalid System Disk. Replace the Disk and then press any key" message appears. → This message may appear when the connected USB memory or CD media does not include bootable data.
- Page 51 - This Document can not be used without Samsung's authorization - 4. Troubleshooting ◆ Windows / Screen Related Problems 24. The computer hangs while running a program. → If the running program causes an error: In Windows XP, press the <Ctrl>, <Alt> and <Del> key combination, select the application program and click on End Task in the Applications tab of the [Windows Task Manager] window.
-
Page 52: Device Settings Related Software Diagnosis
- This Document can not be used without Samsung's authorization - 4. Troubleshooting 6) Device Settings Related Software Diagnosis (1) Check if the drivers of each of the devices are properly installed. That is, check if there are any yellow exclamation marks in the Device Manager. - Page 53 - This Document can not be used without Samsung's authorization - 4. Troubleshooting (4) HDD and ODD Related Problems For an HDD, check if the HDD operates in Ultra DMA Mode 5 by selecting the Primary IDE Channel in the Control Panel as follows. If it does not, check the BIOS SETUP, reinstall the operating system or replace the HDD-FPC or HDD, if necessary.
- Page 54 - This Document can not be used without Samsung's authorization - 4. Troubleshooting For an ODD, check if it operates in Ultra DMA Mode 2. If it does not, check if the disc inserted into the ODD is clean. If the disc is contaminated, the access speed may slows down. If the disc is clean, check the BIOS SETUP, reinstall the operating system or ODD, if necessary.
-
Page 55: Battery Use Time
- This Document can not be used without Samsung's authorization - 4. Troubleshooting 7) Battery Use Time Check the following check lists for systems where the battery use time is too short to diagnose problems. (1) Check the battery Check if the battery is out of order referring to the Battery check program distributed to Service Centers and the 'Battery Check Manual' included in the 'Note-PC A/S Guide'. - Page 56 - This Document can not be used without Samsung's authorization - 4. Troubleshooting SENS R60 Plus < 4 - 25 >...
- Page 57 - This Document can not be used without Samsung's authorization - 4. Troubleshooting SENS R60 Plus < 4 - 26 >...
- Page 58 - This Document can not be used without Samsung's authorization - 4. Troubleshooting 3. Battery Capacity Table 4. Battery Check Program SENS R60 Plus < 4 - 27 >...
- Page 59 - This Document can not be used without Samsung's authorization - 4. Troubleshooting (2) Check the battery use environment 1. Generally, the battery usage time in advertisements by notebook manufacturers refers to the maximum battery use time. Since the system specifications and the usage environment may differ, the user's battery usage time may differ from the advertisement even if there is no problem with the system.
-
Page 60: Other
- This Document can not be used without Samsung's authorization - 4. Troubleshooting 8) Other 8)-1. CPU Spec 4-6 code Type 업체 P/N Description T7700 0902-002199 uFCPGA LF80537GG0564M 2.4GHz,uFCPGA,479P,TR,PLASTIC,1.05V,34W,0to+100C,4MB,FSB800 T7500 0902-002198 uFCPGA LF80537GG0494M 2.2GHz,uFCPGA,479P,TR,PLASTIC,1.05V,34W,0to+100C,4MB,FSB800 T7300 0902-002197 uFCPGA LF80537GG0414M 2.0GHz,uFCPGA,479P,TR,PLASTIC,1.05V,34W,0to+100C,4MB,FSB800 T7100 0902-002196 uFCPGA LF80537GG0332M 1.8GHz,uFCPGA,479P,TR,PLASTIC,1.05V,34W,0to+100C,2MB,FSB800... -
Page 61: System Wire Diagram
- 이 문서는 삼성전자의 기술 자산으로 승인자만이 사용할 수 있습니다 - - This Document can not be used without Samsung's authorization - 7. System Wire Diagram 1) Wiring Diagram (Top / Bottom) SENS R60 Plus < 7 - 1 >... -
Page 62: Lcd
- 이 문서는 삼성전자의 기술 자산으로 승인자만이 사용할 수 있습니다 - - This Document can not be used without Samsung's authorization - 7. System Wire Diagram 2) LCD SENS R60 Plus < 7 - 2 >... -
Page 63: System Layout
- 이 문서는 삼성전자의 기술 자산으로 승인자만이 사용할 수 있습니다 - - This Document can not be used without Samsung's authorization - 7. System Wire Diagram 3) System Layout SENS R60 Plus < 7 - 3 >... - Page 64 - This Document cannot be used without the authorization of Samsung - Precautions 1) General After-Sales Service Precautions (1) Do not let customers repair the product themselves. ☞ There is a danger of injury and the product life time may be shortened.
- Page 65 - This Document cannot be used without the authorization of Samsung - Precautions 2) Safety Precautions (1) EMI This device has been registered regarding EMI for residential use. It can be used in all areas. (2) Circuit Test (Logic Test) Precautions The LSI and MSI used in this product are semiconductor integrated circuits based on MOS-FET or CMOS.
- Page 66 - This Document cannot be used without the authorization of Samsung - Precautions 3) Ground The product must be grounded to protect it from static electricity and other dangers. When using a multitap, please use a multitap with a ground terminal only.