Table of Contents
Advertisement
3-859-057-34 (1)
Video Camera
Recorder
Operating Instructions
Before operating the unit, please read this manual thoroughly,
and retain it for future reference.
Manual de instrucciones
Antes de utilizar la unidad, lea detenidamente este
manual y consérvelo para futuras referencias.
CCD-TRV12
CCD-TRV10/TRV12
1996 by Sony Corporation
Advertisement
Table of Contents

Related Manuals for Sony Handycam Vision CCD-TRV10


Summary of Contents for Sony Handycam Vision CCD-TRV10
-
Page 1: Operating Instructions
Operating Instructions Before operating the unit, please read this manual thoroughly, and retain it for future reference. Manual de instrucciones Antes de utilizar la unidad, lea detenidamente este manual y consérvelo para futuras referencias. CCD-TRV12 CCD-TRV10/TRV12 1996 by Sony Corporation... - Page 2 English Welcome ! Congratulations on your purchase of this Sony Handycam Vision camcorder. With your Handycam Vision, you can capture life’s precious moments with superior picture and sound quality. Your Handycam Vision is loaded with advanced features, but at the same time it is very easy to use.
-
Page 3: Table Of Contents
Resetting the date and time ... 42 Playback modes ... 43 Tips for using the battery pack ... 43 Maintenance information and precautions ... 47 Using your camcorder abroad ... 52 Trouble check ... 53 Specifications ... 59 Identifying the parts ... 61 Warning indicators ... -
Page 4: Before You Begin Using This Manual
“CCD-TRV12 only”. As you read through this manual, buttons and settings on the camcorder are shown in capital letters. e.g. Set the POWER switch to CAMERA. As indicated with ≥ in the illustrations, you can hear the beep sound to confirm your operation. -
Page 5: Precautions On Camcorder Care
Over 99.99% are operational for effective use. • Do not let the camcorder get wet. Keep the camcorder away from rain and sea water. Letting the camcorder get wet may cause the unit to malfunction, and sometimes this malfunction cannot be repaired. -
Page 6: Checking Supplied Accessories
7 AC-V16/V16A/V17/V17A AC power adaptor (1) (p. 7, 26) Contents of the recording cannot be compensated if recording or playback is not made due to a malfunction of the camcorder, video tape, etc. Comprobación de los accesorios suministrados Compruebe si los siguientes accesorios están incluidos con su videocámara. -
Page 7: Getting Started
Getting started Charging and installing the battery pack Before using your camcorder, you first need to charge and install the battery pack. To charge the battery pack, use the supplied AC power adaptor. Charging the battery pack Charge the battery pack on a flat place without vibration. -
Page 8: Battery Life
Charging and installing the battery pack Battery life CCD-TRV10 While recording Battery pack LCD open 70 (30) NP-33 (supplied) 85 (45) NP-55H 120 (65) NP-C65/67 110 (60) NP-66 185 (100) NP-77H/77HD 225 (125) NP-98/98D CCD-TRV12 While recording Battery pack LCD open... -
Page 9: Installing The Battery Pack
VTR (DC OUT) and disconnect the power cord. After about one minute, reconnect the power cord and set the selector to CHARGE again. • You cannot operate the camcorder using the AC power adaptor while charging the battery pack. Installing the battery pack (1) Insert the top of the battery pack into the top of the battery mounting surface. -
Page 10: Inserting A Cassette
Inserting a cassette Make sure that a power source is installed. (1) While pressing the small blue button, slide EJECT in the direction of the arrow. The cassette compartment automatically opens. (2) Insert a cassette (not supplied) with the window facing out. (3) Press the PUSH mark on the cassette compartment to close it. -
Page 11: Basic Operations Camera Recording
START/STOP MODE switch inside the LCD panel is set to When you use the camcorder for the first time, power on it and reset the date and time to your time (p. 42) before you start recording. The date is automatically recorded for 10 seconds after you start recording (AUTO DATE feature). - Page 12 Then, eject the cassette and remove the battery pack. Note on standby mode If you leave the camcorder for 5 minutes or more with a cassette inserted in Standby mode, the camcorder goes off automatically. This prevents wearing down the battery and wearing out the tape.
- Page 13 To focus the viewfinder lens If the viewfinder is not in focus at all or when you use the camcorder after someone else has used it, focus the viewfinder lens. Turn the viewfinder lens adjustment ring so that the indicators in the viewfinder come into sharp focus.
- Page 14 Several beeps also sound as a warning of any unusual condition of the camcorder. Note that the beep sound is not recorded on the tape. If you do not want to hear the beep sound, change the BEEP setting to OFF.
-
Page 15: Using The Zoom Feature
Using the zoom feature Zooming is a recording technique that lets you change the size of the subject in the scene. For more professional-looking recordings, use the zoom sparingly. “T” side: for telephoto (subject appears closer) “W” side: for wide-angle (subject appears farther away) Zooming speed (Variable speed zooming) - Page 16 Camera recording Notes on digital zoom – CCD-TRV12 only • More than 13x zoom is performed digitally, and the picture quality deteriorates as you go toward the “ T ” side. If you do not want to use the digital zoom, set the D ZOOM function to OFF.
-
Page 17: Shooting With The Lcd Screen
• When closing the LCD panel, turn it vertically until it clicks [a]. • When turning the LCD panel, turn it always vertically; otherwise, the camcorder body may be damaged or the LCD panel may not close properly [b]. • Close the LCD panel completely when not in use. -
Page 18: Hints For Better Shooting
For hand-held shots, you’ll get better results by holding the camcorder according to the following suggestions: • Hold the camcorder firmly and secure it with the grip strap so that you can easily manipulate the controls with your thumb. • Place your right elbow against your side. - Page 19 Si posee un trípode para cámara fotográfica, podrá emplearlo también con esta videocámara. Cuando utilice un trípode que no sea Sony, asegúrese de que la longitud del tornillo del trípode sea inferior a 6,5 mm. De lo contrario, es posible que el tornillo dañe las partes internas de...
-
Page 20: Checking The Recorded Picture
(not supplied). Hold down the – side of EDITSEARCH until the camcorder goes back to the scene you want. The last recorded portion is played back. To go forward, hold down the + side (Edit Search). - Page 21 To stop playback Release EDITSEARCH. To go back to the last recorded point after edit search Press END SEARCH. The last recorded point is played back for about 5 seconds if the tape was recorded in SP mode, or 10 seconds if the tape was recorded in LP mode, and stops.
-
Page 22: Playing Back A Tape
LCD screen if necessary. (4) Press ( to start playback. (5) Adjust the volume using VOL. You can also monitor on the TV screen after connecting the camcorder to the VCR/TV. CAMERA PLAYER To stop playback, press p. - Page 23 When watching on the LCD screen You can turn the LCD panel over and move back to the camcorder with the LCD screen facing out. You can change the angle of the LCD panel. [b] Using the Remote Commander You can control playback using the supplied Remote Commander.
-
Page 24: Searching For The End Of The Picture
Notes on playback • Streaks appear and the sound is muted in the various playback modes. • When playback pause mode lasts for 5 minutes more, the camcorder automatically enters stop mode. Searching for the end of the picture You can go to the end of the recorded portion... -
Page 25: Advanced Operations Using Alternative Power Sources
Esta marca indica que este producto es un accesorio genuino para los productos de vídeo Sony. A la hora de adquirir los productos de vídeo Sony, recomendamos adquirir los accesorios con esta marca “GENUINE VIDEO ACCESSORIES”. -
Page 26: Using The House Current
Using alternative power sources Using the house current To use the supplied AC power adaptor: (1) Connect the power cord to a wall outlet. Insert the top of the connecting plate of the AC power adaptor into the top of the battery mounting surface. -
Page 27: Letting The Subject Monitor The Shot
Quítelo igual que la batería. Utilización con la batería de un automóvil Utilice un paquete de CC DCP-77 Sony (no suministrado). Conecte el cable del paquete de CC a la toma del encendedor de cigarrillos de un automóvil (12 o 24 V). - Page 28 Turn the LCD panel back toward the viewfinder. Notes on mirror mode • When you turn the LCD panel about 135 degrees to 210 degrees, the camcorder enters mirror mode. • Using the mirror mode, you can record yourself while watching yourself on the LCD [a].
-
Page 29: Recording With The Date Or Time
Recording with the date or time Before you start recording or during recording, press DATE(+) or TIME(NEXT). You can record the date or time displayed on the LCD screen or in the viewfinder with the picture. You cannot record the date and time at the same time. Except for the date or time indicator, no indicator on the LCD screen or in the viewfinder is recorded. -
Page 30: Shooting With Backlighting
Shooting with backlighting When you shoot a subject with the light source behind the subject or a subject with a light background, use the BACK LIGHT function. Press BACK LIGHT. The the viewfinder or on the LCD screen. [a] Subject is too dark because of backlight. [b] Subject becomes bright with backlight compensation. -
Page 31: Using The Program Ae Function
Using the PROGRAM AE function You can select from three PROGRAM AE (Auto Exposure) modes to suit your shooting situation. When you use PROGRAM AE, you can capture high-speed action or night views. Selecting the best mode Select the best mode by using the following examples. - Page 32 Using the PROGRAM AE function Using the PROGRAM AE function Set the mark of the desired mode to the r mark above the PROGRAM AE dial. To return to automatic mode Turn the PROGRAM AE dial so that the r mark points to AUTO.
-
Page 33: Selecting The Start/Stop Mode
These modes enable you to take a series of quick shots resulting in a lively video, or to avoid recording unnecessary scenes resulting from failing to turn off the camcorder. (1) While pressing PUSH OPEN, open the LCD panel. -
Page 34: Superimposing A Title
Superimposing a title You can select from nine preset titles to superimpose it on the picture during recording. Each time you press TITLE, the preset titles appear one by one. To superimpose from the beginning (1) Set the POWER switch to CAMERA. (2) Turn STANDBY up. -
Page 35: Using The Wide Mode Function (Ccd-Trv12 Only)
Using the wide mode function — CCD-TRV12 only You can record a 16:9 wide picture to watch on the 16:9 wide-screen TV. (1) While pressing PUSH OPEN, open the LCD panel. (2) Set 16:9 WIDE to 16:9 WIDE. The picture in the viewfinder [a] or on a normal TV [b] is horizontally compressed. -
Page 36: Changing The Mode Settings
D ZOOM <ON/OFF> – CCD-TRV12 only • Select ON to activate digital zooming. • Select OFF to not use the digital zoom. The camcorder goes back to 13x zoom. REC MODE <SP/LP> • Select SP to record a tape in SP (standard play) mode. -
Page 37: Watching On A Tv Screen
Watching on a TV screen Connect the camcorder to your VCR or TV to watch the playback picture on the TV screen. When monitoring the playback picture by connecting the camcorder to your TV, we recommend you to use the house current for the power source. - Page 38 Watching on a TV screen If you connect directly to TV Connect the camcorder to the inputs on the TV by using the supplied A/V connecting cable. Set the TV/VCR selector on the TV to VCR. To connect to a VCR or TV without Video/ Audio input jacks Use an RFU adaptor (not supplied).
-
Page 39: Editing Onto Another Tape
VHS, k S-VHS, VHSC, K S-VHSC, or l Betamax VCR that has video/audio inputs. Turn down the volume of the camcorder while editing. Otherwise, picture distortion may occur. After connecting the camcorder to the VCR, (1) Set the POWER switch to PLAYER. -
Page 40: Additional Information Changing The Lithium Battery In The Camcorder
POWER en CAMERA. En este caso, reemplace la pila por otra de litio CR2025 Sony o DL-2025 Duracell. El empleo de otra pila puede suponer un riesgo de incendio o explosión. La pila de litio para la videocámara durará... - Page 41 Changing the lithium battery When replacing the lithium battery, keep the battery pack or other power source attached. Otherwise, you will need to reset the date and time . (1) Open the lid of the lithium battery compartment. (2) Push the battery in once and pull it out from the holder.
-
Page 42: Resetting The Date And Time
When you press the same button again, the indicator goes out. The year indicator changes as follows: Note on the time indicator The internal clock of the camcorder operates on a 12-hour cycle. 12:00:00 AM stands for midnight 12:00:00 PM stands for noon. -
Page 43: Playback Modes
TV color system. Because the TV color systems differ from country to country, you may not be able to play back foreign prerecorded tapes. Refer to the list of “Using your camcorder abroad” to check the TV color system of foreign countries. - Page 44 When the i indicator in the viewfinder or on the LCD screen changes from slow flashing to rapid flashing while you are recording, set the POWER switch to OFF on the camcorder and replace the battery pack. Leave the tape in the camcorder to obtain smooth transition between scenes after the battery pack has been replaced.
- Page 45 Battery pack care • Remove the battery pack from the camcorder after using it, and keep it in a cool place. When the battery pack is installed to the camcorder, a small amount of current flows to the camcorder even if the POWER switch is set to OFF.
- Page 46 Tips for using the battery pack Notes on charging A brand-new battery A brand-new battery pack is not charged. Before using the battery pack, charge it completely. After long storage Recharge the battery pack after a long period of storage. If the battery pack is charged fully but not used for a long time (about 1 year), it becomes discharged.
-
Page 47: Maintenance Information And Precautions
Eject the cassette, turn off the camcorder, and leave also the cassette about 1 hour. The camcorder can be used again if the { indicator does not appear when the power is turned on again. -
Page 48: Video Head Cleaning
Do not use a commercially available wet-type cleaning cassette. It may damage the video heads. Note If the V8-25CLH cleaning cassette is not available in your area, consult your nearest Sony dealer. Información sobre el mantenimiento y precauciones Limpieza de las cabezas de vídeo Para asegurar imágenes claras, limpie las cabezas... - Page 49 Removing dust from inside the viewfinder (1) Remove the screw with a screwdriver (not supplied). Then, while sliding the RELEASE knob, turn the eyecup in the direction of the arrow and pull it out. (2) Clean the surface with a commercially available blower.
- Page 50 • Si dentro de la videocámara cae algún objeto sólido o líquido, desenchufe la videocámara y haga que sea revisada por su proveedor Sony más cercano antes de reutilizarla. • Evite tratos bruscos o golpes. Tenga especial cuidado con el objetivo.
- Page 51 Esto es normal. • No coloque la unidad en lugares: – Extremadamente cálidos o fríos – Polvorientos o sucios – Muy húmedos – Sujetos a vibraciones Si surge alguna dificultad, desenchufe la unidad y póngase en contacto con su proveedor Sony.
-
Page 52: Using Your Camcorder Abroad
TV color systems. Before using your camcorder abroad, check the following points: Power sources You can use your camcorder in any country or area with the supplied AC power adaptor within 110 V to 240 V AC, 50/60 Hz. Difference in color systems This camcorder is an NTSC system-based camcorder. -
Page 53: Trouble Check
English Trouble check If you run into any problem using the camcorder, use the following table to troubleshoot the problem. Should the difficulty persist, disconnect the power source and contact your Sony dealer or local authorized Sony service facility. Camcorder... - Page 54 The camcorder is not malfunctioning. m Change locations. • The video heads may be dirty. m Clean the heads using the Sony V8-25CLH cleaning cassette. (p. 48) • The LCD panel is open. m Close the LCD panel. (p. 17) •...
- Page 55 The problem is with the AC power adaptor. Please contact our nearest Sony dealer in connection with the product with the problem. If you use a battery pack which you have just bought or which has been left unused for a long time, the CHARGE lamp may flash at the first charging.
-
Page 56: Solución De Problemas
Solución de problemas Si encuentra algún problema utilizando la videocámara, consulte la tabla siguiente para solucionarlo. Si el problema persiste, desconecte la fuente de alimentación y póngase en contacto con su proveedor o con un centro de servicio Sony. Videocámara Alimentación Síntoma... - Page 57 • La pantalla de cristal líquido está abierta. m Ciérrela. (pág. 17) • El tubo fluorescente incorporado está quemado. m Póngase en contacto con su proveedor Sony. • La videocámara no está funcionado mal. • La videocámara esté en el modo de demostración.
- Page 58 El problema se encuentra en el adaptador de alimentación de CA. Póngase en contacto con su proveedor Sony en relación con el producto que tenga el problema. Si utiliza una batería recién comprada, u otra que no haya empleado durante mucho tiempo, la lámpara CHARGE puede parpadear en la primera carga, pero esto no es ningún problema.
-
Page 59: Specifications
Electronic viewfinder Black and white Lens Combined power zoom lens, F1.8–2.8 Filter diameter 37 mm (1 ⁄ inches) CCD-TRV10: 13x (Optical) CCD-TRV12: 13x (Optical), 52x (Digital) Focal distance f = 5.3 – 68.9 mm ( ⁄ – 2 ⁄ inches) -
Page 60: Especificaciones
Visor Electrónico, Blanco y Negro Objetivo Zoom motorizado combinado, F 1,8 – 2,8 Diámetro para filtro: 37 mm CCD-TRV10: 13 aumentos (óptico) CCD-TRV12: 13 aumentos (óptico), 52 aumentos (digital) Distancia focal f = 5,3 – 68,9 mm Convertida a una cámara fotográfica de 35 mm... -
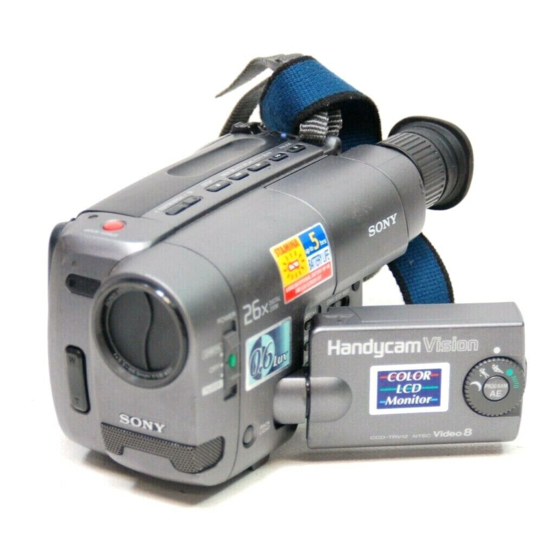
Page 61: Identifying The Parts
Identifying the parts 1 Tape transport buttons (p. 22, 23, 24) p STOP 0 REW (rewind) ( PLAY (playback) ) FF (fast forward) P PAUSE These buttons will function in PLAYER mode. 2 EDITSEARCH button (p. 20) 3 Recording lamp 4 Remote sensor (p. - Page 62 Identifying the parts !∞ Recording lamp !§ DATE (+) button (p. 29) !¶ TIME (NEXT) button (p. 29) !• LCD screen (p. 22, 69) !ª Lithium battery compartment (p. 41) @º DISPLAY button (p. 23) @¡ COUNTER RESET button (p. 14) @™...
- Page 63 #¡ START/STOP button (p. 18) Use this button when recording in a low position. #™ Tripod receptacle (p. 19) #£ PUSH OPEN button (p. 17, 22) #¢ LCD BRIGHT dial (p. 17) #∞ Eyecup (p. 18, 49) #§ Battery mounting surface (p. 9) #¶...
- Page 64 Identifying the parts $º Cassette compartment (p. 10) $¡ EJECT knob (p. 10) $™ Eyecup release knob (p. 49) $£ Hooks for shoulder strap (p. 64) $¢ Grip strap (p. 18) $∞ VIDEO OUT jack (p. 37, 38) $§ RFU DC OUT (RFU adaptor DC out) jack $¶...
-
Page 65: Remote Commander
Using the Remote Commander Make sure that the COMMANDER mode is set to ON (p. 36). The buttons that have the same name on the Remote Commander as on the camcorder function identically. 1 Transmitter Point toward the remote sensor to control the camcorder after turning on the camcorder. - Page 66 Identifying the parts To prepare the remote commander To use the Remote Commander, you must insert two R6 (size AA) batteries. Use the supplied R6 (size AA) batteries. (1) Remove the battery cover from the Remote Commander. (2) Insert both of the R6 (size AA) batteries with correct polarity.
- Page 67 VTR 2. The commander modes (1, 2, and 3) are used to distinguish this camcorder from other Sony VCRs to avoid remote control misoperation. If you use another Sony VCR at commander mode VTR 2, we recommend you change the commander mode or cover the remote sensor of the VCR with black paper.
- Page 68 You can watch a brief demonstration of pictures with special effects. If the demonstration appears when you turn on the camcorder for the first time, exit the Demo mode to use your camcorder. To enter demo mode (1) Eject the cassette and set the POWER switch to OFF.
- Page 69 In the viewfinder and on the LCD screen 1 Power zoom indicator (p. 16) 2 Back light indicator (p. 30) 3 Warning indicator (p. 70) 4 Lithium battery indicator (p. 40) 5 Recording lamp/battery lamp (p. 11) (in the viewfinder) 6 Mirror mode indicator (p.
-
Page 70: Warning Indicators
(pág. 48). 8 Se ha producido algún otro problema. Desconecte la fuente de alimentación y póngase en contacto con su proveedor Sony o con un centro de reparaciones autorizado local. 9 La pila de litio está débil, o no está colocada (pág. -
Page 71: Index
Index Adjusting viewfinder ... 13 ANTI GROUND SHOOTING ... 33 AUTO DATE ... 14 BACK LIGHT ... 30 BEEP ... 14, 36 Camera recording ... 11 Car battery ... 27 Charging battery ... 7 Cleaning video heads ... 48 COUNTER RESET ... 14 DATE/TIME ... - Page 72 Sony Corporation Printed in Japan...