Table of Contents
Advertisement
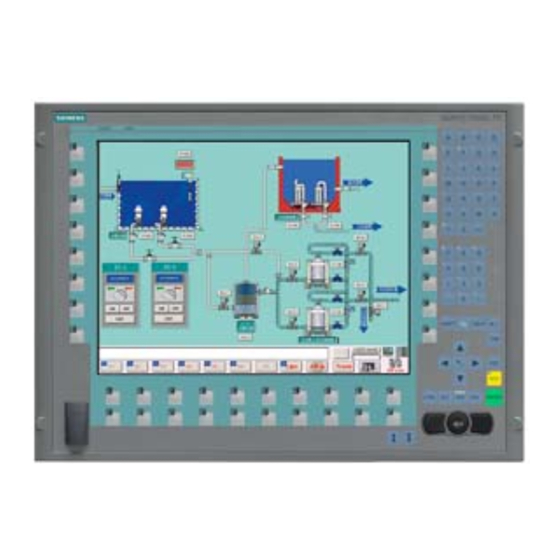
SIMATIC PC Panel PC 677/877, Control Unit
SIMATIC PC
Panel PC 677/877, Control Unit
Operating Instructions
Edition 04/2005
A5E00407724-01
Preface
______________
Safety Information
______________
Description
______________
Application planning
______________
Installation
______________
Connecting
______________
Operation
______________
Operating and parametrizing
______________
Maintenance and service
______________
Technical specifications
______________
Dimensional Drawings
______________
Appendix
______________
ESD guidelines
______________
List of abbreviations
1
2
3
4
5
6
7
8
9
10
A
B
C
Advertisement
Table of Contents

Related Manuals for Siemens SIMATIC Panel PC 677


Summary of Contents for Siemens SIMATIC Panel PC 677
- Page 1 Preface SIMATIC PC Panel PC 677/877, Control Unit ______________ Safety Information ______________ Description SIMATIC PC ______________ Application planning Panel PC 677/877, Control Unit ______________ Installation ______________ Connecting Operating Instructions ______________ Operation ______________ Operating and parametrizing ______________ Maintenance and service ______________ Technical specifications ______________ Dimensional Drawings...
- Page 2 Trademarks All names identified by ® are registered trademarks of the Siemens AG. The remaining trademarks in this publication may be trademarks whose use by third parties for their own purposes could violate the rights of the owner.
- Page 3 Preface Purpose of this manual This manual provides information based on the requirements defined by DIN 8418 regarding mechanical engineering documentation. This information relates to the device, its place of use, transport, storage, installation, use and maintenance. This manual is intended for the following target groups: •...
- Page 4 • SIMATIC Panel PC 677, QuickStart, SIMATIC Panel PC 877, QuickStart with the following information: – Startup – Legal information • SIMATIC Panel PC 677/877, Operating Instructions for Control Unit, this document with the following information: – Operation – Fault diagnostics –...
- Page 5 Registered trademarks All names labeled with ® symbol are registered trademarks of Siemens AG. Other names used in this documentation may be trademarks, the use of which by third parties for their own purposes could violate the rights of the owner.
- Page 6 Preface SIMATIC PC Panel PC 677/877, Control Unit Operating Instructions, Edition 04/2005, A5E00407724-01...
-
Page 7: Table Of Contents
Table of contents Preface ................................i Safety Information........................... 1-1 General safety notes........................1-1 General Notes ..........................1-2 Description.............................. 2-1 Panel PC 677: Computer unit and control unit ................2-1 Panel PC 877: Computer unit and control unit ................2-2 Accessories..........................2-4 Application planning.......................... - Page 8 Table of contents Operator controls of the touch screen panels ................6-7 6.3.1 Overview ............................ 6-7 6.3.2 Touch screen ..........................6-8 Operating and parametrizing ........................7-1 Startup............................7-1 7.1.1 Overview ............................ 7-1 7.1.2 Switching on the device ......................7-2 7.1.3 Setting up the Microsoft Windows operating system ..............
- Page 9 Table of contents ESD guidelines ............................B-1 ESD Directives ........................... B-1 List of abbreviations..........................C-1 Abbreviations ..........................C-1 Glossary Index Tables Table 3-1 Measurements for the mounting cut-out in mm ................. 3-7 Table 10-1 Panel PC 677 dimensions in mm..................... 10-2 Table 10-2 Panel PC 877 dimensions in mm.....................
- Page 10 Table of contents SIMATIC PC Panel PC 677/877, Control Unit viii Operating Instructions, Edition 04/2005, A5E00407724-01...
-
Page 11: Safety Information
Safety Information General safety notes Warning Emergencies If the device malfunctions, remove the power cable immediately and contact your nearest customer service representative. Malfunctions can occur when the operator controls or power cable are damaged or when liquids or foreign objects penetrate the device. Electrical connections Warning Unplug the device before every intervention and after disconnecting it from the power... -
Page 12: General Notes
Software Tools & Downloads Please check regularly if updates and hotfixes are available for download to your device. Downloads are available on the Internet at "http://www2.automation.siemens.com/hmi" under "Support". Click on "Software Tools & Downloads" on "Overview Panel PCs" Using the global search function, you can search for any downloads you require. - Page 13 Safety Information 1.2 General Notes Sources of light Notice Position the screen so that it is not subject to direct sunlight or other strong sources of light. Faulty pixels in the display At present, the manufacturing process of modern displays does not guarantee that all pixels of the display will be perfect.
- Page 14 Safety Information 1.2 General Notes SIMATIC PC Panel PC 677/877, Control Unit Operating Instructions, Edition 04/2005, A5E00407724-01...
-
Page 15: Description
Description Panel PC 677: Computer unit and control unit Structure The device is available in two different configurations: • Centralized configuration: Computer unit and control unit form an entity. • Distributed configuration: Computer unit and control unit are in separate locations. Principle In a centralized configuration, the computer is secured to the back of the control unit with two mounting rails. - Page 16 Description 2.1 Panel PC 677: Computer unit and control unit Short description The device is available with different control units which are distinguished by the size of the display and by the membrane keyboard or touch screen. Keyboard variants • Color display with backlighting: –...
-
Page 17: Panel Pc 877: Computer Unit And Control Unit
Description 2.2 Panel PC 877: Computer unit and control unit Panel PC 877: Computer unit and control unit Structure The device is available in two different configurations: • Centralized configuration: Computer unit and control unit form an entity. • Distributed configuration: Computer unit and control unit are in separate locations. Principle In a centralized configuration, the computer is secured to the back of the control unit with two mounting rails. -
Page 18: Accessories
Description 2.3 Accessories Touch screen variants • Color display with backlighting – 15" TFT technology; 1024 x 768 resolution – 19" TFT technology; 1280 x 1024 resolution • LEDs for power supply and temperature • Front-mounted USB 2.0 port for connecting external I/O modules. The front-mounted USB port is sealed and unusable for some device variations. -
Page 19: Application Planning
Application planning Overview Introduction This section describes the first steps after unpackaging, the permitted mounting positions and the fixation. This section describes the necessary considerations for EMC. Field of application The Panel PC is an industry-standard PC platform for demanding tasks in the field of PC- based automation. -
Page 20: Make Note Of Identification Data
Application planning 3.3 Make note of identification data 4. Keep the packaging material in case you have to transport the unit again. Notice The packaging protects the device during transport and storage. Therefore, never dispose of the original packaging material! 5. -
Page 21: Guidelines For Handling Electrostatic Sensitive Devices (Emc)
The device is designed as a built-in model with front-sided Protection Class IP 65. Ensure compliance with the EN 61000-4-2 standard by installing the device in grounded metal cabinets, e.g. MC cabinets, Siemens catalog NV21. Note Please refer to the appendix for for more information concerning the EMC requirements. -
Page 22: Mounting Positions And Fastening
Application planning 3.5 Mounting positions and fastening Mounting positions and fastening 3.5.1 Installation notes Before installing the device, read the following general notes relating to installation. Warning Danger, high voltage Isolate the power supply to the switchgear cabinet before opening it. Make sure that the power to the switchgear cabinet cannot be turned on accidentally. -
Page 23: Permitted Mounting Positions
Application planning 3.5 Mounting positions and fastening • Ensure there is enough free space in the switchgear cabinet to allow the sheet metal cover to be removed. You will otherwise have to remove the device from the switchgear cabinet or boom when replacing memory or the battery. •... -
Page 24: Type Of Fixation
Application planning 3.6 Mounting cut-out 3.5.3 Type of fixation The computer unit is secured in the installation cut-out either with clamps or screws. Notice Securing with screws is not possible with the 12" touch screen variant. For more information, please refer to the chapter "Description." Select the method of attachment suitable to your requirements for the degree of protection. -
Page 25: Dimensions
Application planning 3.6 Mounting cut-out 3.6.2 Dimensions The following illustrations show the dimensions for the installation cut-out. Figure 3-4 Drill holes for the screws and pressure points for the clamp screws Drill hole for screw attachment Pressure point for clamp setscrews Clamp 120 in the seal area... - Page 26 Application planning 3.6 Mounting cut-out 1) M6 thread or drill hole with a diameter of 7 mm 2) Cut-outs for the shafts of the insert strip are only necessary for 15" key panels. 3) Only for 19" touch panel fronts are two clamps necessary for vertically securing clamps. More information about device dimensions, e.g.
-
Page 27: Installation
Installation Securing with clamps Range of validity Skip this step if you have selected "screw mounting." Requirements • The installation cut-out has been completed. • Clamps are readily available in the accessories. Clamp and grub screws are included in the contents of delivery. Figure 4-1 Clamp assembly Procedure... -
Page 28: Securing With Screws
Installation 4.2 Securing with screws Securing with screws Range of validity Skip this step if you have selected "clamp mounting." Notice You cannot use screws to secure the device with the 12" touch screen variant. For more information, please refer to the chapter "Description." Requirements The installation cut-out has been completed. -
Page 29: Connecting
Connecting Front ports Introduction A USB port is located on the front side. For more information, please refer to the chapter "Operation." Attach an external keyboard or an external mouse, for example, to the USB port. The front-sided USB port supports the standard USB 2.0. Caution Wait at least 10 seconds between the unplugging and replugging of USB devices. - Page 30 Connecting 5.2 Other interfaces Rear panel On the back side of the control unit are several cables for connecting to the computer unit. Figure 5-1 Other ports on the computer unit Display cable K2 and display cable K3 USB cable USB peripheral cable K1 *) Only for 19"...
-
Page 31: Operation
Operation Status displays The two LEDs on the upper left hand side of the front panel display the operating mode: • LED "POWER" green: Active voltage. • LED "TEMP" orange: The temperature threshold has been exceeded, it is set in the diagnostic software SIMATIC SOM Safecard on the motherboard. -
Page 32: Keyboard
Operation 6.2 Operator controls on key panels Figure 6-1 Example of a 12" key panel Status displays Display Alphanumeric, numeric, cursor keys and control keys Integrated mouse Function keys, softkeys USB port 6.2.2 Keyboard Principle The layout of the membrane keyboard is "English/USA international." Warning Faulty operation If you activate several keys simultaneously, a malfunction on the device cannot be excluded. - Page 33 Operation 6.2 Operator controls on key panels Overview The keyboard is divided into different functional groups: • Function keys and softkeys • Control keys • Alphanumeric keys • Numeric keys • Cursor keys Function keys and softkeys The softkeys are arranged on the left and on the right, and the function keys in a double row below the display.
- Page 34 Operation 6.2 Operator controls on key panels Alphanumeric keys Enter letters, special characters, blank spaces and underline using the alphanumeric keys. Figure 6-4 Alphanumeric keys Underline space character Toggling between lowercase and uppercase letters Enter the lower case letters using the pre-defined assignment of the alphanumeric keys. To enter an upper case letter, proceed as follows: 1.
-
Page 35: Labelling Function Keys And Softkeys
Operation 6.2 Operator controls on key panels Enter special characters, arithmetic signs and signs Special characters, arithmetic signs and signs are also assigned to most of the alphanumeric and numeric keys. These signs are indicated by white symbols on the top left of the keys. To enter such a sign, proceed as follows: 1. - Page 36 Operation 6.2 Operator controls on key panels DIN A4 film is available for the production and insertion of the labelling strips, as described under Service and Maintenance in the options. Warning Labeling Label the function keys and softkeys to conform with the project. Labeling without reference to a project leads to incorrect operations on the system to be observed.
-
Page 37: Integrated Mouse
Operation 6.3 Operator controls of the touch screen panels 6.2.4 Integrated mouse The position on which you press the middle round button determines the direction in which the cursor moves. The amount of pressure determines the speed of the cursor. You can also connect an external mouse to the front USB port. -
Page 38: Touch Screen
Operation 6.3 Operator controls of the touch screen panels 6.3.2 Touch screen The display is sensitive to touch and application-specific surface elements, e.g. a button, appear on the screen. By tapping the button with your finger, the function assigned to the button is activated. -
Page 39: Operating And Parametrizing
Connect the I/O modules using shielded cable and metal plugs. Otherwise, the specified norms and specifications declared by Siemens AG are no longer valid. Secure the plugs of the interface cables to the PC housing with screws. This improves the electrical shielding. -
Page 40: Switching On The Device
Operating and parametrizing 7.1 Startup Requirements • A USB keyboard is connected. Procedure 1. Switching on the device 2. Install Microsoft Windows operating system. 3. Installing applications and drivers. 7.1.2 Switching on the device Procedure 1. Plug the power plug of the supplied power supply cable in the AC/DC power supply connector of the computer unit. -
Page 41: Setting Up The Microsoft Windows Operating System
Operating and parametrizing 7.1 Startup 7.1.3 Setting up the Microsoft Windows operating system Introduction The setup wizard appears immediately following the startup of the device. The wizard is used to set the parameters of the operating system. Note The dialogs of the setup wizards differ slightly in some places for the Windows 2000 and Windows XP operating systems. - Page 42 Operating and parametrizing 7.1 Startup Procedure 1. In the "Panel Wizard" dialog, click on the type of panel that corresponds to your device. Figure 7-1 Panel Wizard, selection of the panel type Setting the touch screen This step only applies to control units with touch screen panels. 2.
- Page 43 Operating and parametrizing 7.1 Startup Figure 7-3 Touch screen panel, end Panel Wizard 4. New hardware, the touch controller, is found. In order to start the 9-point touch calibration, click on "OK". Carry out the following steps carefully: Figure 7-4 Start touch screen calibration 5.
- Page 44 Operating and parametrizing 7.1 Startup Notice If the dialog disappears after the specified time, the calibration settings are discarded and the touch screen is not calibrated. Repeat the calibration as specified in the operating instructions for the control unit, described under "Setting the touch screen" in the "Additional drivers and applications" section.
- Page 45 Operating and parametrizing 7.1 Startup 9. Exit the operating system session and restart the device. Otherwise the "Security features" from "KeyTools" or "KeyHook" will not be activated. Warning Use "KeyTools" as described in the "Additional Drivers and Applications" section of the "Operation and Configuration"...
-
Page 46: Normal Operation
Caution Using shielded cables and metal connectors for peripherals. Otherwise, the specified norms and specifications declared by Siemens AG are no longer valid. Secure the plugs of the interface cables to the PC housing with screws. This improves the electrical shielding. -
Page 47: Turning Off The Device
Operating and parametrizing 7.2 Normal operation After switching on the power supply, the device performs a self test. During the self test, the message "Press <F2> to enter SETUP" appears briefly. When the self test is finished, the operating system will be loaded and the desktop will be displayed. -
Page 48: Additional Drivers And Applications
Operating and parametrizing 7.3 Additional drivers and applications Additional drivers and applications 7.3.1 Overview The necessary drivers and applications are contained in the supplied "Documentation & Drivers" CD. Caution Do not turn off the device during the installation of drivers and applications. Otherwise parts of the software which are necessary for trouble-free operation will be lost. - Page 49 Operating and parametrizing 7.3 Additional drivers and applications If the touch screen does not react as expected when touched, repeat the calibration. To do this, first activate the 9 point calibration and then calibrate the touch screen. Figure 7-10 Touch defaults, tab "Calibration" Note For further information press the "Help"...
-
Page 50: Windows Security Center
Operating and parametrizing 7.3 Additional drivers and applications 7.3.3 Windows Security Center Start • Start menu "Start", command "Settings > Control panel > Security Center" Function Activates and deactivates the following functions on the device: • Firewall • Automatic updates •... -
Page 51: Keytools
Operating and parametrizing 7.3 Additional drivers and applications Alarms Click on "Change the way Security Center alerts me" to switch off security alarms upon switching on the device. The "Alert Settings" dialog appears. Deactivate the desired alarms. Figure 7-12 "Alert Settings" Dialog 7.3.4 KeyTools Start... -
Page 52: Somatic Som Safecard On Motherboard
Operating and parametrizing 7.3 Additional drivers and applications 7.3.5 SOMATIC SOM Safecard on Motherboard Start "SIMATIC SOM" symbol in the message field. SIMATIC SOM is activated automatically after the device is started. Function The open window displays information concerning, for example, the current temperature, the internal temperature of the device and the I/O modules. -
Page 53: Set Brightness
Operating and parametrizing 7.3 Additional drivers and applications Figure 7-14 TouchInput 7.3.7 Set brightness Start "Set brightness" symbol on the desktop. Function The intensity of the backlighting is adjusted using "Set brightness." Figure 7-15 Set brightness 7.3.8 CheckLanguageID Area of validity The following applies to Windows 2000 Multi-Language and Windows XP Multi-Language. -
Page 54: Multilingual Settings For The Operating System
Operating and parametrizing 7.3 Additional drivers and applications Function "CheckLanguageID" displays the currently installed languages. Figure 7-16 CheckLanguageID • SystemDefaultLangID: System language • UserDefaultLangID: User language • UserDefaultUILangID: User interface language Notice All three languages displayed should be assigned to the same ID. 7.3.9 Multilingual settings for the operating system Windows 2000 MultiLanguage MUI operating system enables users to set the language of... -
Page 55: Dvd Rom/Cd Rw
Operating and parametrizing 7.3 Additional drivers and applications 7.3.10 DVD ROM/CD RW The DVD-ROM/CD-RW drive is an optional feature. Recording methods supported by the disk drive: Disc-at-once, Track-at-once, Session-at-once Packet writing, whereby Disc-at- once und Track-at-once are recommended due to their compatibility to other CD drives. DVD-ROM, CD-ROM, CD-R and Video CDs can be read. -
Page 56: Usb Keyboard Controller Driver And Usb Stack
Operating and parametrizing 7.3 Additional drivers and applications 7.3.11 USB keyboard controller driver and USB stack Range of validity The following applies to Windows 2000 and Windows XP: Start The USB keyboard controller is installed by default. Functions The following functions are provided by the USB keyboard controller: •... -
Page 57: Maintenance And Service
Maintenance and service Service Scope of maintenance The device is designed to require little service. You should nevertheless clean the membrane keyboard on key panels. Cleaning agents Use dish soap or foaming screen cleaner only as cleaning agents. Caution Do not clean the device with agressive solvents or scrubbing agents or with pressurized air or steam cleaner. -
Page 58: Maintenance And Replacement Parts
Maintenance and service 8.2 Maintenance and replacement parts Maintenance and replacement parts The device has the following replacement parts: Replacement part Order No. Key panel 12''-TFT 6AV7672-1AB00-0AA0 15''-TFT 6AV7672-1AD00-0AA0 Touch panel 12''-TFT 6AV7672-1AA00-0AA0 15''-TFT 6AV7672-1AC00-0AA0 19''-TFT 6AV7672-1AE00-0AA0 Key panel, front-mounted USB port is sealed 12''-TFT 6AV7672-1AB10-0AA0 15''-TFT... - Page 59 Maintenance and service 8.3 Separating the control unit from the computer unit Figure 8-1 Separating the control unit from the computer unit 4. Swing the computer unit (1) away. The connectors on the back of the control unit (3) are now accessible.
-
Page 60: Separating Panel Pc 877
Maintenance and service 8.3 Separating the control unit from the computer unit Figure 8-2 Back of the control unit with the interface positions Display cable K2 and display cable K3 USB cable USB peripheral cable K1 *) Only for 19" touch panel fronts. Separating the device in an uninstalled state As an alternative, dismount the device completely and separate the control unit and computer unit from one another in an uninstalled state. - Page 61 Maintenance and service 8.3 Separating the control unit from the computer unit Figure 8-3 Separating the control unit from the computer unit 4. Swing the computer unit (1) away. The connectors on the back of the control unit (3) are now accessible.
-
Page 62: Remount The Device
Maintenance and service 8.3 Separating the control unit from the computer unit Figure 8-4 Back of the control unit with the interface positions Display cable K2 and display cable K3 USB cable USB peripheral cable K1 *) Only for 19" touch panel fronts. Separating the device in an uninstalled state As an alternative, dismount the device completely and separate the control unit and computer unit from one another in an uninstalled state. - Page 63 Maintenance and service 8.3 Separating the control unit from the computer unit Figure 8-5 Separate the control unit from the computer unit, example regarding folding cables Position Spacing 4.5 cm 4 cm SIMATIC PC Panel PC 677/877, Control Unit Operating Instructions, Edition 04/2005, A5E00407724-01...
- Page 64 Maintenance and service 8.3 Separating the control unit from the computer unit SIMATIC PC Panel PC 677/877, Control Unit Operating Instructions, Edition 04/2005, A5E00407724-01...
-
Page 65: Technical Specifications
Technical specifications EMC requirements Standards EMC requirements EN 61000-6-4 EN 61000-6-2 Radio frequency interference EN 55011 Class A, Group 1 Immunity level against very steep impulses: Bursts • EN 61000-4-4 DC 24 V; 2.0 kV, interference criterion B Interference immunity on power lines •... -
Page 66: General Specifications
Technical specifications 9.2 General specifications General specifications Color display 12" TFT 15" TFT 12" TFT 15" TFT 19" TFT touch screen touch screen touch screen Resolution 800 x 600 1024 x 768 800 x 600 1024 x 768 1280 x 1024 Mean Time Before Failure MTBF Lifetime... -
Page 67: Ambient And Environmental Conditions
Technical specifications 9.3 Ambient and environmental conditions 1) A small number of faults in the display is unavoidable. However, the displays do comply with the described quality standards of the ISO norm 134906-2, class 2. Information concerning panel resistance to chemicals is located in the section "General Information."... -
Page 68: Keyboard Table
Technical specifications 9.5 Keyboard table Keyboard table Key codes The following table applies only to control units with key panels. It contains all characters that can be entered in SIMATIC KeyTools in the "Keycode table" area and under "User specific". The character that is triggered by pressing a specific key is listed in the "Display/function"... - Page 69 Technical specifications 9.5 Keyboard table Name Code (Hex) 0x Check box Display/function — L Shift/R Shift — L Shift/R Shift — L Shift/R Shift R Alt ø R Alt+L Shift/R Shift Ø — L Shift/R Shift R Alt µ L Gui/R Gui Minimize all windows —...
- Page 70 Technical specifications 9.5 Keyboard table Name Code (Hex) 0x Check box Display/function — L Shift/R Shift R Alt ú R Alt+L Shift/R Shift Ú — L Shift/R Shift L Ctrl/R Ctrl Inserting — L Shift/R Shift R Alt å R Alt+L Shift/R Shift Å...
- Page 71 Technical specifications 9.5 Keyboard table Name Code (Hex) 0x Check box Display/function 7 & — L Shift/R Shift & R Alt ½ — L Shift/R Shift R Alt ¾ — L Shift/R Shift R Alt — L Shift/R Shift R Alt Return —...
- Page 72 Technical specifications 9.5 Keyboard table Name Code (Hex) 0x Check box Display/function ‘ ~ — ‘ L Shift/R Shift , < — L Shift/R Shift < R Alt ç R Alt+L Shift/R Shift Ç . > — L Shift/R Shift >...
- Page 73 Technical specifications 9.5 Keyboard table Name Code (Hex) 0x Check box Display/function L Shift/R Shift L Ctrl/R Ctrl — L Shift/R Shift L Ctrl/R Ctrl Print Screen, F +INS 46 — Print Screen, F +INS Scroll Lock — Scroll Lock Break, Ctrl+Pause —...
- Page 74 Technical specifications 9.5 Keyboard table Name Code (Hex) 0x Check box Display/function — — — — — — — — — Left Control — Left Control Left Shift — Left Shift Left Alt — Left Alt Left GUI — Left GUI Right Control —...
-
Page 75: Dimensional Drawings
Dimensional Drawings 10.1 Panel PC 677 dimensional drawing 10.1 Figure 10-1 Panel PC 677 dimensional drawing SIMATIC PC Panel PC 677/877, Control Unit 10-1 Operating Instructions, Edition 04/2005, A5E00407724-01... -
Page 76: Table 10-1 Panel Pc 677 Dimensions In Mm
Dimensional Drawings 10.1 Panel PC 677 dimensional drawing Figure 10-2 Panel PC 677 dimensional drawing, computer unit swung-away from control unit Table 10-1 Panel PC 677 dimensions in mm Control unit N (lbf) key panels 12" TFT 482,6 310,3 447,2 314,9 30,8 39,8... -
Page 77: Panel Pc 877 Dimensional Drawing
Dimensional Drawings 10.2 Panel PC 877 dimensional drawing 10.2 Panel PC 877 dimensional drawing 10.2 Figure 10-3 Panel PC 877 dimensional drawing SIMATIC PC Panel PC 677/877, Control Unit 10-3 Operating Instructions, Edition 04/2005, A5E00407724-01... -
Page 78: Table 10-2 Panel Pc 877 Dimensions In Mm
Dimensional Drawings 10.2 Panel PC 877 dimensional drawing Figure 10-4 Panel PC 877 dimensional drawing, computer unit swung-away from control unit Table 10-2 Panel PC 877 dimensions in mm Control unit N (lbf) key panels 12" TFT 482,6 310,3 447,2 392,8 30,8 39,8... -
Page 79: Appendix
DIN ISO 9001 certificate The quality assurance system for the entire product process (development, production, and marketing) at Siemens fulfills the requirements of ISO 9001 (corresponds to EN29001: 1987). This has been certified by DQS (the German society for the certification of quality management systems). -
Page 80: Approvals
Siemens AG. The correction of interference caused by such unauthorized modification, substitution or attachment will be the responsibility of the user. -
Page 81: Additional Support
Appendix A.2 Additional support Additional support Do you have additional questions regarding use of the described products, which are not answered in the documentation? Then, contact the Siemens representative or office nearest you. • Your Siemens representative: "http://www.siemens.com/automation/partner" • Access to available technical documentation for individual SIMATIC products and systems: "http://www.siemens.de/simatic-tech-doku-portal"... - Page 82 Appendix A.2 Additional support SIMATIC PC Panel PC 677/877, Control Unit Operating Instructions, Edition 04/2005, A5E00407724-01...
-
Page 83: Esd Guidelines
ESD guidelines ESD Directives What does ESD mean? Almost all electronic modules are equipped with highly integrated components and elements in MOS technology. For technological reasons, these electronic components are very sensitive to overvoltages and, consequently, to electrostatic discharge. These components are therefore marked as follows: •... - Page 84 ESD guidelines B.1 ESD Directives Handling ESD assemblies As a rule: Only touch ESD components if unavoidable due to necessary tasks. Only touch the components when the following holds true: • You are permanently grounded by means of an ESD armband. •...
-
Page 85: List Of Abbreviations
List of abbreviations Abbreviations ANSI American National Standards Institute ASCII American Standard Code for Information Interchange Width BIOS Basic Input Output System CD-ROM Compact Disc – Read Only Memory Central Processing Unit Direct Current DHCP Dynamic Host Configuration Protocol Domain Name Service Distributed I/O Data Source Name DVD ROM... -
Page 86: C.1 Abbreviations
List of abbreviations C.1 Abbreviations SIMATIC PC Panel PC 677/877, Control Unit Operating Instructions, Edition 04/2005, A5E00407724-01... -
Page 87: Glossary
Glossary Application An application is a program which is put directly on the operating system MS-DOS or windows. An application on the PC/PG, for example, is STEP 7. Automation device (AD) The programmable automation devices (AD) of the SIMATIC S5 system consist of a central unit, one or several CPUs, and other modules, e.g. - Page 88 Glossary Documentation & Drivers CD The "Documentation & Drivers" CD is included. The CD contains specific drivers and drivers and applications for the supported operating system. Drivers Program parts of the operating system. They adapt user program data to the specific formats required by peripheral devices, such as hard disk, monitors, and printers.
- Page 89 Glossary Interface The connection of individual hardware elements, e.g. automation device, PCs, programming device, printer, or screen, by means of physical plug connectors. Connection between different programs in order to exchange data. LPT interface The LPT interface is a parallel centronic interface to which a printer is connected, for example.
- Page 90 Glossary SIMATIC PC Panel PC 677/877, Control Unit Operating Instructions, Edition 04/2005, A5E00407724-01...
-
Page 91: Index
Index CD-R / CD-RW Operating notes, 7-17 Restrictions under Microsoft Windows NT, 7-17 CE label, ii 12" variant, 2-2, 3-6, 6-1 Certificates, A-1 15" variant, 6-7 CheckLanguageID, 7-15 Checklist, 7-1 Chipset, 1 Clamp, 4-1 Abbreviations, C-1 Class of protection, 9-2 Accessories, 2-4 Cleaning agents, 8-1 Alarms, 7-12, 7-13... - Page 92 Index Central design, 3-5 Field of application, 3-1 Device, 3-3, 4-1, 4-2, 7-1, 7-8, 7-9, 8-2, 8-4, 8-6 Firewall, 7-12 commissioning, 7-1 Fixation, 4-1, 4-2 EMC-compliant installation, 3-3 Securing with clamps, 4-1 Mounting, 4-1, 4-2, 8-6 Securing with screws, 4-2 Separating, 8-2, 8-4, 8-6 Formatting, 2 Switching on, 7-8...
- Page 93 Index Key panel, 6-1, 7-6 Setting, 7-6 Navigation, 6-5 Keyboard, 2-2, 2-3, 5-1, 6-2, 6-5, 7-18 Notation, iii External keyboard, 5-1, 6-5 Note, 1-1, 1-2, 3-4 USB keyboard controller driver, 7-18 General Notes, 1-2 USB stack, 7-18 Installation notes, 3-4 Keyboard table, 9-4 Safety instruction, 1-1 Keyboard variant, 2-2, 2-3...
- Page 94 Index Resolution, 9-2 switching over, 6-4 Restore CD, 3 Toggling between lowercase and uppercase ROM memory, 3 letters, 6-4 Safety instruction, 1-1 Temperature change, 9-3 Safety requirement, 9-2 Temperature limit, 9-3 Scope of maintenance, 8-1 Temperature threshold, 6-1 Screw attachment, 4-2 TFT technology, 2-2, 2-3 Screws, 4-2 Touch screen...