Table of Contents
Advertisement
ELECTRONIC ORGANIZER
OPERATION MANUAL
Instrucciones abreviadas en español
CONTENTS
Part Names and Tablet Key Assignments .......................................... 1
Using the Organizer for the First Time ............................................... 2
Display Symbols .................................................................................. 4
Entering Characters ............................................................................ 5
Built-in Calendar and Clock ................................................................ 6
Clock Mode .......................................................................................... 6
Alarm ................................................................................................... 8
Timer .................................................................................................... 8
Telephone Mode .................................................................................. 9
Calendar Mode .................................................................................. 10
Schedule Mode ................................................................................. 12
Anniversary Mode ............................................................................. 13
To Do Mode ....................................................................................... 15
Memo Mode ....................................................................................... 16
OZ590_1211.pm65p31_cover2
cover 1
OZ - 590
Expense Mode ................................................................................... 17
Editing Entries ................................................................................... 20
Deleting Entries ................................................................................. 20
Word Translator Mode ....................................................................... 21
Calculator Mode ................................................................................ 22
Conversion Mode .............................................................................. 23
Secret Function ................................................................................. 25
Game Mode ....................................................................................... 26
Managing the Organizer's Memory ................................................... 27
Using the Included PC Software ....................................................... 27
Battery Replacement ......................................................................... 30
Specifications .................................................................................... 31
Appendix ............................................................................................ 33
Instrucciones abreviadas en español ............................................. S-1
02.12.13, 1:47 PM
MODEL
41
Advertisement
Chapters
Table of Contents

Related Manuals for Sharp OZ-590


Summary of Contents for Sharp OZ-590
-
Page 1: Table Of Contents
ELECTRONIC ORGANIZER OPERATION MANUAL Instrucciones abreviadas en español CONTENTS Part Names and Tablet Key Assignments ... 1 Using the Organizer for the First Time ... 2 Display Symbols ... 4 Entering Characters ... 5 Built-in Calendar and Clock ... 6 Clock Mode ... - Page 2 NOTICE • SHARP strongly recommends that separate permanent written records be kept of all important data. Data may be lost or altered in virtually any electronic memory product under certain circumstances. Therefore, SHARP assumes no responsibility for data lost or otherwise rendered unusable whether as a result of improper use, repairs, defects, battery replacement, use after the specified battery life has expired, or any other cause.
-
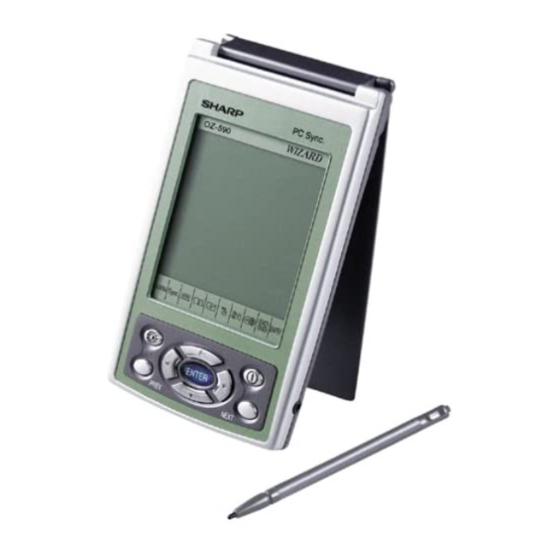
Page 3: Part Names And Tablet Key Assignments
Part Names Stylus Touch Display RESET switch (on the back of the unit) Mode keys ENTER key Backlight key Cursor keys Search keys Power ON/OFF key Option port OZ590_1203.pm65 Tablet Key Assignments (!): MAIN key (p): Synchronization mode key for PC Software (v): Telephone mode key (©): Schedule/Calendar mode key (∑): Memo/Anniversary mode key... -
Page 4: Using The Organizer For The First Time
Note: • Do not use an object with a breakable or sharp tip. 6. A dialog “System Reset Clear All Data? Yes No” appears on the screen. Use the stylus to tap “Yes” on the screen to proceed. - Page 5 Auto Power Off Function When none of the keys have been pressed or tapped for a specified time (default: 3 minutes), the Organizer will automatically turn off to save the battery. To adjust the Auto Power Off time, do the following: 1.
-
Page 6: Display Symbols
Entering User Information 1. Tap ! once or twice, then tap to select :. 2. In the list of Setup items, tap to select "2. User Information". 3. On the menubar, tap “, then enter your name, address, e-mail, and mobile phone information with the touch keyboard. Refer to page 5 "Entering Characters"... -
Page 7: Entering Characters
Entering Characters Entering Characters Entering letters and numbers Menubar When the cursor enters a text entry field, a touch keyboard will pop up on the screen. To enter characters, use the attached stylus to tap on the keys. A list of frequently used keys is shown below: Shift keys: when tapped, it will rotate through lowercase, caps, and caps-lock mode, to enable... -
Page 8: Built-In Calendar And Clock
Built-in Calendar and Clock Precautions • Calendar, Schedule, Expense, ToDo, Anniversary and Clock modes allow you to enter any desired date and time between Jan. 1, 1950 and Dec. 31, 2150. • If an attempt is made to store an invalid time or date, you will not be able to move the cursor to date entering, or store the time and date by pressing x. - Page 9 Setting the Home Clock 1. Enter the Home Clock mode; tap the h icon in the Main menu. Note: • During the period of Daylight Saving Time (summer time), set the DST ON beforehand as described in "Setting Daylight Saving Time ON/OFF"...
-
Page 10: Alarm
Alarm The Organizer has 2 types of alarm: 1. Daily Alarm... Sounds every day at the specified time (for approx. 1 minute), when " " is displayed. Up to 3 alarms can be set separately (Alarm1, Alarm2, and Alarm3). 2. Schedule Alarm... Sounds at the specified times set in the Schedule entries (see page 12). -
Page 11: Telephone Mode
Telephone Mode Four telephone entry categories are available: Business, Personal, Unfiled, and All. Selecting the Business category, for example, will display the entries categorized as “Business”, so that data can be browsed easily. Selecting “All”, on the other hand, will list all entries. -
Page 12: Calendar Mode
7. Press m and enter “619-542-7320” as the Work Number. 8. Enter the rest of the fields, then tap æ to store the entry. The overview of the new entry will be displayed. To verify entries, scroll down the display area by tapping m. Search 1. - Page 13 Verifying Schedule, To Do, and Anniversary mode entries Schedule, To Do, or Anniversary entries will be indicated as dots on the right side of the day number. In this example, one or more entries in all three modes exist on the 5th.
-
Page 14: Schedule Mode
Schedule Mode Entry <Example> A project meeting will be held from 10:00 AM to 11:00 AM on September 15, 2004. 1. In the Main menu, tap g to enter the Schedule mode. 2. Tap “ to select “New Entry” in the menu. -
Page 15: Anniversary Mode
Direct Search Direct search can be done by either the date or the description of an event. 1. In the Main menu, tap g to enter the Schedule mode. 2. In the Schedule mode, tap “ to select “Search Entry” in the menu. The Search entry screen will appear. - Page 16 5. At the Description field, enter “Nancy’s birthday”. To enter an apostrophe ( ), tap the s key first, then tap the character key. 6. When done, tap æ to store and activate the entry. The overview of the newly entered fields will be displayed. Note The anniversary sign (A) will not appear until the day is set in the Reminder.
-
Page 17: To Do Mode
To Do Mode The To Do mode is used to store your important To Do items with a priority index. Entry <Example> You have to visit the NY Exhibition by December 10, 2004. 1. In the Main menu, tap t to enter the To Do mode. -
Page 18: Memo Mode
Setting Entry Status to Done/Pending 1. In the Main menu, tap t to enter the To Do mode. A list of To Do entries appear. 2. Tap to select and open the desired entry. The overview of the entry will show. 3. -
Page 19: Expense Mode
Direct Search Direct search can be done by either the title or the Memo contents. 1. In the Main menu, tap w to enter the Memo mode. 2. In the Memo mode, tap “ to select “Search Entry” in the menu. The Search entry screen will appear. - Page 20 6. Tap the next highlighted menu to enter method of payment; “Cash”, “Check”, “Card”, or “Others” can be selected. Tap to select “Card”. 7. Next, select the expense category : Meals ➠ Hotel ➠ Car ➠ Phone ➠ Fares ➠ Enter’t (Entertainment) ➠...
- Page 21 Expense Report 1. Tap y to enter the Expense mode. 2. Tap on the menubar to select the Expense menu, then select “Period Report”. 3. Enter the first date from which you wish to summarize the expenses (August 15, 2004), then tap ≈. 4.
-
Page 22: Editing Entries
Editing Entries Edit 1. Recall an entry in the desired mode. 2. Tap “, then select “Edit Entry”. The display will change to the edit mode. 3. Edit the data. j l k m: move the cursor to left, right, up or down, respectively (If the cursor is placed in a date entry field, tap ≈... -
Page 23: Word Translator Mode
Word Translator Mode Word Translator English-Spanish bi-directional word translator function is available for download. Refer to "Download Dictionary Database" on page 29 for details. 1. In the Main menu, tap ] to enter the Word Translator mode. 2. English → Spanish translation is set by default. -
Page 24: Calculator Mode
Calculator Mode The Organizer’s built-in calculator can perform arithmetic calcula- tions using up to 12 digits. Tap q in the Main menu to enter Calculator mode. Before performing any calculations, tap c twice to clear the display. • An error occurs if the integer section of the calculation result exceeds 12 digits, if the memory exceeds 12 digits, or a number is divided by zero. -
Page 25: Conversion Mode
Conversion Mode Two Conversion modes - Metric, and Currency - can be accessed by tapping ^ or " in the Main menu. Conversion Table Conversion Pattern Unit 1 5 currency conversions are available. Metric Conversion Patterns ⇔ inch centimeter (cm) ⇔... - Page 26 6. Enter the rate; 1.45. Up to 12 numeric characters can be entered for the rate. If you need to clear the rate number, tap c. 7. Tap æ to store the settings. Currency conversion Be sure to set the rate before starting a conversion. <e.g.
-
Page 27: Secret Function
Secret Function The Secret function allows you to protect entries with a password, so that no unauthorized person can access them. You can use up to 8 characters as the password. Registering a Password As a failsafe measure, keep a written record of the password. -
Page 28: Game Mode
Game Mode The Organizer comes equipped with two games: “Slots”, and “Brick Attack”. To access one of these games, tap _ in the Main menu. Slots As its name suggests, Slots is an easy-to-access slot machine simulator. 1. Tap _ in the Main menu, then tap –... -
Page 29: Managing The Organizer's Memory
Managing the Organizer's Memory Use the memory management function to utilize the Organizer's memory more efficiently. Note: • Before performing memory management, back up your data. • While the memory management is in progress, do not press the RESET switch. Doing so may result in losing all the data stored in the Organizer. - Page 30 Connecting the Organizer to Your PC 1. Turn off your PC and the Organizer. 2. Connect the standard 9-pin connector of the PC-Link cable to the PC’s serial port. • Using a 25-pin connector will require an additional adapter. (Commercially available) 3.
- Page 31 Synchronization action: : Merges the data between the PC and the unit. : PC overwrites the data of the unit. : The unit overwrites the PC data. The Conflict Resolution Tab The Synchronization software’s Conflict Resolution tab allows you to select the way data conflicts are resolved when data modifica- tions are made and the “Synchronize”...
-
Page 32: Battery Replacement
Battery Replacement Battery used Type Size/Model Alkaline battery “AAA”/LR03 • Be sure to write down any important information stored in the memory before replacing the battery. Precautions Since improper use of the battery may cause leakage or explosion, strictly observe the following precautions: •... -
Page 33: Specifications
Replace the battery promptly. • Make sure to confirm all settings after replacing the battery. OZ590_1119.pm65_p30 Specifications Model: OZ-590 Product name: Electronic Organizer Display: 80 x 111 dot matrix liquid crystal display Memory capacity:... - Page 34 Calendar mode: From Jan.,1950 to Dec., 2150, Confirmation of Schedule, To Do, and Anniversary mode entries can be made by the indication marks seen on the right side of the date Schedule mode: Entry and recall of schedule (year, month, day, hour and minute), schedule alarm and Description Anniversary mode: Entry and recall of year, month, day and...
-
Page 35: Appendix
Appendix Names of the cities recognized by the clock # COUNTRY CITY # COUNTRY 1 Afghanistan Kabul 26 Chile 2 Algeria Algiers 3 Argentina Buenos Aires 28 China 4 Australia Adelaide Brisbane Canberra 31 Colombia Darwin 32 Denmark Melbourne 33 Egypt Perth 34 Fiji Sydney... - Page 36 (2) this device must accept any interference received, including interference that may cause undesired operation. Responsible Party: SHARP ELECTRONICS CORPORATION Sharp Plaza, Mahwah, New Jersey 07430-1163 TEL: 1-800-BE-SHARP Tested To Comply With FCC Standards FOR HOME OR OFFICE USE WARNING –...
-
Page 37: Instrucciones Abreviadas En Español
Instrucciones abreviadas en español ÍNDICE Empleo del Organizador por primera vez ... S-1 Función de desactivación automática ... S-2 Preparación de la luz de fondo ... S-2 Ajuste del contraste de la pantalla LCD ... S-2 Activación y desactivación de la tecla de sonido ... S-2 Comprobación de la memoria disponible ... -
Page 38: Función De Desactivación Automática
Función de desactivación automática 1. Dé un toque en ! una o dos veces para visualizar la segunda página del menú principal, y luego dé un toque en 2. En la lista de los elementos de preparación, desplace la lista hacia abajo dando toques en m y luego dé... - Page 39 Abajo se muestra una lista de las teclas utilizadas con mayor frecuencia: Teclas de mayúsculas: cuando se toquen, el modo cambiará entre minúsculas, mayúsculas y bloqueo de mayúsculas, para poder escribir con mayúsculas y minúsculas. Cuando la tecla ` aparezca en el teclado, dé un toque en la tecla una vez;...
-
Page 40: Modo De Reloj
Modo de reloj Para introducir el modo del reloj local o del reloj mundial, dé un toque en el icono h o ; del menú principal. Navegación en el modo del reloj En algunos iconos y teclas, en los modos del reloj, se pueden dar toques para activar funciones: Dé... -
Page 41: Modo De Alarma
Selección del formato de la fecha (Ajuste predeterminado: Mes-Día-Año) 1. Dé un toque a !, y luego dé toques para seleccionar h o 2. La tecla del formato de la fecha (ajuste predeterminado: “MDY”) deberá encontrarse en la parte inferior de la pantalla. Cada vez que se dé... -
Page 42: Temporizador
Temporizador 1. Dé un toque en ! una o dos veces, y luego encuentre y dé un toque en el icono Q para introducir el modo del temporizador. 2. En el modo del temporizador, ponga la hora de activación del temporizador. -
Page 43: Modo De Calendario
Búsqueda 1. Dé un toque en v y luego seleccione la categoría en la barra de menú. 2. Dé un toque en “ y luego seleccione “Search Entry” en el menú. 3. Seleccione el campo deseado dando un toque en el nombre del campo (“Last Name”, por ejemplo) y luego introduzca una serie de letras para hacer la búsqueda. -
Page 44: Modo De Programa De Actividades
Verificación de las introducciones en los modos de programa, cosas a hacer, y aniversario Las introducciones de programa, cosas a hacer o aniversario se indicarán como puntos en el lado derecho del número del día. En este ejemplo, una o más introducciones en los tres modos existen en el día 5. -
Page 45: Modo De Aniversario
Búsqueda directa 1. En el menú principal, dé un toque en g para introducir el modo de programa. 2. En el modo de programa, dé un toque en “ para seleccionar “Search Entry” en el menú. Aparecerá la pantalla de introducción de búsqueda. 3. -
Page 46: Modo De Cosas A Hacer
Modo de cosas a hacer 1. En el menú principal, dé un toque en t para introducir el modo de cosas a hacer. 2. En el modo de cosas a hacer, dé un toque en “ para seleccionar “New Entry” en el menú. Aparecerá... -
Page 47: Modo De Apuntes
Modo de apuntes 1. En el menú principal, dé un toque en el icono w para introducir el modo de apuntes. 2. Dé un toque en “ y luego seleccione “New Entry” desde los elementos del menú. 3. En el campo “Title”, introduzca un título para esta introducción y luego dé... - Page 48 Visualización de introducciones por tipos/categorías Se puede visualizar una lista de introducciones de gastos por tipos de pagos o por categorías de gastos. 1. En el modo de gastos, dé un toque en en la barra de menú para visualizar un menú. 2.
-
Page 49: Edición De Introducciones
Edición de introducciones 1. Recupere una introducción en el modo deseado. 2. Dé un toque en “ y luego seleccione “Edit Entry”. 3. Edite los datos. j l k m: mueva el cursor a la izquierda, derecha, arriba o abajo respectivamente. -
Page 50: Modo De Calculadora
Modo de calculadora Dé un toque en q en el menú principal para introducir el modo de la calculadora. Antes de realizar cualquier cálculo, dé dos toques en c para cancelar la visualización. • Si la sección de los enteros del resultado de un cálculo supera los 12 dígitos, si la memoria supera también 12 dígitos o si se divide un número por cero, se produce un error. -
Page 51: Utilización Del Software De Pc Incluido
Modo de conversión métrica La conversión métrica se encuentra disponible con el cálculo de 12 dígitos. Conversión de unidad métrica <Ejemplo> Conversión de 68°F a °C 1. En el menú principal, dé un toque en ^ para introducir el modo de conversión métrica. - Page 52 Conexión del Organizador al PC 1. Apague su PC y el Organizador. 2. Conecte el conector de 9 contactos estándar del cable PC-Link al puerto serial del PC. • La utilización de un conector de 25 contactos requerirá un adaptador adicional. (De venta en el comercio) 3.
- Page 53 Ficha de resolución de conflictos La ficha de resolución de conflictos del software de sincronización le permite seleccionar la forma en que los conflictos de datos se resuelven cuando se hacen modificaciones en los datos y se selecciona la opción “Synchronize” en la ficha general. •...
- Page 54 Descarga de la base de datos del diccionario La descarga de la base de datos del diccionario le permite descargar del PC la base de datos del diccionario para el traductor de palabras. Inserte el CD-ROM, y luego haga clic en "Download..." para seleccionar el archivo que va ha descargar.
-
Page 55: Cambio De La Pila
Cambio de la pila Pila usada Tipo Tamaño/Modelo Pila alcalina “AAA”/LR03 • Antes de cambiar la pila asegúrese de escribir cualquier información importante guardada en la memoria. Precauciones Como el uso incorrecto de las pilas puede causar fugas en las mismas o una explosión, siga estrictamente las precauciones siguientes: •... - Page 56 1. Apague el Organizador. 2. En la parte posterior del REPLACE BATTERY • • NORMAL OPERATION Organizador, deslice el conmutador de cambio de la pila hasta la posición “REPLACE BATTERY”, luego deslice la tapa del compartimiento de la pila para quitarla.
- Page 57 MEMO OZ590_1203.pm65 02.12.3, 8:12 PM...
- Page 58 MEMO OZ590_1203.pm65 02.12.3, 8:12 PM...
-
Page 59: Limited Warranty
Product which were caused by repairs or attempted repairs performed by anyone other than an authorized servicer. Nor shall Sharp be liable or in any way responsible for any incidental or consequential economic or property damage. - Page 60 SHARP ELECTRONICS CORPORATION Sharp Plaza, Mahwah, New Jersey 07430-1163 PRINTED IN CHINA/IMPRESO EN CHINA 02LGK (TINSE0588EHZZ) OZ590_1119.pm65_cover_ cover 4 02.12.6, 9:28 PM...