
Related Manuals for Toshiba RG4-E01


Summary of Contents for Toshiba RG4-E01
-
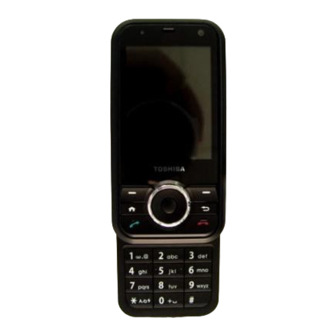
Page 1: Toshiba
TOSHIBA RG4-E01 User Manual Version 1.0 Copyright©2006 TOSHIBA CORPORATION, All rights reserved. -
Page 2: Introduction
UMTS. This phone provides advanced entertainment features including video telephony, video messaging and high-speed access to Vodafone live! The TOSHIBA RG4-E01 has a sophisticated design, high-quality 65,000 colour display mega pixel camera. Furthermore, you can rotate the colour display to suit your needs. - Page 3 • Interference may affect your phone’s performance. This is perfectly normal and once you move away from the source of the interference, the phone should operate as usual. • Do not attempt to disassemble your product. Only Toshiba authorized personnel should perform service.
-
Page 4: Interference With Medical Equipment Functions
Information to User This equipment has been tested and found to comply with the limits of a Class B digital device, pursuant to Part 15 of the FCC Rules. These limits are designed to provide reasonable protection against harmful interference in a residential installation. This equipment generates, uses and can radiate radio frequency energy and, if not installed and used in accordance with the instructions, may cause harmful interference to radio communications. -
Page 5: Danger
DANGER •Do not disassemble, modify or repair the handset, battery pack, charger, Stereo Earphone or BluetoothTM Stereo Headset •Doing so may cause overheating, rupturing, fire, electric shock, injury or malfunction. Modification of the handset is prohibited by Japanese Radio Law. For repair, contact your nearest SoftBank Shop or SoftBank Customer Assistance (page 21-53). -
Page 6: Warning
•Doing so may cause ignition, rupturing, malfunction or fire. If electrolyte fluid leaking from the dry battery of BluetoothTM Stereo Headset comes into contact with your skin or clothes, wash it immediately with clean water as this may hurt your body. And if it gets into your eyes, do not rub them, and have them immediately treated by an ophthalmologist after washing them with clean water. - Page 7 Do not use the handset with any power voltage other than the specified voltage Doing so may cause a fire. The power voltages are 100 to 240 V AC for the rapid charger and 12 or 24 V DC (for a negative ground car only) for an In-Car Charger. Wipe away any dust on the plug of the rapid charger with a dry cloth after removing the plug from the outlet Dust on the plug or outlet may cause a fire.
- Page 8 electronic medical equipment, radio waves may interfere with such a device or equipment Observe the following guidelines 1. If you have an implanted cardiac pacemaker or defibrillator, carry and use the handset at a distance of at least 22 centimetres away from the implanted device. 2.
-
Page 9: Caution
CAUTION Do not use or leave the handset or battery pack in places where it will be exposed to direct sunlight or in hot places such as inside a car in the sun Doing so may cause overheating, fire or malfunction. Keep the handset, battery pack and charger away from infants and small children Failing to do so may result in the battery pack or memory card being accidentally swallowed or cause an injury. - Page 10 Replacing the fuse with other than a designated fuse may cause overheating and fire.For details on replacing the fuse, refer to the instruction manual of the In-Car Charger. If fluid leaking from the battery pack comes into contact with skin or clothing, wash it away immediately with clean water Failing to do so may cause skin irritation.
- Page 11 Use only the memory card supported by the handset Failing to do so may cause data loss or malfunction.The handset supports memory cards with a storage capacity of up to 2 GB (as of XXX, 2006). Do not let children use cables such as a video output cable, the Stereo Earphone or BluetoothTM Stereo Headset unsupervised and keep cables out of infant's reach An injury may be caused if, for instance, the cable is wrapped around a neck.
-
Page 12: Table Of Contents
Content TOSHIBA............................... 1 RG4-E01.............................. 1 User Manual Version 1.0........................1 INTRODUCTION ..........................2 NETWORK SERVICES ........................2 IMPORTANT SAFETY INFORMATION .................... 2 INTERFERENCE WITH MEDICAL EQUIPMENT FUNCTIONS........... 4 NONIONIZING RADIATION ....................... 4 TRADEMARK INFORMATION......................4 DANGER ............................... 5 WARNING ............................. 6 CAUTION............................... - Page 13 Chapter 3 Using your phone......................28 3.1 Making a call........................... 28 Make a call by entering a phone number................ 28 Make a call by entering a contact name ................. 29 Make a call from an open contact ..................29 Making a call from the contact list..................29 Making a call from Call History..................
- Page 14 Configuring your device to receive beamed information ..........43 To receive beamed information ..................43 Chapter 5 Messaging......................... 43 5.1 Text message ........................... 44 Create a text message ...................... 44 Insert predefined text into message ................44 Reply to a message ......................45 Forward a message ......................
- Page 15 Manage Contacts ....................... 63 Change Your Display Name....................63 Check your own Messenger Status ................. 63 Subscribe to status updates for selected Contacts ............64 Let Contacts know you are not available ................ 64 Read a Message ........................ 64 Send a Message......................... 64 Sign In and Out........................
- Page 16 To make your device visible to other Bluetooth users..........103 To enable and disable all wireless elements ..............103 7.10 TOSHIBA Sharing Application................... 103 Preparation for using TOSHIBA Sharing Application ..........104 To start sharing ......................... 104 7.11 TOSHIBA Zoom Application....................106 7.12 TOSHIBA VoIP Application ....................
- Page 17 To hard reset your phone ....................112 Appendix Other Applications ......................112 A.1 Battery Information ......................112 Battery life estimates (approximations)................. 113 To check the battery power ..................... 113 To optimize the power performance ................113 To manage a low battery ....................113 A.2 PC requirements to run ActiveSync 4.2 ................
-
Page 18: Chapter 1 Knowing Your Device
Chapter 1 Knowing your device 1.1 Getting Started Important information such as current date, time, status indicators, appointments and profile are displayed on the Home screen. You can open a program directly by selecting its icon and pressing Enter (the key in the middle of the navigation pad). The Home screen can be accessed from anywhere by pressing the Home key. -
Page 19: Status Indicators
1.2 Status Indicators You will find the below indicators on your screen. Voice call New instant message Voice call in progress New email or text message Data call in progress New voice mail Bluetooth is on and/or device Calls forwarded is visible Call on hold Sync error... -
Page 20: Method Indicators
Method indicators When you move the cursor into a field that requires you to enter text or numbers, it will auto-select an appropriate input method. The present input method status indicator will appear in the top right corner of status bar. Multi-press text mode in lower case Multi-press mode, initial letter is up- per case and subsequent letters are... -
Page 21: Numeric Method
word’ and select that option. Now type the word you wish to insert into the dictionary. The next time you type that word, it will appear in the suggestions list. Numeric method In Numeric method, you can just tap a key in order to enter the corresponding number into a field. -
Page 22: Chapter 2 Personalizing Your Phone
Chapter 2 Personalizing your phone 2.1 Home Screen The Home screen is the screen displayed on the phone when you press the Home key . Please refer to Chapter-1 for details on status indicators which are displayed in the Home screen. -
Page 23: An Alternative Method To Set An Image As The Home Screen
Note: This applies throughout the rest of the document whenever you access any phone settings which shows numbers listed. Also, you may need to press 0 (More…) if the setting is hidden in the next page. Simply press one of the numbers (here it is 4) on the keypad for fast selection of a menu item or you can use the NAVIGATION button to scroll down the list. -
Page 24: Specifying The Sound For An Event
reminder. 1. Connect the phone to your PC using a USB connection (see the chapter on ActiveSync setup for your PC). 2. On your PC, copy the sound file you want. 3. In ActiveSync on your PC, click Explore and double-click My Windows Mobile device . Note: For ring tones, the sound files can be in either midi, wma, mp3, mmr or wav file format. -
Page 25: Settings
4. Do one of the following: • Modify the settings, and click Done . • To cancel without saving changes, click Cancel . To revert to the default profile settings, click Menu > Reset to default. 2.3 Settings Although these are not mandatory to use the phone, for optimum use it is advised that you go through and set them up. -
Page 26: Changing Accessibility Settings
Changing accessibility settings 1. On the Home screen, click Start > Settings > More > Accessibility . 2. Select your preference for the following: • System font size to set the size of the font that is displayed on the screen. •... -
Page 27: Enabling Your Sim Pin
lost or stolen. However some security features can also be applied to prevent the phone from unauthorised use. The security which can be applied to the phone is – • Keypad lock – to prevent the phone from making a call if the device keypad is accidentally pressed when it is placed in a hangbag or a pocket •... -
Page 28: Unlocking The Keypad
Unlocking the Keypad Simply press the Unlock key in the Home screen and the screen prompts you with the correct key press required to unlock the keypad. Enabling the Device lock This complements the SIM PIN feature to provide additional security to your phone. It means that the phone is protected from unauthorised use. -
Page 29: Make A Call By Entering A Contact Name
– Enter the number you wish to call and then press the Phone button to dial Alternatively, scroll down the list to the item required and press the Phone button to dial. Make a call by entering a contact name 1. -
Page 30: Making A Call From Call History
application, highlight a contact. You may press the left and right navigation keys to change the number that will be called. The letter on the right of the contact will indicate the default number being dialed. Making a call from Call History Call History displays calls you have made, received, and missed recently. -
Page 31: Using A Speed Dial
is normally pre-configured by the SIM card. If it is not set automatically you need to set this up by going to Start > Settings > Phone > Call Options > Voice Mail Number. You can find this number by calling your Service Provider. Using a speed dial On the Home screen, press and hold the number on the keypad that you have assigned as a speed dial for the phone number, e-mail address, or Web page. -
Page 32: In-Call Options
3.3 In-Call Options Answering or postponing a second call For this to work, you will first need to enable the call waiting option from your Home screen by clicking Start > Setting > Phone > Provide Call Waiting notifications. After this option this has been enabled on your phone and the settings have been sent automatically by your phone and accepted by your Service Provider, you will receive an audible and visual notification on your phone if another call comes in during your current... -
Page 33: To Put A Call On Speakerphone
choosing Menu > Conference. If you wish to have a private conversation with one of the callers, you may split the conference call back up into its individual users. With the conference running choose Menu > Private. Then select the caller with whom you wish to have the private conversation. -
Page 34: Insert An International Country Code
Insert an international country code To make an international call you must include a country code at the beginning of the dialing sequence for the phone number. • Enter the country code, press and hold 0 until a plus (+) sign appears, and then enter the rest of the phone number. -
Page 35: Automatic Setup Of Your Data Connections
4.1 Automatic setup of your data connections Your device is able to configure itself for data services for many of the major operators across the world. Simply insert your SIM card and switch on your device. When the device powers on, it will configure itself or Web, WAP and MMS services. -
Page 36: Create A Dial-Up Connection
Create a dial-up connection Every network connection is different. You should gather all of the relevant information or network settings you need before starting this process. 1. On the Home screen, click Start > Settings > Connections. 2. Click Dial-up . 3. -
Page 37: Create A Vpn Connection
• In Password , enter your password. Create a VPN connection Please ensure that you have setup a successful GPRS connection first – the VPN connection uses the GPRS connection for connection to your Work network. You should gather all of the relevant information or network settings you need before starting this process. -
Page 38: Connect To Intranet Urls
Connect to intranet URLs Some companies use periods in their intranet URLs (for example, intranet. companyname.com). A Work URL exception tells Internet Explorer Mobile and/or Activesync to look on the Work network to find the URL instead of searching the Internet. This has to be setup also if you wish to browse web sites in your intranet through your VPN connection. -
Page 39: Bluetooth
2. Click Menu > Advanced. 3. In Internet connection, select the connection you want to use for general Web access, and click Done. 4. Similarly, select the connection you wish to use for the WAP network 5. The Work Network connection is used if you are planning to use a Virtual Private Network connection. -
Page 40: To Create A Bluetooth Partnership From Your Device To Another Device
3. If you wish to allow this device to be seen by other Bluetooth devices nearby, tick the box for ‘Make this device Visible to other devices’. Note: You can also turn Bluetooth on and off using the Wireless Manager described later in this manual. -
Page 41: End A Bluetooth Partnership
turned on. End a Bluetooth partnership 1. On the Home screen, click Start > Settings > Connections > Bluetooth . 2. Click Menu > Devices. 3. Select the Bluetooth partnership you want to end. 4. Click Menu > Delete. Make your device visible to other Bluetooth devices Your device must be set to visible: •... -
Page 42: Set Up An Incoming Bluetooth Com Port
Set up an incoming Bluetooth COM port 1. Make sure that your device is currently connected to the other device via Bluetooth. 2. On the Home screen, click Start > Settings > Connections > Bluetooth. 3. Click Bluetooth > Menu > COM Ports . 4. -
Page 43: Receive Beamed Information
• If using Bluetooth, select the device to which you want to send the item. 3. Click beam. Receive beamed information Your device is set by default not to receive beamed information. This is for the security of your device. In order to accept data you must make the one- off menu selection below. Configuring your device to receive beamed information 1. -
Page 44: Text Message
• Multimedia message (MMS) A guide to the messaging application Messenger is also given – which allows online chat over-the-air and access to your Hotmail account. 5.1 Text message Text Message (also known as SMS) is a popular way of sending short messages to other mobile phone users, and in some countries to land lines as well. -
Page 45: Reply To A Message
3. Click Menu > My Text . 4. Select the text you want to insert by keying the number corresponding to that in the list above Reply to a message 1. From an open message, click Reply on (bottom left corner) or Menu > Reply All (bottom right corner) 2. -
Page 46: Delete A Message
Delete a message 1. On the Home screen, click Start > Messaging and select an account. 2. Select the message to delete. 3. Click Menu > Delete. Email Before you can send or receive emails, you will need to setup an email account. There are different types of email accounts supported by the phone. -
Page 47: Set Up An Internet Email Account Manually
3. On the next screen choose the option Your Email provider: Other (POP3/IMAP) 4. In Your name, enter your display name for e-mail messages. Note: If the account is set up successfully, you will be prompted to send and receive e-mail. - Page 48 A name for this account. You must use a different name for Account name each account that you set up. The type of network your e-mail server connects to. Network The name of your incoming Email server (POP3 or IMAP4). Incoming mail server Select this to ensure you always receive e-mail for this ac-...
-
Page 49: Now You're Ready To Set Up Your Account
Your user name for the outgoing e-mail server. User name Your password for the outgoing e-mail server. Password The domain name of the outgoing e-mail server. Domain A connection that enables you to send personal information Require SSL more securely. Prompt that if you select this and your ISP connection... -
Page 50: Set Up An Outlook E-Mail Account
Set up an Outlook e-mail account An Outlook e-mail account is created and managed by Microsoft’s Exchange Server. You will need to have this account setup first before carrying on with the other steps described in this section. For sending and receiving messages with your Exchange Server, click Start > ActiveSync You will get this prompt on your phone if your Exchange Server is qualified to install the feature called MSFP –... -
Page 51: View The Inbox Message List
Once the ActiveSync completes successfully, click Start > Messaging > Outlook Email > Menu > Folders and you should see e-mail folders similar to the Outlook client in a PC. View the Inbox message list On the Home screen, click Start > Messaging, and select an account. The Inbox message list displays your received messages. -
Page 52: Insert Predefined Text Into Message
7. Click Send. E-mail messages are stored in Outbox and are sent to recipients the next time you synchronize or connect to your e-mail server and send and receive mail. You can quickly enter e-mail addresses from your contact list. In the To field, press ENTER and select a recipient from the list. -
Page 53: Send And Receive Internet E-Mail Messages
you do not edit the original message. This may reduce data transfer costs based on your rate plan. Send and receive Internet e-mail messages 1. On the Home screen, click Start > Messaging. 2. Select the Internet e-mail account for which you want to send and receive messages. 3. -
Page 54: Download An Attachment
Download an attachment In an open message with an attachment to download, click the attachment. The attachment is downloaded the next time you synchronize or connect to your e-mail server and send and receive e-mail. Alternatively, you can scroll down to the bottom of the message and click “Get the rest of this message”. -
Page 55: Add A Picture To An E-Mail Message
Add a picture to an e-mail message 1. In the message area of an e-mail message, click Menu > Insert > Picture. 2. Click the picture you want to add. Note: If there are multiple attachments in the message, all attachments are downloaded. You can view attachments only for file types that are supported by the phone. -
Page 56: Running The Mms Program
being enabled for the service. An MMS can be made of many pages, also known as ‘slides’. Each slide can hold an image, a sound and text, but you do not need to set all of these for each message. The maximum amount of content that can be sent in a message is set by your service provider. -
Page 57: Adding Text To The Message
Note: If you add a video to the message, then you cannot add any further audio to this slide. Adding text to the message Click on the ‘Insert Text…’ area and enter the message you wish to send. You can also choose from some predefined text if you wish to use this by clicking on Menu >... -
Page 58: Setting Up The Mms Account
Setting up the MMS account If your device has not been preconfigured, then you will need to manually enter the details of the MMS. This is a two-stage process : In stage one you will set up the data connection, and in the second stage you will define the address of the MMS server on the internet. -
Page 59: Defining The Server
Defining the server From the Home Screen, click Start > Messaging . Highlight the MMS entry, and press Menu > Settings On the next page, choose Menu > MMSC Settings, and on the following page choose Menu > New. In the Name Field, enter a name for the server details (for example, “My MMSC”) MMSC URL: Enter the address of the server, as supplied by your mobile service provider WAP gateway: Enter the WAP gateway to be used for this connection, as supplied by your mobile serve provider... -
Page 60: About Msn Hotmail
Note: You need to have either a Microsoft .NET Passport (from www.passport.com) or a Hotmail account (www.hotmail.com) to use MSN Messenger. Your phone needs to be connected to the Internet. About MSN Hotmail With MSN Hotmail on your smartphone, you have access to your Hotmail inbox even when you’re mobile. -
Page 61: View Your Hotmail Inbox
2. Click Messenger or MSN Hotmail , and then enter the e-mail address and password you use to sign in to MSN Mobile. Click Save password to have Pocket MSN automatically sign you in. 3. Click Sign in. Caution This could be a security risk if your mobile device is lost or stolen, others may gain access to MSN Messenger and Hotmail. -
Page 62: Keep Your Hotmail Inbox Always Up-To-Date
Menu > Reply All 3. Enter the text of your reply, and then click Send. To write or reply to e-mail while offline, follow the steps above. Then, when you have an open data connection, click Menu > Send/receive mail. Keep your Hotmail Inbox always up-to-date You can set your Hotmail inbox to automatically update with new e-mail whenever you have an open data connection. -
Page 63: Set Up An Account
Set up an Account Before you can use MSN Messenger, you must set up an instant messaging account. For MSN Messenger Service, you must have Microsoft Passport Network credentials or a Hotmail account. To use MSN Messenger Service, you need to create a connection to the Internet. -
Page 64: Subscribe To Status Updates For Selected Contacts
Subscribe to status updates for selected Contacts When your device has an open data connection, status update notifications alert you when contacts come online or change their MSN Messenger status. 1. Select the contact. 2. Click Menu > Auto update status . Let Contacts know you are not available Select your own name at the top of the page, and then click the desired status description (such as Away). -
Page 65: Sign In And Out
Sign In and Out 1. On the Home screen, click Start > Pocket MSN. 2. Click MSN Messenger > Sign in . 3. Enter the e-mail address and password for your Microsoft Passport Network credentials or Hotmail account, and click Sign in. Signing in to an account may take several minutes, depending on your connection speed and how busy your mobile network is. -
Page 66: Install And Set Up Activesync
6.2 Install and set up ActiveSync You can either install ActiveSync from your Windows Mobile Getting started CD or download a copy of ActiveSync from http://www.microsoft.com/windowsmobile/addons/default.mspx After the software has been installed and the USB cable is connected between your PC and the phone, the ActiveSync setup wizard starts up. - Page 67 To sync with Exchange Server instead of your PC, click the box above and enter the Exchange Server details as shown below –...
- Page 68 Please ensure that your PC has a connection which is accessible to the Server address above as the setup will check the connection and that your User name / Password settings above are valid also. Note: Ensure that you select correctly in the drop down box for the sync Source below. The remaining screenshots will sync with the option - Windows PC.
- Page 69 For example, you may choose to synchronize details of your Calendar for the past two weeks only:...
- Page 70 After you click Finish above, you should get a screen prompt as below. This needs to be selected as appropriate to your own requirements depending on the state of your PC. The time taken for the sync below depends on how much data is to be synchronize d. Typically it should not take more than 2- 4 mins or even less depending on the data volume and responsiveness of your PC.
-
Page 71: Change Activesync Settings
Change ActiveSync settings Once you set up synchronization using the Sync Setup wizard on the PC, you can later change your synchronization settings: • If you want to change Active settings for synchronizing with a PC, use ActiveSync on the PC. -
Page 72: Connect The Phone
information, see “Connecting a mobile device to a PC” in ActiveSync Help on your PC. Connect the phone Connect to a PC using Bluetooth 1. Follow the instructions in ActiveSync Help on the PC for configuring Bluetooth on your PC to support ActiveSync. Make sure that your PC’s Bluetooth is set to Visible (also known as ‘Discoverable’), and that Activesync on the PC has the Bluetooth COM port enabled –... -
Page 73: Mixed Synchronization Settings Between Exchange Server And Pc
Mixed synchronization settings between Exchange Server and If you wish to sync your phone to Exchange Server for Email and Tasks, and to your PC for Contacts and Calendar, from your phone, click Start > ActiveSync > Menu > Options and select from the list as preferred (see example below). -
Page 74: Set Up An Exchange Server Connection
Set up an Exchange Server connection You can synchronize your email, Calendar Appointment and Contacts directly with your Exchange server. Tasks may also be synchronized if your company is running Exchange Server 2003 with Service Pack 2. The synchronization may be performed over the air using a cellular connection, or by using your PC as a desktop passthrough. -
Page 75: Start And Stop Synchronization
with a PC or Exchange Server. Start and stop synchronization 1. On the Home screen, click Start > ActiveSync . 2. To start synchronization, click Sync . 3. To stop synchronizing, click Stop . (Note this menu only shows up during the synchronization) Synchronizing your Media Your device is able to synchronize media from your PC, such as music and video. -
Page 76: Contacts
7.1 Contacts Contacts are names of people which you setup to make it easier for you to communicate with either by phone, SMS or email. Further, you can customize each contact by adding a picture or a ring tone for example to identify that person who is phoning you. Create a new contact 1. -
Page 77: Delete A Contact
2. Click the contact whose information you want to view. 3. To edit the information, click Menu > Edit . 4. When finished making changes, click Done. Delete a contact 1. On the Home screen, click Start > Contacts. 2. Scroll to the contact to delete. 3. -
Page 78: Assign A Ring Tone To A Contact
Assign a ring tone to a contact To easily identify who is calling you by the ring tone, you can assign a custom ring tone to each contact. 1. On the Home screen, click Start > Contacts . 2. Click the contact you want to assign a ring tone to. 3. -
Page 79: Schedule An Appointment
Schedule an appointment 1. On the Home screen, click Start > Calendar. 2. Click Menu > New Appointment. 3. Enter information about the appointment. To schedule an all-day event, under End time , select All day event . 4. Click Done. Note: All-day events do not occupy blocks of time in Calendar;... -
Page 80: Change The Display Of The Work Week
4. If the appointment is recurring, click Yes to delete the series, or click No to delete only the current occurrence. Note: When you delete an appointment in Calendar on your phone, it is also deleted on your PC the next time you synchronize. If the appointment has not been synchronized with a PC, it will be deleted only from the phone. -
Page 81: View Your Agenda For A Specific Date
To view previous or approaching dates, scroll left or right, or click Menu > Go to Date. To quickly view today’s agenda, on the Home screen, click an upcoming appointment (if one is present). View your agenda for a specific date 1. -
Page 82: Delete A Task
set up in the phone but the tasks Note: You can synchronize information on your phone with your PC to keep your task list up to date in both locations. If you create a new task with a reminder on your PC and then synchronize tasks with your phone, the reminder will play at the time it was set on your PC. -
Page 83: Camera And Video Recorder
Note: Categories only appear in tasks that are synchronized with your PC. To filter your task further, click Active Tasks or Completed Tasks. 7.4 Camera and Video Recorder Your phone is equipped with a digital camera which can be used to capture photos and video clips. -
Page 84: Capturing A Video
Landscape: Taken photos or videos horizontally. Front camera: Taken photos or videos with camera lens face to you. Environment: To set the colour correction of the camera in order to show the best effect at the current light. You may also choose to manually set up the correction. Effect: Choose photo effect like: normal, black &... -
Page 85: Pictures And Videos
7.5 Pictures and videos You can view pictures stored in your phone or memory card using the Pictures and Videos application. You can also set a picture to be your Home Screen background from here, or you can send an image to another user. To use Pictures and Videos From the Home Screen go to Start >... -
Page 86: To Open A Picture
To open a picture Highlight a picture and press View to open the picture. To Send the image to another user, press Send, and choose the account by which you will send it. For other options, press Menu Zoom: zoom in or out of the picture detail; Play slide show: View all pictures as a slide show Use as home screen: Set the picture as wallpaper for the Home Screen. -
Page 87: Overview Of The Controls
desktop computers running the Windows or Macintosh operating systems. In this documentation, the version of Windows Media Player for Windows- based desktop or notebook computers is called the desktop Media and the version for Smartphone is called the Smartphone Media. Overview of the controls By default, these hardware buttons are assigned to Windows Media Player Mobile functions. -
Page 88: Overview Of Now Playing Screen Commands
playlist indicates the currently playing file and any files that are queued up to play next. Library screen. The screen that lets you quickly find your audio files, video files, and playlists. It contains categories such as My Music, My Video, My TV, and My Playlists. It also includes a link that lets you switch to the Now Playing screen. -
Page 89: Overview Of Library Screen Commands
Shuffle/Repeat > Plays the items in the Now Playing playlist in a Shuffle random order. Plays the items in the Now Playing playlist Shuffle/Repeat > repeatedly. Repeat Removes all items from the Now Playing playlist. Clear Now Playing Displayserror information about the selected item Error Details (an exclamation mark appears before the item name if error details are available). -
Page 90: Play Items On Your Phone
site http://www.playsforsure.com When copying a protected file from your computer to your phone: • Always use the desktop version of Windows Media Player 10 to synchronize (copy) the file to your phone. For example, do not use Windows Explorer to drag and drop files from your computer to your phone. -
Page 91: Copy Files To Your Phone
connected. Copy files to your phone You can either copy files to your phone manually or if you have a PC, automatically copy (synchronize) files between your PC and your phone. The latter is described below. Use the Sync feature in the desktop version of Windows Media Player 10 to synchronize (copy) digital media files from your computer to your phone. - Page 92 Click this now and follow thru the steps in screenshots...
-
Page 94: To Synchronize Content To Your Phone Automatically, Do The Following
To synchronize content to your phone automatically, do the following: 1. On your computer, start Windows Media Player 10. - Page 95 2. Insert a 32 MB or larger storage card into your phone, and then connect your phone to your computer. On your computer, the Device Setup Wizard opens. 3. In the wizard, click Automatic, select the Customize the playlists that will be synchronized check box, and then select the playlists that you want to synchronize.
- Page 96 For more information about the Sync feature, start the desktop version of Windows Media Player 10, and then press F1. To sync manually, you can also drag and drop items into your Sync List as shown below – Note: • Always use the desktop version of Windows Media Player 10 to synchronize (copy) files to your phone.
-
Page 97: Change Player Appearance
• The desktop version of Windows Media Player 10 is only available for computers running Windows XP. If you are not running Windows XP on your desktop computer, use the C opy to CD or Device feature of Windows Media Player 9 Series to copy your audio files and video files to your phone. -
Page 98: Troubleshooting
Note: To download new skins, see the WMplugins.com site (http://www.wmplugins.com). After downloading a skin to your computer and unzipping it if necessary, use ActiveSync to copy the .skn and .bmp files to your phone (such as to the location My Smartphone\Program Files\Windows Media Player). -
Page 99: Change The Size Of Text On Web Pages
2. Click Menu > Address Bar. 3. Enter the address, and click Go. Change the size of text on Web pages 1. On the Home screen, click Start > Internet Explorer. 2. Click Menu > Zoom and select the size you want. Go to a Web page in the History list 1. -
Page 100: View A Favorite
View a favorite 1. On the Home screen, click Start > Internet Explorer. 2. Click Favorites. 3. Select a favorite, and click Go Clear history, cookies, or temporary files Through frequent use of Internet Explorer, your phone may accumulate lots of pages which could use up storage space in your device gradually. -
Page 101: To Install A Java Application
To install a Java application Press Menu > Install You can now choose where to find the MIDlets • To install from a Web site choose ‘Browser’. This will launch Internet Explorer Mobile. Now navigate to the web site where the Java MIDlet is kept. Select the file and it will be loaded into the Java application. -
Page 102: Wireless Manager
7.9 Wireless Manager The wireless manager is an application that allows you to easily switch on and off the Bluetooth and Telephony functionality of your phone. To start the Wireless Manager, either • Press and hold the Volume up key, and choose ‘Wireless Manager’ form the Quick List, •... -
Page 103: To Turn Bluetooth On And Off
‘1’ on the keypad. 7.10 TOSHIBA Sharing Application TOSHIBA Sharing enables you to use two functions,Remote Keyboard and Remote Screen. Using Remote Keyboard, you can scroll a PC application displayed on a PC screen in the direction of four directions using mobile phone from the distant place. Using Remote Screen, you can display the replica of a LCD screen of your device on PC screen. -
Page 104: Preparation For Using Toshiba Sharing Application
Preparation for using TOSHIBA Sharing Application ・ Sharing Application is beforehand pre-installed in your device ・ Please install Sharing Application to a PC. Sharing Application is recorded on accompanying CD. ・ Sharing Application supports the communication using one network of USB, Bluetooth, and Wi-Fi. - Page 105 You could select the connection method of the device and PC. Those methods are: Bluetooth, USB and Wi-Fi. Port: To set the port of TOSHIBA Sharing click Menu > Port. Shown below is the port setting screen. Passcode: To set the passcode of TOSHIBA Sharing, click Menu > Passcode. Shown below is the passcode setting screen.
-
Page 106: Toshiba Zoom Application
To quit Toshiba Sharing click Menu > Quit 7.11 TOSHIBA Zoom Application TOSHIBA Zoom Application enables you to magnify or decrease the current window size. The window could be magnified to as large as 8 times of normal size. You can use the Set Zoom Level dialog box to set a specific zoom level in the Viewer or in Edit Mode. -
Page 107: Toshiba Voip Application
7.12 TOSHIBA VoIP Application Toshiba VoIP for Smartphone enables you to: - Call an IP phone (Toshiba VoIP for Smartphone) - Use answering machine functions - Check your buddies’ current status (offline, online, busy, or away) - Notify your buddies of your current status (offline, online, busy, or away) - Send and receive instant message while you’re talking... - Page 108 Redialing using outgoing call history You can redial using outgoing call history. The maximum number of outgoing call history stored at the same time is 20. If it exceeds the limit, the oldest outgoing call history is deleted. To redial using outgoing call history: 1) Open outgoing call history if it’s not by selecting Menu >...
-
Page 109: Sim Manager
Instant messaging (IM) While you connect to another Toshiba VoIP, you can send and receive instant message each other. To start instant messaging: 1) Call another Toshiba VoIP user and wait to have the call answered. 2) Press Menu > Send Instant Msg after the call is connected. -
Page 110: Remote Lock
7.14 Remote Lock To prevent your personal computer (PC) from being operated by others when you are not at the place, you may lock your personal computer or logoff your account, and when you come back to your personal computer, you may unlock it. Usually these operations are troublesome and companied with the password inputting. -
Page 111: Chapter 8 Maintaining Your Phone
Chapter 8 Maintaining your phone 8.1 Maintaining your phone Your phone is a well-designed and engineered product and the following tips and suggestions will enable you to obtain the best use of your phone for many years. • Keep the phone is a dry environment. If the phone or battery were to get wet due to misuse, this can invalidate the manufacturer’s warranty. -
Page 112: To Restart The Phone
To restart the phone 1. Remove the battery. 2. Reinsert the battery and turn on your phone. WARNING! If the phone is restarted while a program is running, data that you have not saved will be lost. Hard Resetting your Device If your phone starts to perform badly, you may try to Hard Reset the device to clear the issue. -
Page 113: Battery Life Estimates (Approximations)
Battery life estimates (approximations) • Talk time: 4 hours • GPRS/Internet browsing: 1.5 hours • Standby time: 150 hours To check the battery power • On the Home screen, click Start > Settings > Power Management. To optimize the power performance •... -
Page 114: Pc Requirements To Run Activesync 4.2
A.2 PC requirements to run ActiveSync 4.2 At the time of writing this manual, the requirements for this were published from M icrosoft’s website for ActiveSync 4.2 – http://www.microsoft.com/windowsmobile/downloads/as-sysreq42 .mspx Supported Operating Systems • Microsoft Windows 2000 Service Pack 4; •... -
Page 115: Regulatory Notices
• Microsoft Smartphone 2002 , Microsoft Windows CE OS version 3.0 A.3 Regulatory Notices Agency identification numbers To ensure continued reliable and safe operation of your Smartphone, use only the accessories listed in this document. This produc t is intended to be used with a certified class 2 limited power source, rated 5.6 volts DC, maximum 750mA power supply unit. -
Page 116: Important Health And Safety Information
• ETSI EN 301 489-17 Electromagnetic compatibility and Radio spectrum Matters (ERM); ElectroMagnetic Compatibility (EMC) standard for radio equipment and services; Part 17: Specific co nditions for 2.4 GHz wideband transmission systems. • ETSI EN 300 328 Electromagnetic compatibility and Radio spectrum Matters (ERM); Wideband Transmission systems;... - Page 117 The battery can only be charged in temperatures between +5°C (+41°F) and +35°C (+95°F). • Only use batteries approved by Toshiba and only recharge the battery with the recommended charger supplied by Toshiba.
- Page 118 battery. • Do not leave the battery in a cold (for example, a fridge) or hot place (for example, in a car exposed to direct sunlight) as this will effect its performance. • Do not dispose of the battery in a fire. •...
-
Page 119: Heed Service Markings
SAR information on this model handset is on file with the FCC and can be found under the Display Grant section of http://www.fcc.gov/oet/fccid after searching on FCC ID SP2-RG4-E01. Additional information on Specific Absorption Rates (SAR) can be found on the Cellular Telecommunications &... -
Page 120: Cleaning
Cleaning Unplug the product from the wall outlet before cleaning. Do not use liquid cleaners or aerosol cleaners. Use a damp cloth for cleaning, but NEVER use water to clean the LCD screen. WEEE Notice The Directiv on Weste Electrical and Electronic Equipment (WEEE), which entered into force as European law on 13th F ebruary 2003, resulted in a major change in the treatment of electrical equipment at end-of-life.