Advertisement
Quick Links
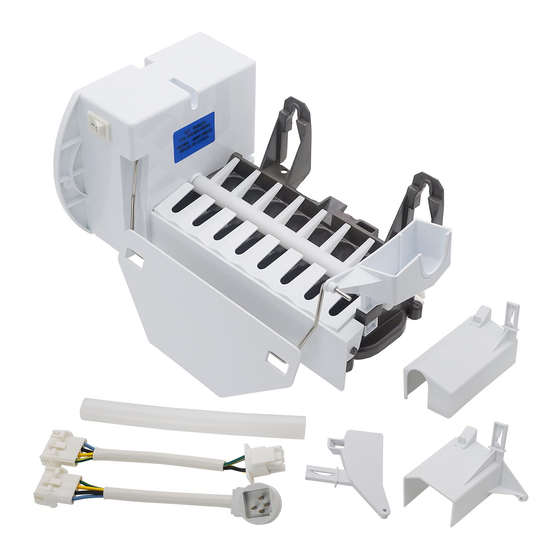
INSTALLATION INSTRUCTIONS FOR WR30X10093
WARNING! Electrical Shock Hazard
To avoid risk of electrical shock,
personal injury or death; disconnect
electrical power before servicing.
Before you begin:
Read these instructions completely and carefully. Wait 5
minutes after the power has been disconnected before
beginning the installation procedure.
Remove items from the freezer to safely allow access for
the removal of the existing ice maker and the installation
of the new ice maker.
Tools needed:
• Phillips head screwdriver
• Flatblade screwdriver
• 1/4" Hex head driver
For Metal Interior Lined Side-by-side
Refrigerators ONLY
1. Remove the ice bucket and chiller shelf (if applicable).
See Figure 1 & 2.
FIG. 1
Non-Dispenser
Side-by-side Bucket
Ice Bucket
FIG. 2
Dispenser
Side-by-side Bucket
Ice Bucket
Ice Maker
Mounting Tabs
Chiller Shelf
2. Remove the existing ice maker.
The ice maker will be attached to the ice maker bracket
with a Phillips head or Hex head screws. See Figure 3.
For side-by-side refrigerator with no through the door
ice dispenser
• Using the appropriate screwdriver, loosen the 2
mounting screws until the screw heads extend about
1/2" (13mm) from the ice maker bracket. NOTE: Do
not completely remove the screws.
• Slide the ice maker upwards so that the screws are
in the wide part of the mounting tab. Pull the ice
maker away from the ice maker bracket. See Figure 1.
• Unplug the ice maker from the socket located on the
rear wall of the freezer.
FIG. 3
For side-by-side refrigerator with a through the door ice
dispenser
• Unscrew front screw, slide out ice maker by pulling
towards you from side wall. See Figure 4.
• To unplug the ice maker, locate the restraints on
each side of the plug. Unclip the restraints by pulling
outward. See Figure 4.
Unscrew front screw, slide
out ice maker by pulling
towards you from side
wall
FIG. 4
Unclip restraints by
pinching the sides
with your hand
IS059 (6/10)
Advertisement

Related Manuals for GE WR30X10093


Summary of Contents for GE WR30X10093
- Page 1 INSTALLATION INSTRUCTIONS FOR WR30X10093 Ice Maker 2. Remove the existing ice maker. WARNING! Electrical Shock Hazard The ice maker will be attached to the ice maker bracket To avoid risk of electrical shock, with a Phillips head or Hex head screws. See Figure 3.
- Page 2 3. Remove the fill cup and ice maker insert. • Remove the fill cup and ice maker insert from the old ice maker. See Figure 5. • Discard the old ice maker. FIG. 7 Fill Cup Ice Maker Insert Rear view NOTE: The power cord SHOULD NOT be placed in the clip on the back of the ice maker.
- Page 3 • Replace the ice bucket and chiller shelf, if applicable. 4. Install fill cup and ice maker insert into new ice maker. Return any items that were removed to the freezer. • If you received a NEW fill cup with your ice maker, It may take several hours for the freezer to reach the install the fill cup now.
- Page 4 7. Complete the installation • Plug the ice maker power cord into the socket. Press firmly into place. Lock the plug in place by clipping • Reconnect power to the refrigerator. the restraints onto each side of the plug. See Figure 6. •...