Advertisement
Quick Links
Slip On Exhaust Instructions
®
®
®
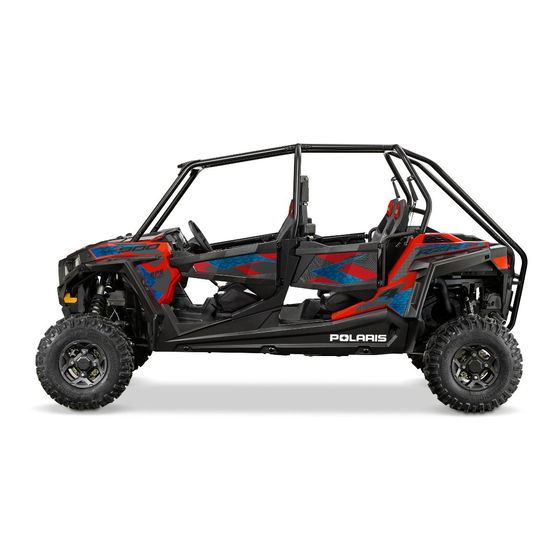
For Models: RZR
4 900 (2015-2016), RZR
S 900 (2015-2016), RZR
900 Trail (2015-2015),
®
RZR
900 XC (2015-2016)
Removal
1. Remove the screws from the plastic rear fascia. Slowly begin to pull the rear fascia away from
the machine. When there is enough room, reach in and disconnect the tail light harness. Set the
rear fascia aside.
2. Using a long piece of electrical wire or a spring puller, remove the 2 springs at the head pipe-to-
silencer joint and the 2 springs that hold the silencer against the frame. Slowly pull back on the
silencer to remove it. Note: You can remove the 2 rubber mounts from the frame as they will
not be reused.
3. Remove the top nut from the rear transmission mount.
4. For slip on: Move on to step 1 of HMF Slip on exhaust installation.
For full system: Move on to step 5.
5. Remove the following:
Seats, Air intake housing, Rear close off panel, Head pipe
6. Carefully remove any gasket material left on the cylinder head.
Installation
1. Install the HMF silencer bracket using the top transmission mount stud and original nut, and
the supplied M8 20 hex bolts, fender washers, M8 nyloc nuts and flat washers.
Note: We have found that some frames have a hole under the plastic (leftmost arrow) and some will
have a hole where the middle arrow is. Use whichever mounting hole is present on your frame. All
will have the hole where the arrow on the right is pointing.
Advertisement

Related Manuals for Polaris 2016 RZR 4 900


Summary of Contents for Polaris 2016 RZR 4 900
- Page 1 Slip On Exhaust Instructions ® ® ® For Models: RZR 4 900 (2015-2016), RZR S 900 (2015-2016), RZR 900 Trail (2015-2015), ® 900 XC (2015-2016) Removal 1. Remove the screws from the plastic rear fascia. Slowly begin to pull the rear fascia away from the machine.
- Page 2 2. Inspect the original donut gasket for wear or damage and replace it with a new one if necessary. 3. Remove the lower rear facia brackets. Your HMF exhaust comes with replacement brackets. 4. Using the original mounting bolts, install the HMF replacement rear facia brackets.
- Page 3 5. Install the HMF slip on exhaust using the 4 fender washers, M8 40 hex bolts, flat washers, and nylock nuts. 6. Using a long piece of wire or spring puller, install 2 of the original springs at the headpipe-to- inlet joint.
-
Page 4: Dual Full System Exhaust Instructions
8. Replace rear facia. Remember to plug in the tail light harness and be sure that the harness is tied away from the exhaust. 9. Inspect all areas around the exhaust system for proper clearance and alignment. Adjust as necessary. Dual Full System Exhaust Instructions ®... - Page 5 4. For slip on: Move on to step 1 of HMF Slip on exhaust installation. For full system: Move on to step 5. 5. Unplug the O2 sensor from the wiring harness. 6. Remove the following: Seats, Air intake housing, Rear close off panel, Head pipe 6.
- Page 6 4. Slide the “S” bend for the lower silencer over the lower collector outlet on the head pipe. 5. Slide the lower silencer onto the lower “S” bend. Once the silencer is in position, insert 2 Supplied M8x20 Bolts and flat washers in through the back of the mounting bracket. Install the supplied M8 nyloc nuts and flat washers.
- Page 7 9. With the top silencer level, tighten up the nuts and bolts for the top silencer. 10. Use a spring puller or long piece of electrical wire to install the supplied springs at the Collector to “S” bend joints and also at the “S” bend to silencer joints.
-
Page 8: Defender Rear Bumper, Polaris Rzr ® 4 900 Instructions
11. Replace all body panels and fasteners and check all areas around the exhaust system for proper clearance and alignment. ATTENTION! Improper fuel tuning can cause damage to your engine and exhaust. HMF is not responsible for this type of damage. ® Defender Rear Bumper, Polaris RZR 4 900 Instructions ® For Models: RZR... - Page 9 2. Pop the knockouts out of the rear fascia. These snap in and out of place and can be removed by gently pulling back on them. 3. Gently tap the very bottom of the heat shield to bend it in toward the muffler. This will create clearance between the heat shield and your new rear bumper.
-
Page 10: Apex Intrusion Bar, Polaris Rzr ® 4 900 Instructions
8. Once all bolts are started you can begin to tighten them. Take a step back and check for proper alignment and clearance. Adjust as necessary and finish tightening six bolts. ® Apex Intrusion Bar, Polaris RZR 4 900 Instructions ®... -
Page 11: Spare Tire Rack, Polaris Rzr ® 4 900 Instructions
2. Install Cage Clamps using the M6x20 Bolts, and tighten in criss-cross pattern ® Spare Tire Rack, Polaris RZR 4 900 Instructions ® For Models: RZR 4 900 (2015-2016) Installation 1. Using the supplied Lug Nuts, mount your Spare Wheel and Tire onto the Spare Tire Holder. - Page 12 5. Place the white IQ Sticker on the Spare Tire Rack.
- Page 14 ttttttttttttttttttttttttttttttt ttttt tttttt tR000 00 00 t0tttttttt t RR 5tttt tttttt t00 00 05 t0tttt5t0tt Rtts stttttt 0mttt ttsttttt 5tttt0ttttttt 0 KsKK 0KR0ttt 0R R0t00 0R 00 K500K R KsKK 0KR0ttt 0R R0t00 00 00 RstK 0t0 5RtRRKR 0 KsKK 0KR0ttt 0R R0t00 00 0R Kt t tssttttstRR5KtRtRK5t00RKKt0 5RtRRKR Ktmt5ttsttt5tR0 Ktmt tmttt5tR0...