Table of Contents
Advertisement
Advertisement
Table of Contents

Related Manuals for Epson AL-M320DN


Summary of Contents for Epson AL-M320DN
- Page 1 User’s Guide NPD5658-00 EN...
-
Page 2: Table Of Contents
M310DN only)......20 Using EPSON Status Monitor....61... - Page 3 The Printer Does Not Print....92 Contacting Epson Support....111 Ready light is off.
- Page 4 AL-M320DN/AL-M310DN/AL-M220DN User's Guide Contents Help for Users in Europe....111 Help for Users in Taiwan....111 Help for Users in Singapore.
-
Page 5: Where To Find Information
Provides you with information on assembling the injury. printer and installing the printer software. ❏ Password Setup Sheet (for AL-M320DN/ Caution AL-M310DN) must be observed to avoid bodily injury. Provides you with information on how to set a Important password for the printer. -
Page 6: Note For This Publication
Corporation’s operating and maintenance instructions. ® ® Windows Microsoft Windows Server 2012 Server 2012 Operating System Seiko Epson Corporation and its affiliates shall not be Windows Microsoft ® Windows Server ® 2008 R2 liable against any damages or problems arising from the Server 2008... -
Page 7: Important Instructions
AL-M320DN/AL-M310DN/AL-M220DN User's Guide Important Instructions ❏ Make sure that there is no dust on the socket. Important Instructions ❏ Be sure to insert the plug completely into the electrical outlet. Important Safety ❏ Do not handle the plug with wet hands. -
Page 8: Finding The Place For The Printer
AL-M320DN/AL-M310DN/AL-M220DN User's Guide Important Instructions ❏ When connecting this product to a computer or ❏ Do not put your printer where the cord will be other device with a cable, ensure the correct stepped on. orientation of the connectors. Each connector has ❏... -
Page 9: Handling The Consumable Products And Maintenance Parts
-After turning on the printer, wait until Ready not use a vacuum cleaner. appears on the LCD panel (AL-M320DN/ AL-M310DN), or the Ready light turns on ❏ Wait at least one hour before using a toner cartridge (AL-M220DN). -
Page 10: Safety Information
Ozone exposure limit ❏ Do not let the paper’s edge slide across your skin because the edge of the paper may cut you. The Epson laser printer generates less than 1.5 mg/h of continuous printing. Safety Information Minimize the risk... -
Page 11: Making Copies Of The Following Items Is Prohibited By Law
AL-M320DN/AL-M310DN/AL-M220DN User's Guide Important Instructions Making copies of the following items is prohibited by law ❏ Bank bills, coins, government-issued marketable securities, government bond securities, and municipal securities ❏ Unused postage stamps, pre-stamped postcards, and other official postal items bearing valid postage ❏... -
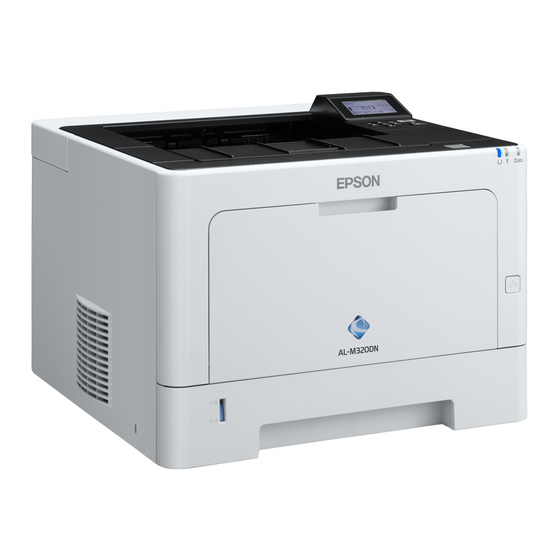
Page 12: Getting To Know Your Printer
AL-M320DN/AL-M310DN/AL-M220DN User's Guide Getting to Know Your Printer Getting to Know Your paper support Printer Inside the paper cassette Printer Parts Front and right side view AL-M320DN/AL-M310DN paper guide (side guide) paper guide (back guide) Inside the printer AL-M220DN lever to remove maintenance unit A... -
Page 13: Led Status
AL-M320DN/AL-M310DN/AL-M220DN User's Guide Getting to Know Your Printer cover E AC inlet Ethernet interface connector LED1: data light LED2: status light For the information that the lights indicate, see the table below. USB interface connector LED Status a: LED1 b: LED2... -
Page 14: Control Panel For Al-M320Dn/Al-M310Dn
AL-M320DN/AL-M310DN/AL-M220DN User's Guide Getting to Know Your Printer Control Panel for AL-M320DN/AL-M310DN Press to scroll the items on the control panel menus. u Up button l Left button Press to go back to the previous menu, or press to show the help if l Press for help is displayed. -
Page 15: Control Panel For Al-M220Dn
AL-M320DN/AL-M310DN/AL-M220DN User's Guide Getting to Know Your Printer Data light On when print data is stored in the print buffer (the section of printer memory reserved for receiving data) but not yet printed. Flashes when the printer is processing data. - Page 16 AL-M320DN/AL-M310DN/AL-M220DN User's Guide Getting to Know Your Printer Note: ❏ When the printer is in sleep or deep sleep mode, all lights are off. When in sleep or deep sleep mode, pressing any button returns the printer to the ready state.
-
Page 17: Using The Control Panel
AL-M320DN/AL-M310DN/AL-M220DN User's Guide Getting to Know Your Printer Press the r Right button to view the items in a Using the Control Panel menu. Depending on the menu, the LCD panel displays an item and the current setting separated ( YYYY=ZZZZ), or only an item ( When to make control panel YYYY). -
Page 18: From The Printer Driver
AL-M320DN/AL-M310DN/AL-M220DN User's Guide Getting to Know Your Printer Connect the printer to the same network as your Click the Optional Settings tab, and then click computer. the Printer Settings button. Note: See the following manuals for how to connect the printer to the network. -
Page 19: Language
Getting to Know Your Printer Language Item Explanation Language Specifies the language displayed on the LCD panel (AL-M320DN/AL-M310DN only) and that printed on the status sheet. Settings (default in bold): English, Français, Deutsch, Italiano, ESPAÑOL, SVENSKA, Dansk, Nederlands, SUOMI, Português, Norsk, CATALÀ, , Türkçe, Polski, Ceština, Magyar,... -
Page 20: Quick Print Jobmenu
This menu allows you to print or delete print jobs that were stored in the printer’s memory using the Quick Print Job feature (Re-Print Job, Verify Job) of the printer driver’s Reserve Job function. For instructions on using this menu, see“Using the Reserve Job function (AL-M320DN/AL-M310DN)” on page ConfidentialJobMenu (AL-M320DN/AL-M310DN only) This menu allows you to print or delete print jobs stored in the printer’s memory using the Confidential Job feature of... -
Page 21: Common Settings
AL-M320DN/AL-M310DN/AL-M220DN User's Guide Getting to Know Your Printer Common Settings Setup Menu Note: To use EpsonNet Config with a web browser to do settings, access Configuration > Common Settings > Setup Menu. Item Explanation I/F Time Out Specifies the length of the time, in seconds, before a time out when interfaces are being switched automatically. - Page 22 If a Print Overrun error message appears on the LCD panel (AL-M320DN/AL-M310DN), or on the computer screen while printing, turn this setting on and reprint your data. This reduces the amount of memory reserved for processing data so your computer may take longer to send the print job, but it will allow you to print complex jobs.
- Page 23 AL-M320DN/AL-M310DN/AL-M220DN User's Guide Getting to Know Your Printer Item Explanation A4/LT Auto Switching If LT->A4 (or A4->LT) is selected, if letter (or A4) size paper is selected for printing but there is no paper source set to letter (or A4), the printout is output on A4 (or Letter).
-
Page 24: Usb Menu
AL-M320DN/AL-M310DN/AL-M220DN User's Guide Getting to Know Your Printer Item Explanation Job Information (M320DN/ Selects the pattern in which the job information is displayed on the control panel. M310DN) If Off is selected, no job information is displayed on the control panel, even if the Pause/ Release button is pressed to cancel or skip a job. -
Page 25: Network Menu
AL-M320DN/AL-M310DN/AL-M220DN User's Guide Getting to Know Your Printer Item Explanation Buffer Size Determines the amount of memory to be used for receiving data and printing data. Note: ❏ To activate Buffer Size settings, you must turn off the printer for more than five seconds then turn it back on. - Page 26 When this setting is set to On, the printer switches to the deep sleep mode instead of the sleep mode if the printer is not operated or receives no jobs. In deep sleep mode, the Wakeup/Sleep button lights (for AL-M320DN/AL-M310DN) or the Ready light blinks (for AL-M220DN) and more power is saved than when in sleep mode.
-
Page 27: Reset Menu
AL-M320DN/AL-M310DN/AL-M220DN User's Guide Getting to Know Your Printer Sleep Schedule Menu Note: You need to use EpsonNet Config with a web browser to reset the history, because this item is not displayed on the control panel. See the Network Guide for the procedure to access EpsonNet Config with a web browser. -
Page 28: Printer Settings
AL-M320DN/AL-M310DN/AL-M220DN User's Guide Getting to Know Your Printer Printer Settings Note: ❏ The settings in the Printing Menu are overridden by the settings done in the printer driver from the Printing Preferences. ❏ You can also set items in Printing Menu from Printer Properties > Optional Settings > Printer Settings. -
Page 29: Printing Menu
If you select Auto, paper feeds from the paper source containing paper that matches your Paper Size setting. Settings (default in bold): Auto, MP Tray, Cassette1, Cassette2 , Cassette3 * For AL-M320DN/AL-M310DN only Orientation Specifies whether the page is printed in portrait or landscape orientation. Settings (default in bold): Port, Land Resolution Specifies the printing resolution. - Page 30 AL-M320DN/AL-M310DN/AL-M220DN User's Guide Getting to Know Your Printer Item Explanation Toner Save When this setting is selected, the printer saves toner by substituting a gray shade for the black inside of characters. The characters are outlined in full black on the right and lower edges.
-
Page 31: Emulation Menu
AL-M320DN/AL-M310DN/AL-M220DN User's Guide Getting to Know Your Printer Item Explanation Low Speed Mode When this mode is selected, the printing speed is slow. The slow printing is expected the following effects: - improves the fixing failure. - lowers the mechanical sounds. -
Page 32: Ps3 Menu
AL-M320DN/AL-M310DN/AL-M220DN User's Guide Getting to Know Your Printer Item Explanation SymSet Selects the default symbol set. If the font you selected in FontSource and Font Number is not available in the new SymSet setting, the FontSource and the Font Number settings are automatically replaced with the default value, IBM-US. -
Page 33: Escp2 Menu
AL-M320DN/AL-M310DN/AL-M220DN User's Guide Getting to Know Your Printer Item Explanation Binary Specifies the data format. Select On for the Binary data and select Off for the ASCII data. Note: Binary can only be used with network connection. To use the Binary data, make sure your application supports Binary data and that SEND CTRL-D Before Each Job and SEND CTRL-D After Each Job are set to No. - Page 34 AL-M320DN/AL-M310DN/AL-M220DN User's Guide Getting to Know Your Printer Item Explanation CGTable Use the character generator (CG) table option to select the graphics character table or the italics table. The graphics table contains graphic characters for printing lines, corners, shaded areas, international characters, Greek characters, and mathematical symbols. If you select Italic, the upper half of the character table is defined as italic characters.
- Page 35 AL-M320DN/AL-M310DN/AL-M220DN User's Guide Getting to Know Your Printer FX Menu Item Explanation Font Selects the font. Settings (default in bold): Courier, Prestige, Roman, Sans serif, Script, Orator S, OCR A, OCR B Pitch Selects the pitch (the horizontal spacing) of the font in fixed pitch, measured in cpi (characters per inch).
-
Page 36: I239X Menu
AL-M320DN/AL-M310DN/AL-M220DN User's Guide Getting to Know Your Printer Item Explanation Auto LF If you select Off, the printer does not send an automatic line-feed (LF) command with each carriage-return (CR). If On is selected, a line-feed command is sent with each carriage-return. - Page 37 AL-M320DN/AL-M310DN/AL-M220DN User's Guide Getting to Know Your Printer Item Explanation Text Sets the page length in lines. For this option, a line is assumed to be 1 pica (1/6 inch). If you change the Orientation, Page Size, or T.Margin settings, the page length setting automatically returns to the default for each paper size.
-
Page 38: Admin Settings
Password. ❏ Enter the administrator password to access the Admin Settings menu for AL-M320DN/AL-M310DN. ❏ The password is not set in default. For AL-M320DN/AL-M310DN press the OK button to proceed when the Admin Password is required. ❏ If you forget your password, contact your dealer. Note that when the password is initialized, the settings and data stored on the printer are deleted. -
Page 39: Bookmark Menu
AL-M320DN/AL-M310DN/AL-M220DN User's Guide Getting to Know Your Printer Bookmark Menu (For AL-M320DN/AL-M310DN) The bookmark menu appears by pressing the OK button while the LCD panel displays Ready. In the bookmark menu, the bookmarked setting items are listed and you can select one of them. The following menus are bookmarked by default. -
Page 40: Loading Paper
Available Paper and Capacities Since the quality of any particular brand or type of paper may be changed by the manufacturer at any time, Epson cannot guarantee the quality of any type of paper. Always test samples of paper stock before purchasing large quantities or printing large jobs. - Page 41 Using this auto select function, for plain paper (80 g/m²), the printer can continuously print up to 850 sheets (for AL-M320DN/AL-M310DN), or up to 350 sheets (for AL-M220DN). ❏ The output tray capacity for plain paper (80 g/m²) is up to 250 sheets (standard output tray) ❏...
-
Page 42: Available Paper Types And Weights
60 - 90 g/m² Thick 106 - 135 g/m² Thick 136 - 163 g/m² Extra-Thick 164 - 216 g/m² Super-Thick Custom 60 - 216 g/m² MP tray only 60 - 163 g/m² Paper cassette1/2/3 (for AL-M320DN/AL-M310DN) Paper cassette1 (for AL-M220DN) - Page 43 AL-M320DN/AL-M310DN/AL-M220DN User's Guide Loading Paper Important: You cannot use the following paper in this printer. It may cause printer damage, paper jams, and poor print quality: ❏ Media meant for other black-and-white laser printers, color laser printers, color copiers, black-and-white copiers, or ink jet printers ❏...
-
Page 44: Loading Paper
Perform the same procedure to load paper into the optional paper cassette. Note: For AL-M320DN/AL-M310DN, a warning message appears if the cassette that is higher than the cassette from which the printer is fed (if feeding from C3, then C2 and C1) is not inserted. -
Page 45: Mp Tray
AL-M320DN/AL-M310DN/AL-M220DN User's Guide Loading Paper Load a stack of the desired paper on the center of MP tray the paper cassette with the printable surface facing down. Note: To load envelopes, see “Envelopes” on page Note: ❏ Make sure that you do not load paper beyond the limit mark. -
Page 46: Paper Output Settings
To eject paper to the optional face-up tray, see media may be changed by the manufacturer at any “Paper Output Settings” on page time, Epson cannot guarantee the quality of any type of media. Always test samples of media stock before purchasing large quantities or printing large jobs. -
Page 47: Other Paper
AL-M320DN/AL-M310DN/AL-M220DN User's Guide Loading Paper Printer driver settings Printer driver settings Make the following settings according to the envelopes Make the following settings according to the paper you you loaded on the printer. loaded on the printer. See “Available Paper and Capacities”... - Page 48 ❏ When sharing the printer on a network, you cannot create User Defined Size at the client. ❏ If you cannot use the printer driver as explained above, access the control panel (for AL-M320DN/ AL-M310DN), or EpsonNet Config from your web browser, select Printer Settings > Printing...
-
Page 49: Printing Tasks
For how to load paper in the paper source, see “Loading Paper” on page Make the appropriate settings in the control panel (for AL-M320DN/AL-M310DN), in Printer Settings in the printer driver (for AL-M220DN), or in EpsonNet Config on your web browser. -
Page 50: Setting The Main Screen
AL-M320DN/AL-M310DN/AL-M220DN User's Guide Printing Tasks Item Explanation Paper Type Selects the type of print media loaded in the paper source. (printout image) Displays an image of the printout. Note: ❏ To show the help for each item, right-click the item and click Help on the printer driver. -
Page 51: Setting The More Options Screen
AL-M320DN/AL-M310DN/AL-M220DN User's Guide Printing Tasks Item Explanation 2-Sided Printing Prints on the front and back of the sheet. Combined with the Reduce/Enlarge function, a 2 page A3 document can be printed on one A4 size sheet. Click Settings to make Binding Edge, Binding Margin and folded booklet settings. - Page 52 This function is useful to prevent unauthorized copying. Any text string can be registered. Note: ❏ Epson does not guarantee protection from information leakage or any other damages caused by using this function. Hidden letters may appear in some cases.
-
Page 53: Setting The Maintenance Screen
AL-M320DN/AL-M310DN/AL-M220DN User's Guide Printing Tasks Setting the Maintenance Screen This screen enables you to start Job Arranger Lite, enables settings, such as Notice Settings for EPSON Status Monitor. For details, see the help for each item. For AL-M220DN users You can do Printer Adjust Menu settings on the printer’s control panel from this screen. See “Printer Adjust Menu”... -
Page 54: Setting Advanced Features
AL-M320DN/AL-M310DN/AL-M220DN User's Guide Printing Tasks Set paper that is suitable for 2-sided printing (duplex Setting Advanced printing). See “Available Paper and Capacities” on page Features Printing to fold a batch of pages in The printer driver has useful functions such as 2-sided... -
Page 55: Printing Data For A Single Page Across Multiple Sheets (Poster Printing)
AL-M320DN/AL-M310DN/AL-M220DN User's Guide Printing Tasks Select Auto (Long-edge binding) or Auto If you want to print alignment marks, select (Short-edge binding) in the 2-sided Printing list Settings - Print Cutting Guides, select either one, and then click OK. box and click Settings. - Page 56 AL-M320DN/AL-M310DN/AL-M220DN User's Guide Printing Tasks Lay Sheet 1 on Sheet 2 so that the × marks align. Lay Sheet 1 and Sheet 2 on Sheet 3 and Sheet 4 so that the × marks align. Place tape on the back to Place tape on the back to hold it temporarily.
-
Page 57: Using The Reserve Job Function (Al-M320Dn/Al-M310Dn)
AL-M320DN/AL-M310DN/AL-M220DN User's Guide Printing Tasks Using Re-Print Job/Verify Job (Quick Cut off the margins along the outer alignment marks. Print Job feature) Sending the print job Click the Maintenance tab, then click Reserve Jobs Settings. The Reserve Jobs Settings dialog box appears. -
Page 58: Printing With An Overlay
Up button to select the character and press the r Right button to determine the character. After Select Print from the File menu, select EPSON all characters are determined, press the r Right FormOverlayUTL, then click Preferences. button. -
Page 59: Improving The Clarity Of Color Documents
AL-M320DN/AL-M310DN/AL-M220DN User's Guide Printing Tasks Type the form name in the Form data box and its Improving the clarity of color description in the Description box. documents Note: Printing text clearly in black The following 9 characters cannot be used for form names: \ / : * ? "... -
Page 60: Entering The Sleep Mode Manually (For Al- M320Dn/Al-M310Dn)
To wake up the printer from sleep mode, do one of the items. following operations: - Press the Wakeup/Sleep button (For AL-M320DN/ Use EpsonNet Config with a web browser for these AL-M310DN) settings. See the Network Guide for the procedure to - Press any button (for AL-M220DN) access EpsonNet Config with a web browser. -
Page 61: Changing The Printer Driver's Default Settings (For Administrators)
Accessing EPSON Status Monitor - A network communication has been planned to start within a minute. EPSON Status Monitor is a utility program on your - Bonjour is set to On (default) and within 10 computer that monitors your printer and gives you minutes after the printer has been turned on. -
Page 62: Notice Settings
Printing Tasks When you want to know the current status of the Accessing from the printer driver: printer, click the EPSON Status Monitor tray icon on the taskbar, then select the printer name and menu you want to access. When you want to know the remaining service lives of the replacement parts, click Replacement Parts Information. -
Page 63: From The Computer
AL-M320DN/AL-M310DN/AL-M220DN User's Guide Printing Tasks Press the d Down or u Up button to select the job that you want to cancel, then press the OK button. Press the d Down or u Up button to select Cancel Job, then press the OK button. Printing is canceled. -
Page 64: Uninstalling And Installing Software
If you uninstall the printer driver, EPSON Status Monitor is also uninstalled. Installing Software Note for Mac OS users: ❏ To uninstall all drivers for Epson page printer at once, use the uninstaller. Download the uninstaller from the Epson website. Uninstalling Software http://www.epson.eu/Support... -
Page 65: Installing The Postscript Printer Driver With Windows
Click Have Disk and specify the following path Note: for the Software Disc. If your disc drive is D:, the If your computer does not have a disc drive, path will be D:\Driver\PostScript\eppsnt.inf. download the driver from the Epson website. Then click OK. http://www.epson.eu/Support (Europe) Note: Connect your computer to the printer with a USB Change the drive letter as needed for your system. -
Page 66: Installing The Postscript Printer Driver With Mac Os
Installing the PostScript printer For Windows Server 2003, click Start, point to driver Settings, and click Printers. Then double-click the Add Printer icon. Go to the following Epson support website to download and install the driver. The Add Printer Wizard appears. http://www.epson.eu/Support (Europe) Select Add a local printer. -
Page 67: Installing The Pcl Printer Driver (For Windows Only)
Scan" for Mac OS X 10.7 or later). Installing the PCL printer driver (For Windows only) Epson Universal Print Driver is the universal PCL6 compatible print driver that has the following features: ❏ It supports the basic print functions needed for business situations. -
Page 68: Maintaining The Printer
“Handling the consumable products and maintenance parts” on page If a consumable product reaches the end of its service life, the printer displays the following message on the LCD panel or the window of EPSON Status Monitor. Replacement Messages/Lights For AL-M320DN/AL-M310DN... - Page 69 AL-M320DN/AL-M310DN/AL-M220DN User's Guide Maintaining the Printer Statuses and handling methods (status monitor messages in bold) Replace Toner cartridge The toner cartridge has reached the end of their service life and need to be replaced. For details about replacement, see the instructions that come with the toner...
-
Page 70: Cleaning The Printer
AL-M320DN/AL-M310DN/AL-M220DN User's Guide Maintaining the Printer Remove the maintenance unit A. Cleaning the Printer The printer needs only minimal cleaning to keep it in good condition. If the printer’s outer case is dirty or dusty, turn off the printer and clean it with a soft, clean cloth moistened with a mild detergent. - Page 71 AL-M320DN/AL-M310DN/AL-M220DN User's Guide Maintaining the Printer Gently wipe the metallic roller inside with a soft Insert the maintenance unit A. and dry cloth to remove the grime and paper particles. Close covers F1 and F2. Hold the grip of the cleaner on the top part of maintenance unit B and move it back and forth, 2 or 3 times.
-
Page 72: Troubleshooting
Common Settings from the control panel, then select Clear Warning. See “How to access the control panel menus (AL-M320DN/AL- Check Cassette xx (AL-M320DN/AL-M310DN only) M310DN)” on page 17 for instructions. This is the message that appears when warnings are set for no cassettes and no paper. - Page 73 If a paper jam occurs at two or more locations Feed Roller C1 Needed Soon, Feed Roller C2 Needed simultaneously, the corresponding multiple locations Soon (AL-M320DN only), Feed Roller C3 are displayed. (AL-M320DN only) For details about clearing paper jams, see “Clearing...
- Page 74 There are errors in the ROM module. Turn off the different from those when using genuine Epson toner printer and contact your dealer. cartridges. Epson shall not be liable for any damages or problems arising from the use of consumable products not manufactured or approved by Epson.
- Page 75 (network connections cannot be done for updates during recovery mode). Reset to Save 2. Download the newest firmware from the Epson web A control panel menu setting was changed while the site, and then update. printer was printing. Press the OK button to clear this message.
- Page 76 AL-M320DN/AL-M310DN/AL-M220DN User's Guide Troubleshooting Wrong Password (AL-M320DN/AL-M310DN only) - When printing a job specified as A4 with the printer driver, there is no paper source that is set as A4 or as LT This appears if you change your password in Password (alternate size for A4) in the Tray Menu.
- Page 77 AL-M320DN/AL-M310DN/AL-M220DN User's Guide Troubleshooting Install only the toner cartridge listed in “Consumable Products and Options” on page 109.
-
Page 78: Status And Error Lights (For Al-M220Dn)
You can check the printer status from combinations and patterns of the lights on the control panel. Note: You can check the printer status and error easily on the Windows computer by using EPSON Status Monitor. See “Using EPSON Status Monitor” on page 61 for more information. - Page 79 The printout and remaining service life of the toner cartridge displayed on the control panel may be different from those when using genuine Epson toner cartridges. Epson shall not be liable for any damages or problems arising from the use of consumable products not manufactured or approved by Epson.
- Page 80 AL-M320DN/AL-M310DN/AL-M220DN User's Guide Troubleshooting Statuses and handling methods (status monitor messages in bold) Turn Paper MP Tray, Turn Paper Cassette1 The orientation (portrait or landscape) of the paper that is set in the indicated paper source is not correct. Change the orientation of the paper in the paper source.
- Page 81 AL-M320DN/AL-M310DN/AL-M220DN User's Guide Troubleshooting Statuses and handling methods (status monitor messages in bold) There is not enough memory in the printer. Print Overrun The required time to process the print data exceeded the print engine speed because the current page is too complex. Press the OK button to resume printing, or cancel the print job.
- Page 82 AL-M320DN/AL-M310DN/AL-M220DN User's Guide Troubleshooting Statuses and handling methods (status monitor messages in bold) F/W Update Firmware is being updated. Do not turn off the power until the update is complete. Filling Toner Wait for the toner to fill. Form Feed The printer is ejecting paper due to a user request.
- Page 83 AL-M320DN/AL-M310DN/AL-M220DN User's Guide Troubleshooting Statuses and handling methods (status monitor messages in bold) Reboot to apply settings A setting item that is not enabled unless the printer is restarted has been changed. Turn the printer on and off, or do a reset all.
-
Page 84: Printing A Status Sheet
Paper jams may occur in more than one panel, as an example. location simultaneously. For example, for AL-M320DN/AL-M310DN and when the LCD panel displays a message, such as Clear Paper Jam C1 DM, Turn on the printer. The LCD panel shows clear the jams in the order they are displayed. -
Page 85: F (Cover F)
AL-M320DN/AL-M310DN/AL-M220DN User's Guide Troubleshooting ❏ If jammed paper is torn and remains in the printer, Caution: or if paper is jammed in a place not mentioned in ❏ Be careful of the covers opening and closing this section, contact your dealer. - Page 86 AL-M320DN/AL-M310DN/AL-M220DN User's Guide Troubleshooting Press the button on the top, then open covers F1 While holding up inside cover C, remove any and F2. sheets of paper. Press lever A on left side. Insert the maintenance unit B. Remove the maintenance unit A.
-
Page 87: E (Cover E)
AL-M320DN/AL-M310DN/AL-M220DN User's Guide Troubleshooting Close cover E at the back. E (Cover E) Open cover E at the back. Press the button on the top, open and close cover F1, then close cover F2. Remove any sheet of paper. If you cannot pull the paper out from the upper part, go to step 3. -
Page 88: C1 Dm (Cassette1/Dm Knob)
AL-M320DN/AL-M310DN/AL-M220DN User's Guide Troubleshooting Insert the paper cassette. C1 DM (Cassette1/DM knob) Remove the paper cassette. Lower the inside cover with your finger on the blue knob. Press the button on the top, open and close cover F1, then close cover F2. -
Page 89: C1 - C3 (Cassette 1 - 3)
Config on your web browser, or in Printer Settings in the printer driver (for AL-M220DN). C1 - C3 (Cassette 1 - 3) For AL-M320DN/AL-M310DN, these instructions use the standard paper cassette (C1) as an example. Use the same procedure for optional paper cassettes C2 and C3. -
Page 90: Paper Does Not Feed Properly
AL-M320DN/AL-M310DN/AL-M220DN User's Guide Troubleshooting Paper Does Not Feed Properly Cause What to do The paper guides are not set correctly. Make sure that the paper guides in all the paper cassettes and the MP tray are set to the correct paper size positions. -
Page 91: The Printer Turns Off Automatically
“Support Menu” on page 106. The printer is in the power off mode (the Wakeup/ Turn on the printer by pressing the power switch. For AL-M320DN/ AL-M310DN, pressing the Wakeup/Sleep button also makes the Sleep button blinks for AL-M320DN/AL-M310DN or all lights are off for AL-M220DN). -
Page 92: The Printer Does Not Print
The printer is in the power off mode (All lights go out). Turn on the printer by pressing the power switch. For AL-M320DN/ AL-M310DN, pressing the Wakeup/Sleep button also makes the printer available for printing. -
Page 93: Printout Problems
For AL-M320DN/AL-M310DN, if RAM Disk is set to Maximum or continue printing. Normal on the control panel, you can increase the available memory space by changing this setting to Off. -
Page 94: The Printout Is Not What You Expected
Reduce the contents of print jobs, or increase the available memory print jobs. on your printer. For AL-M320DN/AL-M310DN, if RAM Disk is set to Maximum or Normal on the control panel, you can increase the available memory space by changing this setting to Off. -
Page 95: Printing In The Ps3 Mode Problems
AL-M320DN/AL-M310DN/AL-M220DN User's Guide Troubleshooting The last page of a two-sided printout is printed on the wrong side of the paper Cause What to do Convert to Simplex is set to Odd Page or 1 Page. For jobs with three or more pages, set Convert to Simplex to Off or 1 Page to do duplex printing. -
Page 96: The Printer Does Not Print Correctly In The Postscript Mode
AL-M320DN/AL-M310DN/AL-M220DN User's Guide Troubleshooting The printer does not print correctly in the PostScript mode Cause What to do The printer’s emulation mode setting is incorrect. The printer is set to the Auto mode by default, so that it can automatically determine the encoding used in the received print job data and select the appropriate emulation mode. -
Page 97: The Edges Of Texts And/Or Images Are Not Smooth
AL-M320DN/AL-M310DN/AL-M220DN User's Guide Troubleshooting The edges of texts and/or images are not smooth Cause What to do The Print Quality is set to Fast. Change the Print Quality setting to Fine. The printer does not print normally via the USB interface... -
Page 98: Other Problems
AL-M320DN/AL-M310DN/AL-M220DN User's Guide Troubleshooting Other Problems The optional product is not available Cause What to do The printer does not recognize the optional product. Print a configuration status sheet to see if the printer recognizes the optional product. If not, reinstall the optional product. -
Page 99: Cannot Access The Shared Printer
AL-M320DN/AL-M310DN/AL-M220DN User's Guide Troubleshooting Cannot access the shared printer Cause What to do Inappropriate texts are used for the Share name of the Do not use spaces or hyphens for the Share name. shared printer. An additional driver cannot be installed on the client Install the printer drivers from the Software Disc. -
Page 100: Transporting The Printer
Remove the following items from the printer. ❏ Interface cables ❏ Power cord ❏ Loaded paper ❏ Interface cables ❏ Installed options (For AL-M320DN/ ❏ Loaded paper AL-M310DN) ❏ Installed options (For AL-M320DN/ Be sure to lift the printer by the correct positions AL-M310DN) as shown below. -
Page 101: Installing Options (Al-M320Dn/Al-M310Dn)
AL-M320DN/AL-M310DN/AL-M220DN User's Guide Troubleshooting Press down on lever A on the left side. Installing Options (AL-M320DN/ AL-M310DN) Optional paper cassette unit For details about the paper types and sizes that you can Remove maintenance unit A. use with the optional paper cassette unit, see “Available... - Page 102 AL-M320DN/AL-M310DN/AL-M220DN User's Guide Troubleshooting Installing the optional paper cassette Removing the optional paper unit cassette unit Perform the installation procedure in reverse. Turn the printer off and unplug the power cord and interface cable. Important: Be sure to unplug the power cord from the printer to prevent getting an electric shock.
-
Page 103: Appendix
AL-M320DN/AL-M310DN/AL-M220DN User's Guide Appendix Appendix Technical Specifications General Item AL-M320DN AL-M310DN AL-M220DN Printing method Laser beam scanning and dry electrophotographic process Resolution 600 × 600 dpi, 1200 × 1200 dpi 40 ppm 35 ppm 30 ppm Continuous printing speed on A4 size paper... - Page 104 AL-M320DN/AL-M310DN/AL-M220DN User's Guide Appendix Item AL-M320DN AL-M310DN AL-M220DN Printable area The assured printable area is an area 4 mm from all sides. * 4 mm Note: The printable area may be smaller depending on the application. *2*3*4 Dimensions (Width ×...
-
Page 105: Electrical
AL-M320DN/AL-M310DN/AL-M220DN User's Guide Appendix Electrical AL-M320DN AL-M310DN AL-M220DN Rated voltage 110 V 220-240 V 110 V 220-240 V 110 V Rated frequency 50 Hz/60 Hz 50 Hz/60 Hz 50 Hz/60 Hz 50 Hz/60 Hz 50 Hz/60 Hz Rated current 8.8 A 4.2 A... -
Page 106: Support Menu
AL-M320DN/AL-M310DN/AL-M220DN User's Guide Appendix Support Menu You can make special settings by using the control panel. Normally you do not need to change the settings. For AL-M320DN/AL-M310DN: Pressing the d Down button while turning the printer on, opens the SUPPORT MODE. Press the r Right button, select Common Settings by pressing the u Up or d Down button, then select the Support Menu. - Page 107 AL-M320DN/AL-M310DN/AL-M220DN User's Guide Appendix Item Explanation 001 Plain Adjusts the print quality for plain paper according to paper type. Settings (default in bold): 1: Plain paper 2: Semi-thick paper 020 Special Adjusts the print quality for special paper according to the paper type.
- Page 108 AL-M320DN/AL-M310DN/AL-M220DN User's Guide Appendix Item Explanation 054 Scan Offset2 Do this adjustment after you have eliminated the variation between the paper sources by 058/062/066/070/074/078. This function adjusts the horizontal position at which to start printing. The position moves to the right of the sheet of paper as the value increases. This setting is used when printing on the front side of the sheet of paper for duplex printing.
-
Page 109: Consumable Products And Options
15 to 80% RH Extra Capacity Toner Cartridge (for 10078 ❏ AL-M320DN) These products comply with CE marking requirements in accordance with EMC Directive 2004/108/EC. Maintenance Unit A (for AL-M320DN/ 10081 AL-M310DN) Maintenance Unit B (for AL-M320DN/ 10082 AL-M310DN) Options... -
Page 110: Copyrights, Trademarks, And Licenses
\Manual\LICENSE.pdf. EPSON, EPSON EXCEED YOUR VISION, EXCEED YOUR VISION, EPSON ESC Page, EPSON ESC/P and 4) The license terms of each open source software their logos are registered trademarks and Epson ESC/P2 program are described on \Manual\LICENSE_D.pdf. -
Page 111: Where To Get Help
Epson support services for assistance. If Epson support for your area is not listed below, contact the dealer where you purchased your product. Epson support will be able to help you much more quickly if you give them the following information: ❏ Product serial number (The serial number label is usually on the back of the product.) -
Page 112: Help For Users In Singapore
❏ Enquiries on repair service and warranty Repair service center: http://www.tekcare.com.tw/branchMap.page TekCare corporation is an authorized service center for Epson Taiwan Technology & Trading Ltd. Help for Users in Singapore Sources of information, support, and services available from Epson Singapore are: World Wide Web http://www.epson.com.sg... -
Page 113: Help For Users In Vietnam
AL-M320DN/AL-M310DN/AL-M220DN User's Guide Where To Get Help ❏ Product usage questions or problems ❏ Enquiries on repair service and warranty Help for Users in Vietnam Contacts for information, support, and services are: Epson Hotline Phone: 84-8-823-9239 Service Center: 80 Truong Dinh Street, District 1, Hochiminh City... - Page 114 AL-M320DN/AL-M310DN/AL-M220DN User's Guide Where To Get Help Province Company Name Address Phone E-mail WEST JAWA ESC Bandung JL. CIHAMPELAS NO. 48A-BANDUNG (+6222)4207033 JABAR 40116 bdg-technical@epson-indone sia.co.id DI YOGYAKARTA ESC Yogyakarta YAP Square, Blok A No.6 Jl. C (+62274)581065 Simanjutak YOGYAKARTA - DIY ygy-technical@epson-indone sia.co.id...
-
Page 115: Help For Users In Hong Kong
To obtain technical support as well as other after-sales services, users are welcome to contact Epson Hong Kong Limited. Internet Home Page http://www.epson.com.hk Epson Hong Kong has established a local home page in both Chinese and English on the Internet to provide users with the following information: ❏ Product information ❏ Answers to Frequently Asked Questions (FAQs) ❏... -
Page 116: Help For Users In The Philippines
Information on product specifications, drivers for download, Frequently Asked Questions (FAQ), and E-mail Enquiries are available. Technical support To obtain technical support as well as other after sales services, users are welcome to contact the Epson Philippines Corporation at the telephone and fax numbers and e-mail address below: Trunk Line:...