Table of Contents
Advertisement
Available languages
Available languages
Quick Links
Advertisement
Chapters
Table of Contents
Troubleshooting

Related Manuals for Pioneer DV-LX50


Summary of Contents for Pioneer DV-LX50
- Page 1 Operating Instructions | Instruzioni per l’uso DVD Player Lettore DVD...
- Page 2 Thank you for buying this Pioneer product. Please read through these operating instructions so you will know how to operate your model properly. After you have finished reading the instructions, put them away in a safe place for future reference.
- Page 3 Check the power cord once in a while. When you find it damaged, ask your nearest PIONEER authorized service center or your dealer for a replacement. This product incorporates copyright protection technology that is protected by method claims of certain U.S.
-
Page 4: Table Of Contents
Connecting to an AV receiver ......12 Controlling this player via another Pioneer component ..13 Connecting using HDMI . -
Page 5: Before You Start
HDMI Licensing LLC. • HDMI Control By connecting this unit to a Pioneer plasma television, AV system (amplifier or AV receiver etc.), or HD AV Converter with an HDMI cable, you can control this unit from the connected plasma... -
Page 6: What's In The Box
What’s in the box Please confirm that the following accessories are in the box when you open it. • Remote control • AA/R6P dry cell batteries x 2 • Audio cable (red/white plugs) • Video cable (yellow plug) • Power cable •... -
Page 7: Disc/Content Format Playback Compatibility
Disc/content format playback compatibility This player is compatible with a wide range of disc types (media) and formats. Playable discs will generally feature one of the following logos on the disc and/or disc packaging. Note however that some disc types, such as recordable CD and DVD, may be in an unplayable format —... -
Page 8: Divx Video Compatibility
About MPEG-4 AAC Advanced Audio Coding (AAC) is at the core of the MPEG-4 AAC standard, which incorporates MPEG-2 AAC, forming the basis of the MPEG-4 audio compression technology. The file format and extension used depend on the application used to encode the AAC file. -
Page 9: Connections
S-Video and RGB (page 11). CONTROL IN Use to control this player from the remote sensor of another Pioneer component with a CONTROL OUT terminal and bearing the mark. Connect the CONTROL OUT of the other component to the CONTROL IN of this player using a mini-plug cord (page 13). -
Page 10: Easy Connections
Easy connections Important • Before making or changing any connections, switch off the power and disconnect the power cable from the AC outlet. • The setup described here is a basic setup that allows you to play discs using just the cables supplied with the player. In this setup, stereo audio is played through the speakers in your TV. -
Page 11: Connecting Using A Scart Av Cable
Connecting using a SCART AV cable A SCART-type AV connector is provided for connection to a TV or AV receiver. The video output is switchable between ordinary composite, S-Video and RGB. See AV Connector Out on page 33 for how to set it. The SCART AV connector also outputs analog audio, so there is no need to also connect the AUDIO OUT (5.1ch) jacks. -
Page 12: Connecting To An Av Receiver
AV receiver if you prefer. • You usually have to connect the same kind of video cable between your DVD player and AV receiver, and between your AV receiver and TV. Connecting the multichannel analog outputs If your AV receiver has 5.1 channel analog inputs, we recommend... -
Page 13: Controlling This Player Via Another Pioneer Component
The CONTROL IN jack allows you to control this player via the remote control sensor of another Pioneer component — typically an AV receiver — that has a CONTROL OUT jack. Remote control signals are passed through to the player from the remote sensor of the other component, allowing you greater freedom in the placement of your player. -
Page 14: Connecting Using Hdmi
Connecting using HDMI If you have a HDMI equipped monitor or display, you can connect it to this player using a commercially available HDMI cable. The HDMI connector outputs uncompressed digital video, as well as almost every kind of digital audio that the player is compatible with, including DVD-Video, DVD-Audio (see below for limitations), SACD, Video CD/Super VCD, CD, WMA, MP3, MPEG-4 AAC, DivX video and WMV. -
Page 15: Changing The Output Resolution
Changing the output resolution Use the OUTPUT RESOLUTION button located on the remote control to switch the output resolution for the HDMI and component video outputs. Depending on the type of disc or file being played, the signals may not be output with the resolution set at Resolution (Max) (page 33). For details, see the table below. -
Page 16: Controls And Displays
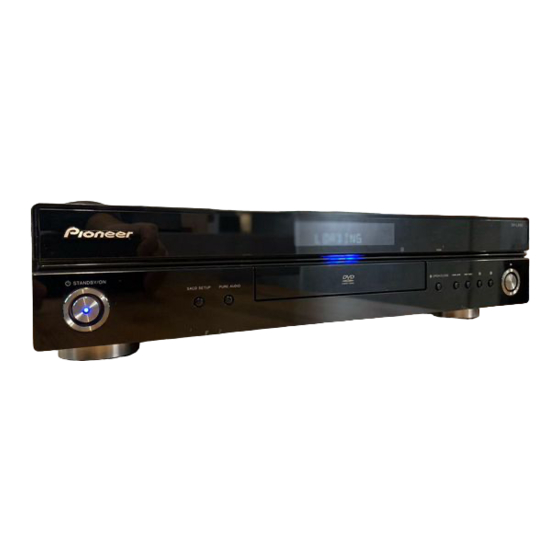
Chapter 3 Controls and displays Front panel STANDBY/ON (page 20) Press to switch the player on (the power indicator and indicator in the middle of the unit light up when the power is on) or into standby. SACD SETUP Press to select which part of an SACD disc you want to listen to —... -
Page 17: Display
Display 5.1CH Lights when analog 5.1 channel output is selected (page 36). V-PART Lights when playing a video part of a DVD disc. PRGSVE Lights when the video output is 1080i/720p/576p/480p (page 11). Lights during multi-angle scenes on a DVD disc (page 30). GUI (Graphical User Interface) Lights when a menu is displayed on-screen. -
Page 18: Remote Control
Remote control STANDBY/ON (page 20) FL DIMMER Press to change the display brightness. Number buttons (page 22) CLEAR (pages 19 and 28) AUDIO (page 29) SUBTITLE (page 29) TOP MENU (page 23) ENTER & cursor buttons (page 21) HOME MENU (page 21) 10 SURROUND (page 31) 11 PLAY MODE (page 27) 12 ... -
Page 19: Setting Up The Remote To Control Your Tv
Goldstar 10, 23 Grandiente Hitachi 06, 24, 25, 32 Magnavox 12, 29 Mitsubishi Panasonic 08, 22, 41 Philips Pioneer 00, 35, 40, 44 01, 15, 16, 17, 18 Samsung 73, 75 Sanyo 14, 21 Sharp 02, 19, 27 Sony Toshiba... -
Page 20: Getting Started
Chapter 4 Getting started Switching on and setting up When you switch the player on for the first time the Startup Navigator screen appears. We recommend using this to make a few basic player settings. Switch on your TV and set the video input to this player. Press the ... -
Page 21: Using The On-Screen Displays
Use the / buttons to select whether or not to display a black band on the left and right sides of the screen when playing DVDs recorded with a 4:3 aspect ratio (‘Yes’ or ‘No’), then press ENTER. Select ‘Finish’ to accept the settings and exit the Startup Navigator, or ‘Go Back’... -
Page 22: Playing Discs
Playing discs The basic playback controls for playing DVD, CD, SACD, Video CD/ Super VCD, DivX video/WMV and MP3/WMA/MPEG-4 AAC discs are covered here. Further functions are detailed in the next chapter. For details on playing JPEG picture discs, see Viewing a JPEG slideshow on page 25. - Page 23 Resume and Last Memory With the exception of DVD-Audio and SACD discs, when you stop playback of a DVD, CD, or Video CD/Super VCD or DivX video/WMV discs, RESUME is shown in the display indicating that you can resume playback again from that point. If the disc tray is not opened, the next time you start playback the display shows RESUME and playback resumes from the resume point.
- Page 24 • After I load a DVD disc, it ejects automatically after a few seconds! Most likely, the disc is the wrong region for your player. The region number should be printed on the disc; check it against the region number of the player (which you can find on the rear panel).
-
Page 25: Playing Discs
Chapter 5 Playing discs Note • Many of the functions covered in this chapter apply to DVD and SACD discs, Video CDs/Super VCDs, CDs, DivX video/WMV and MP3/WMA/MPEG-4 AAC/JPEG discs, although the exact operation of some varies slightly with the kind of disc loaded. •... -
Page 26: Browsing Dvd Or Video Cd/Super Vcd Disc With The Disc Navigator
Browsing DVD or Video CD/Super VCD disc with the Disc Navigator Use the Disc Navigator to browse through the contents of a DVD-Video, VR mode DVD-R/-RW or Video CD/Super VCD disc to find the part you want to play. Important •... -
Page 27: Looping A Section Of A Disc
• To play the contents of the whole disc rather than just the current folder, exit the Disc Navigator and start playback using the PLAY button. Looping a section of a disc The A-B Repeat function allows you to specify two points (A and B) within a track (CD, Video CD/Super VCD) or title (DVD-Video and DVD-RW) that form a loop which is played over and over. -
Page 28: Using Random Play
Using random play Use the random play function to play titles or chapters (DVD-Video), Groups (DVD-Audio), or tracks (DVD-Audio, SACD, CD, Video CD/ Super VCD) at random. (Note that the same track/title/chapter may play more than once.) You can set the random play option when a disc is playing or stopped. -
Page 29: Searching A Disc
• Use the following controls during program play: Button What it does PLAY MODE Save the program list and exit the program edit screen without starting playback (HOME MENU does the same). NEXT Skip to the next step in the program list. Other functions available from the program menu There are a number of other options in the program menu in addition to Create/Edit. -
Page 30: Switching Camera Angles
Switching camera angles Some DVD discs feature scenes shot from two or more angles — check the disc box for details. When a multi-angle scene is playing, a to let you know that other angles are available (this can be switched off if you prefer—see Display settings on page 34). -
Page 31: Audio Settings And Video Adjust Menus
Chapter 6 Audio Settings and Video Adjust menus Audio Settings menu The Audio Settings menu offers features for adjusting the way discs sound. Press HOME MENU and select ‘Audio Settings’ from the on- screen display. Audio Settings Select and change settings using the /// (cursor) buttons, and ENTER. -
Page 32: Initial Settings Menu
Chapter 7 Initial Settings menu Using the Initial Settings menu The Initial Settings menu provides audio and video output settings, parental lock settings, and display settings, among others. If an option is grayed out it means that it cannot be changed at the current time. -
Page 33: Video Output Settings
Video Output settings Setting Option TV Screen 4:3 (Letter Box) • (This setting effective for analog and HDMI 4:3 (Pan & Scan) video output. See also Screen sizes and disc formats on page 40.) 16:9 (Wide) 16:9 (Compressed) AV Connector Out Video •... -
Page 34: Display Settings
Display settings Setting Option OSD Language English • Languages as displayed On-screen displays are shown in the language selected. Angle Indicator On • Options settings Setting Option HDMI Control On • Pure Audio Button Available Unavailable • SACD Playback 2ch Area • Multi-ch Area CD Area DVD Playback Mode... -
Page 35: Parental Lock
Parental Lock • Default level: Off; Default password: none; Default Country/Area code: us (2119) To give you some control over what your children watch on your DVD player, some DVD-Video discs feature a Parental Lock level. If your player is set to a lower level than the disc, the disc won’t play. Some discs also support the Country/Area Code feature. -
Page 36: About Divx® Vod Content
® About DivX VOD content In order to play DivX VOD (video on demand) content on this player, you first need to register the player with your DivX VOD content provider. You do this by generating a DivX VOD registration code, which you submit to your provider. - Page 37 About the audio output settings The table below shows how the audio settings you make in the Initial Settings menu (page 32) affect the output from the 2 channel and the 5.1 channel analog outputs, and from the digital outputs with various types of disc. Disc audio format Player setting Dolby Digital...
-
Page 38: About The Hdmi Audio Output Settings
About the HDMI audio output settings The table below shows how the audio settings you make in the HDMI Out (page 32) and Audio Output Mode (page 36) screens affect the HDMI output with various types of disc. Disc audio format Dolby Digital Dolby Digital (karaoke) Linear PCM... -
Page 39: Speaker Distance
Speaker Distance • Default settings: all speakers 3.0m You only need to make this setting if you connected this player to your amplifier using the 5.1 channel analog outputs. These settings do not affect any digital audio output. To get the best surround sound from your system, you should set up the speaker distances from your listening position. -
Page 40: Additional Information
Do not use cracked, chipped, warped, or otherwise damaged discs as they may damage the player. This player is designed to be used only with conventional, fully circular discs. Do not use shaped discs. Pioneer disclaims all liability arising in connection with the use of shaped discs. Cleaning discs Fingerprints and dust on discs can affect playback performance. -
Page 41: Setting The Tv System
All DVD-Video discs carry a region mark on the case somewhere that indicates which region(s) of the world the disc is compatible with. Your DVD player also has a region mark, which you can find on the rear panel. Discs from incompatible regions will not play in this player. -
Page 42: Troubleshooting
Sometimes the trouble may lie in another component. Inspect the other components and electrical appliances being used. If the trouble cannot be rectified after checking the items below, ask your nearest Pioneer authorized service center or your dealer to carry out repair work. - Page 43 Problem Remedy No audio, or audio is distorted. • No audio is output during slow motion playback or when scanning discs other than Audio CDs and SACDs. • Some DVD discs do not output digital audio: Switch your amplifier to the player’s analog outputs. •...
-
Page 44: Hdmi Troubleshooting
• Certain functions are not supported on some plasma televisions. • This player does not support HDMI Control-compatible components other than those made by Pioneer. • This unit will not function properly with components that do not support HDMI Control, or when connected with components other than those made by Pioneer. -
Page 45: Glossary
• Static electricity or other external influences may cause malfunctioning of this unit. In this case, unplug the power cord and then plug back in. This will usually reset the unit for proper operation. If this does not correct the problem, please consult your nearest Pioneer service center. -
Page 46: Language Code List
Language code list Language (Language code letter), Language code Japanese (ja), 1001 English (en), 0514 French (fr), 0618 German (de), 0405 Italian (it), 0920 Spanish (es), 0519 Chinese (zh), 2608 Dutch (nl), 1412 Portuguese (pt), 1620 Swedish (sv), 1922 Russian (ru), 1821 Korean (ko), 1115 Greek (el), 0512 Afar (aa), 0101... -
Page 47: Specifications
The specifications and design of this product are subject to change without notice, due to improvement. 200 mVrms (1 kHz, –20 dB) 200 mVrms (1 kHz, –20 dB) Published by Pioneer Corporation. Copyright © 2007 Pioneer Corporation. All rights reserved. - Page 48 Grazie per aver acquistato questo prodotto Pioneer. Leggere attentamente questo manuale di istruzioni per familiarizzarsi con l’uso dell’apparecchio. Conservare poi il manuale per ogni eventuale futuro riferimento. IMPORTANTE Il simbolo del lampo con terminale a forma di freccia situato all’interno di un triangolo equilatero serve ad avvisare l’utilizzatore...
- Page 49 AVVERTIMENTO RIGUARDANTE IL FILO DI ALIMENTAZIONE Questo prodotto include tecnologia di protezione dei diritti d’autore protetta da rivendicazioni metodologiche di certi brevetti statunitensi e di altri diritti di proprietà intellettuale posseduti dalla MacroVision Corporation e da terze parti. L’uso di questa tecnologia di protezione dei diritti d’autore deve venire autorizzata dalla Macrovision Corporation.
- Page 50 Controllo di questo lettore tramite un altro componente Pioneer ....... . . 13 Collegamento tramite HDMI .
-
Page 51: Informazioni Preliminari
HDMI Licensing LLC. • HDMI Control Collegando questo apparecchio ad un televisore al plasma Pioneer, a un sistema AV (amplificatore o ricevitore AV, ecc.) o a un convertitore HD AV con un cavo HDMI, è possibile controllare l’apparecchio dal televisore al plasma collegato. Il collegamento del... -
Page 52: Contenuto Della Confezione
Contenuto della confezione Verificare che i seguenti accessori siano inclusi nella confezione. • Telecomando • Batterie a secco AA/R6P x 2 • Cavo audio (spine rosse/bianche) • Cavo video (spina gialle) • Cavo di alimentazione • Istruzioni per l’uso • Documento di garanzia Inserimento delle batterie nel telecomando •... -
Page 53: Compatibilità Di Riproduzione Dei Diversi Formati Di Disco/Contenuti
Compatibilità di riproduzione dei diversi formati di disco/contenuti Questo lettore è compatibile con una vasta gamma di tipi di dischi (supporti) e di formati. I dischi riproducibili sono contrassegnati di norma con uno dei seguenti loghi del disco e/o sulla sua custodia. Tenere presente che alcuni tipi di disco, ad esempio i CD o DVD registrabili, possono essere di un formato non riproducibile. - Page 54 Informazioni su MPEG-4 AAC Advanced Audio Coding (AAC) è la parte essenziale dello standard MPEG-4 AAC, che comprende MPEG-2 AAC e costituisce la base della tecnologia di compressione audio MPEG-4. Il formato del file e l’estensione usata dipendono dall’applicazione utilizzata per la codifica del file ACC.
-
Page 55: Collegamenti
è commutabile tra video, S-Video e RGB (pagina 11). CONTROL IN Utilizzare per controllare questo lettore dal sensore remoto di un altro componente Pioneer con un terminale CONTROL OUT e recante il simbolo . Collegare CONTROL OUT dell’altro componente a CONTROL IN del lettore con uno spinotto (pagina 13). -
Page 56: Collegamenti Facili
Collegamenti facili Importante • Prima di effettuare o modificare i collegamenti, spegnere l’apparecchio e scollegare il cavo di alimentazione dalla presa CA. • La seguente installazione è basica e consente di riprodurre dei dischi utilizzando solo i cavi in dotazione con il lettore. In questa installazione l’audio stereo viene riprodotto attraverso i diffusori del televisore. -
Page 57: Collegamento Tramite Cavo Av Scart
Collegamento tramite cavo AV SCART Un connettore AV SCART è in dotazione per il collegamento ad un televisore o ricevitore AV. L’uscita video è commutabile tra composito, S-Video e RGB. Per le modalità di selezione, consultare AV Connector Out a pagina 33. Il connettore AV SCART inoltre emette audio analogico, per cui non è... -
Page 58: Collegamento A Un Ricevitore Av
Commutazione dell’uscita video interlacciato su 576i/480i con i comandi del pannello anteriore Portare il lettore sulla modalità standby, quindi, con i comandi del pannello anteriore, premere STANDBY/ON mentre si tiene premuto per riportare il lettore su 576i/480i. •... -
Page 59: Controllo Di Questo Lettore Tramite Un Altro Componente Pioneer
(ad esempio, un ricevitore AV). Il telecomando non funzionerà correttamente se puntato in direzione di questo apparecchio. • Non è possibile utilizzare System Control con componenti che non dispongono di presa System Control oppure prodotti da compagnie diverse da Pioneer. -
Page 60: Collegamento Tramite Hdmi
Collegamento tramite HDMI Se si dispone di un monitor o di un display dotato di interfaccia HDMI, è possibile collegarlo al lettore mediante un cavo HDMI disponibile in commercio. Il connettore HDMI presenta in uscita un segnale video digitale non compresso, nonché... -
Page 61: Modifica Della Risoluzione In Uscita
Modifica della risoluzione in uscita Utilizzare il tasto OUTPUT RESOLUTION situato sul telecomando per cambiare la risoluzione delle uscite HDMI e video component. A seconda del tipo di disco o file riprodotto, i segnali potrebbero non essere emessi con la risoluzione impostata su Resolution (Max) (pagina 33). -
Page 62: Comandi E Display
Capitolo 3 Comandi e display Pannello anteriore STANDBY/ON (pagina 20) Premere per accendere il lettore (l’indicatore di alimentazione e quello al centro dell’apparecchio si illuminano quando l’apparecchio è acceso) o portarlo in standby. SACD SETUP Premere per selezionare la parte di un disco SACD che si desidera ascoltare —... -
Page 63: Display
Display 5.1CH Si illumina quando si seleziona l’uscita analogica a 5.1 canali (pagina 36). V-PART Si illumina quando si riproduce una porzione video di un DVD. PRGSVE Si illumina quando l’uscita video è 1080i/720p/576p/480p (pagina 11). Si illumina durante le scene riprese da più angolazioni su un DVD (pagina 30). -
Page 64: Telecomando
Telecomando STANDBY/ON (pagina 20) FL DIMMER Premere per cambiare la luminosità del display. Tasti numerici (pagina 22) CLEAR (pagine 19 e 28) AUDIO (pagina 29) SUBTITLE (pagina 29) TOP MENU (pagina 23) ENTER e tasti cursore (pagina 21) HOME MENU (pagina 21) 10 SURROUND (pagina 31) 11 PLAY MODE (pagina 27) 12 ... -
Page 65: Impostare Il Telecomando Per Controllare Il Televisore
Goldstar 10, 23 Grandiente Hitachi 06, 24, 25, 32 Magnavox 12, 29 Mitsubishi Panasonic 08, 22, 41 Philips Pioneer 00, 35, 40, 44 01, 15, 16, 17, 18 Samsung 73, 75 Sanyo 14, 21 Sharp 02, 19, 27 Sony Toshiba... -
Page 66: Predisposizione
Capitolo 4 Predisposizione Accensione e impostazione Quando si accende il lettore per la prima volta, appare la schermata Startup Navigator. Si consiglia di utilizzarla per le impostazioni basiche del lettore. Accendere il televisore e impostare l’ingresso video sul lettore. Premere il tasto STANDBY/ON del telecomando o del pannello anteriore per accenderlo. -
Page 67: Utilizzo Dei Display Su Schermo
Utilizzare i tasti / per selezionare se visualizzare o meno una banda nera sui lati sinistro e destro dello schermo durante la riproduzione di DVD registrati con rapporto di formato 4:3 (‘Yes’ o ‘No’), quindi premere ENTER. Selezionare ‘Finish’ per accettare le impostazioni e uscire da Startup Navigator o ‘Go Back’... -
Page 68: Riproduzione Di Dischi
Riproduzione di dischi Di seguito vengono illustrati i comandi di base per la riproduzione di dischi DVD, CD, SACD, Video CD/Super VCD, video DivX/WMV e MP3/WMA/MPEG-4 AAC. Nel capitolo successivo vengono spiegate ulteriori funzioni. Per i dettagli sulla riproduzione di dischi di immagini JPEG, consultare Visione di una sequenza JPEG a pagina 25. - Page 69 Ripristino e ultima memoria Ad eccezione dei dischi DVD-Audio e SACD, quando si arresta la riproduzione di un disco DVD, CD, Video CD/Super VCD o video DivX/WMV, sul display appare la dicitura RESUME che indica la possibilità di riprendere la riproduzione a partire da quel punto. Se il vano del disco non viene aperto, la prossima volta che si inizia la riproduzione appare la dicitura RESUME e la riproduzione riprende da quel punto (per cancellare il punto di ripresa della...
- Page 70 Domande più frequenti (FAQ) • Quando si inserisce un disco DVD, questo viene espulso automaticamente dopo pochi secondi! È probabile che il disco disponga di un codice area non corretto per il lettore. Il codice area dovrebbe essere riportato sul disco; verificare che sia lo stesso del lettore (riportato sul pannello posteriore).
-
Page 71: Scansione Dei Dischi
Capitolo 5 Riproduzione di dischi Nota • Molte delle funzioni descritte in questo capitolo riguardano dischi DVD e SACD, Video CD/Super VCD, CD, video DivX/WMA e MP3/WMA/MPEG-4 AAC/JPEG, sebbene le modalità di funzionamento varino leggermente a seconda del tipo di disco inserito. -
Page 72: Come Navigare Nei Dvd O Nei Dischi Video Cd/Super Vcd Con Disc Navigator
Come navigare nei DVD o nei dischi Video CD/Super VCD con Disc Navigator Utilizzare Disc Navigator per esplorare un DVD-Video, un DVD-R/-RW in modalità VR o un Video CD/Super VCD e trovare la porzione da riprodurre. Importante • Non è possibile utilizzare Disc Navigator con Video CD/ Super VCD in modalità... -
Page 73: Riproduzione Ripetuta Di Una Sezione Di Un Disco
Riproduzione ripetuta di una sezione di un disco La funzione A-B Repeat consente di specificare due punti (A e B) all’interno di un brano (CD e Video CD/Super VCD) o di un titolo (DVD-Video e DVD-RW) che formano un passaggio riprodotto ripetutamente. -
Page 74: Utilizzo Della Riproduzione Casuale
Utilizzo della riproduzione casuale Utilizzare la funzione di riproduzione casuale per riprodurre casualmente titoli o capitoli (DVD-Video), gruppi (DVD-Audio) o brani (DVD-Audio, SACD, CD, Video CD/Super VCD). (lo stesso brano/titolo/capitolo può venire riprodotto più di una volta.) È possibile impostare l’opzione di riproduzione casuale quando si riproduce o si arresta un disco. -
Page 75: Ricerca Su Disco
Consiglio • Durante la riproduzione programmata, usare i seguenti comandi: Tasto A cosa serve PLAY MODE Salvare l’elenco dei programmi ed uscire dalla schermata di editing del programma senza avviare la riproduzione (HOME MENU agisce alla stessa maniera). NEXT Saltare alla fase successiva dell’elenco dei programmi. -
Page 76: Per Cambiare L'angolazione Della Telecamera
Per cambiare l’angolazione della telecamera Alcuni dischi DVD dispongono di scene riprese da due o più angolazioni. Per i dettagli, vedere la custodia del disco. Quando viene riprodotta una scena multiangolo, viene visualizzata l’icona per indicare che sono disponibili ulteriori angolazioni (è... -
Page 77: Menu Audio Settings E Video Adjust
Capitolo 6 Menu Audio Settings e Video Adjust Menu Audio Settings Il menu Audio Settings offre funzioni di regolazione dell’audio di un disco. Premere HOME MENU e selezionare ‘Audio Settings’ dal display su schermo. Audio Settings Selezionare e modificare le impostazioni tramite i tasti ///... -
Page 78: Menu Initial Settings
Capitolo 7 Menu Initial Settings Utilizzo del menu Initial Settings Il menu Initial Settings consente di configurare, tra le altre, le impostazioni relative all’uscita audio e video, al blocco della visione e alla visualizzazione. Se un’opzione non è disponibile significa che in quel determinato momento non può... -
Page 79: Impostazioni Video Output
Impostazioni Video Output Impostazione Opzione TV Screen 4:3 (Letter Box) • (Questa impostazione è valida per l’uscita video 4:3 (Pan & Scan) analogica e HDMI. Vedere anche Dimensioni dello 16:9 (Wide) schermo e formati dei 16:9 (Compressed) dischi a pagina 40.) AV Connector Out Video •... -
Page 80: Impostazioni Display
Impostazioni Display Impostazione Opzione OSD Language English • Lingue visualizzate Angle Indicator On • Impostazioni Options Impostazione Opzione HDMI Control On • Pure Audio Button Available Unavailable • SACD Playback 2ch Area • Multi-ch Area CD Area DVD Playback Mode DVD-Audio •... -
Page 81: Parental Lock
Parental Lock • Livello predefinito: Off; Password predefinita: nessuna; Codice Paese/area predefinito: us (2119) Per garantire il controllo sui programmi visti dai bambini sul lettore DVD, alcuni DVD-Video dispongono della funzione Parental Lock. Se il lettore è impostato su un livello inferiore rispetto a quello del disco, il disco non viene riprodotto. -
Page 82: Audio Output Mode
Informazioni sul contenuto DivX Prima di riprodurre contenuto DivX VOD (video on demand) su questo lettore, occorre registrare il lettore presso il provider del contenuto DivX VOD. Ciò può essere effettuato generando un codice di registrazione DivX VOD da presentare poi al provider. Importante •... - Page 83 Informazioni sulle impostazioni di uscita audio Nella tabella di seguito viene illustrato come le impostazioni audio effettuate nel menu Initial Settings (pagina 32) influiscano sull’uscita di segnale dai terminali analogici a 2 e a 5.1 canali, oltre che dalle uscite digitali con vari tipi di disco. Impostazione Formato audio del disco lettore...
-
Page 84: Informazioni Sule Impostazioni Di Uscita Audio Hdmi
Informazioni sulle impostazioni di uscita audio HDMI Nella tabella di seguito viene illustrato in che modo le impostazioni audio delle schermate HDMI Out (pagina 32) e Audio Output Mode (pagina 36) influisce sull’uscita HDMI con vari tipi di dischi. Formato audio del disco Dolby Digital Dolby Digital (karaoke) PCM lineare... -
Page 85: Speaker Distance
Speaker Distance • Impostazioni predefinite: tutti i diffusori Questa impostazione è necessaria solo se questo lettore è stato collegato ad un amplificatore usando le uscite analogiche a 5.1 canali. Queste impostazioni non influiscono su alcuna uscita audio digitale. Per ottenere il miglior suono surround dal proprio sistema, impostare le distanze dei diffusori dalla posizione di ascolto. -
Page 86: Informazioni Supplementari
La lente del lettore DVD non dovrebbe sporcarsi se utilizzata normalmente. Se non funziona correttamente a causa di polvere o sporcizia, consultare il più vicino centro di assistenza autorizzato Pioneer. Non si consiglia l’uso dei prodotti per lenti di lettori CD disponibili in commercio. Condensa Se il lettore viene portato in un ambiente caldo dall’esterno oppure... -
Page 87: Impostazione Del Sistema Televisivo
Alcuni rapporti di forma cinematografici sono superiori a 16:9, quindi anche disponendo di un televisore widescreen, questi dischi vengono riprodotti in formato ‘letterbox’ con barre nere nelle parti superiore e inferiore dello schermo. Agli utenti di televisori standard Se si dispone di un televisore standard, l’impostazione TV Screen (pagina 33) di questo lettore deve essere regolata su 4:3 (Letter Box) o 4:3 (Pan &... -
Page 88: Risoluzione Dei Problemi
Se non si riesce a risolvere il problema neppure dopo aver eseguito i controlli elencati di seguito, rivolgersi al più vicino centro di assistenza Pioneer autorizzato o al proprio rivenditore per la riparazione. - Page 89 Problema Soluzione Audio assente o distorto. • Durante la riproduzione in slow motion o la scansione di dischi diversi da CD audio o SACD, non viene prodotto alcun suono. • Alcuni DVD non emettorno audio digitale: Impostare le uscite analogiche del lettore. •...
- Page 90 HD AV. • Alcuni televisori al plasma non supportano determinate funzioni. • Questo lettore supporta solo i componenti compatibili con HDMI Control Pioneer. • Questo apparecchio non funziona correttamente con componenti che non supportano HDMI Control o se collegato a componenti non prodotti da Pioneer.
-
Page 91: Glossario
Glossario Audio analogico Rappresentazione diretta di suoni con un segnale elettrico. Consultare anche Audio digitale. Rapporto di formato Rapporto tra la larghezza e l’altezza dello schermo del televisore. I televisori normali hanno un rapporto di formato pari a 4:3, quelli widescreen ne hanno uno a 16:9. -
Page 92: Elenco Dei Codici Delle Lingue
Elenco dei codici delle lingue Lingua (lettera codice), Codice della lingua Japanese (ja), 1001 English (en), 0514 French (fr), 0618 German (de), 0405 Italian (it), 0920 Spanish (es), 0519 Chinese (zh), 2608 Dutch (nl), 1412 Portuguese (pt), 1620 Swedish (sv), 1922 Russian (ru), 1821 Korean (ko), 1115 Greek (el), 0512... -
Page 93: Uscita Video
Le specifiche e il disegno di questo prodotto sono soggette a modifiche senza preavviso dovute a miglioramenti. 200 mVrms (1 kHz, –20 dB) 200 mVrms (1 kHz, –20 dB) Pubblicato da Pioneer Corporation. Copyright © 2007 Pioneer Corporation. Tutti i diritti riservati. - Page 94 253 Alexandra Road, #04-01, Singapore 159936 TEL: 65-6472-7555 PIONEER ELECTRONICS AUSTRALIA PTY. LTD. 178-184 Boundary Road, Braeside, Victoria 3195, Australia, TEL: (03) 9586-6300 PIONEER ELECTRONICS DE MEXICO S.A. DE C.V. Blvd.Manuel Avila Camacho 138 10 piso Col.Lomas de Chapultepec, Mexico,D.F. 11000 TEL: 55-9178-4270 K002_B_En Published by Pioneer Corporation.