Table of Contents
Advertisement
Available languages
Available languages
Quick Links
Download this manual
See also:
Installation Manual
Advertisement
Chapters
Table of Contents

Related Manuals for Pioneer DEH-P75BT


Summary of Contents for Pioneer DEH-P75BT
-
Page 1: Operation Manual
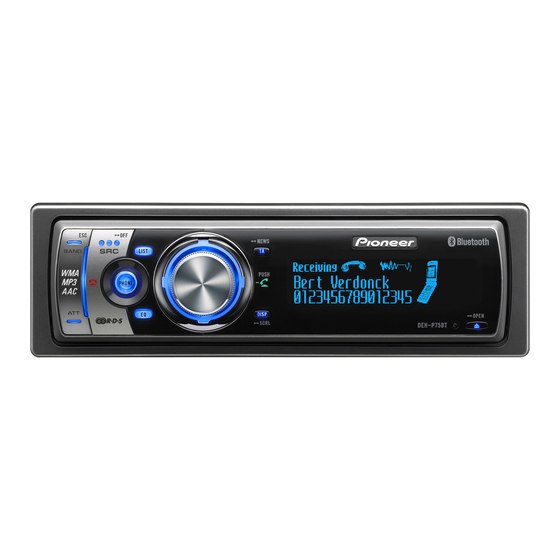
Operation Manual Manual de instrucciones High power CD/MP3/WMA/AAC Player with Bluetooth Wireless Technology, RDS tuner and Multi-CD control Reproductor de CD/MP3/WMA/ACC de alta potencia con tecnología inalámbrica Bluetooth, sintonizador RDS y control de CD múltiple DEH-P75BT... -
Page 3: Table Of Contents
Contents Thank you for buying this Pioneer product. Please read through these operating instructions so you will know how to operate your model properly. After you have finished reading the instructions, keep this man- ual in a safe place for future reference. - Page 4 31 MP3/WMA/AAC/WAV Player Playing MP3/WMA/AAC/WAV files 33 Selecting a track directly in the current folder 34 Introduction of advanced built-in CD player (MP3/WMA/AAC/WAV) operation 34 Repeating play 35 Playing tracks in random order 35 Scanning folders and tracks 35...
- Page 5 Displaying system version for repair 59 Multi-CD Player Playing a CD 60 Selecting a track directly 60 50-disc multi-CD player 61 Introduction of advanced multi-CD player operation 61 Repeating play 62 Playing tracks in random order 62 Scanning CDs and tracks 62...
- Page 6 – About AUX1 and AUX2 90 – Selecting AUX as the source 90 – Setting the AUX title 90 Using different entertainment displays 91 Additional Information Understanding built-in CD player error messages 92 CD player and care 92 CD-R/CD-RW discs 93 Dual Discs 93 MP3, WMA, AAC and WAV files 93 –...
-
Page 7: Before You Start
Refer all ser- vicing to qualified personnel. ! The Pioneer CarStereo-Pass is for use only in Germany. ! Keep this manual handy as a reference for op- erating procedures and precautions. -
Page 8: About This Manual
Bluetooth audio player. ® iPod compatibility When you use this unit with a Pioneer iPod adapter (CD-IB100), you can control an iPod with Dock Connector. ! iPod is a trademark of Apple Computer, Inc., registered in the U.S. and other... -
Page 9: About Wma
2 000 companies worldwide. ! The Bluetooth word mark and logos are owned by the Bluetooth SIG, Inc. and any use of such marks by Pioneer Corporation is under license. Other trademarks and trade names are those of their respective owners. -
Page 10: Clearing All Memory
Section Before You Start % Press RESET with a pen tip or other pointed instrument. RESET button Clearing all memory To protect personal and private information, data about the phone stored in this unit can be deleted. Press SOURCE and hold until the unit turns off. -
Page 11: Removing The Front Panel
Before You Start Removing the front panel Press and hold EJECT to open the front panel. Slide and remove the front panel to- ward you. Take care not to grip it too tightly or to drop the front panel and protect it from contact with water or other fluids to prevent perma- nent damage. -
Page 12: Use And Care Of The Remote Control
FUNCTION button operation % Press FUNCTION to select the desired mode (e.g., built-in CD player). Press FUNCTION repeatedly to switch be- tween the following modes: Play mode (repeat play)—Random mode (random play)—Scan mode (scan play)—... - Page 13 Section Before You Start Fader (balance adjustment)—PWRFL (graphic equalizer adjustment)—50Hz (7-band graphic equalizer adjustment)—LOUD (loudness)— Sub W.1 (subwoofer on/off setting)—Sub W.2 (subwoofer setting)—Bass (bass boost)—HPF (high pass filter)—SLA (source level adjust- ment)—ASL (automatic sound levelizer) Note Refer to Introduction of audio adjustments on page 79.
-
Page 14: What's What
Section What’s What 1 1 1 Head unit 1 BAND button Press to select among three FM bands and MW/LW bands and to cancel the control mode of functions. 2 SOURCE button This unit is turned on by selecting a source. Press to cycle through all the available sources. - Page 15 But- tons 1–6 can operate the preset tuning for the tuner or disc number search for the multi-CD player. j OFF HOOK button Press to start talking on the phone while op- erating a phone source.
-
Page 16: Basic Operations
— When the BT Audio source is set to off (refer to Activating the BT Audio source on page 89). ! External unit refers to a Pioneer product (such as one available in the future) that, although incompatible as a source, enables control of basic functions by this unit. -
Page 17: Adjusting The Volume
Basic Operations ! If you cannot insert a disc completely or if after you insert a disc the disc does not play, check that the label side of the disc is up. Press EJECT to eject the disc, and check the disc for damage before inserting it again. -
Page 18: Tuner
Section Tuner Listening to the radio 1 1 1 1 2 2 2 2 6 6 6 These are the basic steps necessary to operate the radio. More advanced tuner operation is explained starting on the next page. This unit’s AF (alternative frequencies search) function can be turned on and off. -
Page 19: Introduction Of Advanced Tuner Operation
Tuner Introduction of advanced tuner operation 1 1 1 1 Function display Shows the function status. Press MULTI-CONTROL to display the main menu. FUNCTION, AUDIO and ENTERTAINMENT appear on the display. Use MULTI-CONTROL to select FUNCTION. Turn to change the menu option; press to se- lect. -
Page 20: Storing The Strongest Broadcast Frequencies
Section Tuner Storing the strongest broadcast frequencies BSM (best stations memory) lets you automa- tically store the six strongest broadcast fre- quencies under 0-9 (1–6) on the remote contorl and once stored there you can tune in to those frequencies with the touch of a but- ton. -
Page 21: Rds
Introduction of RDS operation 1 1 1 1 2 2 2 2 9 9 9 8 8 8 7 7 7 RDS (radio data system) is a system for provid- ing information along with FM broadcasts. This inaudible information provides such fea- tures as program service name, program type, traffic announcement standby and automatic tuning, and is intended to aid radio listeners in... -
Page 22: Selecting Alternative Frequencies
Section Selecting alternative frequencies If you are listening to a broadcast and the re- ception becomes weak or there are other pro- blems, the unit will automatically search for a different station in the same network which is broadcasting a stronger signal. ! The default setting for AF is off. -
Page 23: Receiving Traffic Announcements
Receiving traffic announcements TA (traffic announcement standby) lets you re- ceive traffic announcements automatically, no matter what source you are listening to. TA can be activated for both a TP station (a sta- tion that broadcasts traffic information) or an enhanced other network’s TP station (a station carrying information which cross-references TP stations). -
Page 24: Using News Program Interruption
Section # To cancel the search, press MULTI-CONTROL again. Notes ! The program of some stations may differ from that indicated by the transmitted PTY. ! If no station is broadcasting the type of pro- gram you searched for, Not found is dis- played for about two seconds and then the tuner returns to the original station. -
Page 25: Storing And Recalling Radio Text
Push MULTI-CONTROL up or down to scroll. Push MULTI-CONTROL up to go to the begin- ning. Push MULTI-CONTROL down to scroll the radio text data. Storing and recalling radio text You can store data from up to six radio text transmissions for buttons 1–6. -
Page 26: Pty List
Section PTY list General Specific News&INF NEWS AFFAIRS INFO SPORT WEATHER FINANCE Popular POP MUS ROCK MUS EASY MUS OTH MUS JAZZ COUNTRY NAT MUS OLDIES FOLK MUS Classics L. CLASS CLASSIC Others EDUCATE DRAMA CULTURE SCIENCE VARIED CHILDREN SOCIAL RELIGION PHONE IN TOURING... -
Page 27: Built-In Cd Player
Built-in CD Player Playing a CD 2 2 2 These are the basic steps necessary to play a CD with your built-in CD player. More ad- vanced CD operation is explained starting on the next page. 1 Track number indicator Shows the track number currently playing. -
Page 28: Introduction Of Advanced Built-In Cd Player Operation
Repeating play There are two repeat play ranges for the built- in CD player: Disc repeat (disc repeat) and Track repeat (one-track repeat). Use MULTI-CONTROL to select Play mode in the function menu. -
Page 29: Scanning Tracks Of A Cd
Built-in CD Player Scanning tracks of a CD Scan play lets you hear the first 10 seconds of each track on the CD. Use MULTI-CONTROL to select Scan mode in the function menu. Scan mode appears in the display. Press MULTI-CONTROL to turn scan play The first 10 seconds of each track is played. -
Page 30: Searching Every 10 Tracks In The Current Disc
Section Built-in CD Player Searching every 10 tracks in the current disc If a disc contains over 10 tracks, you can search every 10 tracks. When a disc contains many tracks, you can roughly search for the track you want to play. -
Page 31: Displaying Disc Titles
! After data for 48 discs has been stored in memory, data for a new disc will overwrite the oldest one. ! If you connect a multi-CD player, you can input disc titles for up to 100 discs. ! When a multi-CD player that does not support disc title functions is connected, you cannot enter disc titles in this unit. - Page 32 Section Built-in CD Player Press LIST to switch to the track title list mode. Use MULTI-CONTROL to select the de- sired track title. Turn to change the track title; press to play. # You can also change the track title by pushing MULTI-CONTROL up or down.
-
Page 33: Mp3/Wma/Aac/Wav Player
MP3/WMA/AAC/WAV files and audio data (CD-DA), playback starts at the first track on the disc. ! The built-in CD player can play back an MP3/ WMA/AAC/WAV file recorded on CD-ROM. (Refer to page 93 for files that can be played back.) -
Page 34: Selecting A Track Directly In The Current Folder
After entering the number input mode, if you do not perform an operation within about eight sec- onds, the mode is automatically canceled. Introduction of advanced built-in CD player (MP3/ WMA/AAC/WAV) operation 1 1 1 1 Function display Shows the function status. -
Page 35: Repeating Play
MP3/WMA/AAC/WAV Player Repeating play For MP3/WMA/AAC/WAV playback, there are three repeat play ranges: Folder repeat (folder repeat), Track repeat (one-track repeat) and Disc repeat (repeat all tracks). Use MULTI-CONTROL to select Play mode in the function menu. Play mode appears in the display. Press MULTI-CONTROL to select the re- peat range. -
Page 36: Pausing Mp3/Wma/Aac/Wav Playback
Section MP3/WMA/AAC/WAV Player Pausing MP3/WMA/AAC/ WAV playback Pause lets you temporarily stop playback of the MP3/WMA/AAC/WAV. Use MULTI-CONTROL to select Pause in the function menu. Pause appears in the display. Press MULTI-CONTROL to turn pause Playback of the current track pauses. # To turn pause off, press MULTI-CONTROL again. -
Page 37: Displaying Text Information On Mp3/Wma/Aac/Wav Disc
MP3/WMA/AAC/WAV Player # If the current folder contains less than 10 tracks, pushing and holding MULTI-CONTROL left recalls the first track of the folder. Also, if the remaining number of tracks after searching every 10 tracks is less than 10, pushing and holding MULTI-CONTROL left recalls the first track of the folder. -
Page 38: Selecting Tracks From The File Name List
Section MP3/WMA/AAC/WAV Player Selecting tracks from the file name list File name list lets you see the list of file names (or folder names) and select one of them to playback. Press LIST to switch to the file name list mode. -
Page 39: Bluetooth Telephone
Bluetooth Telephone Hands-free phoning with cellular phones featuring Bluetooth wireless technology If your cellular phone features Bluetooth wire- less technology, you can connect to this unit for hands-free, wireless calls, even while driving. Important Since this unit is on standby to connect with your cellular phones via Bluetooth wireless technol- ogy, using this unit without running the engine can result in battery drainage. -
Page 40: About The Telephone Source
Section Bluetooth Telephone — A2DP (Advanced Audio Distribution Pro- file) — AVRCP (Audio/Video Remote Control Pro- file) ! When phone is selected as a source, volume and equalizer curve are automatically chan- ged to suitable settings for the phone source. When the source is returned to another source, volume and equalizer settings auto- matically return to the original setting. -
Page 41: Making A Phone Call
Bluetooth Telephone Making a phone call Dial a number The most basic way to make a call is to simply dial the number. Press DIRECT on the remote control and dial a phone number by pressing 0-9. Press JOYSTICK on the remote control to confirm the number. - Page 42 Section Bluetooth Telephone # If the private mode is selected on the cellular phone, hands-free phoning may not be per- formed. To end the call, press PHONE. The estimated call time appears in the display (this may differ slightly from the actual call time).
-
Page 43: Introduction Of Advanced Hands-Free Phoning Operation
Bluetooth Telephone Introduction of advanced hands-free phoning operation 1 Function display Shows the function status. Press MULTI-CONTROL to display the main menu. FUNCTION, AUDIO, ENTERTAINMENT and RECEIVING MOVIE appear in the display. Use MULTI-CONTROL to select FUNCTION. Turn to change the menu option; press to se- lect. -
Page 44: Searching For Available Cellular Phones
Press MULTI-CONTROL to connect the selected cellular phone. While connecting, Connecting is displayed. To complete the connection, please check the device name (Pioneer BT Unit) and enter the link code on your cellular phone. If the con- nection is established, Connected is dis- played. -
Page 45: Disconnecting A Cellular Phone
Bluetooth Telephone # The link code is set to 0000 as default. You can change this code in the initial setting. Refer to Entering PIN code for Bluetooth wireless con- nection on page 89. Disconnecting a cellular phone When you are done using your phone with this unit, you can close the Bluetooth wireless con- nection. -
Page 46: Connecting To A Registered Cellular Phone
Section Bluetooth Telephone Push MULTI-CONTROL up or down to select a registration assignment. Each time MULTI-CONTROL is pushed up or down, the registration assignment is switched in the following order: P1 (user phone 1)—P2 (user phone 2)—P3 (user phone 3)—G1 (guest phone 1)—G2 (guest phone 2) # If the assignment is empty, No data is dis- played and the operation is not possible. -
Page 47: Using The Phone Book
Bluetooth Telephone Use MULTI-CONTROL to select Auto connect in the function menu. Auto connect appears in the display. Press MULTI-CONTROL to turn auto- matic connection on. ON appears in the display. If your cellular phone is set ready for Bluetooth wireless connection, the connection to this unit will be automatically established. -
Page 48: Calling A Number In The Phone Book
Section Bluetooth Telephone Use MULTI-CONTROL to select PH.B.Name view in the function menu. Invert Names YES appears in the display. Press MULTI-CONTROL to change the name view order. Inverted is displayed and the name view order is changed. Pressing MULTI-CONTROL repeatedly changes the name view order between first name and last name. -
Page 49: Editing The Name Of A Phone Book Entry
Bluetooth Telephone Press MULTI-CONTROL to assign the genre to the phone number. The selected genre is assigned to the phone number, and the display reverts to the detailed list. Editing the name of a Phone Book entry You can edit the names of Phone Book entries. Each name can be up to 40 characters long. -
Page 50: Clearing A Phone Book Entry
Section Bluetooth Telephone Turn MULTI-CONTROL clockwise or counterclockwise to switch to the number input screen. Turning MULTI-CONTROL switches input screens in the following order: Edit genre (genre input screen)—Edit name (name input screen)—Edit number (number input screen)—Clear memory (clear memory screen) Push MULTI-CONTROL left or right to move the cursor to the number you want... -
Page 51: Clearing Memory
Bluetooth Telephone Press and hold one of 0-9 on the remote control to store the selected phone number in that preset. Press 1 to store in P 1; 4 to store in P 4, etc. Press 0 to store in preset P10. Hold the button down until you hear a beep. -
Page 52: Calling A Number From The Call History
Section Bluetooth Telephone Push MULTI-CONTROL right to display the detailed list. Calling time and date, and phone number are displayed in the detailed list. # If the number is already in the Phone Book then the name is also displayed. # Turning MULTI-CONTROL clockwise or coun- terclockwise switches to the previous or next phone number diplayed in the detailed list. -
Page 53: Making A Call By Entering Phone Number
Bluetooth Telephone Making a call by entering phone number You can make a call by directly entering phone numbers on this unit. Use MULTI-CONTROL to select Number dial in the function menu. Number dial appears in the display. # You can also enter in this menu from the standby display by pressing DIRECT on the re- mote control. -
Page 54: Setting The Automatic Rejecting
# Pushing MULTI-CONTROL right returns to the device name. Press BAND to return to the standby display. Displaying BD address of this unit Use MULTI-CONTROL to select Device Info in the function menu. The device name (Pioneer BT Unit) of this unit appears in the display. -
Page 55: Displaying System Version For Repair
Use MULTI-CONTROL to select Device Info in the function menu. The device name (Pioneer BT Unit) of this unit appears in the display. Push MULTI-CONTROL down to switch to the system version of this unit. -
Page 56: Bluetooth Audio
Section Bluetooth Audio Listening to songs on BT Audio (Bluetooth audio player) 1 1 1 1 2 2 2 2 You can use this unit to control a separately sold portable audio player featuring Bluetooth wireless technology (Bluetooth audio player). Even though your audio player does not con- tain a Bluetooth module, you can still control it from this unit via Bluetooth wireless technol-... -
Page 57: Connecting A Bluetooth Audio Player
Bluetooth Audio Activation Refer to Activating the BT Audio source on page 89 for instructions on how to turn the BT Audio on. Connection Refer to Connecting a Bluetooth audio player on this page on how to connect your Blue- tooth audio player to this unit. -
Page 58: Function Operation
Section Bluetooth Audio Function operation 1 1 1 1 Function display Shows the function status. Once connected via Bluetooth wireless tech- nology, “Play”, “Stop” and other functions on Bluetooth audio player can be controlled from this unit’s function menu. Press MULTI-CONTROL to display the main menu. -
Page 59: Stopping Playback
You can display the BD address of this unit. Use MULTI-CONTROL to select Device Info in the function menu. The device name (Pioneer BT Unit) of this unit appears in the display. Push MULTI-CONTROL left to switch to the BD address. -
Page 60: Multi-Cd Player
! If an error message such as ERROR-11 is dis- played, refer to the multi-CD player owner’s manual. ! If there are no discs in the multi-CD player ma- gazine, No disc is displayed. ! When you select a CD TEXT disc on a CD TEXT... -
Page 61: 50-Disc Multi-Cd Player
Only those functions described in this manual are supported by 50-disc multi-CD players. This unit is not designed to operate disc title list functions with a 50-disc multi-CD player. About the disc title list functions, please refer to Selecting discs from the disc title list on page 65. -
Page 62: Repeating Play
Section Multi-CD Player Notes ! When playing a CD TEXT disc on a CD TEXT compatible multi-CD player, you cannot switch to disc title input. The disc title will have already been recorded on a CD TEXT disc. ! If you do not operate the function within about 30 seconds, the display is automatically re- turned to the playback display. -
Page 63: Pausing Cd Playback
ITS play lets you listen to the tracks that you have entered into your ITS playlist. When you turn on ITS play, tracks from your ITS playlist in the multi-CD player will begin to play. Select the repeat range. Refer to Repeating play on the previous page. -
Page 64: Erasing A Track From Your Its Playlist
Then you can easily search for and play a de- sired disc. Entering disc titles Use the disc title input feature to store up to 100 CD titles (with ITS playlist) into the multi- CD player. Each title can be up to 10 charac- ters long. -
Page 65: Displaying Disc Titles
Multi-CD Player Play the CD that you want to enter a title for. Push MULTI-CONTROL up or down to select the CD. Use MULTI-CONTROL to select TitleInput "A" in the function menu. TitleInput "A" appears in the display. Press DISPLAY to select the desired character type. -
Page 66: Using Cd Text Functions
Using CD TEXT functions You can use these functions only with a CD TEXT compatible multi-CD player. Some discs have certain information encoded on the disc during manufacture. These discs may contain such information as the CD title, track title, artist’s name and playback time... -
Page 67: Using Compression And Bass Emphasis
Using COMP (compression) and DBE (dy- namic bass emphasis) functions lets you ad- just the sound playback quality of the multi- CD player. Each of the functions has a two- step adjustment. The COMP function balances the output of louder and softer sounds at high- er volumes. -
Page 68: Playing Songs On Ipod
Section Playing songs on iPod Listening to songs on your iPod 1 1 1 1 You can use this unit to control an iPod adapter, which is sold separately. These are the basic steps necessary to operate an iPod adapter. More advanced iPod adapter operation is explained starting on Introduction of advanced iPod adapter operation on page 70. -
Page 69: Selecting A Playlist
Playing songs on iPod Use MULTI-CONTROL to select a song, album, artist or genre. Turn to change the item; press to select. List from the selected item is displayed. # If you select SONG (songs), playback starts in- stantly from the selected one. Repeat step 3 to find a song you want to listen to. -
Page 70: Introduction Of Advanced Ipod Adapter Operation
Section Playing songs on iPod Introduction of advanced iPod adapter operation 1 1 1 1 Function display Shows the function status. Press MULTI-CONTROL to display the main menu. FUNCTION, AUDIO and ENTERTAINMENT appear on the display. Use MULTI-CONTROL to select FUNCTION. -
Page 71: Pausing A Song
Playing songs on iPod Pausing a song Pause lets you temporarily stop playback of a song. Use MULTI-CONTROL to select Pause in the function menu. Pause appears in the display. Press MULTI-CONTROL to turn pause Playback of the current song pauses. # To turn pause off, press MULTI-CONTROL again. -
Page 72: Tv Tuner
Section TV tuner Watching the television 1 1 1 1 You can use this unit to control a TV tuner, which is sold separately. For details concerning operation, refer to the TV tuner’s operation manual. This section pro- vides information on TV operations with this unit which differs from that described in the TV tuner’s operation manual. -
Page 73: Introduction Of Advanced Tv Tuner Operation
TV tuner Introduction of advanced TV tuner operation 1 1 1 1 Function display Shows the function names. Press MULTI-CONTROL to display the main menu. FUNCTION, AUDIO and ENTERTAINMENT appear on the display. Use MULTI-CONTROL to select FUNCTION. BSSM appears on the display. # To return to the channel display, press BAND. -
Page 74: Selecting Stations From The Preset Channel List
Section TV tuner # If you do not operate the list within about 30 seconds, the preset channel list mode is can- celed automatically. Note Storing broadcast stations with BSSM may re- place broadcast stations you have saved using P 1—P12. Selecting stations from the preset channel list The preset channel list lets you see the list of... -
Page 75: Dvd Player
DVD Player Playing a disc 1 1 1 1 2 2 2 2 3 3 3 3 5 5 5 You can use this unit to control a DVD player or multi-DVD player, which is sold separately. For details concerning operation, refer to the DVD player’s or multi-DVD player’s operation manual. -
Page 76: Introduction Of Advanced Dvd Player Operation
Section DVD Player Introduction of advanced DVD player operation 1 1 1 1 Function display Shows the function names. Press MULTI-CONTROL to display the main menu. FUNCTION, AUDIO and ENTERTAINMENT appear on the display. Use MULTI-CONTROL to select FUNCTION. Turn to change the menu option; press to se- lect. -
Page 77: Pausing Disc Playback
! This function differs slightly from ITS play- back with a multi-CD player. With multi- DVD player, ITS playback applies only to the CD playing. For details, refer to Using ITS playlists on page 63. -
Page 78: Entering Disc Titles
Section DVD Player Entering disc titles Disc title input lets you input CD titles up to 10 letters long into the DVD player. For details concerning operation, refer to Entering disc ti- tles on page 64. ! You can operate this function only when a DVD player is connected to this unit. -
Page 79: Audio Adjustments
Audio Adjustments Introduction of audio adjustments 1 1 1 1 Audio display Shows the audio adjustment status. Press MULTI-CONTROL to display the main menu. FUNCTION, AUDIO and ENTERTAINMENT appear on the display. Use MULTI-CONTROL to select AUDIO. Turn to change the menu option; press to se- lect. -
Page 80: Using The Equalizer
For Custom1 and Custom2 equalizer curves, you can adjust the level of each band. ! A separate Custom1 curve can be created for each source. (The built-in CD player and the multi-CD player are set to the same equalizer adjustment setting automati- cally.) If you make adjustments when a... -
Page 81: Adjusting Loudness
Audio Adjustments ! A Custom2 curve can be created common to all sources. If you make adjustments when the Custom2 curve is selected, the Custom2 curve will be updated. Recall the equalizer curve you want to adjust. See Recalling equalizer curves on the previous page. -
Page 82: Boosting The Bass
Section Audio Adjustments # When the subwoofer output is on, you can se- lect Sub W.2. Push MULTI-CONTROL left or right to select cut-off frequency. Each time MULTI-CONTROL is pushed left or right, cut-off frequencies are selected in the following order: 50Hz—63Hz—80Hz—100Hz—125Hz Only frequencies lower than those in the se- lected range are outputted from the subwoo-... -
Page 83: Using Automatic Sound Levelizer
Notes ! The AM tuner volume level can also be ad- justed with source level adjustments. ! The built-in CD player and the multi-CD player are set to the same source level adjustment volume automatically. ! External unit 1 and external unit 2 are set to the same source level adjustment volume automatically. -
Page 84: Initial Settings
Section Initial Settings Adjusting initial settings 1 1 1 Using the initial settings, you can customize various system settings to achieve optimal per- formance from this unit. 1 Function display Shows the function status. Press SOURCE and hold until the unit turns off. -
Page 85: Setting The Clock
Initial Settings Push MULTI-CONTROL up or down to set the date. Pushing MULTI-CONTROL up will increase the selected day, month or year. Pushing MULTI-CONTROL down will decrease the se- lected day, month or year. Setting the clock Use these instructions to set the clock. Use MULTI-CONTROL to select Clock. -
Page 86: Switching Auto Pi Seek
Section Initial Settings Note The tuning step remains at 50 kHz during manual tuning. Switching Auto PI Seek The unit can automatically search for a differ- ent station with the same programming, even during preset recall. Use MULTI-CONTROL to select Auto PI. Auto PI appears in the display. -
Page 87: Switching The Dimmer Setting
Initial Settings Switching the dimmer setting To prevent the display from being too bright at night, the display is automatically dimmed when the car’s headlights are turned on. You can turn the dimmer on or off. Use MULTI-CONTROL to select Dimmer. Dimmer appears in the display. -
Page 88: Switching The Sound Muting/Attenuation
Section Initial Settings Switching the sound muting/attenuation Sound from this system is muted or attenu- ated automatically when the signal from the equipment with mute function is received. ! The sound is muted or attenuated, MUTE or ATT are displayed and no audio adjust- ment is possible. -
Page 89: Activating The Bt Audio Source
Initial Settings Activating the BT Audio source You need to activate the BT Audio source in order to use a Bluetooth audio player. Use MULTI-CONTROL to select BT AUDIO. BT AUDIO appears in the display. Press MULTI-CONTROL to turn the BT Audio source on. -
Page 90: Other Functions
Section Other Functions Using the AUX source This unit can control up to two auxiliary equip- ments such as VCR or portable devices (sold separately). When connected, auxiliary equip- ments are automatically read in as AUX sources and assigned to AUX1 or AUX2. The relationship between AUX1 and AUX2 sources is explained below. -
Page 91: Using Different Entertainment Displays
Other Functions Push MULTI-CONTROL right to move the cursor to the next character position. When the letter you want is displayed, push MULTI-CONTROL right to move the cursor to the next position and then select the next let- ter. Push MULTI-CONTROL left to move back- wards in the display. -
Page 92: Additional Information
Appendix Additional Information Understanding built-in CD player error messages When you contact your dealer or your nearest Pioneer Service Center, be sure to record the error message. Message Cause ERROR-11, 12, Dirty disc 17, 30 ERROR-11, 12, Scratched disc 17, 30... -
Page 93: Cd-R/Cd-Rw Discs
! If the heater is used in cold weather, moist- ure may form on components inside the CD player. Condensation may cause the CD player to malfunction. If you think that con- densation is a problem turn off the CD... -
Page 94: Mp3 Additional Information
Appendix Additional Information ! Depending on the version of Windows Media Player used to encode WMA files, album names and other text information may not be correctly displayed. ! There may be a slight delay when starting playback of WMA/AAC files encoded with image data. -
Page 95: Wma Additional Information
Additional Information ! The sound quality of MP3 files generally be- comes better with an increased bit rate. This unit can play recordings with bit rates from 8 kbps to 320 kbps, but in order to be able to enjoy sound of a certain quality, we recommend using only discs recorded with a bit rate of at least 128 kbps. - Page 96 Appendix Additional Information 1 First level 2 Second level 3 Third level Notes ! This unit assigns folder numbers. The user cannot assign folder numbers. ! It is not possible to check folders that do not include MP3/WMA/AAC/WAV files. (These folders will be skipped without displaying the folder number.) ! MP3/WMA/AAC/WAV files in up to 8 tiers of...
-
Page 97: Terms
Additional Information Terms A2DP A2DP is short for Advanced Audio Distribution Profile. This profile allows the high quality audio data of either stereo or monaural to be transmitted via Bluetooth wireless technology. AAC is short for Advanced Audio Coding and refers to an audio compression technology standard used with MPEG 2 and MPEG 4. - Page 98 Appendix Additional Information Linear PCM (LPCM)/Pulse code modulation This stands for linear pulse code modulation, which is the signal recording system used for music CDs and DVDs. Playlists created using the “WINAMP” soft- ware have a playlist file extension (.m3u). MP3 is short for MPEG Audio Layer 3.
-
Page 99: Specifications
Slope ... –18 dB/oct Gain ... +6 dB to –24 dB Phase ... Normal/Reverse Bass boost: Gain ... +12 dB to 0 dB CD player System ... Compact disc audio system Usable discs ... Compact disc Signal format: Sampling frequency ... 44.1 kHz Number of quantization bits ... - Page 100 Contenido Gracias por adquirir este producto Pioneer. Lea con detenimiento estas instrucciones sobre el funcionamiento del aparato, para que pueda darle el mejor uso posible. Una vez que las haya leído, conserve este manual en un lugar seguro para consultarlo en el futuro.
- Page 101 Contenido Uso de las funciones de títulos de discos 129 – Ingreso de títulos de discos 129 – Visualización de los títulos 130 Uso de las funciones CD TEXT 130 – Visualización de información de texto de discos CD TEXT 130 –...
- Page 102 Contenido – Borrado de una entrada del Directorio de teléfonos 151 – Uso de números prefijados 152 Borrado de la memoria 152 Uso del Historial de llamadas 153 – Visualización del Historial de llamadas 153 – Llamada a un número desde el Historial de llamadas 153 –...
- Page 103 Contenido Uso de la compresión y del enfatizador de graves 170 Para reproducir canciones en el iPod Para escuchar canciones en su iPod 171 Para buscar una canción 171 – Para buscar una canción 171 – Selección de una lista de reproducción 172 Visualización de información de texto en el iPod 172...
- Page 104 Contenido Ajuste de la salida posterior y del controlador de subgraves 192 Cambio del silenciamiento/atenuación del sonido 192 Cambio de la demostración de características 192 Cambio del modo inverso 193 Cambio del desplazamiento continuo 193 Activación de la fuente BT Audio 193 Ingreso del código PIN para la conexión inalámbrica Bluetooth 194 Reajuste del módulo de tecnología...
-
Page 105: Antes De Comenzar
Solicite a personal calificado que realice el servicio técnico. ! El CarStereo-Pass Pioneer es para usarse sólo en Alemania. ! Conserve este manual a mano para que pueda consultar los procedimientos de opera- ción y las precauciones cuando sea necesa-... -
Page 106: Registro Del Producto
En caso de problemas En caso de que este producto no funcione co- rrectamente, póngase en contacto con su con- cesionario o con el centro de servicio Pioneer autorizado más cercano. Características Reproducción de CD Se pueden reproducir CD de música, CD-R y CD-RW. -
Page 107: Acerca De Wma
Bluetooth. Compatibilidad iPod® Cuando usa esta unidad con un adaptador Pioneer para iPod (CD-IB100), puede controlar un iPod con un conector del Dock. ! iPod es una marca comercial de Apple Computer, Inc., registrada en los EE.UU. y otros países. -
Page 108: Reinicialización Del Microprocesador
Sección Antes de comenzar Bluetooth es una tecnología inalámbrica de conectividad por radio de corto alcance, desa- rrollada para sustituir los cables de los teléfo- nos móviles, ordenadores de bolsillo y otros dispositivos. Bluetooth opera a una frecuencia de 2,4 GHz y permite transmitir voz y datos a velocidades de hasta 1 megabit por segundo. -
Page 109: Protección Del Producto Contra Robo
Antes de comenzar Pulse MULTI-CONTROL para borrar la memoria. Todos los datos de la fuente de teléfono, inclui- das las entradas en el Directorio de teléfonos, los números preajustados y el Historial de lla- madas, se borrarán. Protección del producto contra robo La carátula puede extraerse de la unidad prin- cipal y almacenarse en la carcasa protectora... -
Page 110: Acerca Del Modo Demo
Sección Antes de comenzar Acerca del modo demo Esta unidad ofrece dos modos de demostra- ción. Uno es el modo inverso y el otro es la ca- racterística de modo demo. Importante El cable rojo (ACC) de esta unidad se debe co- nectar al terminal acoplado con las funciones de activación/desactivación de la llave de encendido del automóvil. -
Page 111: Uso Del Mando A Distancia
Antes de comenzar Uso del mando a distancia Apunte el mando a distancia hacia la carátula para utilizarlo. ! Es posible que el mando a distancia no funcione correctamente si lo expone a la luz solar directa. Importante ! No guarde el mando a distancia en lugares ex- puestos a altas temperaturas o a la luz solar directa. -
Page 112: Qué Es Cada Cosa
Sección Qué es cada cosa 1 1 1 Unidad principal 1 Botón BAND Pulse este botón para seleccionar entre tres bandas FM y las bandas MW/LW, y para cancelar el modo de control de funciones. 2 Botón SOURCE Esta unidad se enciende al seleccionar una fuente. -
Page 113: Mando A Distancia
Qué es cada cosa d d d 1 1 1 e e e m m m 2 2 2 l l l c c c k k k j j j i i i c Botón ATT Pulse este botón para bajar rápidamente el nivel de volumen, aproximadamente el 90%. -
Page 114: Funciones Básicas
(consulte Activación de la fuente BT Audio en la página 193). ! Por unidad externa se entiende un producto Pioneer (como el que pueda estar disponible en el futuro) que, si bien es incompatible como fuente, permite que este sistema con- trole funciones básicas. -
Page 115: Ajuste Del Volumen
Funciones básicas Notas ! El reproductor de CD incorporado reproduce un CD estándar de 12 cm u 8 cm. No utilice un adaptador cuando reproduzca un CD de 8 ! No coloque ningún otro elemento que no sea un CD en la ranura de carga de CD. ! A veces se produce una demora entre el co- mienzo de la reproducción de un CD y la emi- sión del sonido. -
Page 116: Sintonizador
Sección Sintonizador Para escuchar la radio 1 1 1 1 2 2 2 2 6 6 6 A continuación se indican los pasos básicos necesarios para hacer funcionar la radio. En la página siguiente se explican las funciones más avanzadas del sintonizador. Se puede activar y desactivar la función AF (búsqueda de frecuencias alternativas) de esta unidad. -
Page 117: Introducción A Las Funciones Avanzadas Del Sintonizador
Sintonizador Introducción a las funciones avanzadas del sintonizador 1 1 1 1 Visualización de función Muestra el estado de la función. Pulse MULTI-CONTROL para visualizar el menú principal. FUNCTION, AUDIO y ENTERTAINMENT apa- recen en el display. Utilice MULTI-CONTROL para seleccio- nar FUNCTION. -
Page 118: Almacenamiento De Las Frecuencias De Radio Más Fuertes
Sección Sintonizador Almacenamiento de las frecuencias de radio más fuertes La función BSM (memoria de las mejores emi- soras) le permite almacenar automáticamente seis frecuencias de las emisoras más fuertes en los botones 0-9 (1–6) en el mando a distan- cia. - Page 119 Sintonizador Utilice MULTI-CONTROL para seleccio- nar Local en el menú de funciones. Local aparece en el display. Pulse MULTI-CONTROL para activar la sintonización por búsqueda local. La sensibilidad de búsqueda local (p. ej., Level 2) aparece en el display. # Vuelva a pulsar MULTI-CONTROL para desac- tivar la sintonización por búsqueda local.
-
Page 120: Introducción A La Operación Rds
Sección Introducción a la operación 1 1 1 1 2 2 2 2 9 9 9 8 8 8 7 7 7 La función RDS (sistema de datos de radio) es un sistema que ofrece información junto con las transmisiones FM. Esta información no au- dible brinda funciones tales como nombre del servicio de programa, tipo de programa, espe- ra por anuncio de tráfico y sintonización auto-... -
Page 121: Selección De Frecuencias Alternativas
! Es posible que no todas las emisoras suminis- tren el servicio RDS. ! Las funciones RDS como AF y TA sólo se acti- van cuando la radio está sintonizada en una emisora RDS. Selección de frecuencias alternativas Si está escuchando una transmisión y la re- cepción se debilita o se producen otros proble- mas, la unidad buscará... -
Page 122: Recepción De Anuncios De Tráfico
Sección Pulse MULTI-CONTROL para activar la función regional. ON aparece en el display. # Para desactivar la función regional, vuelva a pulsar MULTI-CONTROL. Notas ! La programación regional y las redes regiona- les se organizan de distinta manera según el país (es decir, pueden cambiar de acuerdo con la hora, el estado o la provincia de que se trate, o el área de transmisión). -
Page 123: Uso De Las Funciones Pty
Uso de las funciones PTY Se puede sintonizar una emisora usando la in- formación PTY (tipo de programa). Búsqueda de una emisora RDS por información PTY Se pueden buscar tipos generales de progra- mas, tales como los que se indican en la pági- na 125. -
Page 124: Uso Del Radio Texto
Sección ! También se puede cancelar un anuncio de emergencia, pulsando SOURCE, BAND o MULTI-CONTROL. Uso del radio texto Este sintonizador puede mostrar los datos de radio texto transmitidos por emisoras RDS, como por ejemplo, información de la emisora, el nombre de la canción que se está transmi- tiendo y el nombre del artista. -
Page 125: Lista Pty
Lista PTY Generales Específico News&INF NEWS AFFAIRS INFO SPORT WEATHER FINANCE Popular POP MUS ROCK MUS EASY MUS OTH MUS JAZZ COUNTRY NAT MUS OLDIES FOLK MUS Classics L. CLASS CLASSIC Others EDUCATE DRAMA CULTURE SCIENCE VARIED CHILDREN SOCIAL RELIGION PHONE IN TOURING LEISURE... -
Page 126: Reproductor De Cd Incorporado
Sección Reproductor de CD incorporado Reproducción de un CD A continuación se indican los pasos básicos necesarios para reproducir un CD con el re- productor de CD incorporado. En la página si- guiente se explican las funciones más avanzadas del reproductor de CD. 1 Indicador de número de pista Muestra el número de pista que se está... -
Page 127: Introducción A Las Funciones Avanzadas Del Reproductor De Cd Incorporado
Reproductor de CD incorporado Introducción a las funciones avanzadas del reproductor de CD incorporado 1 1 1 1 Visualización de función Muestra el estado de la función. Pulse MULTI-CONTROL para visualizar el menú principal. FUNCTION, AUDIO y ENTERTAINMENT apa- recen en el display. Utilice MULTI-CONTROL para seleccio- nar FUNCTION. -
Page 128: Exploración De Las Pistas De Un Cd
Sección Reproductor de CD incorporado Pulse MULTI-CONTROL para activar la reproducción aleatoria. Las pistas se reproducirán en un orden aleato- rio. # Vuelva a pulsar MULTI-CONTROL para desac- tivar la reproducción aleatoria. Exploración de las pistas de un CD La reproducción con exploración le permite escuchar los primeros 10 segundos de cada pista de un CD. -
Page 129: Selección Del Método De Búsqueda
Reproductor de CD incorporado Selección del método de búsqueda Se puede cambiar el método de búsqueda entre las opciones de avance rápido/retroceso y búsqueda cada 10 pistas. Utilice MULTI-CONTROL para seleccio- nar Search mode en el menú de funciones. Search mode aparece en el display. Pulse MULTI-CONTROL para seleccionar el método de búsqueda. -
Page 130: Visualización De Los Títulos
Sección Reproductor de CD incorporado Alfabeto (mayúsculas), números y símbolos— Alfabeto (minúsculas)—letras de idiomas eu- ropeos, tales como aquéllas con acentos (p. ej., á, à, ä, ç)—Números y símbolos Pulse MULTI-CONTROL arriba o abajo para seleccionar una letra del alfabeto. Cada vez que se pulsa MULTI-CONTROL arri- ba, se visualizan las letras del alfabeto, núme- ros o símbolos en orden ascendente (A B C... -
Page 131: Desplazamiento De Información De Texto En El Display
Reproductor de CD incorporado % Pulse DISPLAY. Pulse DISPLAY repetidamente para cambiar entre los siguientes ajustes: Tiempo de reproducción— : título del disco y tiempo de reproducción— : nombre del artis- ta del disco y tiempo de reproducción— : tí- tulo de la pista y tiempo de reproducción—... -
Page 132: Reproductor De Mp3/Wma/Aac/Wav Reproducción De Ficheros Mp3/Wma/Aac/ Wav
Sección Reproductor de MP3/ WMA/AAC/WAV Reproducción de ficheros MP3/WMA/AAC/WAV 1 1 1 1 5 5 5 A continuación se indican los pasos básicos necesarios para reproducir un MP3/WMA/ AAC/WAV con el reproductor de CD incorpora- do. A partir de la página 134 se explican las funciones más avanzadas de MP3/WMA/AAC/ WAV. -
Page 133: Selección Directa De Una Pista En La Carpeta Actual
Reproductor de MP3/ WMA/AAC/WAV Notas ! Al reproducir discos con ficheros MP3/WMA/ AAC/WAV y datos de audio (CD-DA), tales como CD-EXTRA y CD de MODO MIXTO (MIXED-MODE CD), los dos tipos de discos se pueden reproducir sólo si se cambia el modo entre MP3/WMA/AAC/WAV y CD-DA con BAND. -
Page 134: Introducción A Las Funciones Avanzadas Del Reproductor De Cd Incorporado (Mp3/ Wma/Aac/Wav)
Sección Reproductor de MP3/ WMA/AAC/WAV Introducción a las funciones avanzadas del reproductor de CD incorporado (MP3/ WMA/AAC/WAV) 1 1 1 1 Visualización de función Muestra el estado de la función. Pulse MULTI-CONTROL para visualizar el menú principal. FUNCTION, AUDIO y ENTERTAINMENT apa- recen en el display. -
Page 135: Reproducción De Las Pistas En Orden Aleatorio
Reproductor de MP3/ WMA/AAC/WAV Reproducción de las pistas en orden aleatorio La reproducción aleatoria le permite reprodu- cir las pistas en un orden aleatorio dentro de la gama de repetición Folder repeat y Disc repeat. Seleccione la gama de repetición. Consulte Repetición de reproducción en la pági- na anterior. -
Page 136: Uso De La Compresión Y Bmx
Sección Reproductor de MP3/ WMA/AAC/WAV Uso de la compresión y BMX El uso de las funciones COMP (compresión) y BMX le permiten ajustar la calidad de repro- ducción de sonido de este reproductor. Cada una de las funciones tiene un ajuste de dos pasos. -
Page 137: Visualización De La Información De Texto De Un Disco Mp3/Wma/Aac/Wav
Reproductor de MP3/ WMA/AAC/WAV Visualización de la información de texto de un disco MP3/WMA/AAC/WAV Es posible visualizar la información de texto grabada en un disco MP3/WMA/AAC/WAV. Al reproducir un disco MP3/ WMA/AAC % Pulse DISPLAY. Pulse DISPLAY repetidamente para cambiar entre los siguientes ajustes: Tiempo de reproducción—... -
Page 138: Selección De Pistas De La Lista De Nombres De Ficheros
Sección Reproductor de MP3/ WMA/AAC/WAV ! Si se activa la función de desplazamiento con- tinuo en el ajuste inicial, la información de texto se desplazará de manera ininterrumpida por el display. Consulte Cambio del desplaza- miento continuo en la página 193. Selección de pistas de la lista de nombres de ficheros Esta función le permite ver la lista de los nom-... -
Page 139: Teléfono Bluetooth
Teléfono Bluetooth Función manos libres con teléfonos móviles provistos de tecnología inalámbrica Bluetooth Si su teléfono móvil posee tecnología inalámbri- ca Bluetooth, puede conectarse a esta unidad para hacer llamadas inalámbricas de manos li- bres, incluso al conducir. Importante Puesto que esta unidad se encuentra en espera para conectar con sus teléfonos móviles median- te la tecnología inalámbrica Bluetooth, utilizarla sin encender el motor puede descargar la batería. -
Page 140: Bluetooth
Sección Teléfono Bluetooth ! Para utilizar la tecnología inalámbrica Blue- tooth, los dispositivos deben ser capaces de interpretar ciertos perfiles. Esta unidad es compatible con los siguientes perfiles. — GAP (Generic Access Profile) — SDP (Service Discovery Protocol) — OPP (Object Push Profile) —... -
Page 141: Funciones Básicas Manos Libres
Teléfono Bluetooth # Antes de desconectar el teléfono móvil de esta unidad, no olvide ajustar el volumen a un nivel adecuado. Si el volumen ha sido silenciado (nivel cero) en su teléfono móvil, permanecerá si- lenciado incluso después de que desconecte el teléfono de esta unidad. -
Page 142: Aceptación De Una Llamada Telefónica
Sección Teléfono Bluetooth Mantenga pulsado BAND hasta que Voice dial aparezca en el display. Voice dial aparece en el display. Cuando se vi- sualiza Voice dial ON, se activa la función de reconocimiento de voz. # Si su teléfono móvil no tiene la función de re- conocimiento de voz, en el display aparece No voice dial y la operación no está... -
Page 143: Introducción Al Uso Avanzado De La Función Manos Libres
Teléfono Bluetooth Rechazo de una llamada entrante Si desea no interrumpir su llamada actual para responder una llamada entrante, puede rechazarla y agregar el número a la lista de historial de llamadas perdidas. % Pulse PHONE para rechazar una llama- da entrante. -
Page 144: Conexión De Un Teléfono Móvil
Sección Teléfono Bluetooth Search & Connect (buscar y conectar)— Connection open (conexión abierta)— Connect phone (conectar teléfono)— Delete phone (eliminar teléfono)— PH.B.Transfer (transferencia del directorio de teléfonos)—Refuse calls (ajuste de rechazo automático)—Auto answer (ajuste de res- puesta automática)—Ring tone (selección de tono de llamada—Auto connect (ajuste de conexión automática)—Echo cancel (cancela- ción de eco)—Device Info (información del... -
Page 145: Búsqueda De Los Teléfonos Móviles Disponibles
Mientras se realiza la conexión, se mostrará Connecting. Para completar la conexión, veri- fique el nombre del dispositivo (Pioneer BT Unit) e ingrese el código de enla- ce de su teléfono móvil. Si la conexión se esta- blece, se visualizará Connected. -
Page 146: Registro Del Teléfono Móvil Conectado
Sección Teléfono Bluetooth Utilice MULTI-CONTROL para seleccio- nar Disconnect phone en el menú de fun- ciones. El nombre del dispositivo del teléfono conec- tado se visualiza en el display. Pulse MULTI-CONTROL para desco- nectar un teléfono móvil de esta unidad. Una vez completada la desconexión, aparece Disconnected. -
Page 147: Conexión A Un Teléfono Móvil Registrado
Teléfono Bluetooth Pulse MULTI-CONTROL derecha para se- leccionar Delete YES. Se visualiza Delete YES. El borrado del teléfo- no se ajustará ahora en modo en espera. Pulse MULTI-CONTROL para eliminar el teléfono. Una vez que se borre el teléfono, se visualizará Deleted. -
Page 148: Uso Del Directorio De Teléfonos
Sección Teléfono Bluetooth Pulse MULTI-CONTROL para activar la conexión automática. ON aparece en el display. Si su teléfono móvil está preparado para la co- nexión inalámbrica Bluetooth, se establecerá automáticamente la conexión a esta unidad. # Para desactivar la conexión automática, vuel- va a pulsar MULTI-CONTROL. -
Page 149: Llamada A Un Número Del Directorio De Teléfonos
Teléfono Bluetooth Utilice MULTI-CONTROL para seleccio- nar PH.B.Name view en el menú de funcio- nes. Invert Names YES aparece en el display. Pulse MULTI-CONTROL para cambiar el orden de visualización de nombres. Se mostrará Inverted y se cambiará el orden de visualización de nombres. -
Page 150: Asignación De Géneros A Números De Teléfono
Sección Teléfono Bluetooth Asignación de géneros a números de teléfono Si hay muchas entradas en el Directorio de te- léfonos, puede resultar útil asignarlos a géne- ros (categorías) específicos para que la búsqueda sea más fácil. Existen cuatro géne- ros preajustados a los que puede asignar en- tradas: Home, Mobile, Office y Other. -
Page 151: Edición De Números De Teléfono
Teléfono Bluetooth # Los caracteres europeos y los caracteres rusos no se pueden combinar. Pulse MULTI-CONTROL arriba o abajo para seleccionar una letra. # Para eliminar un carácter y dejar un espacio, seleccione “_” (subrayado). Pulse MULTI-CONTROL derecha para mover el cursor a la siguiente posición de carácter. -
Page 152: Uso De Números Prefijados
Sección Teléfono Bluetooth Mantenga pulsado MULTI-CONTROL para visualizar la pantalla de ingreso de gé- nero. Se visualiza Edit genre. Haga girar MULTI-CONTROL hacia la de- recha o hacia la izquierda para cambiar a la pantalla de borrado de memoria. Al girar MULTI-CONTROL se cambiarán las pantallas de entrada en el siguiente orden: Edit genre (pantalla de ingreso de género)—... -
Page 153: Uso Del Historial De Llamadas
Teléfono Bluetooth # Si selecciona All clear, se borrará toda la me- moria, con independencia de los elementos. Pulse MULTI-CONTROL derecha para se- leccionar el elemento que desea eliminar de esta unidad. Se visualiza Clear memory YES. El borrado de memoria se ajustará... -
Page 154: Asignación De Números Prefijados
Sección Teléfono Bluetooth Pulse MULTI-CONTROL para hacer una llamada. Para finalizar la llamada, pulse PHONE. El tiempo estimado de la llamada aparece en el display (esto puede diferir ligeramente del tiempo de llamada real). Llamada a un número internacional desde el Historial de llamadas Cuando llame a un número internacional al- macenado en el Historial de llamadas, ante- ponga al número de país un signo +. -
Page 155: Cancelación Del Eco Y Reducción De Ruido
Teléfono Bluetooth Pulse MULTI-CONTROL derecha para mover el cursor a la siguiente posición. Cuando visualice el número deseado, pulse MULTI-CONTROL derecha para mover el cur- sor a la siguiente posición y seleccione el nú- mero siguiente. Pulse MULTI-CONTROL izquierda para mover el cursor hacia atrás en el display. -
Page 156: Ajuste De La Respuesta Automática
Visualización de la dirección BD de esta unidad Utilice MULTI-CONTROL para seleccio- nar Device Info en el menú de funciones. El nombre del dispositivo (Pioneer BT Unit) de esta unidad se mostrará en el display. Pulse MULTI-CONTROL izquierda para visualizar la dirección BD. -
Page 157: Visualización De La Versión Del Sistema Para Tareas De Reparación
Puede visualizar las versiones y confirmarlas. Utilice MULTI-CONTROL para seleccio- nar Device Info en el menú de funciones. El nombre del dispositivo (Pioneer BT Unit) de esta unidad se mostrará en el display. Pulse MULTI-CONTROL abajo para cam- biar a la versión del sistema de esta uni- dad. -
Page 158: (Reproductor De Audio Bluetooth)
Sección Bluetooth Audio Escuchar canciones en BT Audio (reproductor de audio Bluetooth) 1 1 1 1 2 2 2 2 Puede utilizar esta unidad para controlar un re- productor portátil de audio, vendido por separa- do, provisto de tecnología inalámbrica Bluetooth (reproductor de audio Bluetooth). -
Page 159: Bluetooth Audio
Bluetooth Audio Ajuste del reproductor de audio Bluetooth Antes de utilizar su reproductor de audio Blue- tooth, debe configurar la unidad para su uso. Activación ConsulteActivación de la fuente BT Audio en la página 193 para obtener instrucciones sobre cómo activar BT Audio. Conexión Consulte Conexión de un reproductor de audio Bluetooth en esta página para saber cómo co-... -
Page 160: Función
Sección Bluetooth Audio Función 1 1 1 1 Visualización de función Muestra el estado de la función. Cuando esté conectado a través de tecnología inalámbrica Bluetooth, las funciones “Repro- ducir”, “Parar” y otras funciones del reproduc- tor de audio Bluetooth se pueden controlar desde el menú... -
Page 161: Para Detener La Reproducción
Puede visualizar la dirección BD de esta uni- dad. Utilice MULTI-CONTROL para seleccio- nar Device Info en el menú de funciones. El nombre del dispositivo (Pioneer BT Unit) de esta unidad se mostrará en el display. Pulse MULTI-CONTROL izquierda para visualizar la dirección BD. - Page 162 Sección Bluetooth Audio Pulse MULTI-CONTROL abajo para cam- biar a la versión del sistema de esta uni- dad. Se muestra la versión del sistema (micropro- cesador) de esta unidad. # Si se pulsa MULTI-CONTROL izquierda apare- ce la versión del módulo Bluetooth de esta uni- dad.
-
Page 163: Reproductor De Cd Múltiple
Reproductor de CD múltiple Reproducción de un CD 1 1 1 1 3 3 3 Se puede usar esta unidad para controlar un re- productor de CD múltiple, que se vende por se- parado. A continuación se indican los pasos básicos necesarios para reproducir un CD con el re- productor de CD múltiple. -
Page 164: Selección Directa De Una Pista
Sección Reproductor de CD múltiple Selección directa de una pista Al utilizar el mando a distancia, se puede se- leccionar directamente una pista ingresando el número de la pista deseada. Pulse DIRECT. Se visualiza en el display el área para ingresar el número de pista. -
Page 165: Repetición De Reproducción
Reproductor de CD múltiple Notas ! Al reproducir un disco CD TEXT en un repro- ductor de CD múltiple compatible con CD TEXT, no se podrá cambiar al ingreso de títu- los de discos. El título del disco estará ya gra- bado en un disco CD TEXT. -
Page 166: Pausa De La Reproducción De Un Cd
Sección Reproductor de CD múltiple Pulse MULTI-CONTROL para activar la reproducción con exploración. Se reproducirán los primeros 10 segundos de cada pista del disco actual (o la primera pista de cada disco). Cuando encuentre la pista (o el disco) deseada(o), pulse MULTI-CONTROL para desactivar la exploración. -
Page 167: Reproducción De La Lista De Reproducción Its
Reproductor de CD múltiple Nota Después que los datos para 100 discos han sido almacenados en la memoria, los datos para un nuevo disco se sobreponen a los datos más anti- guos. Reproducción de la lista de reproducción ITS La reproducción ITS le permite escuchar las pistas que ha ingresado en su lista de repro- ducción ITS. -
Page 168: Uso De Las Funciones De Títulos De Discos
Sección Reproductor de CD múltiple Pulse MULTI-CONTROL abajo para bo- rrar todas las pistas del CD que se está re- produciendo de la lista de reproducción ITS. Todas las pistas del CD que se está reprodu- ciendo se borran de la lista de reproducción y se visualiza Memory deleted. -
Page 169: Visualización De Los Títulos
Reproductor de CD múltiple ! Después que los datos para 100 discos han sido almacenados en la memoria, los datos para un nuevo disco se sobreponen a los datos más antiguos. Visualización de los títulos Puede visualizar la información de texto en cualquier disco al cual se le haya ingresado un título. -
Page 170: Selección De Pistas De La Lista De Títulos De Las Pistas
Sección Reproductor de CD múltiple % Mantenga pulsado DISPLAY hasta que la información de texto comience a despla- zarse por el display. Se desplazan los títulos. Nota Si se activa la función de desplazamiento conti- nuo en el ajuste inicial, la información de texto se desplazará... -
Page 171: Para Reproducir Canciones En El Ipod
Para reproducir canciones en el iPod Para escuchar canciones en su iPod 1 1 1 1 2 2 2 Se puede utilizar esta unidad para controlar un adaptador de iPod, que se vende por separado. A continuación se indican los pasos básicos necesarios para hacer funcionar un iPod. -
Page 172: Selección De Una Lista De Reproducción
Sección Para reproducir canciones en el iPod Utilice MULTI-CONTROL para seleccio- nar GENRE, ARTIST, ALBUM o SONG de entre las categorías. Haga girar el control para cambiar la catego- ría y pulse para seleccionarla. Se visualiza la lista de la categoría selecciona- Utilice MULTI-CONTROL para seleccio- nar una canción, álbum, artista o género. -
Page 173: Introducción A Las Funciones Avanzadas Del Adaptador De Ipod
Para reproducir canciones en el iPod Introducción a las funciones avanzadas del adaptador de iPod 1 1 1 1 Visualización de función Muestra el estado de la función. Pulse MULTI-CONTROL para visualizar el menú principal. FUNCTION, AUDIO y ENTERTAINMENT apa- recen en el display. -
Page 174: Para Poner En Pausa Una Canción
Sección Para reproducir canciones en el iPod ! Shuffle Songs – Reproduce canciones en un orden aleatorio dentro de la lista selec- cionada ! Shuffle Albums – Selecciona un álbum de manera aleatoria y luego reproduce todas las canciones en el orden en que se en- cuentran en el álbum ! Shuffle OFF –... -
Page 175: Sintonizador De Tv
Sintonizador de TV Uso del televisor 1 1 1 1 Se puede utilizar esta unidad para controlar un sintonizador de TV, que se vende por separado. Para obtener más información, consulte el manual de instrucciones del sintonizador de TV. Esta sección proporciona información acerca de las funciones de TV con esta unidad que difieren de las descritas en el manual de instrucciones del sintonizador de TV. -
Page 176: Introducción A Las Funciones Avanzadas Del Sintonizador De Tv
Sección Sintonizador de TV Introducción a las funciones avanzadas del sintonizador de TV 1 1 1 1 Visualización de función Muestra los nombres de las funciones. Pulse MULTI-CONTROL para visualizar el menú principal. FUNCTION, AUDIO y ENTERTAINMENT apa- recen en el display. Utilice MULTI-CONTROL para seleccio- nar FUNCTION. -
Page 177: Selección De Emisoras De La Lista De Canales Presintonizados
Sintonizador de TV Utilice MULTI-CONTROL para seleccio- nar la emisora deseada. Haga girar el control para cambiar la emisora y pulse para seleccionarla. # También puede cambiar la emisora pulsando MULTI-CONTROL arriba o abajo. # Si no se utiliza la lista en unos 30 segundos, el modo de lista de canales presintonizados se cancelará... -
Page 178: Reproductor De Dvd
Sección Reproductor de DVD Reproducción de un disco 1 1 1 1 2 2 2 2 Se puede utilizar esta unidad para controlar un reproductor de DVD o un reproductor de DVD múltiple, que se vende por separado. Para obtener más información sobre el funcio- namiento, consulte el manual de funciona- miento del reproductor DVD o del reproductor de DVD múltiple. -
Page 179: Introducción A Las Funciones Avanzadas Del Reproductor De Dvd
Reproductor de DVD Introducción a las funciones avanzadas del reproductor de DVD 1 1 1 1 Visualización de función Muestra los nombres de las funciones. Pulse MULTI-CONTROL para visualizar el menú principal. FUNCTION, AUDIO y ENTERTAINMENT apa- recen en el display. Utilice MULTI-CONTROL para seleccio- nar FUNCTION. -
Page 180: Pausa De La Reproducción De Un Disco
Sección Reproductor de DVD Notas ! Si se seleccionan otros discos durante la repe- tición de reproducción, la gama de repetición cambia a Disc repeat. ! Durante la reproducción de un vídeo CD o un CD, si se realiza una búsqueda de pistas o el avance rápido/retroceso durante la repetición Track repeat, la gama de repetición cambia a Disc repeat. -
Page 181: Uso De La Lista De Reproducción Its Y Las Funciones De Títulos De Discos
Reproductor de DVD Uso de la lista de reproducción ITS y las funciones de títulos de discos ! Se pueden utilizar estas funciones sólo si un reproductor de DVD múltiple está co- nectado a esta unidad. ! Esta función es ligeramente diferente de la reproducción ITS con un reproductor de CD múltiple. -
Page 182: Ajustes De Audio
Sección Ajustes de audio Introducción a los ajustes de audio 1 1 1 1 Visualización de audio Muestra el estado de los ajustes de audio. Pulse MULTI-CONTROL para visualizar el menú principal. FUNCTION, AUDIO y ENTERTAINMENT apa- recen en el display. Utilice MULTI-CONTROL para seleccio- nar AUDIO. -
Page 183: Uso Del Ecualizador
Ajustes de audio Pulse MULTI-CONTROL izquierda o de- recha para ajustar el balance entre los alta- voces izquierdos/derechos. Cada vez que se pulsa MULTI-CONTROL iz- quierda o derecha, se mueve el balance entre los altavoces izquierdos/derechos hacia la iz- quierda o hacia la derecha. Se visualiza L 15 a R 15 mientras el balance entre los altavoces izquierdos/derechos se mueve desde la izquierda hacia la derecha. -
Page 184: Ajuste Del Ecualizador Gráfico De
Sección Ajustes de audio # La gama real de ajustes difiere de acuerdo con la curva de ecualización seleccionada. # No se puede ajustar una curva de ecualiza- ción con todas las frecuencias definidas en 0. Ajuste del ecualizador gráfico de 7 bandas Para la curva Custom1 o Custom2, se puede ajustar el nivel de cada banda. -
Page 185: Uso De La Salida De Subgraves
Ajustes de audio Uso de la salida de subgraves Esta unidad está equipada con una salida de subgraves que se puede activar o desactivar. Utilice MULTI-CONTROL para seleccio- nar Sub W.1. Sub W.1 aparece en el display. Pulse MULTI-CONTROL para activar la salida de subgraves. -
Page 186: Uso Del Filtro De Paso Alto
Sección Ajustes de audio Uso del filtro de paso alto Cuando no desea que se generen los sonidos bajos de la gama de frecuencias de salida de subgraves a través de los altavoces delanteros o traseros, active el filtro de paso alto (HPF). Sólo las frecuencias más altas que aquéllas en la gama seleccionada se generan a través de los altavoces delanteros o traseros. -
Page 187: Uso Del Nivelador Automático De Sonido
Ajustes de audio Uso del nivelador automático de sonido Al conducir su automóvil, los ruidos en el ve- hículo cambian de acuerdo con la velocidad de conducción y las condiciones de la carrete- ra. El nivelador automático de sonido (ASL) controla los niveles variables de estos ruidos y aumenta el volumen automáticamente, si los ruidos alcanzan niveles más altos. -
Page 188: Ajustes Iniciales
Sección Ajustes iniciales Configuración de los ajustes iniciales 1 1 1 Utilizando los ajustes iniciales, puede perso- nalizar varios ajustes del sistema para lograr un funcionamiento óptimo de esta unidad. 1 Visualización de función Muestra el estado de la función. Mantenga pulsado SOURCE hasta que se apague la unidad. -
Page 189: Ajuste De La Fecha
Ajustes iniciales Ajuste de la fecha La visualización de calendario ajustada en este modo aparece cuando la fuente del telé- fono está seleccionada y las fuentes o la de- mostración de características están desactivadas. Utilice MULTI-CONTROL para seleccio- nar Calendar. Calendar aparece en el display. -
Page 190: Activación Y Desactivación De La Visualización Del Reloj De Apagado
Sección Ajustes iniciales Activación y desactivación de la visualización del reloj de apagado Si la visualización del reloj de apagado está activada, cuando las fuentes y la demostra- ción de características están desactivadas, la visualización de calendario y reloj aparece en el display. -
Page 191: Cambio De La Apertura Automática De La Cara
Ajustes iniciales Pulse MULTI-CONTROL para activar el tono de advertencia. ON aparece en el display. # Para desactivar el tono de advertencia, vuelva a pulsar MULTI-CONTROL. Cambio de la apertura automática de la cara Para brindar protección contra robo, la carátu- la se abre automáticamente y se extrae con fa- cilidad. -
Page 192: Ajuste De La Salida Posterior Y Del Controlador De Subgraves
Sección Ajustes iniciales Ajuste de la salida posterior y del controlador de subgraves La salida posterior de esta unidad (salida de cables de altavoces traseros y salida RCA pos- terior) se puede usar para la conexión de alta- voces de toda la gama (Rear SP :F.Range) o subgraves (Rear SP :S/W). -
Page 193: Cambio Del Modo Inverso
Ajustes iniciales Notas ! Recuerde que si este modo de demostración sigue funcionando cuando el motor del ve- hículo está apagado, se puede descargar la batería. ! También puede activar o desactivar la demos- tración de características, pulsando DISPLAY mientras la unidad está apagada. Para obte- ner más detalles, consulte Modo de demostra- ción de características en la página 110. -
Page 194: Ingreso Del Código Pin Para La Conexión Inalámbrica Bluetooth
Sección Ajustes iniciales Ingreso del código PIN para la conexión inalámbrica Bluetooth Para conectar su teléfono móvil a esta unidad a través de tecnología inalámbrica Bluetooth, debe ingresar el código PIN en su teléfono para verificar la conexión. El código predefini- do es 0000, aunque puede cambiarlo en esta función. -
Page 195: Otras Funciones
Otras funciones Uso de la fuente AUX Esta unidad puede controlar hasta dos com- ponentes auxiliares, como VCR o dispositivos portátiles (se venden por separado). Cuando están conectados, los componentes auxiliares son identificados automáticamente como fuentes AUX y se asignan a AUX1 o AUX2. La relación entre las fuentes AUX1 y AUX2 se ex- plica a continuación. -
Page 196: Uso De Diferentes Visualizaciones De Entretenimiento
Sección Otras funciones Pulse MULTI-CONTROL derecha para mover el cursor a la siguiente posición de carácter. Cuando visualice la letra deseada, pulse MULTI-CONTROL derecha para mover el cur- sor a la siguiente posición y seleccione la letra siguiente. Pulse MULTI-CONTROL izquierda para mover el cursor hacia atrás en el display. -
Page 197: Información Adicional
Información adicional Comprensión de los mensajes de error del reproductor de CD incorporado Cuando contacte con su concesionario o con el centro de servicio Pioneer más cercano, asegúrese de anotar el mensaje de error. Mensaje Causa Acción ERROR-11, 12, Disco sucio Limpie el disco. -
Page 198: Discos Cd-R/Cd-Rw
Apéndice Información adicional ! Para limpiar un CD, pásele un paño suave desde el centro hacia afuera. ! Si se usa un calefactor cuando hace frío, se puede condensar humedad en las pie- zas internas del reproductor de CD. La hu- medad condensada puede causar una mal funcionamiento del reproductor de CD. -
Page 199: Ficheros Mp3, Wma, Aac Y Wav
Información adicional Ficheros MP3, WMA, AAC y ! MP3 es la abreviatura de “MPEG Audio Layer 3” y alude a una norma de tecnología de compresión de audio. ! WMA es la abreviatura de Windows Media™ Audio, y se refiere a la tecnología de compresión de audio desarrollada por Microsoft Corporation. -
Page 200: Información Adicional Sobre Mp3
Apéndice Información adicional ! Esta unidad reproduce ficheros con extensio- nes (.mp3, .wma, m4a o .wav) como ficheros MP3/WMA/AAC/WAV, respectivamente. Para evitar ruidos y fallas de funcionamiento, no use estas extensiones para ficheros que no sean MP3/WMA/AAC/WAV. Información adicional sobre MP3 ! Los ficheros son compatibles con los for- matos de etiqueta ID3 Ver. -
Page 201: Acerca De Las Carpetas Y Los Ficheros Mp3/Wma/Aac/Wav
Información adicional ! La calidad del sonido de los ficheros WAV suele ser mejor cuando se utiliza una gran cantidad de bits de cuantificación. Esta unidad puede reproducir grabaciones con 8 y 16 bits de cuantificación (LPCM) o con 4 bits de cuantificación (MS ADPCM), pero para poder disfrutar de una determinada calidad de sonido, se recomienda utilizar discos grabados con la mayor cantidad de... -
Page 202: Glosario
Apéndice Información adicional Glosario A2DP A2DP es la abreviatura de Advanced Audio Distribution Profile. Este perfil permite realizar la transmisión de los datos de audio de alta calidad estéreo o monoaural a través de tecno- logía inalámbrica Bluetooth. AAC es la abreviatura de “Advanced Audio Co- ding”... - Page 203 Información adicional HSP es la abreviatura de Head Set Profile (Per- fil de audífono), el que se usa para conectar los audífonos con un terminal de comunica- ción mediante la tecnología inalámbrica Blue- tooth. Las listas de reproducción creadas con el pro- grama “WINAMP”...
- Page 204 Apéndice Información adicional Velocidad de grabación Expresa el volumen de datos por segundo o unidades bps (bits por segundo). Cuanto mayor sea la velocidad, más información habrá para reproducir el sonido. Si se utiliza el mismo método de codificación (tal como MP3), cuanto mayor sea la velocidad, la cali- dad del sonido será...
-
Page 205: Especificaciones
Información adicional Especificaciones Generales Fuente de alimentación ... 14,4 V CC (12,0 V a 14,4 V permisible) Sistema de conexión a tierra ... Tipo negativo Consumo máximo de corriente ... 10,0 A Dimensiones (An × Al × Pr): Bastidor ... 178 × 50 × 161 mm Cara anterior ... - Page 206 Apéndice Información adicional Relación de señal a ruido ... 65 dB (red IEC-A) Bluetooth Versión ... Certificada para Bluetooth Potencia de salida ... +4 dBm Máx. (Clase de potencia 2) Características del diodo de láser Longitud de onda ... 785 nm a 815 nm Salida máxima ...
- Page 207 TEL: (03) 9586-6300 PIONEER ELECTRONICS OF CANADA, INC. 300 Allstate Parkway, Markham, Ontario L3R OP2, Canada TEL: 1-877-283-5901 PIONEER ELECTRONICS DE MEXICO, S.A. de C.V. Blvd.Manuel Avila Camacho 138 10 piso Col.Lomas de Chapultepec, Mexico, D.F. 11000 TEL: 55-9178-4270 先鋒股份有限公司...