Table of Contents
Advertisement
Quick Links
Register your product and get support at
www.philips.com/welcome
EN
Compact Theatre System (CinemaOne)
FR
Home Cinéma compact (CinemaOne)
ES
Sistema de cine en casa compacto (CinemaOne)
DE
Kompaktes Heimkinosystem (CinemaOne)
NL
Compact Theatre-systeem (CinemaOne)
1_cts4000_12_eng3.indd 1
1_cts4000_12_eng3.indd 1
CTS4000
5
43
81
119
159
10/6/2008 10:53:56 AM
10/6/2008 10:53:56 AM
Advertisement
Table of Contents

Related Manuals for Philips CTS4000/05


Summary of Contents for Philips CTS4000/05
- Page 1 Register your product and get support at www.philips.com/welcome Compact Theatre System (CinemaOne) Home Cinéma compact (CinemaOne) Sistema de cine en casa compacto (CinemaOne) Kompaktes Heimkinosystem (CinemaOne) Compact Theatre-systeem (CinemaOne) 1_cts4000_12_eng3.indd 1 1_cts4000_12_eng3.indd 1 CTS4000 10/6/2008 10:53:56 AM 10/6/2008 10:53:56 AM...
-
Page 2: How To Connect Plug
Performer’s Protection Acts 1958 to 1972. 1_cts4000_12_eng3.indd 2 1_cts4000_12_eng3.indd 2 Italia DICHIARAZIONE DI CONFORMITA’ Si dichiara che l’apparecchio CTS4000, Philips risponde alle prescrizioni dell’art. 2 comma 1 del D.M. 28 Agosto 1995 n. 548. Fatto a Eindhoven Philips Consumer Electronics... - Page 3 Advarsel: Usynlig laserstråling ved åbning når sikkerhedsafbrydere er ude af funktion. Undgå utsættelse for stråling. Bemærk: Netafbryderen er sekundært indkoblet og ofbryder ikke strømmen fra nettet. Den indbyggede netdel er derfor tilsluttet til lysnettet så længe netstikket sidder i stikkontakten. Klass 1 laseraparat Varning! Om apparaten används på...
- Page 4 Manufactured under license from Dolby Laboratories. Dolby, Pro Logic, and the double-D symbol are registered trademarks of Dolby Laboratories. Manufactured under license under U.S. Patent #’s: 5,451,942; 5,956,674; 5,974,380; 5,978,762; 6,487,535 & other U.S. and worldwide patents issued & pending. DTS and DTS Digital Surround are registered trademarks and the DTS logos and Symbol are trademarks of DTS, Inc.
-
Page 5: Table Of Contents
Contents 1 Important Safety and important notice 2 Your product Features highlight Product overview 3 Connect Place the unit Connect video cables Connect to the power outlet Connect audio cables/other devices 4 Get started Prepare the remote control Find the correct viewing channel Select menu display language Select a play source 5 Play... -
Page 6: Important
1 Important Safety and important notice Warning! Risk of fi re or electric shock! • Ensure that air can circulate freely through the ventilation holes on this unit. Allow at least 5~10 cm clearance around the unit. • Never place this unit, remote control or batteries near naked fl... -
Page 7: Copyright Notice
Copyright notice This product incorporates copyright protection technology that is protected by method claims of certain U.S. patents and other intellectual property rights owned by Macrovision Corporation and other rights owners. Use of this copyright protection technology must be authorised by Macrovision Corporation, and is intended for home and other limited viewing uses only unless otherwise authorised by Macrovision Corporation. -
Page 8: Your Product
2 Your product Congratulations on your purchase, and welcome to Philips! To fully benefi t from the support that Philips offers, register your product at www.philips.com/welcome. This Compact Theatre System (CinemaOne) is designed to complement your home perfectly. Enjoy the excellent sound and picture quality. -
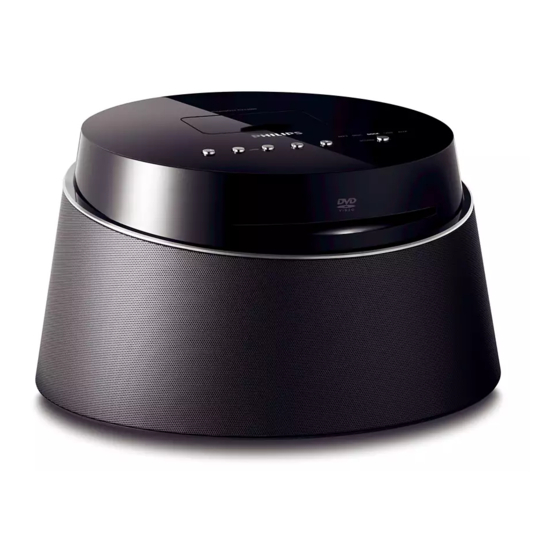
Page 9: Product Overview
Product overview Main unit Disc compartment (Standby-on) • Turn on this unit or turn off to standby mode. - (Volume) • Adjust the volume level. u (Play/Pause) • Start or pause disc play. Docking Station • To connect iPod. Z (Open/Close) •... - Page 10 Remote control CinemaOne 10 EN 1_cts4000_12_eng3.indd 10 1_cts4000_12_eng3.indd 10 (Standby-On) • Turn on this unit or turn off to standby mode. Z (Open/Close) • Open or close the disc compartment. Source buttons DISC • : switch to DISC mode. DOCK •...
- Page 11 MENU • For DVD, go to title menu. • For VCD version 2.0 or SVCD with PBC turned on: return to the menu during playback. • Confi rm an entry or selection. Cursor buttons (v V b B) • Navigate through the on-screen menu. •...
-
Page 12: Connect
3 Connect This section describes the basic connections required for this Compact Theatre System (CinemaOne) before it can be used. Basic connections: • Connect video cables • Connect to power outlet Optional connections: • Connect audio cables/other device • Connect audio from T •... -
Page 13: Connect Video Cables
Connect video cables This section describes how to connect this Compact Theatre System to your TV so to enable viewing of disc play. Select the best video connection that your TV can support. Option 1: • Connect to the HDMI socket (for a HDMI, DVI or HDCP-compliant TV). - Page 14 Option 2: Connect to the SCART socket Connect the SCART converter cable (supplied) from the VIDEO OUT, AUX L/R sockets on this unit to the SCART input socket on your TV. 14 EN 1_cts4000_12_eng3.indd 14 1_cts4000_12_eng3.indd 14 Option 3: Connect to the Video (CVBS) socket SCART Connect a composite video cable...
-
Page 15: Connect To The Power Outlet
Connect to the power outlet Connect the power adaptor and power cord from this unit to the power oulet. When all the required connections are complete, attach the rear cover and you are ready to enjoy this Compact Theatre System. 1_cts4000_12_eng3.indd 15 1_cts4000_12_eng3.indd 15 Connect audio cables/other... - Page 16 Connect audio from cable box/ recorder/game console Connect an audio cable (not supplied) from the AUX L/R sockets on this unit to the AUDIO OUT sockets on the device. Note • To listen to the audio output from this connection, press AUX / MP3 LINK repeatedly until ‘AUX’...
- Page 17 iPod Dock Slide open the lid of the docking station. Dock the iPod. • Push back the rear support to dock into position. To view videos from iPod, switch to the corresponding channel on your TV. Note • To listen to the audio output from this connection, press DOCK.
-
Page 18: Get Started
4 Get started Prepare the remote control Push to open the battery compartment cover. Insert two batteries type R03 or AAA. Match the indications (+-) inside the battery compartment. Close the cover. Note • If you are not going to use the remote control for a long time, remove the batteries. -
Page 19: Find The Correct Viewing Channel
Find the correct viewing channel Press 2 to turn on the Compact Theatre System. Press DISC to switch to disc mode. Turn on the TV and switch it to the correct video-in channel. • You may go to the lowest channel on your TV, then press the Channel Down button on your TVs remote control until you see the Video In channel. -
Page 20: Select A Play Source
Select a play source On the main unit Press SOURCE button repeatedly to select: DISC > DOCK > USB > AUX > MP3 > DISC ... On the remote control • Press DISC to switch to DISC mode. DOCK to switch to iPod mode. •... -
Page 21: Play
5 Play Play from disc Playable discs DVD Video • Region 2 (Europe) • Region 5 (Russia) DVD±RW (DVD Rewritable) DVD±R (DVD Recordable) DVD+R DL (DVD+R Double Layer) CD-RW (CD-Rewritable) ReWritable CD-R (CD-Recordable) Audio CD (Compact Disc Digital Audio) Video CD •... -
Page 22: Play Video
Play video Note • For video disc, playback always resumes from the point where it was last stopped. To start playback from the beginning, press í while the message is displayed. Control a title Play a title. Use the remote control to control the title. Button Action Pause/ resume play. - Page 23 Access DVD menu Press DISC to access disc main menu. Select a play option, then press OK. • In some menus, press number buttons to input your selection. • To return to the title menu during playback, press MENU. Access VCD menu or preview menu The PBC (Playback Control) for VCD is turned on by default in the factory.
- Page 24 Quick skip play to a specifi c time During playback, press INFO. The disc status menu is displayed. Select the current elapsed playing time in the menu, then press OK. [ TT Time ] • (title time) [ CH Time ] •...
-
Page 25: Play Music
Play music Note • For some commercial audio discs, playback may resume from the point where it was last stopped. To start play from fi rst track, press í. Control a track Play a track. Use the remote control to control the track. -
Page 26: Play Photo
Play photo Play photos as slideshow This unit can play JPEG photos (fi les with .jpeg or .jpg extensions). Insert a disc or USB that contains the JPEG photos. Press DISC or USB. For a Kodak disc, the slideshow begins automatically. -
Page 27: Play From Usb Device
Play musical slideshow Play MP3/WMA music fi les and JPEG photo fi les simultaneously to create musical slideshow. The MP3/WMA and JPEG fi les must be stored on the same disc or USB device. Play MP3/WMA music. Navigate to the photo folder/album and press u to start slideshow play. -
Page 28: Play From Portable Media Player
2nd gen iPod with colour display Note • Refer to Philips website for latest updates on the supported iPod range. Control iPod music Push to open the lid of the docking station Dock your iPod to the docking station and turn it on. - Page 29 Start play on your iPod. • To view iPod video play, connect a video cable from the docking station to your TV and turn on ‘TV ON’ setting in your iPod. During playback, you can use the remote control to control the music play. Button Action Change the volume level.
-
Page 30: Adjust Sound
6 Adjust sound Control the volume Press VOL +- to increase or decrease the volume level. • To mute the volume, press • To restore the volume, press or press the volume button. Select a preset sound effect CinemaOne Press SOUND repeatedly to select a sound effect that most suits the video or music you play. -
Page 31: Adjust Settings
7 Adjust settings This section describes the various setting options of this unit. Symbol Options [ General Setup ] [ Audio Setup ] [ Video Setup ] [ Preference Setup ] General setup Press OPTIONS. [ General Setup ] menu is displayed. Press B. -
Page 32: Audio Setup
Tips • Enter this unit’s DivX registration code when you rent or purchase video from www.divx.com/vod. The DivX videos rented or purchased through the DivX® VOD (Video On Demand) service can be played only on the device to which it is registered. 32 EN 1_cts4000_12_eng3.indd 32 1_cts4000_12_eng3.indd 32... -
Page 33: Video Setup
[ HDMI Audio ] When you connect this unit and TV with HDMI cable, select the audio output setting for this connection. [ On ] • – the sound is output through both your TV and this speaker system. If the audio format on the disc is not supported, it will be downmixed to two-channel sound (linear-PCM). - Page 34 [ TV Type ] If the video does not appear correctly, change the setting. By default, this setting matches the most common setting for TVs in your country. • PAL ] – for PAL-system TV. • [ NTSC ] – for NTSC-system TV. •...
-
Page 35: Preference Setup
Note • If the setting is not compatible with your TV, a blank screen appears. Wait for 15 seconds for auto recover or switch to its default mode as follows: 1) Press Z. 2) Press b. 3) Press ZOOM. [ Closed Caption ] Turn on or off display captions. - Page 36 [ Audio ] Select the default audio language for DVDs. [ Subtitle ] Select the default subtitle language for DVDs. [ Disc Menu ] Select the menu language for DVDs. Note • If the language you have set is not available on the disc, the disc uses its own default language.
- Page 37 • This information is required when you want to fi nd out if a newest software version is available at the Philips website that you may download and install on this unit. [ Default ] Reset all the settings of this unit to factory default, except for [ Disc Lock ], [ Password ] and [ Parental ] settings.
-
Page 38: Additional Information
8 Additional information Update software Philips provides software updates to ensure that this unit is compatible with the newest formats. To check for updates, compare the current software version of this unit with the latest software version available at the Philips website. -
Page 39: Specifi Cations
Specifi cations Note • Specifi cation and design are subject to change without notice. Accessories supplied • Quick Start Guide • Remote control and batteries • SCART converter cable • Composite video cable (yellow) • HDMI cable • 3.5mm stereo audio cable (for MP3 LINK) •... -
Page 40: Troubleshooting
If you encounter problems when using this unit, check the following points before requesting service. If the problem remains unsolved, register your product and get support at www.philips.com/welcome. • Disconnect this unit from the power outlet for a few minutes, then connect again. - Page 41 Sound No sound. No sound on HDMI connection. No sound from TV programme. Play DivX video fi les cannot be played. The aspect ratio of the screen is not aligned with the TV display setting. DivX subtitle are not displayed correctly. The contents of the USB fl...
-
Page 42: Glossary
10 Glossary Aspect ratio Aspect ratio refers to the length to height ratio of TV screens. The ratio of a standard TV is 4:3, while the ratio of a high-defi nition or wide TV is 16:9. The letter box allows you to enjoy a picture with a wider perspective on a standard 4:3 screen.