Table of Contents
Advertisement
Quick Links
Always there to help you
1
Register your product and get support at
www.philips.com/welcome
HD4749
Question?
Contact
Philips
EN
User manual
LV
Lietotāja rokasgrāmata
BG
Ръководство за потребителя
PL
Instrukcja obsługi
CS
Příručka pro uživatele
RO
Manual de utilizare
ET
Kasutusjuhend
RU
Руководство пользователя
www.philips.com/welcome
http://www.philips.com/welcome
HR
Korisnički priručnik
SK
Príručka užívateľa
HU
Felhasználói kézikönyv
SL
Uporabniški priročnik
g
LT
Vartotojo vadovas
SR
Korisnički priručnik
User manual
Recipe
3
m
n
o
p
Specifications are subject to change without notice
© 2015 Koninklijke Philips N.V.
All rights reserved.
q
HD4749_UM_EEU_v2.0_151215
English
Default
cooking
Menus
Preset time
temperature
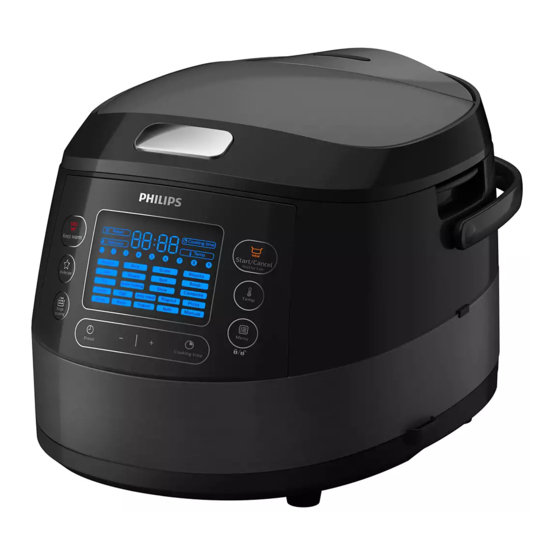
1 Your multicooker
Reheat (Reheat)
/
85°C
Rice (Rice)
1-24 hr
130-140°C
Congratulations on your purchase, and welcome to Philips!
To fully benefit from the support that Philips offers, register your
Grain (Grain)
1-24 hr
130-140°C
product at www.philips.com/welcome.
Risotto (Risotto)
1-24 hr
130-140°C
2 What's in the box
Jam (Jam)
1-24 hr
90-100°C
Steam (Steam)
1-24 hr
100°C
a
Multicooker main unit
f
Measuring cup
Boil (Boil)
1-24 hr
100°C
Power cord
User manual
b
g
Soup (Soup)
1-24 hr
90-100°C
c
Steam basket
h
Recipe booklet
Fry (Fry)
/
145-160°C
d
Rice spatula
i
Warranty card
Slow cooking (Slow
cooking)
1-24 hr
80°C
e
Soup ladle
j
Safety leaflet
Stew (Stew)
1-24 hr
95°C
3 Overview
Compote
(Compote)
1-24 hr
100°C
Product overview
Pasta (Pasta)
/
100°C
Egg (Egg)
/
100°C
a
Top lid
g
Main unit
Jelly meat (Jelly meat) 1-24 hr
90-100°C
b
Detachable inner lid
h
Cooker handle
Ragout (Ragout)
1-24 hr
90°C
Pizza (Pizza)
/
130°C
c
Inner pot
i
Water level indications
d
Control panel
j
Sealing ring
Roast (Roast)
1-24 hr
120-130°C
Bake (Bake)
/
130°C
e
Heating element
k
Detachable steam vent cap
Yogurt (Yogurt)
1-24 hr
40±3°C
f
Power socket
l
Lid release button
Kefir (Kefir)
1-24 hr
40±3°C
Controls overview
Manual (Manual)
1-24 hr
100°C
Stage cooking (Stage
Keep-warm button
Cooking time button
m
s
cooking)
1-24 hr
100°C
MyRecipe button
Menu/Child lock button
n
t
Note
o
Stage cooking button
u
Temperature button
p
Preset time button
v
Start/Cancel button
•
The cooking time for rice (Rice), grain (Grain), and risotto (Risotto)
Decrease button
Display screen
q
w
is determined by the multicooker in accordance to the quantity of
ingredients put in the inner pot.
Increase button
r
•
You can adjust the cooking temperature for bake (Bake), manual
(Manual) and stage cooking (Stage cooking). For bake, the
Menus overview
temperature is available from 40°C to 160°C; for manual and stage
cooking, the temperature is available from 30°C to 160°C.
•
After the cooking process has started, you can touch the Start/
Default
Cooking time
Cancel button (Start/Cancel) to deactivate the current cooking
process, and the multicooker will switch to the standby mode.
Menus
cooking time
regulating range
Reheat (Reheat)
25 min
5-60 min
4 Using the multicooker
Rice (Rice)
30-40 min
/
Grain (Grain)
30-40 min
/
Risotto (Risotto)
35 min
/
Note
Jam (Jam)
10 min
5 min - 2 hr
•
For all menus, do not exceed the MAX indication on the inside of
Steam (Steam)
20 min
5 min - 2 hr
the inner pot when putting food, liquid or ingredients in it, otherwise
Boil (Boil)
20 min
5 min - 2 hr
the food may overflow during cooking.
Soup (Soup)
1 hr
20 min-4 hr
•
The cooking time does not display straight from the beginning for
rice (Rice), grain (Grain) and risotto (Risotto).
Fry (Fry)
15 min
5-60 min
on the screen during most of the cooking time as the multicooker
Slow cooking (Slow cooking)
5 hr
1-15 hr
needs to detect the water/liquid and ingredient volume in the initial
preparation stage. When the multicooker detects the actual cooking
Stew (Stew)
1 hr
20 min - 10 hr
time needed, the remaining cooking time displays on the screen.
Compote (Compote)
10 min
5-40 min
For jam (Jam), steam (Steam), boil (Boil), jelly meat (Jelly meat) and
compote (Compote),
displays on the screen before the
Pasta (Pasta)
4 min
1-15 min
water/liquid is brought to boil. When the water/liquid starts boiling,
Egg (Egg)
4 min
1-15 min
the set cooking time displays on the screen.
•
Jelly meat (Jelly meat)
6 hr
4-10 hr
Refer to the recipe booklet for more details on cooking with each
menu.
Ragout (Ragout)
2 hr
20 min - 10 hr
Pizza (Pizza)
35 min
10-60 min
Tip
Roast (Roast)
1 hr
/
Bake (Bake)
45 min
20 min - 2 hr
•
To select a certain menu, touch "menu" (Menu) repeatedly. You
can also touch "menu" (Menu) once, and then touch increase (+) or
Yogurt (Yogurt)
8 hr
6-12 hr
decrease (-) to do so.
Kefir (Kefir)
8 hr
6-12 hr
Manual (Manual)
2 hr
5 min - 10 hr
Stage cooking (Stage cooking) 5 min
5 min - 15 hr
2
b
a
c
b
d
a
e
c
f
d
www.philips.com/welcome
www.philips.com/welcome
h
i
j
e
Warranty
Safety Leaflet
Temperature
Before first use
Making risotto (Risotto)
regulating
range
1
1
Take out all the accessories from the inner pot, and remove the
Put the ingredients for the risotto into the inner pot.
/
packaging material of the inner pot.
2
Wipe the outside of the inner pot dry (fig. d), and then put it
2
/
Clean all parts of the multicooker thoroughly before using it for
in the multicooker (fig. e).
3
the first time (see chapter 'Cleaning and Maintenance').
Close the lid of the multicooker (fig. f), and put the plug in
/
the power socket (fig. g).
/
Note
4
Touch "menu" (Menu) to select "risotto" (Risotto) (fig. l).
/
5
Touch and hold "start" (Start/Cancel) for 3 seconds to confirm
•
/
Make sure all parts are completely dry before you start using the
and start cooking (fig. i).
multicooker.
6
/
When the cooking is finished, the appliance beeps and turns
/
into warm keeping automatically.
Reheating (Reheat)
/
Cooking jam (Jam)
1
Loosen the food and evenly distribute it in the inner pot.
/
1
2
Put ingredients for the jam into the inner pot and stir a little bit.
Pour some water onto the food to prevent it from becoming
/
2
Wipe the outside of the inner pot dry (fig. d), and then put it
too dry. The quantity of the water depends on the amount of
in the multicooker (fig. e).
food.
3
/
3
Close the lid of the multicooker (fig. f), and put the plug in
Wipe the outside of the inner pot dry (fig. d), and then put it
the power socket (fig. g).
/
in the multicooker (fig. e).
4
4
Touch "menu" (Menu) to select "jam" (Jam) (fig. m).
/
Close the lid of thepre multicooker (fig. f), and put the plug
»
To choose a different cooking time, refer to chapter
in the power socket (fig. g).
/
"Setting up the cooking time".
5
Touch menu (Menu) to select "reheat" (Reheat) (fig. h).
/
5
Touch and hold "start" (Start/Cancel) for 3 seconds to confirm
»
To choose a different cooking time, refer to chapter
/
"Setting up the cooking time".
and start cooking (fig. i).
6
/
6
When the cooking is finished, the appliance beeps and turns
Touch and hold "start" (Start/Cancel) for 3 seconds to confirm
into warm keeping automatically.
40-160°C
and start cooking (fig. i).
7
/
When the cooking is finished, the appliance beeps and turns
Note
into warm keeping automatically.
/
30-160°C
•
displays on the screen before the water/liquid is brought
Cooking rice (Rice) and grain (Grain)
to boil. When the water/liquid starts boiling, the set cooking time
30-160°C
displays on the screen.
•
For details about the ratio of ingredients and liquid, refer to the
Note
recipe booklet.
•
If the voltage is unstable at the area you live, it is possible that food
in the multicooker overflows.
Steaming (Steam)
•
After the cooking is finished, stir the rice/grain and loosen it
immediately to release excessive moisture for fluffy rice/grain.
1
Pour some water into the inner pot.
•
Depending on the cooking conditions, the bottom portion of the
rice/grain may become slightly browned.
Note
1
Measure the rice/grain using the measuring cup provided
•
To steam vegetable, use 0.2L to 1L water depending on the types
(fig. a).
and amount of vegetable; to steam meat, use 0.5L to 2L water
2
Rinse rice, put the washed rice in the inner pot, and fill in water
depending on the size and amount of meat.
(fig. b).
•
Make sure that not all the steaming holes on the steam basket are
covered by the ingredients, so that hot steam could flow up from
Note
under the steam basket.
2
•
For details about the ratio of rice/grain and water, refer to the
Put the steam basket in the inner pot, put the food in a bowl,
recipe booklet.
and then put the bowl on the steam basket.
3
Wipe the outside of the inner pot dry (fig. d), and then put it
3
Press the lid release button to open the lid (fig. c).
in the multicooker (fig. e).
4
Wipe the outside of the inner pot dry (fig. d), and then put it
4
Close the lid of the multicooker (fig. f), and put the plug in
in the multicooker (fig. e).
the power socket (fig. g).
5
Touch "menu" (Menu) to select "steaming" (Steam) (fig. n).
displays
Note
»
To choose a different cooking time, refer to chapter
"Setting up the cooking time".
•
Make sure that the inner pot is in proper contact with the heating
6
Touch and hold "start" (Start/Cancel) for 3 seconds to confirm
element.
•
Make sure that the outside of the inner pot is clean and dry, and
and start cooking (fig. i).
that there is no foreign residue on the heating element.
7
When the cooking is finished, the appliance beeps and turns
into warm keeping automatically.
5
Close the lid of the multicooker (fig. f), and put the plug in
the power socket (fig. g).
Note
6
Touch "menu" (Menu) to select "rice" (Rice) (fig. j) or
"grain" (Grain) (fig. k).
•
When steaming food, do not immerse the steam basket in water.
7
Touch and hold "start" (Start/Cancel) for 3 seconds to confirm
•
displays on the screen before the water/liquid is brought
to boil. When the water/liquid starts boiling, the set cooking time
and start cooking (fig. i).
8
displays on the screen.
When the cooking is finished, the appliance beeps and turns
•
After the steaming is finished, use a kitchen glove or a cloth to
into warm keeping automatically.
remove the bowl and steam basket, as they could be very hot.
4
2
l
k
j
i
8
7
h
g
13
14
15
f
19
20
21
w
v
25
26
27
u
t
31
32
33
s
r
37
38
39
3S
43
44
45
3S
49
50
51
Making soup (Soup)
Boiling (Boil)
1
1
Fill the inner pot with some water.
2
2
Wipe the outside of the inner pot dry (fig. d), and then put it
in the multicooker (fig. e).
3
3
Close the lid of the multicooker (fig. f), and put the plug in
the power socket (fig. g).
4
4
Touch "menu" (Menu) to select "boil" (Boil) (fig. o).
»
To choose a different cooking time, refer to chapter
"Setting up the cooking time".
5
5
Touch and hold "start" (Start/Cancel) for 3 seconds to confirm
and start cooking (fig. i).
6
6
When the water is brought to boil, the multicooker beeps 5
times as a reminder for you to open the lid and put the food in
the inner pot.
Frying (Fry)
Note
1
•
displays on the screen before the water/liquid is brought
2
to boil. When the water/liquid starts boiling, the set cooking time
3
displays on the screen.
4
7
When the cooking is finished, the appliance beeps and turns
5
into standby automatically.
6
7
8
3
4
5
6
9
10
11
12
3S
16
17
18
22
23
24
28
29
30
36
34
35
3S
3S
40
41
42
3S
3S
46
47
48
3S
3S
52
3S
3S
Slow cooking (Slow cooking)
1
Put ingredients and water/liquid for the soup into the inner pot.
Wipe the outside of the inner pot dry (fig. d), and then put it
Wipe the outside of the inner pot dry (fig. d), and then put it
in the multicooker (fig. e).
2
Put the plug in the power socket (fig. g).
in the multicooker (fig. e).
3
Close the lid of the multicooker (fig. f), and put the plug in
Touch "menu" (Menu) to select "slow cooking" (Slow cooking)
(fig. r).
the power socket (fig. g).
»
To choose a different cooking time, refer to chapter
Touch "menu" (Menu) to select "soup" (Soup) (fig. p).
"Setting up the cooking time".
»
To choose a different cooking time, refer to chapter
"Setting up the cooking time".
4
Touch and hold "start" (Start/Cancel) for 3 seconds to confirm
Touch and hold "start" (Start/Cancel) for 3 seconds to confirm
and start cooking (fig. i).
5
When the cooking is finished, the appliance beeps and turns
and start cooking (fig. i).
When the cooking is finished, the appliance beeps and turns
into warm keeping automatically.
into warm keeping automatically.
Making stew (Stew) or ragout (Ragout)
1
Put the ingredients for the stew or ragout in the inner pot.
2
Wipe the outside of the inner pot dry (fig. d), and then put it
Wipe the outside of the inner pot dry (fig. d), and then put it
in the multicooker (fig. e).
in the multicooker (fig. e).
3
Close the lid of the multicooker (fig. f), and put the plug in
Put the plug in the power socket (fig. g).
Pour some cooking oil into the inner pot.
the power socket (fig. g).
4
Touch "menu" (Menu) to select "fry" (Fry) (fig. q).
Touch "menu" (Menu) to select "stew" (Stew) (fig. s) or
Touch and hold "start" (Start/Cancel) for 3 seconds to confirm
"ragout" (Ragout) (fig. t).
and start cooking (fig. i).
»
To choose a different cooking time, refer to chapter
"Setting up the cooking time".
Let the cooking oil heat up for 5 minutes, and then put the
5
ingredients and seasonings into the inner pot.
Touch and hold "start" (Start/Cancel) for 3 seconds to confirm
and start cooking (fig. i).
Keep the lid open and stir the ingredients constantly with a
6
spatula.
When the cooking is finished, the appliance beeps and turns
When the cooking is finished, the appliance beeps and turns
into warm keeping automatically.
into standby automatically.
Making compote (Compote)
1
Put the ingredients for the compote in the inner pot.
2
Wipe the outside of the inner pot dry (fig. d), and then put it
in the multicooker (fig. e).
3
Close the lid of the multicooker (fig. f), and put the plug in
the power socket (fig. g).w
4
Touch "menu" (Menu) to select "compote" (Compote) (fig. u).
To choose a different cooking time, refer to chapter
»
"Setting up the cooking time".
5
Touch and hold "start" (Start/Cancel) for 3 seconds to confirm
and start cooking (fig. i).
6
When the cooking is finished, the appliance beeps and turns
into warm keeping automatically.
Note
•
displays on the screen before the water/liquid is brought
to boil. When the water/liquid starts boiling, the set cooking time
displays on the screen.
Boiling pasta (Pasta)
1
Fill the inner pot with some water.
Note
•
Do not exceed the MAX indication on the inside of the inner pot.
2
Wipe the outside of the inner pot dry (fig. d), and then put it
in the multicooker (fig. e).
3
Close the lid of the multicooker (fig. f), and put the plug in
the power socket (fig. g).
4
Touch "menu" (Menu) to select "pasta" (Pasta) (fig. v).
»
To choose a different cooking time, refer to chapter
"Setting up the cooking time".
5
Touch and hold "start" (Start/Cancel) for 3 seconds to confirm
and start cooking (fig. i).
6
When the water is brought to boil, the multicooker beeps 5
times as a reminder for you to open the lid and put the pasta
in the inner pot.
Note
•
displays on the screen before the water is brought to boil.
When the water starts boiling, the set cooking time displays on the
screen.
•
If the multicooker is left idle for 1 minute after the multicooker
beeps, the multicooker turns into standby mode.
7
After the pasta is put in the inner pot, touch "menu" (Menu) to
resume the cooking process.
8
Keep the lid open and constantly stir the pasta with a spatula.
9
When the cooking is finished, the appliance beeps and turns
into standby automatically.
Boiling egg (Egg)
1
Fill the inner pot with some water.
Note
•
Do not exceed the MAX indication on the inside of the inner pot.
2
Wipe the outside of the inner pot dry (fig. d), and then put it
in the multicooker (fig. e).
3
Close the lid of the multicooker (fig. f), and put the plug in
the power socket (fig. g).
4
Touch "menu" (Menu) to select "egg" (Egg) (fig. w).
»
To choose a different cooking time, refer to chapter
"Setting up the cooking time".
5
Touch and hold "start" (Start/Cancel) for 3 seconds to confirm
and start cooking (fig. i).
6
When the water is brought to boil, the multicooker beeps
5 times as a reminder for you to open the lid and put the eggs
in the inner pot.
Note
•
displays on the screen before the water is brought to boil.
When the water starts boiling, the set cooking time displays on the
screen.
•
The default cooking time for boiling egg is 4 minutes, and "4:00"
displays on the screen.
•
If the multicooker is left idle for 5 minute after the multicooker
beeps, the multicooker turns into standby mode.
7
After the eggs are put in the inner pot, close the lid and touch
"menu" (Menu) to resume the cooking process.
8
When the cooking is finished, the appliance beeps and turns
into standby automatically.
Making jelly meat (Jelly meat)
1
Put the ingredients for the jelly meat in the inner pot.
2
Wipe the outside of the inner pot dry (fig. d), and then put it
in the multicooker (fig. e).
3
Close the lid of the multicooker (fig. f), and put the plug in
the power socket (fig. g).
4
Touch "menu" (Menu) to select "jelly meat" (Jelly meat)
(fig. x).
»
To choose a different cooking time, refer to chapter
"Setting up the cooking time".
5
Touch and hold "start" (Start/Cancel) for 3 seconds to confirm
and start cooking (fig. i).
6
When the cooking is finished, the appliance beeps and turns
into warm keeping automatically.
Note
•
displays on the screen before the water/liquid is brought
to boil. When the water/liquid starts boiling, the set cooking time
displays on the screen.
Making pizza (Pizza)
1
Put the ingredients for the pizza in the inner pot.
2
Wipe the outside of the inner pot dry (fig. d), and then put it
in the multicooker (fig. e).
3
Close the lid of the multicooker (fig. f), and put the plug in
the power socket (fig. g).
4
Touch "menu" (Menu) to select "pizza" (Pizza) (fig. y).
»
To choose a different cooking time, refer to chapter
"Setting up the cooking time".
5
Touch and hold "start" (Start/Cancel) for 3 seconds to confirm
and start cooking (fig. i).
6
When the cooking is finished, the appliance beeps and turns
into warm keeping automatically.
Note
•
If you cook with frozen pizza, you can adjust the cooking time
according to your own preference. The pizza gets browner as the
cooking time increases.
Roasting (Roast)
1
Put ingredients into the inner pot.
2
Wipe the outside of the inner pot dry (fig. d), and then put it
in the multicooker (fig. e).
3
Close the lid of the multicooker (fig. f), and put the plug in
the power socket (fig. g).
4
Touch "menu" (Menu) to select "roast" (Roast) (fig. z).
5
Touch and hold "start" (Start/Cancel) for 3 seconds to confirm
and start cooking (fig. i).
6
There are 2 stages of roasting. When the first stage (about
35 minutes) is over, the multicooker beeps 5 times every 30
seconds as a reminder for you to open the lid, and turn the
food over in the inner pot.
1/6
Advertisement
Table of Contents

Related Manuals for Philips HD4749


Summary of Contents for Philips HD4749
- Page 1 (see chapter ‘Cleaning and Maintenance’). Close the lid of the multicooker (fig. f), and put the plug in To fully benefit from the support that Philips offers, register your Grain (Grain) 1-24 hr 130-140°C...
-
Page 2: Specifications
1 – 24 ч. 130 – 140 °C again (fig. ‡). problem, contact the Philips Consumer Care Center in your country. за да потвърдите и започнете да готвите (фиг. i). е отворен по време на готвене. Затворете капака на многофункционалния уред за готвене... - Page 3 Pokud pečete jiné jídlo při teplotě vyšší než 140 °C, nechte víko на топлината след като приключи готвенето. Naplňte vnitřní hrnec vodou. středisko péče o zákazníky společnosti Philips ve vaší zemi. Telefonní Докоснете и задръжте "Старт" (Start/Cancel) за 3 секунди, Poznámka otevřené.
- Page 4 (Menu) i zatim dodirnete gumb za povećanje (+) ili smanjenje (-). valmistamine Kui toit on valmis, teeb seade piiksu ja lülitub automaatselt Čestitamo vam na kupnji i dobro došli u Philips! "Minu retsepti" nupp Menüü/lasteluku nupp asetage see Multicookerisse (joonis e).
- Page 5 će prijeći u stanje pripravnosti. • Ostavite li multicooker u stanju mirovanja 15 sekundi nakon što problem, obratite se centru za potrošače tvrtke Philips u svojoj državi. A belső edény külső részét törölje szárazra (d ábra), majd tartás funkcióra kapcsol.
- Page 6 20 min.–10 val. Gaminimo etapais išsaugojimas „Mano Érintse meg a „növelés” vagy „csökkentés” (-) gombot az óra Paspauskite dangčio atlaisvinimo mygtuką, kad atidarytumėte probléma merül fel, látogasson el a Philips weboldalára a Pica (Pizza) 35 min. 10–60 min. Nušluostykite vidinio puodo išorę ( d pav.), tada įstatykite jį į...
- Page 7 Pieskarieties izvēlnes pogai (Menu), lai izvēlētos galertu (Jelly ja iestatāt laiku 8 stundas 10:00 no rīta, gatavošanas process tiks Aby w pełni skorzystać z obsługi świadczonej przez firmę Philips, Nosusiniet iekšējā katla ārpusi (d att.), pēc tam to ievietojiet gatavošanas laiku 1. posmam.
-
Page 8: Ochrona Środowiska - Recykling
Orez (Rice) 1-24 hr 130-140°C Zamknij pokrywkę urządzenia (rys. f) i podłącz wtyczkę do Zamknij pokrywkę urządzenia (rys. f) i podłącz wtyczkę do skontaktuj się z Centrum Obsługi Klienta firmy Philips w swoim kraju. (rys. e). Gulasz (Stew) 1–24 godz. 95°C (rys. -
Page 9: Комплект Поставки
Închide capacul multicookerului (fig. f) şi introdu ştecărul în rugăm să vizitezi site-ul web Philips la adresa www.philips.com sau să » Unitatea pentru oră începe să lumineze intermitent pe afişaj. - Page 10 (obr. b). • Примечание Время варки яиц по умолчанию –– 4 минуты, и на дисплее Philips в вашей стране. Ее телефонный номер можно найти в По завершении приготовления прибор подаст сигнал и Polievka (Soup) 1 hod. 20 min – 4 hod.
-
Page 11: Technické Parametre
Po dokončení varenia zariadenie pípne a automaticky prejde do varenia uložiť do ponuky „Môj recept“ (MyRecipe). Če želite popolnoma izkoristiti podporo, ki jo nudi Philips, izdelek Ko začne voda/tekočina vreti, se na zaslonu prikaže nastavljeni čas Zunanjo steno notranje posode obrišite do suhega (sl. d) in udržiavania teploty. - Page 12 Kada multicooker detektuje stvarno vreme pripreme, Jedinica za sate će početi da treperi na ekranu. "prednastavitev" (Preset) (sl. ). » posetite Philips Web lokaciju na adresi www.philips.com ili se obratite Srpski automatski prelazi u režim održavanja temperature. Dodirnite „pokretanje“ (Start/Cancel) i zadržite 3 sekunde da preostalo vreme se prikazuje na ekranu.