
Related Manuals for Sony UTX-B03HR


Summary of Contents for Sony UTX-B03HR
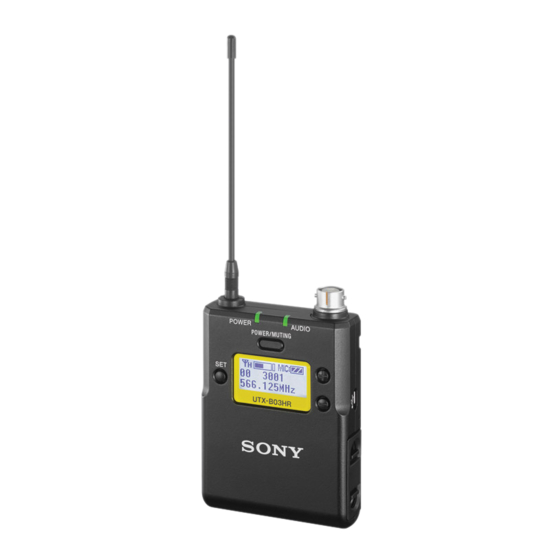
- Page 1 4-590-342-11 (1) UHF Synthesized Transmitter Operating Instructions UTX-B03HR © 2016 Sony Corporation...
-
Page 2: Table Of Contents
Table of Contents Features ............3 Parts Identification ........3 Power Supply..........5 Inserting the Batteries ........5 Supplying Power from a USB Connector..6 Charging Nickel Metal Hydride Batteries ..6 Preparation ..........7 Connecting a Lavalier Microphone ....7 Attaching a Belt Clip ........7 Settings ............8 Setting the Transmit Channel ....... -
Page 3: Features
SMC9-4S connector designed for high reliability. Reliable and proven SMC9-4S (female) interface The unit is compatible with Sony ECM-77BC and ECM- 44BC lavalier microphones, which have a proven record of reliable performance in broadcasting. Digital companding The built-in DSP enables digital companding for high- quality audio transmissions. - Page 4 i Display section Note When the audio input level is set to MIC, a voltage for the lavalier microphone power supply is applied to the audio input connector. When connecting equipment other than lavalier microphones, always use an EC-1.5CF microphone cable (not supplied). e POWER/MUTING button Turns the power on/off.
-
Page 5: Power Supply
k Infrared detector Power Supply Receives the frequency and compander mode set on the receiver. The unit operates using power supplied from two AA batteries (alkaline, nickel metal hydride, or lithium batteries) or from a supply connected to the USB connector. -
Page 6: Supplying Power From A Usb Connector
• When BATTERY is set to TYPE1, the battery level is power off and connect a commercially available USB- indicated based on the use of new LR6 (size AA) Sony output type AC adapter or portable power supply to the alkaline batteries. -
Page 7: Preparation
AC adapter, portable power supply, or Connecting a Lavalier Microphone computer port. • Nickel metal hydride batteries are not charged while the Connect a Sony ECM-77BC or ECM-44BC lavalier transmitter or receiver is turned on. microphone to the unit. Microphone For a secure connection, turn to lock the connector. -
Page 8: Settings
To remove a belt clip Settings Insert a pointed object, such as a ball-point pen, between the belt clip and the transmitter, and pry the end of the belt clip Setting the Transmit Channel from the hole on the side of the transmitter. -
Page 9: Setting The Compander Mode
SET button. The selected compander mode is configured. UWP-D: Select this when operating in conjunction with Sony UWP-D series receivers. UWP: Select this when operating in conjunction with Sony UWP series receivers. WL800: Select this when operating in conjunction with Sony WRR series receivers. -
Page 10: Menu Displays And Detailed Settings
• COMPANDER (compander mode) setting Menu Displays and • PWR LOCK (POWER button lock) function • MUTING (muting function) setting Detailed Settings • PHASE (phase switching) setting • BATTERY (battery type) setting • CONTRAST (display text contrast) setting • RESET (factory default setting) function Menu Structure and Operation •... -
Page 11: Configuration Menu
Adjusting the audio input attenuation Press and hold the SET button until the setting starts flashing. level (ATT) Set the audio input attenuation level in 3 dB increments to Press the + or – button to change the setting. reduce noise distortion. The factory default setting is 9 dB. - Page 12 TYPE1: Recommended setting when using alkaline LR6 (size AA) batteries. Indicates the battery level based on To release the lock state the characteristics of new Sony alkaline LR6 (size AA) To release the lock state, either set the PWR LOCK menu batteries.
-
Page 13: Error Messages
Message Meaning Solution • After a reset, the audio input level is also restored to its An error has Contact your Sony factory default setting. Note that this may cause the ERROR occurred in the service representative. volume on devices connected to the receiver and in backup memory headphones to suddenly change. -
Page 14: Troubleshooting
Troubleshooting If you have any problem, use the following checklist before asking for repairs. If the problem persists, contact your Sony service representative. Symptom Cause Solution The unit does not turn The 3 and # polarity orientation of the batteries is Insert the batteries with the correct polarity incorrect. - Page 15 Symptom Cause Solution The transmitter The infrared receptor on the transmitter is too far Reduce the distance between the infrared receptor channel cannot be set from the infrared transmission port on the receiver. on the transmitter and the infrared transmission with infrared port on the receiver to within about 20 cm (8 in.).
-
Page 16: Important Notes On Use
5.0 V DC (supplied from USB connector) Battery life (measured with two Sony LR6/AA size alkaline batteries at 25 °C (77 °F)) Approx. 8 hours with output power of 30 mW (for model available in USA, Europe, and China) Approx. - Page 17 DURING THE WARRANTY PERIOD OR AFTER EXPIRATION OF THE WARRANTY, OR FOR ANY OTHER REASON WHATSOEVER. • SONY WILL NOT BE LIABLE FOR CLAIMS OF ANY KIND MADE BY USERS OF THIS UNIT OR MADE BY THIRD PARTIES. • SONY WILL NOT BE LIABLE FOR THE...
- Page 18 Sony Corporation...