Table of Contents
Advertisement
1. IMPORTANT SERVICE NOTES ......................................................................................................... 2
2. SPECIFICATIONS .............................................................................................................................. 5
3. PART NAMES AND FUNCTION ........................................................................................................ 6
4. DISASSEMBLY OF THE SET ............................................................................................................ 7
5. MECHANISM ADJUSTMENT ........................................................................................................... 13
6. ADJUSTMENT OF VCR AND CAMERA .......................................................................................... 24
7. SYSTEM BLOCK DIAGRAMS .......................................................................................................... 37
8. SCHEMATIC DIAGRAMS ................................................................................................................. 46
9. PRINTED WIRING BOARD ASSEMBLIES ...................................................................................... 84
10.REPLACEMENT PARTS LIST ......................................................................................................... 97
11.PACKING OF THE SET .................................................................................................................. 114
SHARP CORPORATION
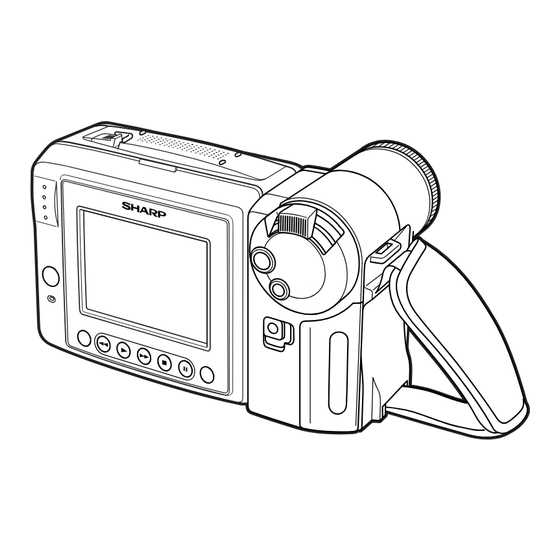
SERVICE MANUAL
LIQUID CRYSTAL CAMCORDER Hi
MODEL
In the interests of user-safety (Required by safety regula-
tions in some countries) the set should be restored to its
original condition and only parts identical to those specified
be used.
CONTENTS
This document has been published to be used for
after sales service only.
The contents are subject to change without notice.
1
S51T2VL-AD260
8
VL-AD260U
Page
VL-AD260U
NTSC
Advertisement
Table of Contents

Related Manuals for Sharp VL-AD260U


Summary of Contents for Sharp VL-AD260U
-
Page 1: Table Of Contents
VL-AD260U SERVICE MANUAL S51T2VL-AD260 LIQUID CRYSTAL CAMCORDER Hi NTSC VL-AD260U MODEL In the interests of user-safety (Required by safety regula- tions in some countries) the set should be restored to its original condition and only parts identical to those specified be used. -
Page 2: Important Service Notes
VL-AD260U 1. IMPORTANT SERVICE NOTES connections, metal cabinet, screw heads, knobs and BEFORE RETURNING THE VIDEO CAMERA control shafts, etc.) and measure the AC voltage drop RECORDER across the resistor. Reverse the AC plug (a non polarized adaptor plug must be used but only for the... - Page 3 VL-AD260U WARNING :TO REDUCE THE RISK OF FIRE OR ELECTRIC SHOCK, DO NOT EXPOSE THIS APPLIANCE TO WET LOCATIONS. CAUTION CAUTION RISK OF ELECTRIC SHOCK DO NOT OPEN This symbol mark means following. Camcorder only For continued protection against fire haz- CAUTION: TO REDUCE THE RISK OF ELECTRIC ard, replace only with same type fuse.
- Page 4 1-800-8-BATTERY or your local recycling center. If you are located outside the United States, contact your local authorities for information concerning proper disposal and/ or recycling of this battery. SHARP’s involvement in this program is part of our commitment to protecting our environment and conserving natural resources.
-
Page 5: Specifications
Specifications are subject to change without notice. SERVICE INFORMATION (For the U.S.) For the location of the nearest Sharp Authorized Service, or to obtain product literature, accessories, supplies or customer assistance, please call 1-800-BE SHARP (1-800-237-4277) or visit SHARP's website (http://www.sharp-usa.com) -
Page 6: Part Names And Function
VL-AD260U 3. PART NAMES AND FUNCTION For details on the use of each control. -
Page 7: Disassembly Of The Set
VL-AD260U 4. DISASSEMBLY OF THE SET 4-1. REMOVAL OF THE CAMERA SECTION Note: Before removing the cabinet, turn off the power supply, and ascertain that the battery has been removed. Connector Pull out 5. Remove the connector of the 6-cell detection switch, and... - Page 8 VL-AD260U 4-2. DISASSEMBLY OF THE VCR MAIN BODY <1. Removal of the VCR lid shaft> Area A (2) Remove five screws ((b)LX-HZ0018TAFF). (1) Remove one screw ((k)LX-HZ0063TAFC). <Detail of area A> VCR lid Tilt frame C Frame V VCR lid shaft...
- Page 9 VL-AD260U <5. Removal of the VCR lid> <3. Removal of the AV unit and AV unit cover> AV unit FPC Area B Wire fixing tape AV unit wire Card FPC Microphone connector (1) Disconnect the microphone connector. (1) Peel the wire fixing tape.
- Page 10 VL-AD260U Caution for installation of the VCR lid <8. Removal of the Lithium PWB> Lithium PWB Main PWB Connector VCR lid (1) Remove the connector of the Lithium PWB from the Main PWB. (2) Move the lithium unit in the direction of the arrow.
- Page 11 VL-AD260U Claw C Claw B View E Claw A Claw D View F Note: When fixing the cassette compartment lid, first engage the claws A and B, and then engage the claws C and D, verify that the four claws (A, B, C and D) of the cassette compartment lid are securely engaged as shown in the view above.
- Page 12 VL-AD260U 4-3. REPLACEMENT OF CCD SENSOR 4-3-1. BEFORE REPLACEMENT 1) The CCD image sensor is more sensitive to electrostatic breakage than C-MOS LSI. Therefore sufficient means to prevent electrostatic damage must be taken when it is replaced. • Ground the soldering iron.
-
Page 13: Mechanism Adjustment
VL-AD260U 5. MECHANISM ADJUSTMENT Configuration 5-1. MECHANISM CHECKING/ADJUSTING JIGS, TOOLS AND PARTS 1. Name 5-1-1. Mechanism checking/adjusting jigs and tools 2. Part No. 3. Code * Model, Uses Remarks <Note: The entries of list> 1. Torque gauge head 1. Cassette torquemeter 1. - Page 14 VL-AD260U 5-2. ITEMS AND TIMINGS OF INSPECTION AND MAINTENANCE The mechanism of VCR needs the following periodic inspection and maintenance in order that it maintains its high quality. Also, after the machine is repaired, execute the following maintenance and checks regardless of how long it has been used.
- Page 15 VL-AD260U 5-3. MECHANISM CHECKS AND ADJUSTMENTS The description given below relates to the general field services, but does not relate to the adjustment and replacement that require high level equipments, jigs, and technical skills. In order to maintain the initial characteristics of the machine, it is necessary to execute the maintenance and check and to prevent damage to tapes and other parts.
- Page 16 VL-AD260U 5-3-4. Checking and adjusting the tension pole position (1) Check – 0.5 When winding of P6-120 tape is started, check whether the tension pole is in the Si roller specified position against Si roller as shown or not. If it is not in the specified position, remove the cassette and adjust the position in the following procedure.
- Page 17 VL-AD260U 5-4. ADJUSTMENT OF MECHANISM TAPE TRAVEL SYSTEM Sup tilted pole 5-4-1. Preparation for adjustment Tu GR Sup GR Tu tilted pole A (1) Clean the tape running areas (guide poles, rollers, drum, Tu tilted pole B Capstan shaft, Pinch roller) (Figure 1)
- Page 18 VL-AD260U 5-4-4. Adjusting the Tu guide Height setting jig Upper flange After replacement of Tu guide preset and adjust the height. Master plane (1) Tu guide height presetting (Figure 6) (JiGMP-MX7U) Adjust the height from the upper surface of mechanism chassis to the Lower upper surface of lower flange with the aid of jig.
-
Page 19: Disassembling And Assembling
VL-AD260U 5-5. MECHANISM ASSEMBLING AND PARTS REPLACEMENT (DISASSEMBLING AND ASSEMBLING) Below is given an explanation of assembling of mechanism and its parts replacement. The removal of cabinet and Circuit Board is explained in the relevant service manual. Notes 1 After removal of cut washers be sure to replace them with new ones. - Page 20 VL-AD260U 5-5-2. Cassette control ass’y Lock Lever Down Guide <Disassembling> (1) Set the unit to the EJECT mode, and let the housing stand upright. Or set the unit to the STANDBY mode, press the lock lever in the arrow direction, and let the housing stand upright.
- Page 21 VL-AD260U 5-5-5. Phase matching The phase of the following parts must be matched as shown in the figure right. (Ascertain that the marks and round holes align.) (1) Lo relay gear (2) Main cam (3) Sub-cam (4) Mode switch Lo relay gear...
- Page 22 VL-AD260U (4) Install the loading block assembly and the capstan motor. (7) Install the guide rail assembly taking care to position it (5) Install the drive gear. At this time, pay attention to the correctly. direction of gear. (The small gear must be located in the chassis side.)
- Page 23 VL-AD260U (8) Install the drum assembly in the chassis. (11) Install the slide chassis. (9) Install the tape guide in the drum assembly. (10) Install the Si roller. T arm guide Tape guide Slide this part towards the T arm.
-
Page 24: Adjustment Of Vcr And Camera
VL-AD260U 6. ADJUSTMENT OF VCR AND CAMERA 6-1. INITIAL SETTING OF E PROM IC 6-1-1. E PROM data alterable ways 1) Set the switch of main body to CAM, and use the remote control (RRMCG0033TASA) for adjustment to turn on the adjustment mode. - Page 25 VL-AD260U < Adjusting the video/LCD section > • Measuring instruments: *Color monitor TV set *Oscilloscope *DC cable (AC adapter accessory) *Digital voltmeter *Frequency counter *Video extension cables *DC power supply *Signal generator *Vector scope *Audio generator (CR oscillator) *AV output cable (accessory)
- Page 26 VL-AD260U • Types of test modes TEST No. Title Contents Sensor on/off Sensors off All sensors but the cassette controller switch, dew sensor and battery sensor stay off. Automatic battery sensor Battery sensor’s input voltage put in memory. adjustment Battery adjustment error Battery sensor’s adjustment errors are displayed at the right of...
- Page 27 VL-AD260U 6-3-2-3. Battery shut-off voltage adjusting method 1) Supply power to the main unit, using the variable-voltage DC power supply (range of 2.5V to 5.0V). 2) Set the CAM/OFF/VCR SW to CAM to switch to the camera mode. 3) Load a recordable tape and set the main unit to CAM REC. PAUSE.
- Page 28 VL-AD260U 6-3-3-1. Adjusting the power 6-3-3. Adjusting the VCR circuit • Test Points on the Video Circuit Board circuit a) POWER CIRCUIT ADJUSTMENT TL3607 TL9405 TL1454 TL607 TL9414 TL5702 TL9404 TL3612 TL5703 TL5701 TL9407 TL3601 TL9403 PROCEDURE TL3611 TL3602 TL5704...
- Page 29 VL-AD260U 6-3-3-2. Adjustment of Video Out circuit Measuring point TL3602 (VIDEO OUT) Address Mode Adjusting method 1) Set the data of address 036. 2) TL3602: Oscilloscope 3) Adjust P-P of TL3602 becomes spec. 286mVp-p SPEC: SYNC LEVEL → 286mVp-p (Terminated in 75Ω) Adjusting standard 286±10mVp-p...
- Page 30 VL-AD260U 6-3-6. Adjustment of audio circuit 1. Adjustment of filter f0 1) Set the alignment tape (JiGWR5-5NSP). 2) Using the adjustment remote controller (RRMCG0033TASA), Measuring instrument Oscilloscope set the VCR adjustment mode, and set the address “33” with Mode the operation switch (FF/REWIND key).
- Page 31 VL-AD260U 5. VCO adjustment Measuring point TL3802 (LCD-HD) Address Mode Adjusting method 1) Connect TL3803 to GND. 2) Connect the frequency counter to TL3802 (LCD-HD), and adjust the frequency. Adjustment standard 15.734kHz ± 100Hz Remarks ——————— 6. H-position adjustment Measuring point...
- Page 32 VL-AD260U 6-4. ADJUSTMENT OF CAMERA SECTION 6-4-1. Servicing of camera section (1) Object, measuring instrument and jigs necessary for camera section servicing • Gray scale chart • Color bar chart • Halogen light (2 pcs.) • Vectorscope • Color temperature conversion filter •...
- Page 33 VL-AD260U 6-4-2-1. Checking the power supply voltage • Measuring terminal: P-CON 4.9V P-CON 3.1V CAM 15V CAM -8V MECHA 5.7V • Measuring instrument: Digital voltmeter 6-4-2-2. Auto focus adjustment • Basic iris adjustment Measuring instrument None DATA Adjustment Subject —...
- Page 34 VL-AD260U 4. Color gain adjustment Measuring instrument Vector scope Subject Color bar chart R spot Tape — R level VIDEO-OUT (Terminated in 75 Ω) Test point Adjustment address R GAIN 1C4 101° 352° B GAIN 1C2 R MAT 1BE B MAT 1C0 Burst R GAIN;...
-
Page 35: Trouble Shooting
VL-AD260U 6-5. TROUBLE SHOOTING 6-5-1. Classification of troubles û Check the Power circuit and system control circuit. No function at all û No tape ejection Check the system control and loading motor circuit. û Check the inverter transformer and power circuit. - Page 36 VL-AD260U 6-5-2. Troubleshooting for the camera section û Check the lens drive circuit (IC551) and main signal No picture line. û Check IC203 (DSP), and their peripherals. No color û Check IC706 System/Servo Control, IC551 No auto white balance function (Lens driver) and its peripherals.
-
Page 37: System Block Diagrams
VL-AD260U 7. SYSTEM BLOCK DIAGRAMS SmartMedia UNIT NONREGE BATTERY IC5703 IC900 IC701 IC5701 CARD 16MB POWER (CAMERA) 3.0V POWER (SYS 3.0V) Power Control IC MICON DRAM POWER (AT 3.0V) IC706 SYSTEM/SERVO CAMERA I CHIP µ-COM CONTROL CONTROL IC705 PROM PROM... - Page 38 VL-AD260U 7-1. POWER SYSTEM BLOCK DIAGRAM...
- Page 39 VL-AD260U 7-2. MAIN BATTERY CIRCUIT SECTION BLOCK DIAGRAM...
-
Page 40: Lens Drive Block Diagram
VL-AD260U 7-3. LENS DRIVE BLOCK DIAGRAM CCD SENSER ZOOM LENS MASTER LENS IC706 SYSCON IC101 DATA IC201 IC203 LENS DATA IRIS, FOCUS, ZOOM CONTROL DATA2 Master Lens POSI 20 19 (PHIRF) IRIS IC553 METER (HALL OFFSET) 4.9V OP-AMP IC102 (DRIVE (+)) - Page 41 VL-AD260U 7-4. SIGNAL FLOW BLOCK DIAGRAM...
- Page 42 VL-AD260U 7-5. CARD REC BLOCK DIAGRAM...
- Page 43 VL-AD260U 7-6. CARD PB BLOCK DIAGRAM...
- Page 44 VL-AD260U 7-7. TAPE REC BLOCK DIAGRAM...
- Page 45 VL-AD260U 7-8. TAPE PB BLOCK DIAGRAM...
-
Page 46: Schematic Diagrams
VL-AD260U 8. SCHEMATIC DIAGRAMS 8-1. OVERALL SCHEMATIC DIAGRAM 46~47... - Page 47 VL-AD260U 8-2. DSP SCHEMATIC DIAGRAM 48~49...
- Page 48 VL-AD260U 8-3. AUDIO SCHEMATIC DIAGRAM 50~51...
- Page 49 VL-AD260U 8-4. SYSCON SCHEMATIC DIAGRAM 52~53...
- Page 50 VL-AD260U 8-5. LCD_INT SCHEMATIC DIAGRAM 54~55...
- Page 51 VL-AD260U å AND SHADED COMPONENTS=SAFETY RELATED PARTS 8-6. POWER SCHEMATIC DIAGRAM 56~57...
- Page 52 VL-AD260U 8-7. VIDEO_OUT SCHEMATIC DIAGRAM 58~59...
- Page 53 VL-AD260U 8-8. D/A_CONVERTER SCHEMATIC DIAGRAM 60~61...
- Page 54 VL-AD260U å AND SHADED COMPONENTS=SAFETY RELATED PARTS 8-9. CHARGE SCHEMATIC DIAGRAM 62~63...
- Page 55 VL-AD260U 8-10. LCD_CTL SCHEMATIC DIAGRAM 64~65...
- Page 56 VL-AD260U 8-11. CARD_MICON SCHEMATIC DIAGRAM 66~67...
- Page 57 VL-AD260U 8-12. RF SCHEMATIC DIAGRAM 68~69...
- Page 58 VL-AD260U 8-13. TG SCHEMATIC DIAGRAM 70~71...
- Page 59 VL-AD260U 8-14. CDS SCHEMATIC DIAGRAM 72~73...
- Page 60 VL-AD260U 8-15. LDRV SCHEMATIC DIAGRAM 74~75...
- Page 61 VL-AD260U 8-16. SOCKET SCHEMATIC DIAGRAM 76~77...
- Page 62 VL-AD260U 8-17. HEAD_AMP SCHEMATIC DIAGRAM 78~79...
- Page 63 VL-AD260U 8-18. MOTOR_DRIVER SCHEMATIC DIAGRAM 80~81...
- Page 64 VL-AD260U 8-19. CCD SCHEMATIC DIAGRAM 82~83...
-
Page 65: Printed Wiring Board Assemblies
VL-AD260U 9. PRINTED WIRING BOARD ASSEMBLIES VCR PWB Component Side SIDE A R7407 C7405 R7403 L7403 L7404 R2423 Q3601 C1981 C7403 C7407 C611 Q7403 C3603 R3602 C7409 C7408 C612 C1457 L601 R1985 R7408 L7401 R1986 R1987 R3601 R7404 R7401 R7410... - Page 66 VL-AD260U VCR PWB Wiring Side SIDE A...
- Page 67 VL-AD260U VCR PWB Component Side SIDE B TL1454 TL3607 R603 R633 TL607 TL3612 TL9414 TL3601 TL5702 TL3602 TL3611 TL5703 TL5701 Q603 CN9401 TL3610 C610 R607 R601 TL5704 R2408 R632 R606 R640 R1425 TL608 R2411 TL5707 T L5706 T L5705 D601...
- Page 68 VL-AD260U VCR PWB Wiring Side SIDE B...
- Page 69 VL-AD260U CAMERA PWB Component Side SIDE A TL26 L101 SC101 TL19 C108 SC11 TL20 TL29 C113 TL28 TL101 TL23 TL100 TL21 C111 TL18 TL16 TL15 TL13 TL11 TL27 TL107 TL17 TL14 TL12 TL103 TL105 TL104 TL109 TL108 TL106 TL24 TL22...
- Page 70 VL-AD260U CAMERA PWB Wiring Side SIDE A...
- Page 71 VL-AD260U CAMERA PWB Component Side SIDE B C104 C119 R147 TL135 R151 C106 IC101 C110 C112 C102 TL136 C109 C101 R106 C107 TL102 R555 R557 TL571 TL572 C574 C568 IC551 R572 R585 R563 C571 R586 R579 R587 C556 C559 R554...
- Page 72 VL-AD260U CAMERA PWB Wiring Side SIDE B...
- Page 73 VL-AD260U CARD PWB Component Side SIDE A FL2001 CN2001 C2001 Wiring Side SIDE A...
- Page 74 VL-AD260U Component Side SIDE B TL2051 TL2003 TL2053 TL2052 TL2001 TL2024 TL2025 TL2002 TL2004 TL2007 TL2009 TL2011 TL2014 TL2016 TL2018 TL2020 TL2021 TL2022 TL2005 TL2006 TL2008 TL2010 TL2012 TL2013 TL2015 TL2017 TL2019 TL2026 TL2023 Wiring Side SIDE B...
- Page 75 VL-AD260U HEAD AMP PWB Component Side SIDE A R3731 R3718 R3717 R3730 TL3752 C3709 TL3705 R3715 R3716 TL3721 TL3722 C3710 C3712 C3713 C3716 C3715 C3717 C3718 TL3708 R3721 IC3701 TL3704 C3720 R3703 R3722 TL3732 TL3703 TL3707 C3723 C3725 C3727 TL3726...
- Page 76 VL-AD260U HEAD AMP PWB Wiring Side SIDE A...
- Page 77 VL-AD260U HEAD AMP PWB Wiring Side SIDE B...
-
Page 78: Replacement Parts List
" HOW TO ORDER REPLACEMENT PARTS " Control IC707 RH-iX0923TAZZ~ IX0923TA, OSD. IC IC708 VHiTA75S01F-1 TA75S01F, Amp in USA: Contact your nearest SHARP Parts Distributor. For loca- IC710 VHiBU4053V/-1 BU4053V tion of SHARP Parts Distributor, IC712 VHiTC7W74U/-1 TC7W74U Call Toll-free 1-IBE800-SHARP... - Page 79 VL-AD260U Ref. No. Part No. Description Code Ref. No. Part No. Description Code Q975 VSHN2A01FU/-1 HN2A01FU D910 VHDFS1J3///-1 FS1J3 Q976 VSKRX202U++-1~ KRX202U++ D930 VHDFS1J3///-1 FS1J3 Q977 VSKRC404E++-1~ KRC404E++ D931 VHDDA227///-1 DA227 Q978 VSKRA303E++-1~ KRA303E++ D934 VHDDA227///-1 DA227 Q979 VSKTC3265Y+-1~ KTC3265Y+...
- Page 80 VL-AD260U Ref. No. Part No. Description Code Ref. No. Part No. Description Code L7402 VPAWM180J3R6N Peaking, 18µH C263 VCKYCZ1CB103K 0.01 16V Ceramic L7403 VPAWM470J6R4N Peaking, 47µH C264 VCKYCZ1CB103K 0.01 16V Ceramic L7404 VP-1M471J310N Peaking, 470µH C265 VCKYCZ1CB103K 0.01 16V Ceramic...
- Page 81 VL-AD260U Ref. No. Part No. Description Code Ref. No. Part No. Description Code C750 VCKYCY0JB105K 6.3V Ceramic C1921 RC-KZ0070TAZZ 16V Ceramic C753 VCKYCZ1HB102K 1000p 50V Ceramic C1922 VCKYCZ1HB561K 560p 50V Ceramic C754 VCKYCZ1HB102K 1000p 50V Ceramic C1923 RC-KZ0055TAZZ 16V Ceramic...
- Page 82 VL-AD260U Ref. No. Part No. Description Code Ref. No. Part No. Description Code C5704 VCKYCZ1AF104Z 10V Ceramic R215 VRS-CZ1JF153J 15k 1/16W Metal Oxide AA C5705 VCKYCZ1AF104Z 10V Ceramic R217 VRS-CZ1JF823D 82k 1/16W Metal Oxide AB R218 VRS-CZ1JF393D 39k 1/16W Metal Oxide AB...
- Page 83 VL-AD260U Ref. No. Part No. Description Code Ref. No. Part No. Description Code R720 VRS-CZ1JF103J 10k 1/16W Metal Oxide AA R903 VRS-CZ1JF562J 5.6k 1/16W Metal Oxide AA R721 VRS-CZ1JF000J 1/16W Metal Oxide AA R904 VRS-CZ1JF562J 5.6k 1/16W Metal Oxide AA...
- Page 84 VL-AD260U Ref. No. Part No. Description Code Ref. No. Part No. Description Code R991 VRS-CZ1JF393J 39k 1/16W Metal Oxide AA R1965 VRS-CY1JFR22J 0.22 1/16W Metal Oxide AA R992 VRS-CZ1JF753J 75k 1/16W Metal Oxide AA R1966 VRS-CZ1JF102D 1/16W Metal Oxide AA...
- Page 85 VL-AD260U Ref. No. Part No. Description Code Ref. No. Part No. Description Code R2944 VRS-CZ1JF152J 1.5k 1/16W Metal Oxide AA R5750 VRS-CZ1JF000J 1/16W Metal Oxide AA R2945 VRS-TV2BDR12J 0.12 1/8W Metal Oxide AB R5751 VRS-CZ1JF104J 100k 1/16W Metal Oxide AA...
- Page 86 VL-AD260U Ref. No. Part No. Description Code Ref. No. Part No. Description Code DUNTK2934QA03 R8413 VRS-CZ1JF471J 470 1/16W Metal Oxide AA R8416 VRS-CZ1JF821J 820 1/16W Metal Oxide AA CAMERA UNIT R8417 VRS-CZ1JF821J 820 1/16W Metal Oxide AA R8421 VRS-CZ1JF471J 470 1/16W Metal Oxide AA...
- Page 87 VL-AD260U Ref. No. Part No. Description Code Ref. No. Part No. Description Code C120 VCKYCZ1CB103K 0.01 16V Ceramic R571 VRS-CZ1JF474J 470k 1/16W Metal Oxide AA C551 VCKYCZ1CB103K 0.01 16V Ceramic R572 VRS-CZ1JF334D 330k 1/16W Metal Oxide AA C552 VCKYCZ1CB103K 0.01...
- Page 88 VL-AD260U Ref. No. Part No. Description Code Ref. No. Part No. Description Code Q343 VSKRC404E++-1~ KRC404E++ RESISTORS R301 VRS-CZ1JF473J 47k 1/16W Metal Oxide AA COILS R302 VRS-CY1JF273J 27k 1/16W Metal Oxide AA L303 VPCCM101K2R1N Peaking, 100µH R303 VRS-CZ1JF152J 1.5k 1/16W Metal Oxide AA...
- Page 89 VL-AD260U Ref. No. Part No. Description Code Ref. No. Part No. Description Code CAPACITORS MECHANISM PARTS VCKYCY1HB102K 1000p 50V Ceramic VCCCCY1HH2R0C 50V Ceramic LCHSM0163GEZZ Main Chassis Ass'y VCKYTV1HF103Z 0.01 50V Ceramic NGERH1280GEZZ Main Cam VCCCCY1HH221J 220p 50V Ceramic NGERH1281GEZZ Sub-Cam...
- Page 90 VL-AD260U Ref. No. Part No. Description Code Ref. No. Part No. Description Code LX-HZ3074GEFN Screw M1.7x5.3 S Tight DUNTK2934QA03 CAMERA Unit — LX-BZ3132GEFF Screw M1.4x1.5xD3.5 QPWBH2937TAZZ Tilt FPC LX-BZ3178GEZZ Screw M1.4x1.5xD4.0 LHLDW1038TA00 FPC Holder LX-HZ3083GEFF Screw M1.4x2.5 S Tight RUNTK0404TAZZ...
- Page 91 VL-AD260U Ref. No. Part No. Description Code Ref. No. Part No. Description Code CASSETTE HOUSING PARTS SUPPLIED ACCESSORIES CHLDX3077GE02 Cassette Compartment ACCESSORIES Ass'y GCOVH1225TASA Lens Cap MSPRT0414GEZZ Up Main Spring QCNW-1295TAZZ A/V Cable QCNW-2022TAZZ 232C Cable RRMCG0084TASA Infrared Remote Control...
- Page 92 VL-AD260U MECHANISM CHASSIS EXPLODED VIEW Ref. No. Part No. Description Code Ref. No. Part No. Description Code...
- Page 93 VL-AD260U CABINET EXPLODED VIEW Ref. No. Part No. Description Code Ref. No. Part No. Description Code 6-14 6-12 6-11 6-10 56-2 6-13...
- Page 94 VL-AD260U CASSETTE HOUSING CONTROL UNIT EXPLODED VIEW Ref. No. Part No. Description Code Ref. No. Part No. Description Code CAMERA UNIT EXPLODED VIEW The mark must be on the face. Lens side side Mark Face the thinner part toward the lens side.
-
Page 95: Packing Of The Set
VL-AD260U 11. PACKING OF THE SET Ref. No. Part No. Description Code Ref. No. Part No. Description Code UBNDS0010TASA (Shoulder Strap) QCNW-1295TAZZ (A/V Cable) UBATL0011TAZZ (Lithium Battery) GCOVH1225TASA åUADP-0312TAZZ (Lens Cap) RCORF0083CEZZ (AC Adapter) (Ferrite Core Small) SPAKF0266TAZZ RCORF0038TAZZ (AC Adapter Packing) - Page 96 VL-AD260U Ref. No. Part No. Description Code Ref. No. Part No. Description Code...
- Page 97 Part No. Description Code © COPYRIGHT 2001 BY SHARP CORPORATION ALL RIGHTS RESERVED. No part of this publication may be reproduced, stored in a retrieval system, or transmitted in any form or by any means, electronic, mechanical, photocopying, recording, or otherwise, without prior written permission of the publisher.