Table of Contents
Advertisement
Quick Links
High Definition Hospitality LCD Display
Pantalla de LCD de alta definición para la industria hotelera
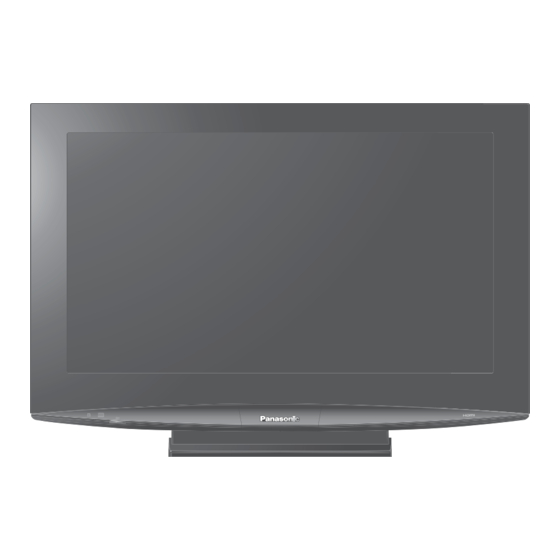
The illustration shown is an image.
Before connecting, operating or adjusting this product, please read these instructions completely.
Please keep this manual for future reference.
La ilustración mostrada es una imagen.
Antes de conectar, utilizar o ajustar este producto, lea completamente este manual de instrucciones;
y guárdelo para consultarlo en el futuro en caso de ser necesario.
English
Español
Operating Instructions
Manual de instrucciones
TH-32LRT12U
Model No.
Número de modelo
TH-37LRT12U
TQB4CM171
Advertisement
Table of Contents

Related Manuals for Panasonic TH-32LRT12U


Summary of Contents for Panasonic TH-32LRT12U
-
Page 1: Operating Instructions
Antes de conectar, utilizar o ajustar este producto, lea completamente este manual de instrucciones; y guárdelo para consultarlo en el futuro en caso de ser necesario. English Español Operating Instructions Manual de instrucciones TH-32LRT12U Model No. Número de modelo TH-37LRT12U TQB4CM171... - Page 2 WARNING: To reduce the risk of electric shock, do not remove cover or back. No user-serviceable parts inside. Refer servicing to qualified service personnel. The lightning flash with arrow-head within a triangle is intended to tell the user that parts inside the product are a risk of electric shock to persons.
-
Page 3: Important Safety Instructions
Important Safety Instructions 1) Read these instructions. 2) Keep these instructions. 3) Heed all warnings. 4) Follow all instructions. 5) Do not use this apparatus near water. 6) Clean only with dry cloth. 7) Do not block any ventilation openings. Install in accordance with the manufacturer’s instructions. 8) Do not install near any heat sources such as radiators, heat registers, stoves, or other apparatus (including amplifiers) that produce heat. -
Page 4: Table Of Contents
Dear Panasonic Customer Welcome to the Panasonic family of customers. We hope that you will have many years of enjoyment from your new LCD Display. To obtain maximum benefit from your set, please read these Instructions before making any adjustments, and retain them for future reference. -
Page 5: Fcc Statement
To assure continued compliance, follow the attached installation instructions and use only shielded interface cables when connecting to computer or peripheral devices. Any changes or modifications not expressly approved by Panasonic Corp. of North America could void the user's authority to operate this device. Responsible Party:... -
Page 6: Safety Precautions
Display from falling down. (All of the following accessories are manufactured by Panasonic Corporation.) safety precaution before carrying out any cleaning. • Electric shocks can result if this is not done. -
Page 7: Maintenance
WARNING Setup Do not place the Display on sloped or unstable surfaces. • The Display may fall off or tip over. Do not place any objects on top of the Display. • If water spills onto the Display or foreign objects get inside it, a short-circuit may occur which could result in fire or electric shock. -
Page 8: Accessories
Accessories Accessories Supplied Check that you have the Accessories and items shown Operating Instruction book HDMI cable (for TH-32LRT12U, TH-37LRT12U) Remote Control Batteries Requires two AA batteries. 1. Push the hook to release, then open the battery cover. Open Hook Helpful Hint: For frequent remote control users, replace old batteries with Alkaline batteries for longer life. -
Page 9: Location
WARNING • Failure to use a Panasonic bracket or choosing to mount the unit yourself will be done at the risk of the consumer. Any damage resulting from not having a professional installer mount will void your unit’s warranty. •... -
Page 10: Connections
Connections Front side Back side Serial Terminals connection (see page 14) Lift door to open AV connection (see page 11) AV connection (see page 11) Component (YPbPr) connection (see page 11) PC input terminals connection (see page 12) HDMI connection (see page 13) Audio out connection (see page 13) -
Page 11: Av Connection
AV connection Example of input signal source S VIDEO VCR S VIDEO CAMCORDER Notes: • Additional equipment and cables shown are not supplied with this set. • If S Video and Video devices are both connected, the S Video input signal is the priority source. Component (YPbPr) connection Example of input signal source Digital TV-SET-TOP-BOX... -
Page 12: Pc Input Terminals Connection
Connections PC Input Terminals connection COMPUTER Notes: • Computer signals which can be input are those with a horizontal scanning frequency of 15 to 79.97 kHz and vertical scanning frequency of 48 to 75 Hz. (However, the image will not be displayed properly if the signals exceed 1,200 lines.) •... -
Page 13: Hdmi Connection
HDMI connection HDMI AV OUT DVD Player or SET-TOP-BOX (HDMI compatible machines only) Note: 1. Additional equipment and HDMI cables shown are not supplied with this set. 2. HDMI Version 1.2. Audio Out connection Audio equipment Note: Additional equipment and cables shown are not supplied with this set. HDMI cable AUDIO Connections... -
Page 14: Serial Terminals Connection
Connections Serial Terminals connection The SERIAL terminal is used when the Display is controlled by a computer. COMPUTER D-sub 9p Notes: • Use the RS-232C straight cable to connect the computer to the Display. • The computer shown is for example purposes only. •... -
Page 15: Power On / Off
Power ON / OFF Using the Power Switch Power Indicator Using the Power Button INPUT POWER MENU MUTE RETURN RECALL ASPECT OFF TIMER TNQ4CM051 Note: The Display will still consume power as long as the AC cord is connected to the wall outlet. Unplug the AC cord to cut-off power. -
Page 16: Initial Selections
Français INPUT Press repeatedly until the desired input source signal is displayed on the screen. Input signals will change as follows: HDMI1 YPbPr MENU Español HDMI2 HDMI3 (TH-32LRT12U) INPUT (TH-37LRT12U) POWER MENU Select Action RECALL ASPECT Select TNQ4CM051 Adjust INPUT... -
Page 17: Basic Controls
MENU Screen ON (see page 20) This button is locked by initial setting. Volume Adjustment Press "+" to increase volume or press "-" to reduce volume. (TH-32LRT12U) Channel Adjustment Press to change to the next or previous channel. Volume Adjustment Press "+"... -
Page 18: Remote Control Transmitter
Basic Controls Remote Control Transmitter POWER button The Monitor must first be plugged into the wall outlet. Press this button to turn the Monitor on, from standby mode. Press it again to turn the Monitor Off to standby mode. MENU button Displays the menu screen. -
Page 19: Aspect Controls
ASPECT Controls The Display will allow you to enjoy viewing the picture at its maximum size, including wide screen cinema format picture. INPUT POWER MENU MUTE RETURN RECALL ASPECT OFF TIMER TNQ4CM051 Aspect mode Picture Enlarged screen 16:9 JUST DISPLAY ASPEC T Press repeatedly to change the aspect. -
Page 20: On-Screen Menu Display
On-Screen Menu Display Various menus allow you to make settings for the picture, sound, and other functions so that you can enjoy watching Display best suited for you. Display the menu screen. Select the menu. Main Menu Picture Menu Sound Menu Setup Menu Select the item. - Page 21 Overview Note: Menu that cannot be adjusted is grayout. Adjustable menu changes depending on signal, input and menu setting. Main Menu Picture Menu Sound Menu Setup Menu During “AV”, “YPbPr” and “HDMI” input signal. Picture Menu Picture Mode Vivid Standard Contrast Brightness Color...
-
Page 22: Picture Menu
Picture Menu MENU Press to display the menu screen. Select Picture Menu. Select to adjust each item. Press repeatedly to exit the menu. RETURN During "AV", "YPbPr", "HDMI" input signal. Picture Menu Picture Mode User Standard Contrast Brightness Color Tint Sharpness During "PC"... -
Page 23: Sound Menu
Sound Menu MENU Press to display the menu screen. Select Sound Menu. Select to adjust each item. Press repeatedly to exit the menu. RETURN Sound Menu Dynamic Sound Mode Sound AI Standard Bass Treble Balance Stereo Press the or buttons to switch between modes. -
Page 24: Setup Menu
Setup Menu MENU Press to display the menu screen. Select Setup Menu. Select to adjust each item. Press repeatedly to exit the menu. RETURN During "AV", "YPbPr", and "HDMI" input signal. Setup Menu Language English Movie Mode Press to select the menu to adjust. Press to enter menu. - Page 25 PC Setup MENU Press to display the menu screen. Select Setup Menu. Select to adjust each item. Adjust the setting. Press repeatedly to exit the menu. RETURN During "PC" input signal. Setup Menu Auto H-Pos V-Pos Dot_Clock Clock_Phase English Language Movie Mode Notes: •...
-
Page 26: Hotel Mode Setup
HOTEL MODE Setup The Hotel Mode is a special function which allows users to configure settings to suit certain locations or applications. MENU Press to display the menu screen. Select Setup Menu. Main Menu Picture Menu Sound Menu Setup Menu Select Movie Mode. - Page 27 Hotel Mode Menu List Item Adjusts the input signal when the unit is turned on. Off: The input signal when the power was last turned off is set. Initial Input Note: This menu is available only when "Input Lock" is "Off". RF mode is available only when Pal Tuner is connected.
-
Page 28: Troubleshooting
Troubleshooting Before you call for service, determine the symptoms and make a few simple checks as shown below. Symptoms Picture Sound Interference Noisy Sound Normal Picture No Sound No Picture No Sound No Picture Normal Sound No Color Normal Sound No remote control operations can be performed. -
Page 29: Applicable Input Signals
Applicable Input Signals Applicable input signals for Mini D-sub 15P Signal name 640 x 480 @ 60 Hz 640 x 480 @ 72 Hz 640 x 480 @ 75 Hz 800 x 600 @ 56 Hz 800 x 600 @ 60 Hz 800 x 600 @ 72 Hz 800 x 600 @ 75 Hz 1024 x 768 @ 60 Hz... -
Page 30: Specifications
Sound Audio Output Note: Design and specifications are subject to change without notice. Mass and dimensions shown are approximate. TH-32LRT12U 110 - 127 V AC, 50/60 Hz 155 W 27.5" x 15.4" x 31.5" (698 mm x 392 mm x 800 mm) 1,049,088 (1,366 (W) x 768 (H)) 32 °F - 104 °F (0 °C - 40 °C) -
Page 31: Panasonic Professional Flat Panel Display Limited Warranty
Panel Display On-site or carry-in service in the USA and Puerto Rico may be obtained during the warranty period by contacting Panasonic Professional Display Company Service toll free at 1-800-973-4390. This warranty is extended only to the original purchaser and is non transferable. A purchase receipt or other proof of date of original purchase will be required before warranty service is rendered. -
Page 32: Limited Warranty Statement
(for Canada) LIMITED WARRANTY STATEMENT Panasonic Canada Inc. (also known as PCI) warrants this product to be free of defects in material and workmanship under normal use during the applicable warranty coverage period described below. PCI agrees to repair, or at its option, exchange, any part that becomes defective. -
Page 33: Customer Service
Customer Service... - Page 34 Executive Office : One Panasonic Way 1F-10, Secaucus, NJ 07094 EASTERN ZONE : One Panasonic Way 4E-7 Secaucus, NJ 07094 (201) 348-7621 Mid-Atlantic/New England : One Panasonic Way 4E-7 Secaucus, NJ 07094 (201) 348-7621 Southeast Region : 1225 Northbrook Parkway, Ste 1-160 Suwanee GA 30024 (770)338-6835 Central Region : 1707 N Randall Road E1-C-1, Elgin, IL 60123 (847)468-5200 WESTERN ZONE : 3330 Cahuenga Blvd W., Los Angeles, CA 90068 (323) 436-3500...