Honeywell DOMONIAL User Manual
Wireless alarm
Hide thumbs
Also See for DOMONIAL:
- User manual (97 pages) ,
- Technical specifications (2 pages) ,
- User manual (44 pages)
Advertisement
Table of Contents
- 1 User Manual
- 2 Table of Contents
- 3 Introduction to the Security System
- 4 Understanding the System Tones
- 5 How to Use the Wireless Keypad with Display
- 6 How to Use the Wireless Keypad with Prox Reader
- 7 Programming Functions
- 8 How to Use the Keyfob with 1 LED
- 9 How to Use the Keyfob with 3 LED
- 10 Understanding Detector* Operation
- 11 How to Control Your System over the Telephone
- 12 Maintenance and Recommendations
- Download this manual
See also:
User Manual
Advertisement
Table of Contents

Related Manuals for Honeywell DOMONIAL


Summary of Contents for Honeywell DOMONIAL
-
Page 1: User Manual
DOMONIAL USER MANUAL... - Page 2 Congratulations on the purchase of your DOMONIAL security system This system is designed to operate on an authorised radio frequency and will in no way endanger the user. To make the best out of your system we advise you to read this manual...
-
Page 3: Table Of Contents
INDEX Introduction to the security system Understanding the system tones How to use the wireless keypad with display* How to use the wireless keypad with prox reader How to use the keyfob with 1 LED How to use the keyfob with 3 LEDs Understanding detector* operation How to control your system over the telephone Maintenance and recommendations... -
Page 4: Introduction To The Security System
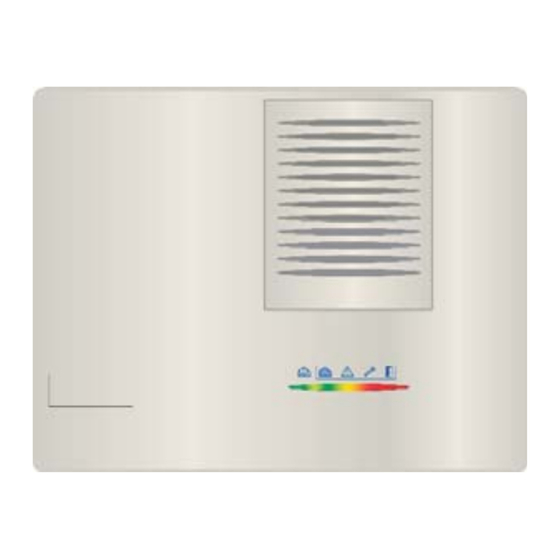
Introduction to the security system The Domonial control panel/communicator unit is the brain of your security system. It exchanges information with the associated wireless peripherals. The control panel centralises the data sent by the detectors, records the arming and disarming operations and communicates with your Alarm Company. - Page 5 INDICATOR LIGHTS The front cover of the control panel features LED indicators which show the status of your security system. Indicators 2, 3, 4 and 5 show the faults, which are occurring or in memory for one set at a time. Indicators are only active when the system is unset and during the arming and disarming phases.
-
Page 6: Understanding The System Tones
Understanding the system tones SIRENS A siren is an effective deterrent due to its power and very irrating tone. The system has a siren built into the control panel, and an optional outdoor and/or indoor wireless siren can be added. The panel siren emits an audible confirmation tone when arming and disarming the security system and a fire tone when a smoke detector is triggered. - Page 7 SYSTEM TONES Sequence of 3 modulated sounds When arming, total set, confirms that the TOTAL SET control panel has received a valid code or ARMING TAG and is preparing to arm total set. Duration : 4 seconds PARTIAL SET Sequence of 2 modulated sounds ARMING When arming the partial set, confirms that the control panel has received a valid code...
-
Page 8: How To Use The Wireless Keypad With Display
How to use the wireless keypad with display INTRODUCTION TO THE TCU KEYPAD Screen TAG identification area Total set Partial set arming key arming key Total set Partial set arming light arming light Keytag (TAG) Validation & for identification Status key Disarming / Go to previous menu / Cancel choice key... - Page 9 THE TCU SCREEN AND ICONS Tamper fault* Total set armed Radio transmission* Partial set disarmed in progress System disarmed System fault* Annex set armed State of keypad battery Annex set Blinking: replace Message area disarmed keypad battery Receiver 1 'ON' Silent mode Menu scrolling and Bypassed detector...
- Page 10 THE SUB-MENUS ANNEX This menu is used to arm or disarm the Annex set. See Arming of the Annex Set, on page 11. EVENTS The security system records events with their time and date. These can be viewed from the keypad when the system is disarmed. TOOLS This function allows you to control receivers, detectors, and so on.
- Page 11 ARMING THE SYSTEM USING YOUR CODE OR TAG Before arming the Total Set, ensure that the keypad is in its base. Press (Total Set arming) or (Partial Set arming) Enter your user code (programmed during installation. Refer to The Users Menu, p.15) or present your TAG to the TAG reader of the TCU.
- Page 12 ARMED IN 20 SECONDS If your system is set up to arm once the final door has been closed, close this door to complete the arming process. Otherwise, you must leave the premises before the end of the exit delay. icon confirms arming of the Annex set.
- Page 13 INCORRECT CODE OR INVALID TAG After five attempts to enter a 4- or 6-digit code , the keypad locks out all users for five minutes. If an invalid TAG is touched to the keypad, the screen displays: IDENTIFICATION ERROR After five attempts to use the TAG, the keypad locks out all users for five minutes. FAULTS ON ARMING When faults are present or in the memory while you are trying to arm the system, they are indicated by an icon and a message on the keypad screen:...
- Page 14 SYSTEM LOCK After a confirmed alarm, your system requires an operator reset. Call your alarm company. The operator will provide the remote reset code, based on the code displayed on the keypad. MEMO SYSTEM LOCKED UNLOCK SYSTEM ----------------------- ----------------------- ----------------------- INTRUDER CALL OPERATOR PLEASE ENTER...
- Page 15 THE USERS MENU The USERS item is a very important item in the menu, because all users must key in their code or present their TAG in order to make any settings or adjustments to the system or to access information about system status. Note that some menus are only available using the Master Code or TAG.
- Page 16 ADDING, MODIFYING OR REMOVING TAGS This function allows you to allocate TAGs to different users. Select 2-TAGS and press Enter the Master Code or present the Master TAG. The list of users is displayed. TAGS 1- USER 1 2- CHRISTOPHER 3- VIRGINIA 4- WILLIAM 5- SOPHIE...
- Page 17 THE TOOLS MENU REMOTE CONTROL OF APPLIANCES This function allows you to control remote receivers. Select 1-REMOTE PLUGS in the TOOLS menu, then select the name of the receiver you wish to modify, using to move up and down. Confirm your choice with The screen displays one of the states below.
- Page 18 MANUALLY BYPASSING DETECTORS This function allows you to temporarily bypass one or more detectors. Bypassed detectors are returned to normal operation the next time the security system is disarmed. Select 3-BYPASS DETECTOR in the TOOLS menu. Enter your User Code or present a TAG.. Select the name of the detector you wish to bypass, using to move up and down.
- Page 19 THE PREFERENCES MENU SETTING SILENT MODE The panel siren’s arming and disarming beeps can be modified by activating or deactivating Silent Mode. Note: You cannot deactivate the fire or intruder siren. Active: No beeps on the panel ► Inactive: Beeps on the panel are active ►...
- Page 20 ALLOCATING SHORTCUT KEYS This function allows you to allocate a shortcut to the keys (left and right arrow keys) to enable easy access to your most commonly-used menu items. Select 3-SHORTCUTS in the PREFERENCES menu. Select the function to be allocated to the left arrow, using the arrow keys, and confirm your choice with Repeat the procedure for the right arrow.
- Page 21 INFORMATION & MAINTENANCE CHECKING THE STATUS Press Enter your code or touch the Tag Identification area of the keypad with your tag. The screen displays the following information: The current arming status ► The current active icons (whether blinking or steady) ►...
-
Page 22: How To Use The Wireless Keypad With Prox Reader
How to use the wireless keypad with prox reader This keypad is used to arm and disarm your security system using a valid access code or key TAG. It is equipped with a proximity reader, positioned in the TAG Identification Area. ARMING USING YOUR CODE OR TAG Press an arming key on the keypad and enter the code or present a programmed TAG. - Page 23 ARMING WITH FAULT If the system diagnoses a fault on arming, you cannot set the alarm. Faults include system faults, tampering and triggering of detectors. A tone indicating a fault is emitted by the panel siren after the arming request, ►...
-
Page 24: Programming Functions
INCORRECT CODE PROTECTION IF YOU ENTER 5 SUCCESSIVE INCORRECT CODES, THE KEYPAD IS BLOCKED FOR 5 MINUTES. PERSONAL ATTACK* * This function is optional, and can be set up at installation. You can send an alarm at any time, even when your system is not armed: Press and hold simultaneously. - Page 25 CHANGING OR SETTING ADDITIONAL KEY TAGS A key TAG can only be programmed for a user who already has a code. To change or set additional key TAGs, you need to enter programming mode: Press simultaneously. The red light will flash slowly. Enter the master code or present the master TAG (user 1).
-
Page 26: How To Use The Keyfob With 1 Led
How to use the keyfob with 1 LED The keyfob can be used to arm or disarm your security system to trigger an audible or silent alert, as well as to control electrical appliances from a distance (see Special Key, on page 29 ). This keyfob is optional, but 1 to 10 keyfobs of this type may be included with this system. - Page 27 DISARMING To disarm, press the disarm button The indicator light comes on briefly when you release the button. The disarming tone is emitted by the panel siren. PERSONAL ATTACK * This function is optional, and can be set up at installation. These keys enable you to send an alarm at any time.
-
Page 28: How To Use The Keyfob With 3 Led
How to use the keyfob with 3 LEDs The keyfob can be used to arm or disarm your security system, to trigger an audible or silent alert, as well as to control electrical equipment from a distance (see Remote Control of Appliances, page 29). This keyfob is optional, but 1 to 10 keyfobs of this type may be included with this system. -
Page 29: Disarming After An Alarm
DISARMING To disarm the Total and/or the Partial Set, press the disarm button The associated light blinks during the communication with the panel and then lights for 3 seconds to confirm the instruction. The disarming tone is emitted by the panel siren. Disarming also stops the siren but does not interrupt the transmission to the alarm company. -
Page 30: Checking The Status Of Your System
CHECKING THE STATUS OF YOUR SYSTEM To check the status of your system, press the control button for 1 second. All three LEDs light several times in succession, and then the LED for the current arming status remains lit for 3 seconds. PERSONAL ATTACK * This function is optional, and can be set up at installation. -
Page 31: Understanding Detector* Operation
Understanding detector operation PIR DETECTOR A PIR detector is a motion detector that reacts to the temperature fluctuations caused by a person in motion. If the detector’s light indicator is set up, it will flash when movement is detected. In order to save the batteries of the wireless detectors, the next detection will be delayed for a few minutes. -
Page 32: How To Control Your System Over The Telephone
How to control your system over the telephone Control of your system over the phone is only possible from a multi-frequency (tone dialling) or cellular phone. This function must be configured by the installer. Remote control is authorised only after you have entered a valid code. The control panel picks up your call after the number of rings configured by the installer or after it has been called twice in succession. - Page 33 REMOTE CONTROL OF ELECTRICAL EQUIPMENT* You can activate/deactivate up to 12 electrical appliances (lights, etc.) from a distance using a telephone. Key in plus the number of the appliance ( 101 to 112) using the keypad. One short beep informs you that your appliance is active.
-
Page 34: Maintenance And Recommendations
Maintenance and recommendations Check your system (once a month or according to your operator’s specifications). Avoid shocks for all the components and especially avoid dropping the keyfob. Do not immerse in water. Only use a damp rag to clean the components (no detergent). Keep in a clean, dry place at room temperature. - Page 35 Honeywell Security & Custom Electronics 1198, Avenue du Docteur Maurice Donat BP1219, 06254 Mougins Cedex Sophia-Antipolis, France Tel : +33 (0) 492 942 950 Fax : +33 (0) 492 942 960 EKZ b Fe All data and images in this document are subject to change without prior notice.