Table of Contents
Advertisement
Advertisement
Table of Contents

Related Manuals for Toshiba SD-170EKB


Summary of Contents for Toshiba SD-170EKB
- Page 1 SD-170EKB SD-170EKE...
-
Page 2: Introduction
MANUAL AND THOSE MARKED ON THE UNIT. RETAIN THIS BOOKLET FOR FUTURE REFERENCE. Changes or modifications made to this equipment, not expressly approved by Toshiba, or parties authorized by Toshiba, could void the user' s authority to operate the equipment. -
Page 3: General Information
Introduction SOME DOS AND DON'TS ON THE SAFE USE OF EQUIPMENT This equipment has been designed and manufactured to meet international safety standards but, like any electrical equipment, care must be taken if you are to obtain the best results and safety is to be assured. So, please read the points below for your own safety. - Page 4 Introduction CAUTION: This Digital Video Disc Player employs a Laser System. To ensure proper use of this product, please read this owner’s manual carefully and retain for future reference Should the unit require maintenance, contact an authorized service location. Use of controls or adjustments or performance of procedures other than those specified herein may result in hazardous radiation exposure.
-
Page 5: Setup
WARNING may result in death or serious injury. (laser). Therefore, refrain from using a cleaning CD. Refer all servicing not specified in this manual to a Toshiba Authorized Service Center. Moisture Condensation Setup Moisture condensation damages the DVD video player. - Page 6 Introduction Region Discs that can be played U.S.A. and Canada regions U.K and Europe regions Asia Pacifi c, Taiwan, Korea Australia, New Zealand, Latin America Russia and India regions China, Calcos Islands, Walls and Futuna Islands Helpful hint: before making or changing any connections, make sure that all the devices are disconnected from the power outlet.
-
Page 7: Table Of Contents
Introduction Table of Contents Introduction SAFETY PRECAUTIONS IMPORTANT SAFETY INSTRUCTIONS Setup Cleaning discs Moisture Condensation Region codes Table of Contents Connections Connecting to television Connecting to a Stereo System Connecting to a Digital AV Receiver Connecting the power cord Product Overview Front and Rear panels Remote Control Getting Started... -
Page 8: Connections
Connections Using Component Video Jacks(Y P Connecting to television IMPORTANT! – You only need to make one video connection from the following options, depending on the capabilities of your television. – Connect the DVD player directly to the televi- sion. Using SCART socket MAINS IMPORTANT! -
Page 9: Connecting To A Stereo System
Connections labelled as 75 ohm or RF In), you will need a RF modulator in order to view the DVD playback on Connecting to a Digital AV Receiver the TV. Use the composite video cable (yellow) to connect the DVD player' s VIDEO OUT (CVBS) jack to the video input jack on the RF modulator (cable sup- plied). -
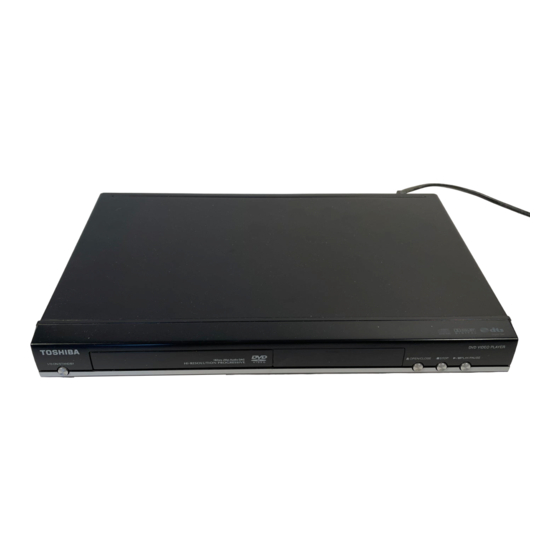
Page 10: Product Overview
Product Overview Front and Rear panels PLAY/ PAUSE ON/STANDBY I/ 2 -Starts or pauses playback -Turns the player on or switches it to standby mode Disc tray STOP - Place a disc here - Stops playback Display OPEN/CLOSE ç - Shows information about the current status of the - Opens or closes the disc tray DVD Player... -
Page 11: Remote Control
Product Overview Remote Control See the page in [ ] for details. REMOTE SIGNAL EMITTER DISPLAY [ 15 ] [ 11 ] -Displays information on -Point remote control to the sensor on TV screen during playback the front panel ON / STANDBY OPEN/CLOSE [ 8, 13 ] [ 13 ]... -
Page 12: Getting Started
Getting Started and highest channels and may be called FRONT, A/V IN or VIDEO. See your TV' s manual for more Inserting Batteries details. Or, you may go to channel 1 on your TV, then press the Channel down button repeatedly until you see the Video In channel. -
Page 13: Setting The Language
Getting Started/Playback from disc Subtitle, Audio and DVD menu Press to highlight { Yes } and press OK to confirm. language The reconfirmation menu will appear on the TV. You can choose your own preferred language or soundtrack from audio, subtitles and DVD menu Confirm again to use new setting languages. -
Page 14: Starting Disc Playback
-Do not close the disc tray manually even if the during the creation of DVD and CD software and/or power is switched off. the manufacture of DVD and CD discs, Toshiba cannot assure that this DVD player will successfully play every disc bearing the DVD and CD logos. If you... -
Page 15: Operations For Video Playback (Dvd/Vcd/Svcd)
Playback Feature To select a playback feature or item ybac Stopping playback Use /// or number buttons on the remote, then press OK to start playback. During playback, press STOP To access or remove the menu. The DVD video player memorises the stopped Press MENU on the remote. -
Page 16: Viewing The Disc Playback Information
Playback Feature Repeating a section within a chapter/ Angle track When {Angle} information appears on the screen, p r e s s A N G L E b u t t o n o n t h e r e m o t e c o n t r o l You can repeat the playback of a specific segment repeatedly to switch between different angles. -
Page 17: Playing Jpeg/Kodak Picture Cd
Playback Feature Playing JPEG/ Kodak picture CD IMPORTANT! You have to turn on your TV and set to the correct Video In channel. (See page 11, ‘ Finding your viewing channel ‘ ). General Operation The Toolkit has the following play mode items: ... -
Page 18: Dvd Menu Options
DVD Menu Options This DVD Player setup is carried out via the TV, enabling you to customise the DVD player to suit Using the Video setup menu your particular requirement. Press SETUP on the remote control. Using the Language setup menu The system setup menu appears. -
Page 19: Using The Audio Setup Menu
DVD Menu Options Press / to highlight one of the following options. { Pan Scan } Brightness Automatically display decoded image on full screen Increase the value to brighten the picture or vice without distortion. versa. Choose zero (0) for average setting. Use ... -
Page 20: Using The Rating Setup Menu
DVD Menu Options you use the AUDIO OUT jacks to connect to a TV or stereo system. Using the Rating setup menu Use / to select a setting and press OK to con- firm. Press SETUP on the remote control. Tips: The system setup menu appears. -
Page 21: Using The Misc (Miscellaneous) Setup Menu
DVD Menu Options confirm. Use Default Settings Select { 8 Adult } to disable parental level and allow all discs to play. DVDs that are rated higher than the level you se- lected will not play unless you enter your four-digit { Yes } password. -
Page 22: Specifications
Specifications DVD Video player/Outputs/Supplied Accessories DVD Video player Power supply 110 V -240V AC, 50/60 Hz Power Consumption Mass External dismensions 360 X 43 X 209 mm (W/H/D) Signal System PAL, NTSC Laser Semiconductor laser, wavelength 650/780 nm Frequency range DVD linear sound : 48 kHz sampling 4 Hz to 22 kHz 96 kHz sampling 4 Hz to 44 kHz Signal-to-noise ratio... -
Page 23: Troubleshooting
Do not open the system as there is a risk of electric shock. If a fault occurs, first check the points listed below before taking the system for repair. If you are unable to remedy a problem by following these guides, consult your dealer or TOSHIBA for help. Problem... -
Page 24: Glossary
Glossary Analogue audio: ® Progressive scan: Dolby Digital: An electrical signal that directly It displays all the horizontal lines A system developed by Dolby represents sound. In contrast, of a picture at one time, as a signal Laboratories that compresses digital audio can also be an electrical frame.