Samsung HW-J7500 User Manual
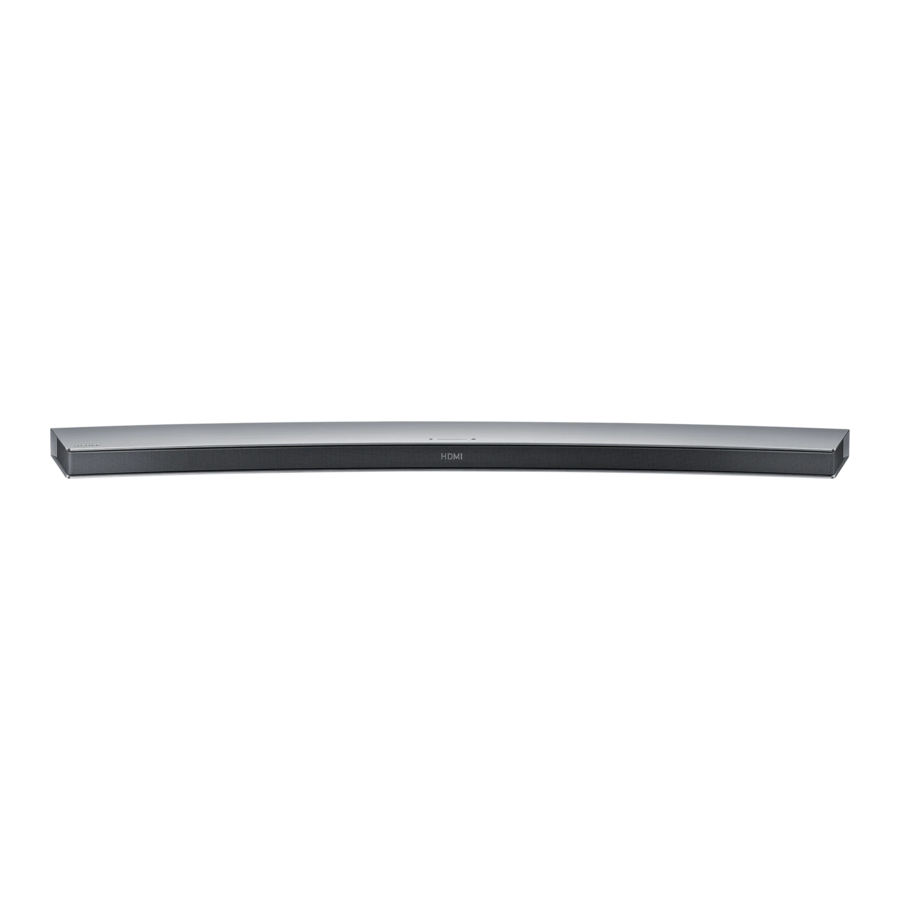
Curved soundbar
Hide thumbs
Also See for HW-J7500:
- User manual (136 pages) ,
- User manual (136 pages) ,
- User manual (35 pages)
Table of Contents

Related Manuals for Samsung HW-J7500


Summary of Contents for Samsung HW-J7500
-
Page 1: User Manual
HW-J7500 User manual Curved Soundbar Imagine the possibilities Thank you for purchasing this Samsung product. To receive more complete service, please register your product at www.samsung.com/register... -
Page 2: Getting Started
Wi-Fi storage devices such as MP3 players, USB flash capabilities. Simply access the Samsung Multiroom App memory, etc. using the Soundbar's USB HOST function. to experience the best of the internet’s subscription streaming music services. -
Page 3: Safety Information
GETTING STARTED SAFETY INFORMATION SAFETY WARNINGS TO REDUCE THE RISK OF ELECTRIC SHOCK, DO NOT REMOVE THE COVER (OR BACK). NO USER-SERVICEABLE PARTS ARE INSIDE. REFER SERVICING TO QUALIFIED SERVICE PERSONNEL. This symbol indicates “dangerous voltage” inside the product that presents a risk of electric CAUTION shock or personal injury. - Page 4 GETTING STARTED PRECAUTIONS 68.6 mm 99.1mm 99.1mm 99.1mm Ensure that the AC power supply in your house complies with the power requirements listed on the identification sticker located on the back of your product. Install your product horizontally, on a suitable base (furniture), with enough space around it for ventilation (7~10 cm).
-
Page 5: Table Of Contents
GETTING STARTED CONTENTS GETTING STARTED 25 FUNCTIONS Features Input Mode Safety Information Bluetooth What’s Included Using the Network Standby On Function DESCRIPTIONS Using the Multiroom Link Software Update Top / Front Panel Rear / Bottom Panel 32 TROUBLESHOOTING Remote Control Troubleshooting 11 INSTALLATION 33 APPENDIX... -
Page 6: What's Included
GETTING STARTED WHAT’S INCLUDED BEFORE READING THE USER’S MANUAL Note the following terms before reading the user manual. + Icons used in this manual Icon Term Definition Caution Indicates a situation where a function does not operate or settings may be canceled. Note Indicates tips or instructions on the page that help you operate a function. -
Page 7: Descriptions
DESCRIPTIONS DESCRIPTIONS TOP / FRONT PANEL VOL. - / + Controls the volume level. (Power) Button The numeric value of the volume level Turns the power on and off. appears in the front panel display. (Source) Button Display Selects the D.IN, AUX, HDMI, BT, TV, or Displays the current mode. -
Page 8: Rear / Bottom Panel
DESCRIPTIONS REAR / BOTTOM PANEL OPTICAL IN (D.IN) Connect to the digital (optical) output of an external device. HDMI OUT (TV-ARC) Outputs digital video and audio signals simultaneously using an HDMI cable. HDMI IN Inputs digital video and audio signals simultaneously using an HDMI cable. -
Page 9: Remote Control
(Default : Auto Power Link OFF, ON - ANYNET+ / OFF - POWER LINK or OFF - ANYNET+ / ON - POWER LINK). The Anynet+ function lets you control the Soundbar with the remote from an Anynet+ compatible Samsung TV. The Soundbar must be connected to the TV via an HDMI cable. - Page 10 DESCRIPTIONS Power Turns the Soundbar on and off. Volume Adjusts the volume level of the unit. Play / Pause Press the & button to pause the playing of a file temporarily. Press the & button again to play the selected file. Skip Back If there is more than one file on the device you are playing, and you press the # button, the previous file is selected.
-
Page 11: Installation
INSTALLING BOTH SOUNDBAR AND TV TO THE WALL MOUNT TYPE ● This model corresponds to the 2015 Samsung curved TV S8500/S9000 - 55"/65", S9500 - 65". Please refer to the home page of Samsung Electronics to see the detail list of corresponding models. - Page 12 INSTALLATION 3. Fasten the four Holder-Screws 1 and four of the Holder-Screws 2 to the four holes in the Soundbar, as shown in the illustration. If the Holder-Foot is attached, remove it first to install the TV-Mount. 65” S9500 TV 5.
- Page 13 INSTALLATION 65” S9500 TV 6. If you mount the Soundbar on a matched Samsung TV, use the Guide on TV to put the TV-Mount on TV securely. 7. Fasten the TV-Mount to the TV using the remaining 4 Holder-Screws 2.
-
Page 14: Installing Soundbar To Tv Stand
INSTALLATION INSTALLING SOUNDBAR TO TV STAND You can install Soundbar to TV stand if you have Soundbar matching TV with this model. Check for the supplied accessories shown below. Holder-Foot : 3EA Holder-Screw 2 : 3EA 1. Place the Soundbar as shown in the illustration, ensuring that none of the buttons touch the surface it is lying on. 2. -
Page 15: Installing Soundbar To Free-Standing
INSTALLATION 4. Align the Soundbar’s center with the center of the base of the TV, and then carefully push it onto the stand as far as it will go, as shown in the illustration. Be careful not to unbalance the TV. ●... -
Page 16: Assembling The Clamp-Wire
INSTALLATION ASSEMBLING THE CLAMP-WIRE Clamp-Wire Attach the clamp-wire to the unit as shown, and then run the cables through the clamp-wire to keep them neat. MOUNTING THE COVER-FOOT ONTO SUBWOOFER 1. Place each Cover-Foot on the 4 holes correspondingly as shown in the illustration. 2. -
Page 17: Connections
CONNECTIONS CONNECTIONS ● Do not connect the power cord of this product or your TV to a wall outlet until all connections between components are complete. ● Before moving or installing this product, be sure to turn off the power and disconnect the power cord. CONNECTING THE SUBWOOFER CONNECTING TO THE SUBWOOFER AUTOMATICALLY The main unit and subwoofer should link (connect wirelessly) automatically when the main unit and subwoofer are... - Page 18 CONNECTIONS ● Before moving or installing the product, be sure to turn off the power and disconnect the power cord. ● If the main unit is powered off, the wireless subwoofer will be in standby mode and the STANDBY LED on the upper side will come on after the Link indicator (Blue LED) blinks for 30 seconds.
-
Page 19: Connecting To A Tv
CONNECTIONS CONNECTING TO A TV CONNECTIONS WITH TV USING HDMI (DIGITAL) CABLE HDMI Cable HDMI IN HDMI OUT (TV-ARC) 1. Connect an HDMI cable from the HDMI OUT (TV-ARC) jack on the back of the product to the HDMI IN jack on your TV. -
Page 20: Tv Soundconnect
3. Press the Anynet+ button on the remote control to toggle the Auto Power Link function on and off. ● Depending on the connected device, Auto Power Link may not function. TV SOUNDCONNECT You can enjoy TV sound through your Soundbar when it is connected to a Samsung TV that supports the TV SoundConnect function. Connect 1. - Page 21 CONNECTIONS ● The TV SoundConnect (SoundShare) function is supported by some Samsung TVs released from 2012 on. Check whether your TV supports the TV SoundConnect (SoundShare) function before you begin. (For further information, refer to the TV’s user manual.). ● If your Samsung TV was released before 2014, check the SoundShare setting menu.
-
Page 22: Connections With External Device
CONNECTIONS CONNECTIONS WITH EXTERNAL DEVICE HDMI CABLE HDMI is the standard digital interface for connecting to TVs, projectors, DVD players, Blu-ray players, set top boxes, and more. HDMI prevents any degradation to the signal due to conversion to analog and maintains the video and audio quality of the original digital source. -
Page 23: Usb
CONNECTIONS + AUX Cable 1. Connect AUX IN (Audio) on the main unit to the AUDIO OUT jack of the Source Device. 2. Press the (Source) button on the top panel of Soundbar or the SOURCE button on remote control to select the AUX mode. - Page 24 CONNECTIONS ● Digital camera PTP protocols are not supported. ● Do not remove the USB device while it is transferring files. ● DRM-protected music files (MP3, WMA) from commercial web sites cannot be played. ● External HDDs are not supported. ●...
-
Page 25: Functions
FUNCTIONS FUNCTIONS INPUT MODE Press the (Source) button on the main unit’s top panel or the SOURCE button on the remote control to select the mode you want. Input mode Display Optical Digital input D.IN ARC (HDMI OUT) input AUX input HDMI input HDMI BLUETOOTH mode... -
Page 26: Bluetooth
The device name can only be displayed in English. An underline " _ " will be displayed if the name is not in English. • If the Bluetooth device has failed to pair with the Soundbar, delete the previous "[Samsung] HW-Jxxxx" found by the Bluetooth device and have it search for the Soundbar again. 4. Play music on the connected device. - Page 27 ● You cannot connect the Soundbar to a Bluetooth device that supports only the HF (Hands Free) function. ● Once you have paired the Soundbar to a Bluetooth device, selecting "[Samsung] HW-Jxxxx" from the device's scanned devices list will automatically change the Soundbar to BT mode.
-
Page 28: Using The Network Standby On Function
● Wi-Fi connection to the Soundbar will be terminated if its power cord was disconnected or the power was cut off. Turn on the Soundbar and reconnect. USING THE MULTIROOM LINK Once the Soundbar is connected to a smart device with Multiroom App, you can connect multiple Samsung Multiroom devices together wirelessly. BEFORE YOU BEGIN... - Page 29 To use the Soundbar, you must download and then install the Samsung Multiroom App by accessing the app through Google play or the App Store. With the Samsung Multiroom App installed, you can play music stored in your smart device, from connected devices and other content providers, and from Internet radio stations.
-
Page 30: Software Update
Note that if there are multiple update files, you must load them onto the USB device singly and use them to update the firmware one file at a time. Please visit samsung.com or contact the Samsung call center to receive more information about downloading updates files. -
Page 31: Auto Update
FUNCTIONS ● After the update, all settings are reset to their factory default settings. We recommend you write down your settings so that you can easily reset them after the update. Note that updating firmware resets the subwoofer connection too. If connection to the subwoofer is not re-established automatically after the update, refer to page 17. -
Page 32: Troubleshooting
• Is the distance between the remote control and main unit too far? The TV SoundConnect (TV pairing) failed. TV SoundConnect is supported by some Samsung • Does your TV support TV SoundConnect? TVs released from 2012 on. Check your TV to see if it supports TV SoundConnect. -
Page 33: Appendix
S/N ratio, distortion, separation, and usable sensitivity are based on measurements using AES (Audio Engineering Society) guidelines. Nominal specification Samsung Electronics Co., Ltd reserves the right to change the specifications without notice. Weight and dimensions are approximate. For the power supply and Power Consumption, refer to the label attached to the product. - Page 34 Para evitar cualquier avería o daños, lea detalladamente este manual de instrucciones antes de conectar y utilizar este aparato. Conserve el manual para referencia futura. (Sólo México) Imagine las posibilidades Gracias por adquirir este producto Samsung. Para recibir un servicio más completo, registre su producto en www.samsung.com/register...
- Page 35 USB como reproductores capacidades Wi-Fi. Solo tiene que acceder a Samsung MP3, memoria flash USB, etc. utilizando la función USB Multiroom App para disfrutar de los mejores servicios de HOST de Soundbar.
- Page 36 INTRODUCCIÓN INFORMACIÓN DE SEGURIDAD ADVERTENCIAS DE SEGURIDAD PARA REDUCIR EL PELIGRO DE DESCARGA ELÉCTRICA, NO RETIRE LA TAPA (NI LA PARTE TRASERA). NO CONTIENE ELEMENTOS QUE DEBA REEMPLAZAR EL USUARIO. EN CASO DE AVERÍA, SOLICITE LA AYUDA DE PERSONAL ESPECIALIZADO. Este símbolo indica que existe un voltaje peligroso dentro de esta unidad que puede PRECAUCIÓN...
- Page 37 INTRODUCCIÓN PRECAUCIONES 68.6 mm 99.1mm 99.1mm 99.1mm Asegúrese de que la toma de CA de su casa cumpla con los requisitos indicados en la pegatina de identificación de la parte posterior del producto. Instale el producto horizontalmente, sobre una base adecuada (mueble), con espacio suficiente a su alrededor para ventilación 7~10 cm.
- Page 38 INTRODUCCIÓN ÍNDICE INTRODUCCIÓN 25 FUNCIONES Características Modo de Entrada Información de seguridad Bluetooth Componentes Utilización de la función Network Standby On DESCRIPCIÓN Utilización de Multiroom Link Actualización de Software Panel Superior/Frontal Panel Posterior/Inferior 32 SOLUCIÓN DE PROBLEMAS Mando a distancia Solución de problemas 11 INSTALACIÓN 33 APÉNDICE...
- Page 39 INTRODUCCIÓN COMPONENTES ANTES DE LEER EL MANUAL DEL USUARIO Tenga en cuenta lo siguiente antes de leer el manual del usuario. + Iconos que se utilizarán en el manual Icono Término Definición Indica una situación en la que la función no está operativa o pueden cancelarse los Precaución ajustes.
- Page 40 DESCRIPCIÓN descripción PANEL SUPERIOR/FRONTAL VOL. - / + Controla el nivel del volumen. Botón (Alimentación) Aparece valor numérico del nivel de Enciende y apaga la unidad Soundbar. volumen en la pantalla del panel frontal. Botón (Fuente) Pantalla Selecciona la entrada D.IN, AUX, HDMI, Muestra el modo actual.
- Page 41 DESCRIPCIÓN PANEL POSTERIOR/INFERIOR OPTICAL IN (D.IN) Se conecta a la salida digital (óptico) de un dispositivo externo. HDMI OUT (TV-ARC) Genera la salida simultáneamente de señales digitales de video y audio utilizando un cable HDMI. HDMI IN Introduce simultáneamente señales digitales de video y audio utilizando un cable HDMI.
-
Page 42: Mando A Distancia
(Por defecto : Auto Power Link OFF, ON - ANYNET+ / OFF - POWER LINK u OFF - ANYNET+ / ON - POWER LINK). La función Anynet+ permite controlar la Soundbar con el mando a distancia desde un TV Samsung compatible con Anynet+. La Soundbar debe conectarse al TV a través de un cable HDMI. - Page 43 DESCRIPCIÓN Alimentación Enciende y apaga la unidad Soundbar. Volumen Ajusta el nivel de volumen de la unidad. Reproducir/Pausa Presione el botón & para detener temporalmente la reproducción del archivo. Presione de nuevo el botón & para reproducir el archivo seleccionado. Salto atrás Cuando hay dos o más archivos en el dispositivo que está...
- Page 44 INSTALACIÓN DE LA SOUNDBAR Y EL TV EN UN TIPO DE MONTAJE EN PARED ● Este modelo corresponde al TV curvo Samsung de 2015 modelos S8500/S9000 de 55"/65" y S9500 de 65". Consulte la página de inicio de Samsung Electronics para ver la lista detallada de los modelos correspondientes.
- Page 45 INSTALACIÓN 3. Apriete los cuatro Tornillo de sujeción 1 y los cuatro Tornillo de sujecion 2 en los cuatro orificios de la Soundbar, como se muestra en la ilustración. 4. Si está colocado el Pie de soporte, retírelo primero para instalar el Soporte de TV. TV S9500 de 65”...
- Page 46 INSTALACIÓN TV S9500 de 65” 6. Si monta la Soundbar en un TV Samsung compatible, utilice la Guía en el TV para colocar el Montaje de TV en el TV de forma segura. 7. Apriete el Montaje de TV al TV utilizando los 4 elementos Tornillo de sujeción 2 restantes.
- Page 47 INSTALACIÓN INSTALACIÓN DE LA SOUNDBAR EN LA BASE DE TV Puede instalar la Soundbar en el TV si tiene un modelo de TV compatible con la Soundbar. Compruebe los accesorios suministrados que se incluyen a continuación. Pie de soporte : 3 Tornillo de sujeción 2 : 3 1.
- Page 48 INSTALACIÓN 4. Alinee el centro de la Barra de sonido con el centro de la base del TV e insértela con mucho cuidado en la base todo lo posible, como se muestra en la ilustración. Tenga cuidado de no desequilibrar el TV. ●...
- Page 49 INSTALACIÓN MONTAJE DE LA ABRAZADERA DE CABLES Abrazadera de cables Coloque la abrazadera de cables en la unidad de la forma mostrada y, a continuación, inserte los cables a través de la misma para mantenerlos ordenados. MONTAJE DE LA TAPA-PIE EN EL SUBWOOFER 1.
- Page 50 CONEXIONES conexiones ● No conecte el cable de alimentación de este producto del TV a la toma de corriente hasta realizar todas las conexiones entre componentes. ● Antes de trasladar o instalar este producto, asegúrese de apagar y desconectar el cable de alimentación. CONEXIÓN DEL SUBWOOFER CONEXIÓN AUTOMÁTICA AL SUBWOOFER La unidad principal y el subwoofer deben vincularse (conectarse de forma inalámbrica) automáticamente cuando se...
- Page 51 CONEXIONES ● Antes de trasladar o instalar el producto, asegúrese de apagar y desconectar el cable de alimentación. ● Si está apagada la unidad principal, el subwoofer estará en modo de espera y se encenderá el LED de STANDBY de la parte superior después de que el indicador Link (LED azul) parpadee durante 30 segundos.
- Page 52 CONEXIONES CONEXIÓN A UN TV CONEXIONES CON EL TV UTILIZANDO UN CABLE HDMI (DIGITAL) Cable de HDMI HDMI IN HDMI OUT (TV-ARC) 1. Conecte un cable HDMI desde la toma HDMI OUT (TV-ARC) de la parte trasera del producto a la toma HDMI IN del TV.
- Page 53 3. Presione el botón Anynet+ del mando a distancia para activar y desactivar la función Auto Power Link. ● Según el dispositivo conectado, es posible que Auto Power Link no funcione. TV SOUNDCONNECT Puede disfrutar del sonido del TV a través de la Soundbar conectada a un TV Samsung compatible con la función TV SoundConnect. Conectar 1.
- Page 54 (Para obtener información adicional, consulte el manual de usuario del TV.) ● Si su TV Samsung se comercializó antes de 2014, compruebe el menú de ajustes de SoundShare. ● Si la distancia entre el TV y la Soundbar supera los 10 m, es posible que la conexión no sea estable o el sonido se interrumpa.
- Page 55 CONEXIONES CONEXIONES CON EL DISPOSITIVO EXTERNO CABLE HDMI HDMI es una interfaz digital estándar para conectar a dispositivos como un TV, un proyector, un reproductor de DVD, un reproductor Blu-ray, un descodificador, etc. Debido a que HDMI transmite la señal digital con la máxima calidad, puede disfrutar de video y audio superior, con la misma calidad que en la fuente digital original.
- Page 56 CONEXIONES + Cable AUX 1. Conecte AUX IN (Audio) de la unidad principal a la toma AUDIO OUT del dispositivo de la fuente. 2. Presione el botón (Fuente) del panel superior de la unidad principal o el botón SOURCE del mando a distancia para seleccionar el modo AUX.
- Page 57 CONEXIONES ● No se admiten los protocolos PTP de cámaras digitales. ● No retire el dispositivo USB mientras se transfieren los archivos. ● No se podrán reproducir los archivos de música con protección DRM (MP3, WMA) de un sitio web comercial. ●...
- Page 58 FUNCIONES funciones MODO DE ENTRADA Presione el botón (Fuente) del panel superior de la unidad principal o el botón SOURCE del mando a distancia para seleccionar el modo que desee. Modo de entrada Pantalla Entrada digital óptica D.IN Entrada ARC (HDMI OUT) Entrada AUX Entrada HDMI HDMI...
- Page 59 El nombre del dispositibo no puede mostrar caracteres especiales. Aparecerá un signo de subrayado " _ " si el nombre tiene caracteres especiales. • Si el dispositivo Bluetooth no se empareja con Soundbar, borre el "[Samsung] HW-Jxxxx" anteriormente encontrado por el dispositivo Bluetooth y realice una búsqueda de Soundbar de nuevo. 4. Reproduzca música en el dispositivo conectado.
- Page 60 ● No puede conectar la Soundbar a un dispositivo Bluetooth que admita solo la función HF (manos libres). ● Una vez que haya emparejado la Barra de sonido a un dispositivo Bluetooth, si selecciona "[Samsung] HW-Jxxxx" en la lista de dispositivos explorados, cambiará automáticamente la Barra de sonido al modo BT.
- Page 61 Encienda la Soundbar y vuelva a conectarla. UTILIZACIÓN DE MULTIROOM LINK Una vez que la Soundbar se conecte a un dispositivo inteligente con la App Multiroom, puede conectar de forma inalámbrica varios dispositivos Multiroom de Samsung. ANTES DE EMPEZAR + Aspectos básicos sobre comunicación...
- Page 62 INSTALACIÓN DE LA APP SAMSUNG MULTIROOM Para utilizar la Soundbar, debe descargar e instalar la App Samsung Multiroom accediendo a la App a través de Google Play o App Store. Con la App Samsung Multiroom instalada, puede reproducir música almacenada en su dispositivo inteligente, desde dispositivos conectados y otros proveedores de contenido, y desde las emisoras de radio en Internet.
- Page 63 Tenga en cuenta que si hay varios archivos de actualización, debe cargarlos en el dispositivo USB por separado y usarlos para actualizar el firmware de uno en uno. Visite Samsung.com o póngase en contacto con el centro de atención al cliente de Samsung para recibir información sobre la descarga de archivos de actualizaciones.
- Page 64 FUNCIONES ● Tras la actualización, todos los ajustes se reinician con sus ajustes por defecto de fábrica. Recomendamos tomar nota de los ajustes para poder reinicializarlos tras la actualización. Tenga en cuenta que al actualizar el firmware se reinicia también la conexión del subwoofer. Si no se establece automáticamente la conexión al subwoofer tras la actualización, consulte la página 17.
- Page 65 Fallo en TV SoundConnect (emparejamiento del TV). TV SoundConnect es compatible con algunos TVs • ¿Es su TV compatible con TV SoundConnect? Samsung comercializados a partir de 2012. Compruebe el TV para ver si es compatible con TV SoundConnect.
- Page 66 AES (Audio Engineering Society). Especificación nominal Samsung Electronics Co., Ltd se reserva el derecho a cambiar las especificaciones sin previo aviso. Los pesos y dimensiones son aproximados. Para la fuente de alimentación y el consumo de energía, consulte la etiqueta pegada en el producto.
- Page 67 © 2015 Samsung Electronics Co., Ltd. Reservados todos los derechos. Contacte con SAMSUNG WORLD WIDE Si tiene alguna pregunta o comentario acerca de productos Samsung, por favor contacte con el servicio de atención al cliente de SAMSUNG. Contact Center ...