Philips 107P User Manual
Philips monitor user's manual
Hide thumbs
Also See for 107P:
- Manuale utente (146 pages) ,
- Electronic user's manual (120 pages) ,
- User manual (138 pages)

Related Manuals for Philips 107P

Summary of Contents for Philips 107P
- Page 1 Philips 201B Electronic User's Manual file:///G|/manual/english/107P/index.htm [10/16/1999 6:29:45 AM]...
-
Page 2: Safety And Troubleshooting Information
Read and follow these instructions when connecting and using your computer monitor: Disconnect the monitor from the power supply if the monitor is not to be used for an extended period of time. - Page 3 Philips Color Monitor Quick Start Guide which summarizes the steps for setting up the monitor. This is included with this product. Notational Descriptions The following subsections describe notational conventions used in this document. file:///G|/manual/english/107P/about/about.htm (1 of 2) [10/16/1999 6:29:53 AM] • Notational Descriptions provides tips and solutions for common problems, and other...
- Page 4 All rights reserved. Reproduction, copying, usage, modifying, hiring, renting, public performance, transmission and/or broadcasting in whole or in part is prohibited without written consent of Philips Electronics N.V. file:///G|/manual/english/107P/about/about.htm (2 of 2) [10/16/1999 6:29:53 AM] RETURN TO TOP OF THE PAGE...
-
Page 5: Product Information
• Horizontal scanning • Vertical scanning VIDEO • Video dot rate • Input impedance - Video file:///G|/manual/english/107P/product/product.htm (1 of 4) [10/16/1999 6:29:53 AM] • Power Management • Product Views RETURN TO TOP OF THE PAGE 17 inch / 41 cm ; 90° deflection angle 0.25 mm... -
Page 6: White Color Temperature
VESA's Mode Video Active Stand-by Blanked file:///G|/manual/english/107P/product/product.htm (2 of 4) [10/16/1999 6:29:53 AM] 2.2 kOhm 0.7 Vpp Separate sync Composite sync Positive and negative x = 0.283 / y = 0.297 x = 0.313 / y = 0.329... -
Page 7: Physical Specifications
* Resolution 1280 x 1024, standard size, contrast max., brightness 50%, 9300 * These information are subject to change without notice. Pin Assignment The 15-pin D-sub connector (male) of the signal cable (IBM systems): file:///G|/manual/english/107P/product/product.htm (3 of 4) [10/16/1999 6:29:53 AM] < 15W < 5W ®... -
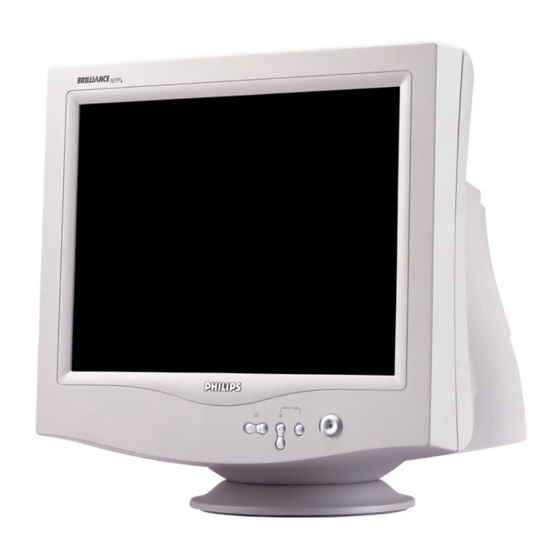
Page 8: Front View
Blue video ground Views Follow the links to see various views of the monitor and its components. Front View Rear View file:///G|/manual/english/107P/product/product.htm (4 of 4) [10/16/1999 6:29:53 AM] Assignment No pin Logic ground Identical output - connected to pin 10 Serial data line (SDA) H. -
Page 9: Installing Your Monitor
OK button which when pressed will take you to the OSD controls Contrast hotkey. When the UP arrow is pressed, the adjustment controls for the CONTRAST will show up. UP and DOWN buttons are used when adjusting the OSD of your monitor file:///G|/manual/english/107P/install/install.htm (1 of 3) [10/16/1999 6:29:54 AM]... -
Page 10: Rear View
OSD of your monitor. By pressing both the UP and OK buttons, you can easily access the Input Signals A and/or B. Rear View file:///G|/manual/english/107P/install/install.htm (2 of 3) [10/16/1999 6:29:54 AM] RETURN TO TOP OF THE PAGE... - Page 11 USB hub or your PC's USB connector. (Not available on all models.) BNC Connectors - Attach the connectors here to get the best video performance from your monitor. file:///G|/manual/english/107P/install/install.htm (3 of 3) [10/16/1999 6:29:54 AM] RETURN TO TOP OF THE PAGE...
-
Page 12: On-Screen Display
On the front controls of your monitor, once you press the Controls window will pop up and you can now start making adjustments to your monitor's various features. Use the or the file:///G|/manual/english/107P/osd/osddesc.htm (1 of 4) [10/16/1999 6:29:55 AM] • The OSD Tree •... - Page 13 Below is an overall view of the structure of the On-Screen Display. You can use this as reference when you want to later on work your way around the different adjustments. file:///G|/manual/english/107P/osd/osddesc.htm (2 of 4) [10/16/1999 6:29:55 AM] RETURN TO TOP OF THE PAGE...
- Page 14 On-Screen Display file:///G|/manual/english/107P/osd/osddesc.htm (3 of 4) [10/16/1999 6:29:55 AM]...
- Page 15 On-Screen Display RETURN TO TOP OF THE PAGE file:///G|/manual/english/107P/osd/osddesc.htm (4 of 4) [10/16/1999 6:29:55 AM]...
-
Page 16: Customer Care And Warranty
Customer Care and Warranty Customer Care & Warranty PLEASE SELECT YOUR COUNTRY TO READ THE WARRANTY COVERED: WESTERN EUROPE: Austria • Belgium • Cyprus • Denmark • France • Germany • Greece • Finland • Ireland • Italy • Luxembourg • the Netherlands • Norway • Portugal • Sweden • Switzerland •... - Page 17 A special construction of connector used in some monitors with higher horizontal scanning frequency. The BNC connection can provide the optimum shielding and matching characteristic impedance of video signal path to ensure the best video performance. file:///G|/manual/english/107P/glossary/glossary.htm (1 of 18) [10/16/1999 6:29:57 AM] R S T U V W X Y Z...
-
Page 18: Color Temperature
Convergence error is expressed in mm often at three well-defined points on the screen, designated A, B and C (see figure ). Also known as misconvergence. file:///G|/manual/english/107P/glossary/glossary.htm (2 of 18) [10/16/1999 6:29:57 AM]... - Page 19 Philips proprietary monitor control software that allows users to control parameters (e.g., Size, Color, Geometry) using software running in Windows. CustoMax is compatible with existing VGA cards. See CrystalClear FAQ and USB Bay FAQ. DDC (Display Data Channel) file:///G|/manual/english/107P/glossary/glossary.htm (3 of 18) [10/16/1999 6:29:57 AM] RETURN TO TOP OF THE PAGE...
-
Page 20: Digital Control
It is currently available in most Philips monitors. Dot pitch The shortest distance between two phosphor dots of the same color on the screen. The smaller the dot pitch, the better the resolution of the monitor. file:///G|/manual/english/107P/glossary/glossary.htm (4 of 18) [10/16/1999 6:29:57 AM]... - Page 21 MPR-II defines maximum permitted electrostatic, magnetic and electric field levels measured at a distance of 50 cm from the center of the monitor (see table). file:///G|/manual/english/107P/glossary/glossary.htm (5 of 18) [10/16/1999 6:29:57 AM] RETURN TO TOP OF THE PAGE...
- Page 22 The unit of frequency named after the physicist Heinrich Hertz (1857-1894). 1 hertz (Hz) is equal to 1 cycle/second. Horizontal dot pitch See Dot pitch. Horizontal scanning frequency file:///G|/manual/english/107P/glossary/glossary.htm (6 of 18) [10/16/1999 6:29:57 AM] RETURN TO TOP OF THE PAGE RETURN TO TOP OF THE PAGE...
- Page 23 50 Hz means a picture (or frame) frequency of 50 Hz. At any given resolution, non-interlaced modes are preferable to interlaced modes; however, generation of non-interlaced modes is more expensive. file:///G|/manual/english/107P/glossary/glossary.htm (7 of 18) [10/16/1999 6:29:57 AM] RETURN TO TOP OF THE PAGE...
-
Page 24: Line Frequency
Currently, there are two areas of interest: very-low frequency (VLF) electric and magnetic fields extending from 2 kHz to 400 kHz, and extreme low frequency (ELF) fields extending from 5 Hz to 2 kHz. See also Electromagnetic radiation standards. file:///G|/manual/english/107P/glossary/glossary.htm (8 of 18) [10/16/1999 6:29:57 AM] RETURN TO TOP OF THE PAGE... - Page 25 This practice is occasionally necessary because some video cards generate a video pattern that is smaller than the visible file:///G|/manual/english/107P/glossary/glossary.htm (9 of 18) [10/16/1999 6:29:57 AM] RETURN TO TOP OF THE PAGE...
- Page 26 The number of pixels that can be written in a video line per second. Pixel rate See pixel frequency Plug-and-Play See DDC. See USB section. file:///G|/manual/english/107P/glossary/glossary.htm (10 of 18) [10/16/1999 6:29:57 AM] RETURN TO TOP OF THE PAGE RETURN TO TOP OF THE PAGE...
-
Page 27: Refresh Rate
The feature that allows users to adjust the whole screen rotating to be horizontal. Because of the magnetic field of earth, the screen of monitor will be tilt when the screen faces toward the different direction. Screen coatings file:///G|/manual/english/107P/glossary/glossary.htm (11 of 18) [10/16/1999 6:29:57 AM] RETURN TO TOP OF THE PAGE... - Page 28 0.5%. ARAS also has a major advantage over other screen treatments: It doesn't diffuse or scatter reflected light, so picture contrast and sharpness remain completely unimpaired. It's also easy to clean and tough enough to withstand commercially available cleaning agents. file:///G|/manual/english/107P/glossary/glossary.htm (12 of 18) [10/16/1999 6:29:57 AM]...
-
Page 29: Self-Test Function
Self-test function A monitor equipped with hardware or software to automatically detect cable connection status. Shape Deviation of a reproduced picture from its intended shape. The following types of distortion are most common: file:///G|/manual/english/107P/glossary/glossary.htm (13 of 18) [10/16/1999 6:29:57 AM]... -
Page 30: Tilt Function
2. Composite sync: Horizontal and vertical sync pulses mixed into a single signal train. 3. SOG: Horizontal and vertical sync pulses mixed, then combined with the green color signal. See Electromagnetic radiation standards. Tilt function file:///G|/manual/english/107P/glossary/glossary.htm (14 of 18) [10/16/1999 6:29:57 AM] RETURN TO TOP OF THE PAGE... - Page 31 Each downstream port can be individually enabled and configured at either full or low speed. The hub isolates low speed ports from full speed file:///G|/manual/english/107P/glossary/glossary.htm (15 of 18) [10/16/1999 6:29:57 AM] RETURN TO TOP OF THE PAGE...
- Page 32 Upstream ports receive downstream data traffic. UPS (Universal Power Supply) The monitor with UPS feature can work in different countries with various mains voltage. file:///G|/manual/english/107P/glossary/glossary.htm (16 of 18) [10/16/1999 6:29:57 AM] RETURN TO TOP OF THE PAGE...
- Page 33 VGA, introduced by VESA in 1991, offers a top resolution of 1024 x 768 pixels (non-interlaced) and a refresh rate slightly higher than IBM's XGA 8514A. High-end, graphics adapters, introduced over the last three years for professional workstations, offer top file:///G|/manual/english/107P/glossary/glossary.htm (17 of 18) [10/16/1999 6:29:57 AM]...
- Page 34 For example, the VIS of a 17-inch monitor is only about 16 inches. It depends on the useful screen size of CRT and the opening of a monitor's front cabinet. file:///G|/manual/english/107P/glossary/glossary.htm (18 of 18) [10/16/1999 6:29:57 AM] RETURN TO TOP OF THE PAGE...
-
Page 35: Download And Print
'source', choose 'source'). Printing instructions: To print the manual: 1. With the manual file open, follow your printer's instructions and print the pages you need. 105B.pdf 105S.pdf 107B.pdf 107P.pdf 107S.pdf 109B.pdf 109P.pdf 109S.pdf file:///G|/manual/english/download/download.htm (1 of 2) [10/16/1999 6:29:58 AM] Mac. - Page 36 Download and Print 201B.pdf 201P.pdf file:///G|/manual/english/download/download.htm (2 of 2) [10/16/1999 6:29:58 AM]...
-
Page 37: Troubleshooting
The screen says "FREQUENCY IS OUT OF RANGE" No Picture (Power LED is amber or yellow) file:///G|/manual/english/107P/safety/saf_troub.htm (1 of 3) [10/16/1999 6:30:06 AM] • Troubleshooting • Regulatory Information Check these items Make sure the Power cable is plugged into the power outlet and back of the monitor. - Page 38 Picture is not sharp Unstable picture For further assistance, refer to the distributor. file:///G|/manual/english/107P/safety/saf_troub.htm (2 of 3) [10/16/1999 6:30:06 AM] Make sure the Brightness and Contrast controls are set correctly. Make sure the monitor cable is properly connected to your computer.
- Page 39 Troubleshooting RETURN TO TOP OF THE PAGE file:///G|/manual/english/107P/safety/saf_troub.htm (3 of 3) [10/16/1999 6:30:06 AM]...
-
Page 40: Regulatory Information
Electronics equipment in offices is often left running continuously and thereby consumes a lot of energy. What does labeling involve? file:///G|/manual/english/107P/safety/regs/regulat.htm (1 of 11) [10/16/1999 6:30:08 AM] • TCO Environmental Requirements •... -
Page 41: Environmental Requirements
The relevant TCO'99 demand requires that plastic components weighing more than 25 grams must not contain flame retardants with organically bound bromine or chlorine. Flame retardants are allowed in the printed circuit boards since no substitutes are available. file:///G|/manual/english/107P/safety/regs/regulat.htm (2 of 11) [10/16/1999 6:30:08 AM] RETURN TO TOP OF THE PAGE... - Page 42 Time settings are adjusted from the system unit by software. From indicated inactivity to Power Saving Position A2, the total time must not be set to more than 70 minutes. NUTEK VESA State file:///G|/manual/english/107P/safety/regs/regulat.htm (3 of 11) [10/16/1999 6:30:08 AM] RETURN TO TOP OF THE PAGE PHILIPS 201B1*...
-
Page 43: Federal Communications Commission (Fcc) Notice (U.s. Only)
To prevent damage which may result in fire or shock hazard, do not expose this appliance to rain or excessive moisture. THIS CLASS B DIGITAL APPARATUS MEETS ALL REQUIREMENTS OF THE CANADIAN file:///G|/manual/english/107P/safety/regs/regulat.htm (4 of 11) [10/16/1999 6:30:08 AM] Green Yellow Amber ®... -
Page 44: Commission Federale De La Communication (Fcc Declaration)
CET APPAREIL NUMERIQUE DE LA CLASSE B RESPECTE TOUTES LES EXIGENCES DU REGLEMENT SUR LE MATERIEL BROUILLEUR DU CANADA. EN 55022 Compliance (Czech Republic Only) file:///G|/manual/english/107P/safety/regs/regulat.htm (5 of 11) [10/16/1999 6:30:08 AM] RETURN TO TOP OF THE PAGE RETURN TO TOP OF THE PAGE... - Page 45 Interference. Install and use the equipment according to the instruction manual. Class B ITE MOC Notice (South Korea Only) Class B Device file:///G|/manual/english/107P/safety/regs/regulat.htm (6 of 11) [10/16/1999 6:30:08 AM] RETURN TO TOP OF THE PAGE RETURN TO TOP OF THE PAGE...
-
Page 46: Polish Center For Testing And Certification Notice
A protection mark "B" confirms that the equipment is in compliance with the protection usage requirements of standards PN-93/T-42107 and PN-89/E-06251. file:///G|/manual/english/107P/safety/regs/regulat.htm (7 of 11) [10/16/1999 6:30:08 AM] RETURN TO TOP OF THE PAGE... - Page 47 FÖRSÄKRA DIG OM ATT HUVUDBRYTARE OCH UTTAG ÄR LÄTÅTKOMLIGA, NÄR DU STÄLLER DIN UTRUSTNING PÅPLATS. Placering/Ventilation ADVARSEL: SØRG VED PLACERINGEN FOR, AT NETLEDNINGENS STIK OG STIKKONTAKT ER NEMT TILGÆNGELIGE. file:///G|/manual/english/107P/safety/regs/regulat.htm (8 of 11) [10/16/1999 6:30:08 AM] RETURN TO TOP OF THE PAGE...
- Page 48 Damit Ihr Monitor immer den in der Zulassung geforderten Werten entspricht, ist darauf zu achten, daß Reparaturen nur durch Fachpersonal durchgeführt werden. nur original-Ersatzteile verwendet werden. bei Ersatz der Bildröhre nur eine bauartgleiche eingebaut wird. file:///G|/manual/english/107P/safety/regs/regulat.htm (9 of 11) [10/16/1999 6:30:08 AM] RETURN TO TOP OF THE PAGE RETURN TO TOP OF THE PAGE...
- Page 49 Please find out about the local regulations on how to dispose of your old monitor from your local Philips dealer. Information for UK only file:///G|/manual/english/107P/safety/regs/regulat.htm (10 of 11) [10/16/1999 6:30:08 AM] RETURN TO TOP OF THE PAGE RETURN TO TOP OF THE PAGE WARNING - THIS APPLIANCE MUST BE EARTHED.
- Page 50 Regulatory Information file:///G|/manual/english/107P/safety/regs/regulat.htm (11 of 11) [10/16/1999 6:30:08 AM] have a value of 5A. If a plug without a fuse is used, the fuse at the distribution board should not be greater than 5A. Note: The severed plug must be destroyed to avoid a possible shock hazard should it be inserted into a 13A socket elsewhere.
-
Page 51: Other Related Information
Use a Cord Set rated minimum 5 A, 250 V ( for units set at 230V ) or 10A, 125V (for units set at 115V). The Cord Set should have the appropriate safety approvals for the country in which the equipment will be installed. file:///G|/manual/english/107P/safety/saf_other.htm [10/16/1999 6:30:08 AM] • Troubleshooting •... - Page 52 Front View • Rear View • Installing your USB Hub Installing your USB Hub file:///G|/manual/english/107P/install/usbhub/usb_inst.htm (1 of 2) [10/16/1999 6:30:21 AM] Installing on a conventional base. Take out the USB hub from the box. Take off the USB hub cover.
- Page 53 USB Hub (Optional Feature) file:///G|/manual/english/107P/install/usbhub/usb_inst.htm (2 of 2) [10/16/1999 6:30:21 AM] RETURN TO TOP OF THE PAGE Position the USB hub to the back of the Multimedia Pedestal. Attach the USB hub by sliding-in to the Multimedia base.
- Page 54 F1rst Choice Warranty Your International Philips F1rst Choice Warranty Thank you for purchasing this Philips monitor. All Philips monitors are designed and manufactured to high standards and deliver high-quality performance, ease of use and ease of installation. Should you encounter any difficulties while installing or using this product, please contact Philips directly to benefit from your Philips F1rst Choice Warranty.
-
Page 55: Your International Guarantee
International Guarantee Your International Guarantee Dear Customer, Thank you for purchasing this Philips product which has been designed and manufactured to the highest quality standards. If, unfortunately, something should go wrong with this product Philips guarantees free of charge labor and replacement parts irrespective of the country where it is repaired during a period of 12 months from date of purchase. - Page 56 United States Guarantee LIMITED WARRANTY (Computer Monitor) Three Years Free Labor / Three Years Free Service on Parts / One Year Exchange* *Product will be exchanged with a new or renewed to original specifications unit within two business days for the first year. This product must be shipped in at your expense for service during years two and three.
- Page 57 United States Guarantee Philips service organization will attempt to provide service (although there may be a delay if the appropriate spare parts and technical manual(s) are not readily available). Where CAN I GET MORE INFORMATION? For more information, contact the Philips Customer Care Center by calling customers only) (903) 242-4804.
- Page 58 United States Guarantee Philips Customer Care Center, P. O. Box 2976, Longview, TX 75601 Your International Philips F1rst Choice Warranty Thank you for purchasing this Philips monitor. All Philips monitors are designed and manufactured to high standards and deliver high-quality performance, ease of use and ease of installation. Should you encounter any difficulties while installing or using this product, please contact Philips directly to benefit from your Philips F1rst Choice Warranty.
- Page 59 The BRIGHTNESS window appears. 2) Press the button to adjust the brightness. 3) When the brightness is adjusted to the level desired, stop pressing the file:///G|/manual/english/107P/osd/osd_cont.htm (1 of 32) [10/16/1999 6:30:41 AM] • The OSD Tree •...
- Page 60 CONTRAST window will disappear with the new adjustment saved. After the CONTRAST window has disappeared, to continue to the MAIN CONTROLS, follow the steps under LANGUAGE Smart Help file:///G|/manual/english/107P/osd/osd_cont.htm (2 of 32) [10/16/1999 6:30:41 AM] RETURN TO TOP OF THE PAGE button and after three...
- Page 61 The MAIN CONTROLS window appears. LANGUAGE should be highlighted. 2) Press the button again. The LANGUAGE window appears. 3) Press the button until the desired language is highlighted. file:///G|/manual/english/107P/osd/osd_cont.htm (3 of 32) [10/16/1999 6:30:41 AM] RETURN TO TOP OF THE PAGE...
- Page 62 The MAIN CONTROLS window appears. 2) Press the button until INPUT SIGNAL SELECTION is highlighted. 3) Press the button. The INPUT SIGNAL SELECTION window appears. file:///G|/manual/english/107P/osd/osd_cont.htm (4 of 32) [10/16/1999 6:30:41 AM] button RETURN TO TOP OF THE PAGE button until INPUT...
- Page 63 1) Press the button on the monitor. The MAIN CONTROLS window appears. 2) Press the button until ZOOM is highlighted. file:///G|/manual/english/107P/osd/osd_cont.htm (5 of 32) [10/16/1999 6:30:41 AM] button until ZOOM is highlighted. Next, follow button RETURN TO TOP OF THE PAGE...
- Page 64 . . . to continue to ADJUST HORIZONTAL, press the HORIZONTAL is highlighted. Next, follow steps 3 - 7 under ADJUST HORIZONTAL. Smart Help . . . to exit completely, press the file:///G|/manual/english/107P/osd/osd_cont.htm (6 of 32) [10/16/1999 6:30:41 AM] button RETURN TO TOP OF THE PAGE button until ADJUST...
- Page 65 1) Press the button on the monitor. The MAIN CONTROLS window appears. 2) Press the button until ADJUST HORIZONTAL is highlighted. 3) Press the button. The ADJUST HORIZONTAL window appears. ADJUST POSITION should be highlighted. file:///G|/manual/english/107P/osd/osd_cont.htm (7 of 32) [10/16/1999 6:30:41 AM]...
- Page 66 1) Press the button on the monitor. The MAIN CONTROLS window appears. file:///G|/manual/english/107P/osd/osd_cont.htm (8 of 32) [10/16/1999 6:30:41 AM] button to return to MAIN CONTROLS window, or press the button.
- Page 67 4) Press the button to move the image up or down. 5) When the position is adjusted, press the to highlight ADJUST SIZE. file:///G|/manual/english/107P/osd/osd_cont.htm (9 of 32) [10/16/1999 6:30:41 AM] button to return to MAIN CONTROLS window, or press the...
- Page 68 The MAIN CONTROLS window appears. 2) Press the button until ADJUST SHAPE is highlighted. file:///G|/manual/english/107P/osd/osd_cont.htm (10 of 32) [10/16/1999 6:30:41 AM] button. button to return to MAIN CONTROLS window. CLOSE MAIN button until ADJUST SHAPE is...
- Page 69 107P The OSD Controls 3) Press the button. The ADJUST SHAPE window appears. ADJUST SIDE CURVE should be highlighted. 4) Press the button. The SIDE CURVE window appears. PINCUSHION should be highlighted. file:///G|/manual/english/107P/osd/osd_cont.htm (11 of 32) [10/16/1999 6:30:41 AM]...
- Page 70 BACK TO MAIN WINDOWS will be highlighted. 9) Press the button to return to the MAIN CONTROLS window, or press the SIDE ANGLES is highlighted. file:///G|/manual/english/107P/osd/osd_cont.htm (12 of 32) [10/16/1999 6:30:41 AM] button. button to highlight BALANCED or press the button.
- Page 71 The MAIN CONTROLS window appears. 2) Press the button until ADJUST SHAPE is highlighted. 3) Press the button. The ADJUST SHAPE window appears. ADJUST SIDE CURVE should be highlighted. file:///G|/manual/english/107P/osd/osd_cont.htm (13 of 32) [10/16/1999 6:30:41 AM] button twice.
- Page 72 The SIDE ANGLES window appears. TRAPEZOID should be highlighted. 6) To adjust the trapezoid, press the 7) When the trapezoid is adjusted, press the button to return to the ADJUST SHAPE window. file:///G|/manual/english/107P/osd/osd_cont.htm (14 of 32) [10/16/1999 6:30:41 AM] button. button to highlight PARALLELOGRAM or press the...
- Page 73 1) Press the button on the monitor. The MAIN CONTROLS window appears. 2) Press the button until ADJUST SHAPE is highlighted. file:///G|/manual/english/107P/osd/osd_cont.htm (15 of 32) [10/16/1999 6:30:41 AM] button. button to return to the ADJUST SHAPE window. button twice. button until ROTATE...
- Page 74 The ADJUST SHAPE window appears. ADJUST SIDE CURVE should be highlighted. 4) Press the arrow until ROTATE IMAGE is highlighted. 5) Press the button. The ROTATE IMAGE window appears. ROTATE should be highlighted. file:///G|/manual/english/107P/osd/osd_cont.htm (16 of 32) [10/16/1999 6:30:41 AM]...
- Page 75 The MAIN CONTROLS window appears. 2) Press the button until ADJUST COLOR is highlighted. file:///G|/manual/english/107P/osd/osd_cont.htm (17 of 32) [10/16/1999 6:30:41 AM] button. button to return to the ADJUST SHAPE window. BACK TO button until ADJUST COLOR is button twice.
- Page 76 5500K for PHOTO RETOUCH, or USER PRESET. 5) Once you have highlighted GENERAL USE, IMAGE MANAGEMENT, or PHOTO RETOUCH, press the button to confirm you selection and return to the MAIN CONTROLS window. CLOSE MAIN CONTROLS will be highlighted. file:///G|/manual/english/107P/osd/osd_cont.htm (18 of 32) [10/16/1999 6:30:41 AM]...
- Page 77 TO FACTORY SETTINGS is highlighted. Next, start with step 3 under RESET TO Help FACTORY SETTINGS..to exit completely, press the file:///G|/manual/english/107P/osd/osd_cont.htm (19 of 32) [10/16/1999 6:30:41 AM] button to highlight RED. Next, press the button to highlight GREEN. Next, press the button to highlight BLUE. Next, press the button to confirm your adjustments and return to the button.
- Page 78 YES or NO. NO is the default. YES returns all settings to their original factory adjustments. 5) Press the button to confirm your selection and return to the MAIN CONTROLS window. CLOSE MAIN CONTROLS will be highlighted. file:///G|/manual/english/107P/osd/osd_cont.htm (20 of 32) [10/16/1999 6:30:41 AM]...
- Page 79 2) Press the button until EXTRA CONTROLS is highlighted. 3) Press the button. The EXTRA CONTROLS window appears. DEGAUSS will be highlighted. file:///G|/manual/english/107P/osd/osd_cont.htm (21 of 32) [10/16/1999 6:30:41 AM] button until EXTRA CONTROLS is button. RETURN TO TOP OF THE PAGE...
- Page 80 The MAIN CONTROLS window appears. 2) Press the DOWN CURSOR button until EXTRA CONTROLS is highlighted. file:///G|/manual/english/107P/osd/osd_cont.htm (22 of 32) [10/16/1999 6:30:41 AM] button. Your screen will be degaussed, then the MAIN button until EXTRA CONTROLS is...
- Page 81 107P The OSD Controls 3) Press the button. The EXTRA CONTROLS window appears. DEGAUSS will be highlighted. 4) Press the button until ADJUST MOIRE is highlighted. 5) Press the button. The ADJUST MOIRE window appears. file:///G|/manual/english/107P/osd/osd_cont.htm (23 of 32) [10/16/1999 6:30:41 AM]...
- Page 82 Remember: you must degauss the monitor BEFORE adjusting the convergence. 1) Press the button on the monitor. The MAIN CONTROLS window appears. 2) Press the button until EXTRA CONTROLS is highlighted. file:///G|/manual/english/107P/osd/osd_cont.htm (24 of 32) [10/16/1999 6:30:41 AM] button. button to return to the EXTRA CONTROLS window. BACK button.
- Page 83 Extra Controls - Degauss section of this manual before adjusting the convergence. 4) Press the button until ADJUST CONVERGENCE is highlighted. 5) Press the button. The ADJUST CONVERGENCE window appears. ADJUST HORIZONTAL is highlighted. file:///G|/manual/english/107P/osd/osd_cont.htm (25 of 32) [10/16/1999 6:30:41 AM]...
- Page 84 Note: If you have not degaussed the monitor, please follow the steps under the Extra Help Controls - Degauss section of this manual before adjusting the purity..to exit completely, press the file:///G|/manual/english/107P/osd/osd_cont.htm (26 of 32) [10/16/1999 6:30:41 AM] button. button to highlight VERTICAL button.
- Page 85 Extra Controls - Degauss section of this manual before adjusting the purity. 4) Press the button until ADJUST PURITY is highlighted. file:///G|/manual/english/107P/osd/osd_cont.htm (27 of 32) [10/16/1999 6:30:41 AM] Remember: you must...
- Page 86 . The ADJUST PURITY window appears. TOP LEFT is highlighted. 6) To adjust the top left purity, press the 7) When the top left purity is adjusted, press the file:///G|/manual/english/107P/osd/osd_cont.htm (28 of 32) [10/16/1999 6:30:41 AM] button. button to highlight TOP RIGHT.
- Page 87 9) When the top right purity is adjusted, press the 10) To adjust the bottom left purity, press the 11) When the bottom left purity is adjusted, press the file:///G|/manual/english/107P/osd/osd_cont.htm (29 of 32) [10/16/1999 6:30:41 AM] button. button to highlight BOTTOM LEFT.
- Page 88 1) Press the button on the monitor. The MAIN CONTROLS window appears. 2) Press the button until EXTRA CONTROLS is highlighted. file:///G|/manual/english/107P/osd/osd_cont.htm (30 of 32) [10/16/1999 6:30:41 AM] button. button to return to the EXTRA CONTROLS button until AUTO CALIBRATE is...
- Page 89 5) Press the button to select OFF or AUTO. 6) When the selection is made, press the CONTROLS window. CLOSE MAIN WINDOW will be highlighted. file:///G|/manual/english/107P/osd/osd_cont.htm (31 of 32) [10/16/1999 6:30:41 AM] button to confirm your selection and return to the MAIN...
- Page 90 After returning to MAIN CONTROLS . . . Smart . . . to exit completely, press the Help CLOSE MAIN CONTROLS file:///G|/manual/english/107P/osd/osd_cont.htm (32 of 32) [10/16/1999 6:30:41 AM] button. RETURN TO TOP OF THE PAGE RETURN TO TOP OF THE PAGE...
-
Page 91: F1Rst Choice Contact Information
F1rst Choice Contact Information F1rst Choice Contact Information Telephone numbers: 0660 311 657* Austria 0800 735 75 Belgium 0809 22 56 Cyprus 808 800 50 Denmark 0800 901 703 France 0800 181 7143 Germany 00800 3112 1223 Greece 0800 113 125 Finland 1 800 553 154 Ireland... -
Page 92: Consumer Information Centers
Consumer Information Centers Consumer Information Centers Antilles ¥ Argentina ¥ Australia ¥ Czech Republic ¥ Dubai Korea ¥ Malaysia ¥ Mexico Philippines ¥ Poland ¥ Russia Uruguay ¥ Venezuela Eastern Europe CZECH REPUBLIC Philips Service V Mezihorí 2180 00 Prage Phone: (02)-6831581 Fax : (02)-66310852 HUNGARY... - Page 93 Consumer Information Centers TURKEY Türk Philips Ticaret A.S. Talatpasa Caddesi No 5. 80640-Gültepe/Istanbul Phone: (0800)-211 40 36 Fax : (0212)-281 1809 Latin America ANTILLES Philips Antillana N.V. Kaminda A.J.E. Kusters 4 Zeelandia, P.O. box 3523-3051 Willemstad, Curacao Phone: (09)-4612799 Fax : (09)-4612772 ARGENTINA Philips Antillana N.V.
- Page 94 Consumer Information Centers COLOMBIA Industrias Philips de Colombia S.A.-Division de Servicio Calle 13,No 51-39 Apartado 4282, Bogota Phone: (01)-6235511/ 9800-18971 (toll free) Fax : (01)-6234399 MEXICO Consumer Information Centre Norte 45 No.669 Col. Industrial Vallejo C.P.02300, -Mexico, D.F. Phone: (05)-3687788 / 9180050462 Fax : (05)-7284272 PARAGUAY Philips del Paraguay S.A.
- Page 95 Consumer Information Centers VENEZUELA Industrias Venezolanas Philips S.A. Apartado Postal 1167 Caracas 1010-A Phone: (02) 2377575 Fax : (02) 2376420 Canada CANADA Consumer Service Division. 4977 Levy Street Ville St.Laurent, Quebec H4R2N9 Phone: (514)-9560120 Fax : (514)-9560828 Pacific AUSTRALIA Philips Consumer Service. Customer Information Centre.
- Page 96 Consumer Information Centers BANGLADESH Philips Service Centre 100 Kazi Nazrul Islam Avenue Kawran Bazar C/A Dhaka-1215 Phone: (02)-812909 Fax : (02)-813062 CHINA BEIJING Beijing Authorized Service Centre. Consumer Information Centre Building 6, West Street Chong Wen Men, Beijing, Jin Bang Co. Led. 100051 BEIJING Phone: (010)-65122276 Fax : (010)-65226236...
- Page 97 Consumer Information Centers HONG KONG Philips Hong Kong Limited Consumer Information Centre 16/F Hopewell Centre 17 Kennedy Road, WANCHAI Phone: 2821-5345 Fax : 2861-3104 INDIA BOMBAY Philips India Customer Relation Centre Bandbox House 254-D Dr. A Besant Road, Worli Bombay 400 025 Phone: (022)-4926611 Fax : (022)-4941698 CALCUTTA...
- Page 98 Consumer Information Centers JAPAN Philips Consumer Electronics 1-11-9,Ebisuminami Shibuya-Ku Tokyo 150 Phone: (03)-3719-2235 Fax : (03)-3715-9992 KOREA Philips Korea Ltd. Philips House C.P.O. box 3680 260-199, Itaewon-Dong. Yongsan-Ku, Seoul 140-202 Phone: (02)-5961195/1196 / (02)-5967632/76325 Fax : (02)-5959688 MALAYSIA Philips Malaysia Sdn. Berhad Service Dept.
- Page 99 Consumer Information Centers PHILIPPINES Philips Electronics and Lighting Inc. 106 Valero St., Salcedo Village Makati, Metro Manilla. Phone: (02)-8100161 Fax : (02)-8173474 SINGAPORE Philips Singapore Private Ltd. Consumer Service Dept. Lorong 1,Toa Payoh., P.O. box 340 Singapore 1231 Phone: 3502000 Fax : 2508037 TAIWAN Philips Taiwan Ltd.
- Page 100 Consumer Information Centers SOUTH AFRICA South African Philips. S.V. Div. 195 Main R.D. Martindale., Johannesburg P.O.box 58088 Newville 2114 Phone: (011)-4715000 Fax : (011)-4715034 Middle East DUBAI Philips Middle East B.V. Consumer Information Centre P.O.Box 7785 DUBAI Phone: (04)-353666 Fax : (04)-353999 EGYPT Philips Egypt Consumer Information Centre...